The time and cost is for the actual building of the Bluenose model. The cost of drawings and books, and the reading/studying of those is not included here.
This web page is NOT a complete instruction manual for building a Bluenose model. There are other sources that do a much better job (see References). I just pulled together information from different source for my use to build the ship with keel, frames, stanchions and rigging like it was done with the real Bluenose/Bluenose II.
In Oct-2017 I started reading and doing research, and in Dec-2017 I made more concrete plans. Made the baseboard and slip on 10-Jan-2018, and then came to the conclusion that I needed to order dimensioned basswood. I was not happy the way my version of the frame sections turned out. Then on 1-Feb-2018 I happen to find the modeling instructions by Gene Bodnar based on the blueprints from P.F. Eisnor. It is exactly what I had in mind of modeling, and NOW I was ready to begin the actual modeling as of 1-Feb-2018. Completed the project on 13-Jan-2023.
Before starting with the project it is important to give a summary of the history of the Bluenose and Bluenose II. It will also illustrate the decisions on scope and scale of the project.
Bluenose History
Bluenose was a fishing and racing schooner. She was designed by William J. Roué of Halifax, and built at the shipyard of Richard W. Smith & George A. Rhuland in Lunenburg, Nova Scotia, Canada. The building was overseen by shipwright John Rhuland. The Bluenose was launched on March 26th, 1921.
Fishing was done over the banks in the Atlantic Ocean off the coast of Nova Scotia. The Bluenose was a fine fishing schooner, holding the record for largest single catch ever landed in Lunenburg. However, what made her famous was as a racer for the International Fishermen's Trophy. Under her skipper, Captain Angus J. Walters, she won undying fame for Nova Scotia and Canada. During World War II she entered the West Indies trade, where her life ended when she broke her back on a coral reef off the coast of Haiti in January 1946.
Nova Scotians are called Bluenosers, and that is where the schooner got its name.
Bluenose 1/4"=1' Scale Model Ship Plans (Eisnor Blueprints)
Philip F. Eisnor's model ship blueprints (7 sheets) of the Bluenose Schooner may be perhaps the most accurate representation of the Bluenose as she was in 1921 when she was launched and ready for the fishing grounds. Eisnor spent many years in researching this project. Much of his time was spent in the Nova Scotia archives and talking with people in the Lunenburg area who sailed on the Bluenose along with some of the shipbuilders who were responsible for building her.
sheet, drawing, date
title
scale
comments
sheet 1, SC-020, May 1990
Hull Lines
1/4"=1'
sheet 2, SC-020-1, May 1990
General Arrangement
1/4"=1'
sheet 3, SC-020-2, May 1990
Inside Bullwarks & Profile Deck Equipment
1/4"=1'
sheet 4, SC-020-3, May 1990
Masting Details
1/4"=1'
sheet 5, SC-020-4, May 1990
Rigging & Sail Plan
1/8"=1'
sheet 6, SC-020-5, Mar 2007
Hull Framing
1/4"=1'
Copy of Jenson page 38?
sheet 7, SC-020-6, Mar 2007
Hull Frames
1/4"=1'
Copy of Jenson pages 38, 40 & 41?
PLUS -- The scale 1/4"=1' (1:48) drawings result in a nice size model of 44"/112cm long (hull plus projections), 6-3/4"/17cm wide and 35-1/2"/90cm high (keel to top of main mast). Drawing measurements taken from the drawing in inch or cm can be used straightaway to measure the model wood. Except the Rigging & Sail Plan (sheet 5) where measurements have to be multiplied by 2. The 1:48 scale also matches the train "O" scale; handy when you look for figurines.
MINUS -- The drawings have no written measurements on it. It would be nice to be able to compare a taken measurement against the written measurement. Drawings do have errors sometimes!
Bluenose II History
Bluenose II was launched at Lunenburg on July 24th 1963, built to original plans and by some of the same workers at Smith and Rhuland. Shipwright John Rhuland oversaw the building of the Bluenose II. The original captain of Bluenose, Angus J. Walters, was consulted on the replica's design. The replica was built for Oland Brewery for roughly Can$300,000 (1963 Canadian dollars) as a marketing tool for their Schooner Lager beer brand. The Bluenose II was the last living example of the great two-masted schooners, and a perfect sailing replica of the original Bluenose.
On September 7th, 1971, the Bluenose II was sold to the goverment of Nova Scotia for the sum of Can$1.00. After several years the province gave possession of the ship to the "Bluenose II Preservation Trust". The trust's mandate was to restore the aging schooner to full operational status and continue to operate her for the people of Nova Scotia. In 1994-95 the ship had its first restoration, but only a small amount of the Can$2.3 million allocated for the schooner have been used for restoration works. It was a well known scandal. The trust maintained and operated Bluenose II until March 31st, 2005, when the government of Nova Scotia placed the vessel under the management of the Lunenburg Marine Museum Society at the Fisheries Museum of the Atlantic.
In July 2010, the Nova Scotia government awarded a Can$12.5 million contract for the restoration of Bluenose II to a consortium of three Nova Scotia shipyards. When the ship was finally relaunched on September 6th, 2013, after major delays, the final retro fit cost was closer to Can$ 16 million for the Nova Scotian Government alone.
This restoration was not without controversy because sources stated the restoration was not intended to create an authentic replica of the original Bluenose and that the builders would not be using the plans. The original schooner was largely scrapped and the schooner was built from keel up with new materials. Some equipment and sections of the old schooner were retained, but the schooner is essentially a new vessel. This has led Joan Roué, a descendant of the original Bluenose's designer William J. Roué and current rights-holder of the design, to question whether this should even be considered the same ship.
In the summer of 2016, Bluenose II renovations were finally completed, and it serves now as a tourist vessel.
Bluenose II, Measured Drawings (Jenson Book)
During the years that the Oland family sailed and operated the Bluenose II, after building her in 1963 for the people of Nova Scotia and Canada, they got often questions about her dimensions, hull, sail plan and rigging. In 1970 Don J. Oland approached the noted marine artist and historic illustrator, Commander L.B. Jenson, RCN (Ret'd) and asked him if he would undertake the task of producing the meausred drawings while the Bluenose II was still a fully rigged and working schooner. After 3½ years Jenson's work was completed and resulted in the limited edition (1,000 copies) of "Bluenose II, The Last of the Tall Schooners, measured drawings", by L. B. Jenson, 1975, Open Library OL18833343M, 32 pages.
Mr. Jenson's interest was developed and he wanted to do much more; how the Bluenose II wooden schooner was constructed, the terminology used, the evolution of the development of the schooner under sail until the diesel engines took over, and he wanted to record how the fishing trade was carried out during the days of sail. For the bigger project Mr Jenson and Mr. Oland formed a partnership which resulted in the book "Bluenose II, Saga of the Great Fishing Schooners, measured drawings", by L. B. Jenson, 1994, ISBN 1-55109-063-5. 140 pages.
PLUS -- Great place to read up on the history of Bluenose, Bluenose II, and fishery schooners in general. Superb detailed drawings that are very useful to complete the model with realism and finesse.
MINUS -- The measured drawings in Appendix I are nice, but have several disadvantages too.
The measurements are in real life feet and need to be converted into scale model measurements. NOTE: feet divided by 4 gives the model measurement in inches (scale 1:48). Several measurements are blurred and simply not readable, even under a well lit magnifying glass.
The drawings have an ackward scale of 1"=6.9...'. And each page has a slightly different scale too; even the horizontal and verticals scales are not the same. Most likely caused by the printing process.
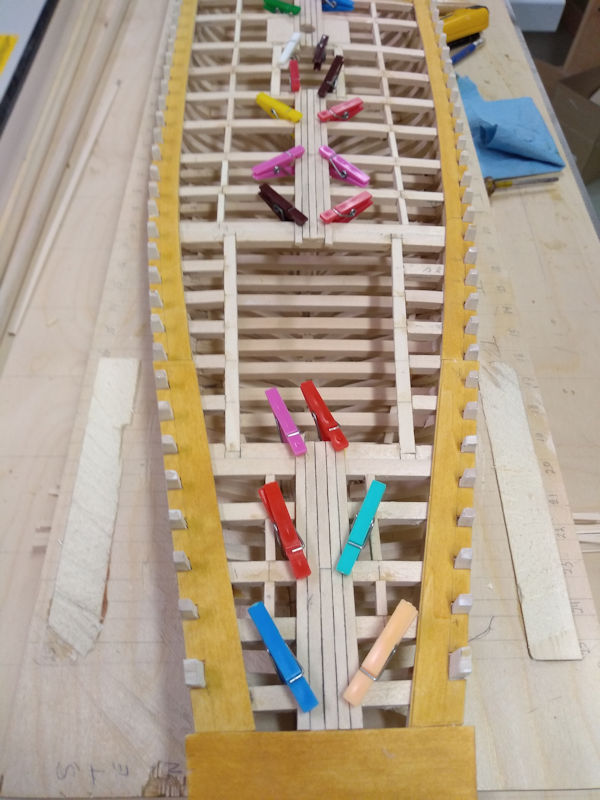
Due to the size of the pages each measured drawing (Appendix I) is split over two pages with an overlap on each page. For example, there is no way to measure the total length of the hull in one go; not that I wanted to do that with the dynamic ackward scale.
DO NOT TRUST ANY DRAWINGS -- To illustrate that you should not trust any drawings, especially in books, just read this.
I wanted to copy the buttocks profiles on page 114 in the model scale size. The vertical "buttocks out" lines are 12' on port side and 12' starboard side which is 24' total, and measures 3.45" in the book. So that needed to be enlarge to 6.0". 6.0 / 3.45 = 1.74, so I had to enlarge that drawing part to 174%.
The main breadth is 27' or 6.75" in model scale. I measured the main breath at the 18' water level and that was 4". 6.75 / 4.0 = 1.69" so I had to enlarge that drawing part to 169%. WHAT IS WRONG IN THE DRAWING, the vertical buttock out lines or the buttock profiles??? We will never know.
Finally I measured the vertical 24' waterline and it was 3.5". So that needed to be enlarge to 6.0". 6.0 / 3.5 = 1.714, so I had to enlarge that drawing part to 171%; a significant difference with horizontal enlargement requirements of 174% and 169%.
Hence different horizontal and vertical scales, and a possible drawing error. Therefore taking direct measurements or copies from these drawings is useless!!!
Bluenose II versus Bluenose, Real Life versus Model Measurements
Just some real life measurements from L.B. Jenson's book (page 17 and specs) and P.F. Eisnor's blueprints model measurements. Other measurements are calculated to allow apples-to-apples comparisons.
BLUENOSE II, L.B.Jenson book
BLUENOSE, P.F.Eisnor blueprints
Sails
life size meas.
scale ¼":1' calc.
scale 1:48 calc.
life size calc.
scale ¼":1' meas.
scale 1:48 calc.
Main Sail
4,100 sqft
256 sqin
1,652 cm²
Fisherman's Staysail
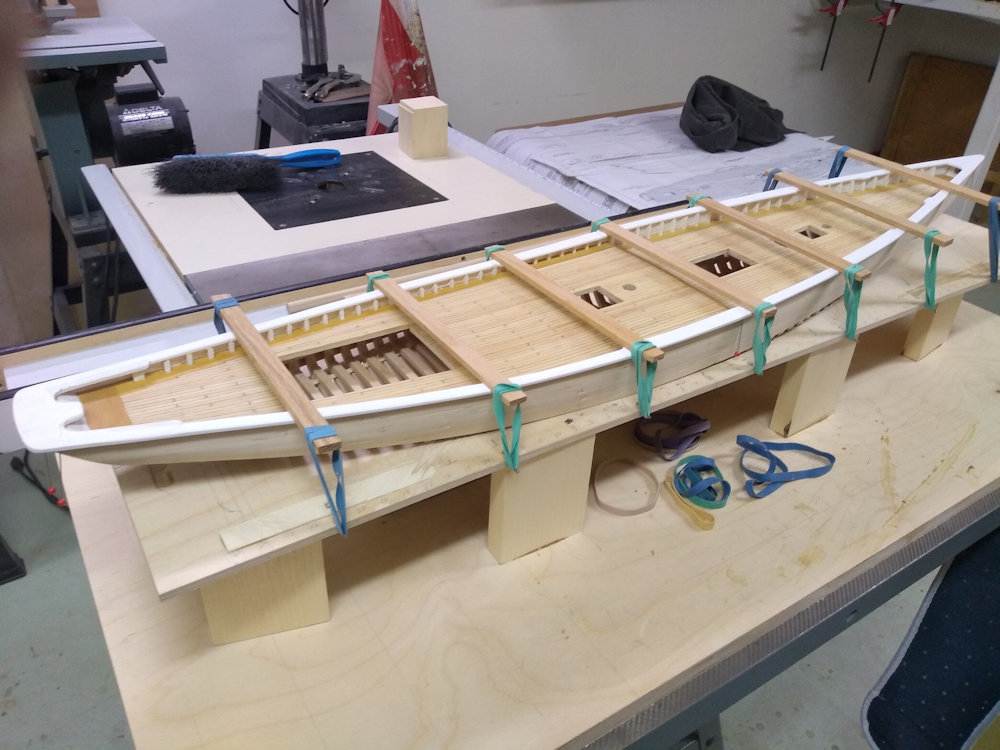
1,900 sqft
119 sqin
768 cm²
Fore Sail
1,480 sqft
93 sqin
600 cm²
Jib Topsail
1,160 sqft
73 sqin
471 cm ²
Total Area of 8 Sails
11,690 sqft
731 sqin
4,716 cm²
Hull Dimensions
Overall length of Hull
143'
35-3/4"
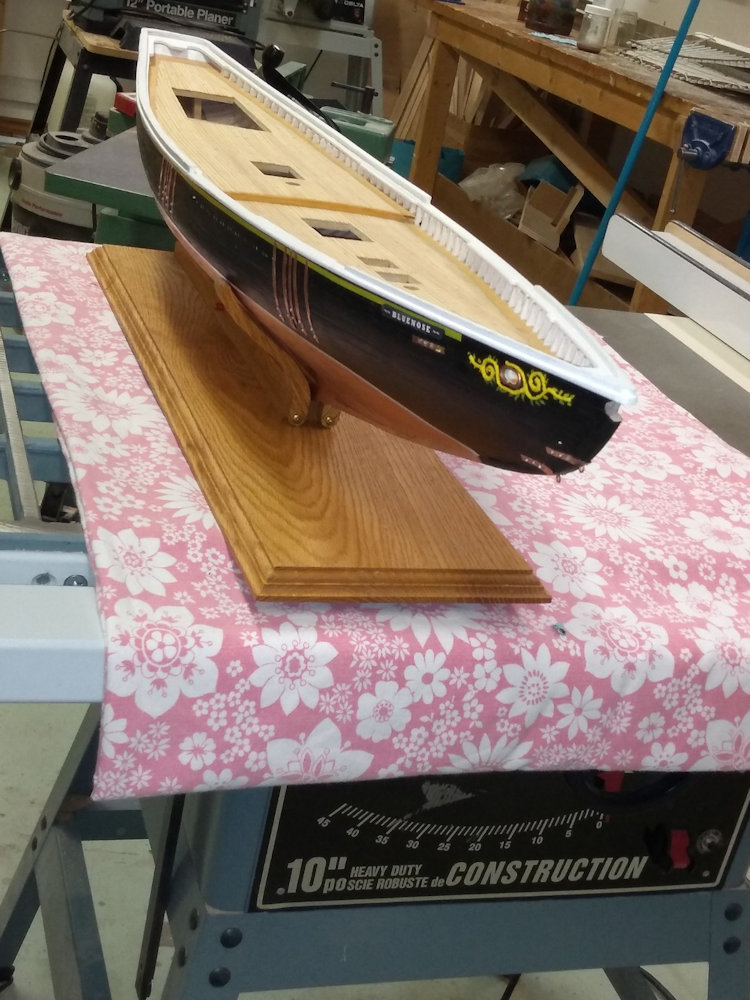
90.8 cm
143'
35-3/4"
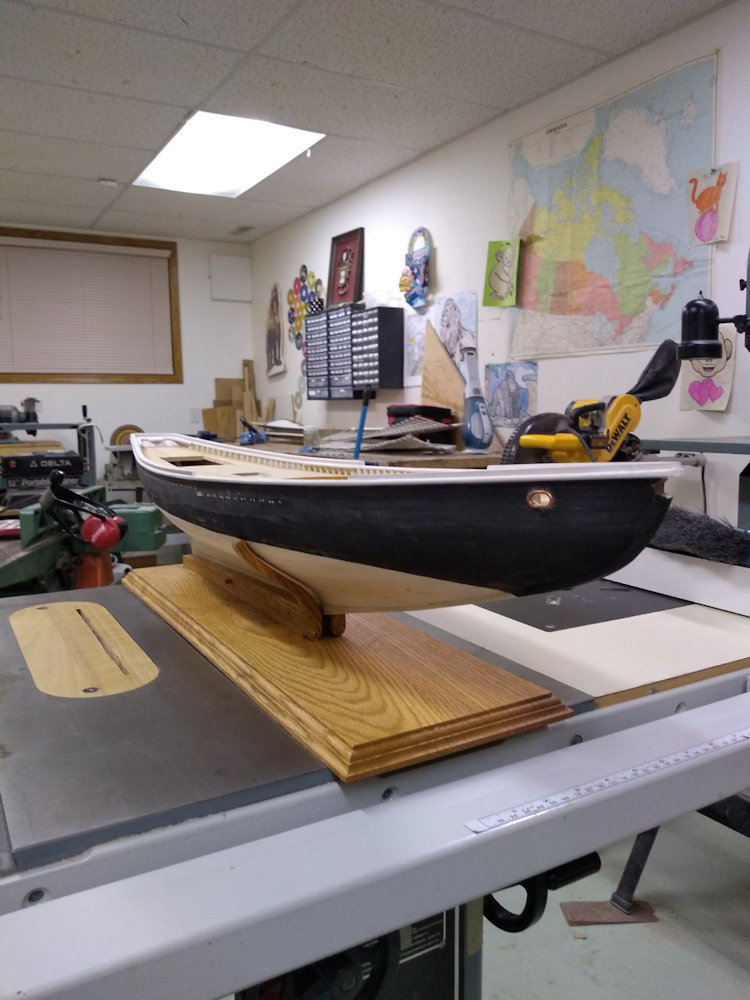
90.8 cm
Bowsprit, total length
34'
8-1/2"
21.6 cm
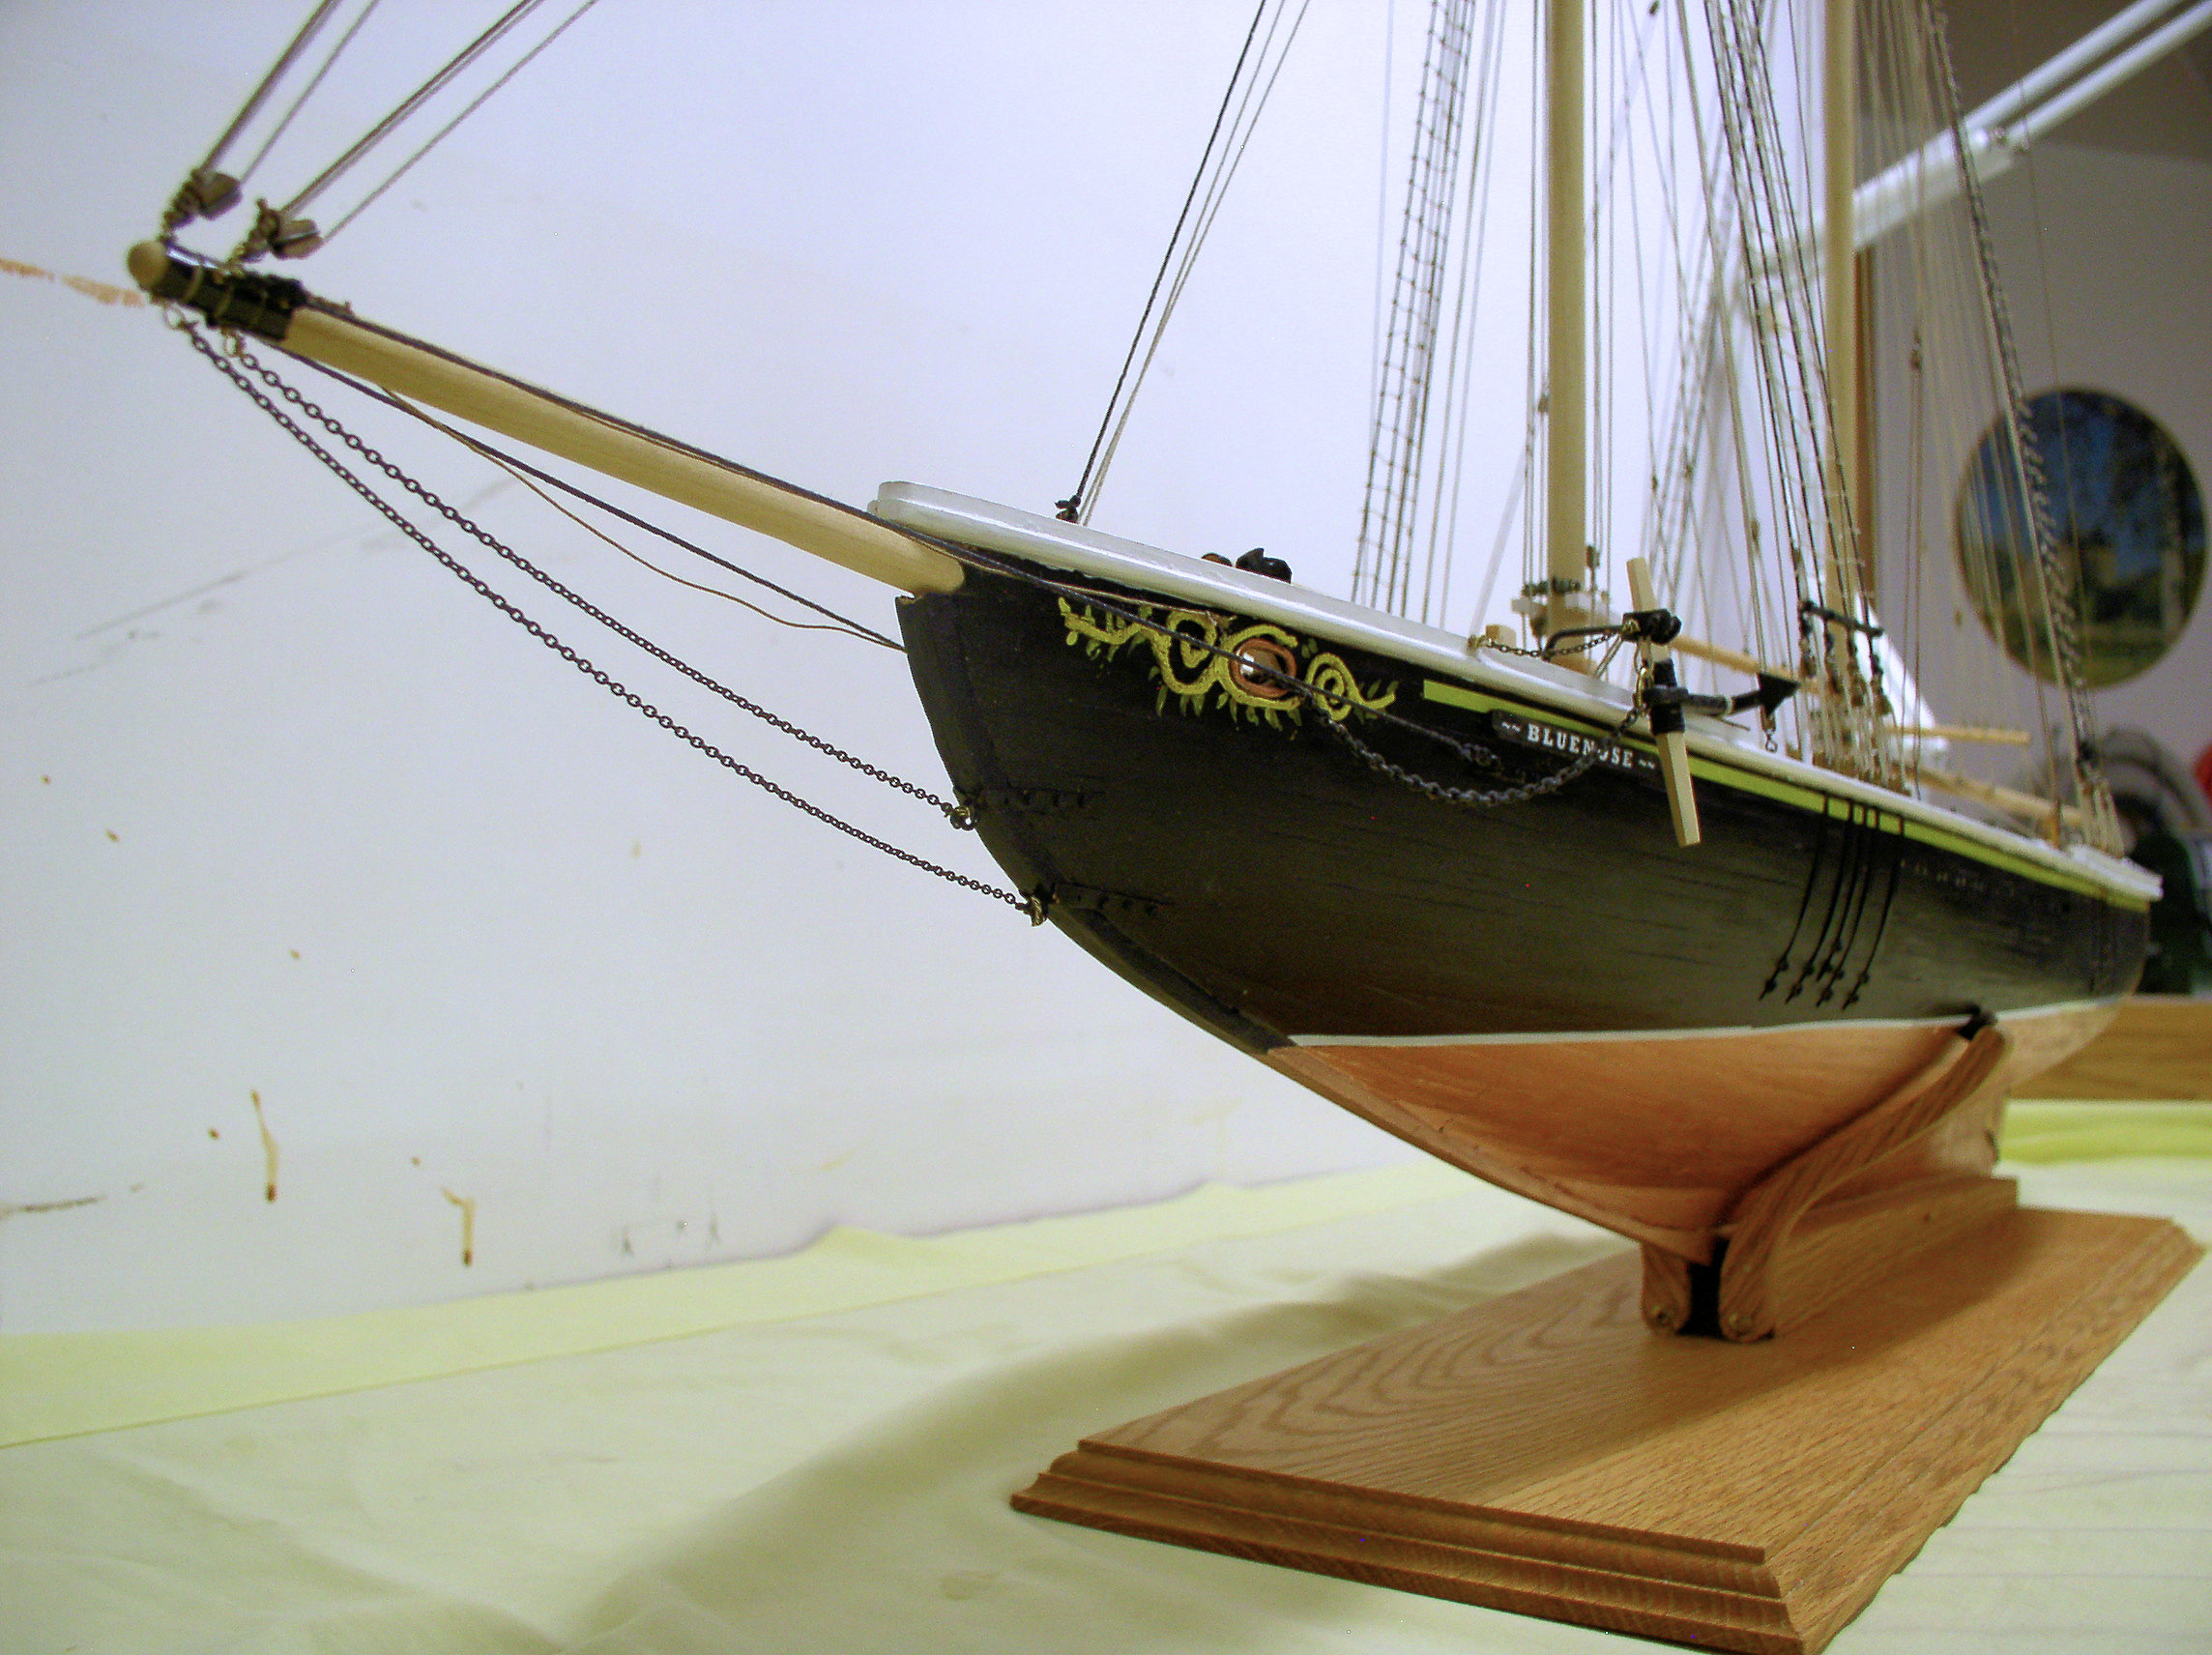
41'
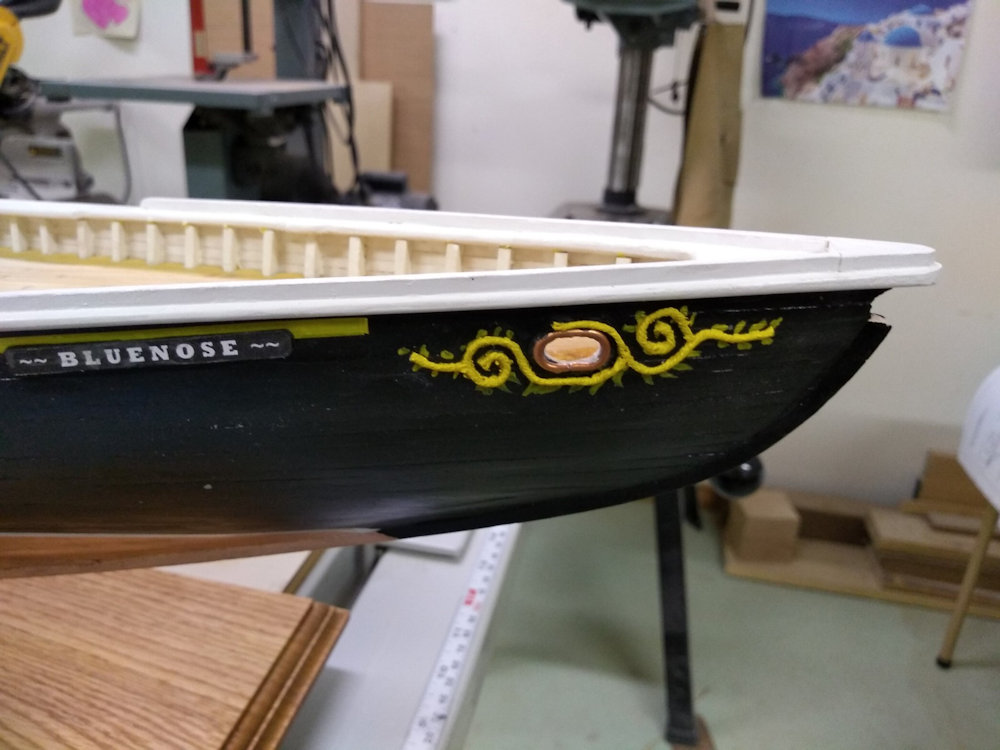
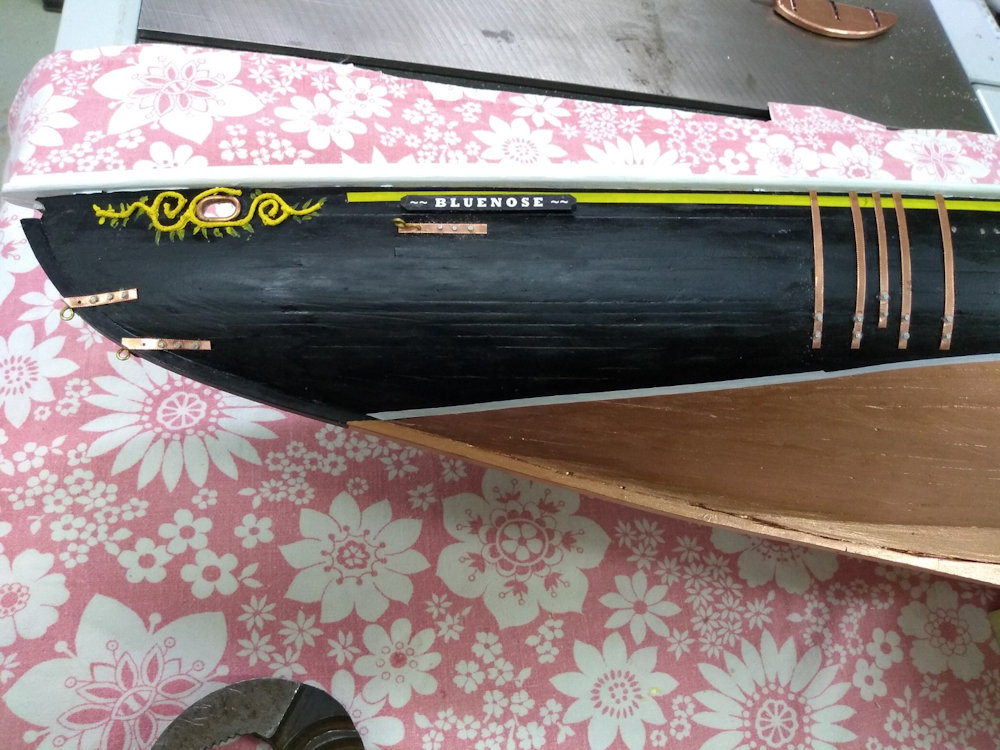
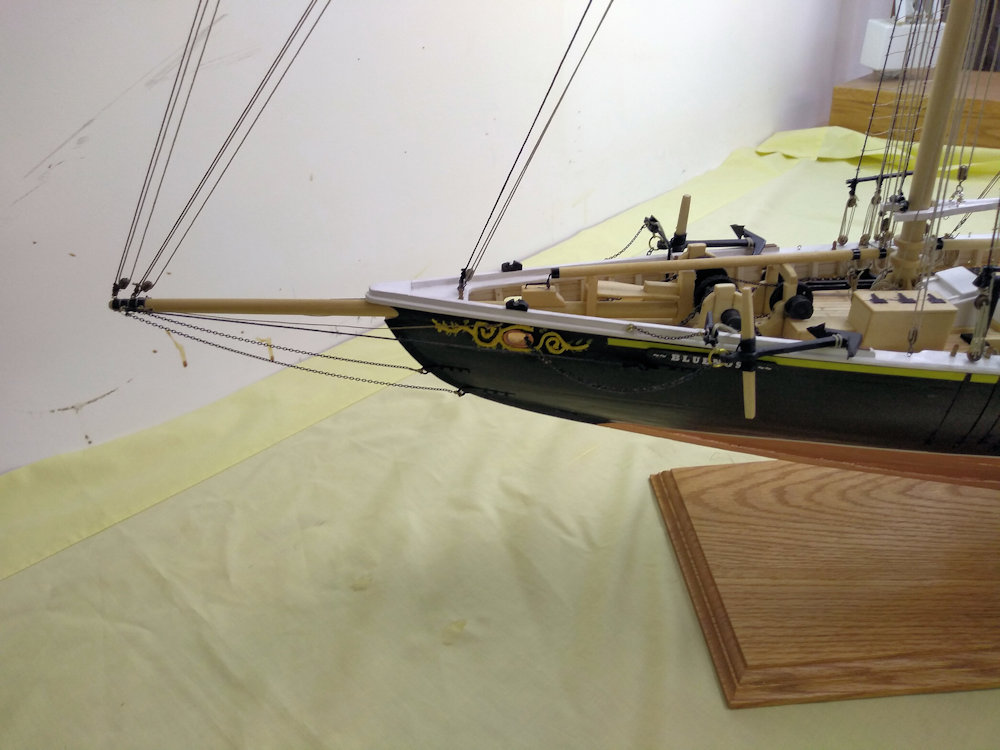
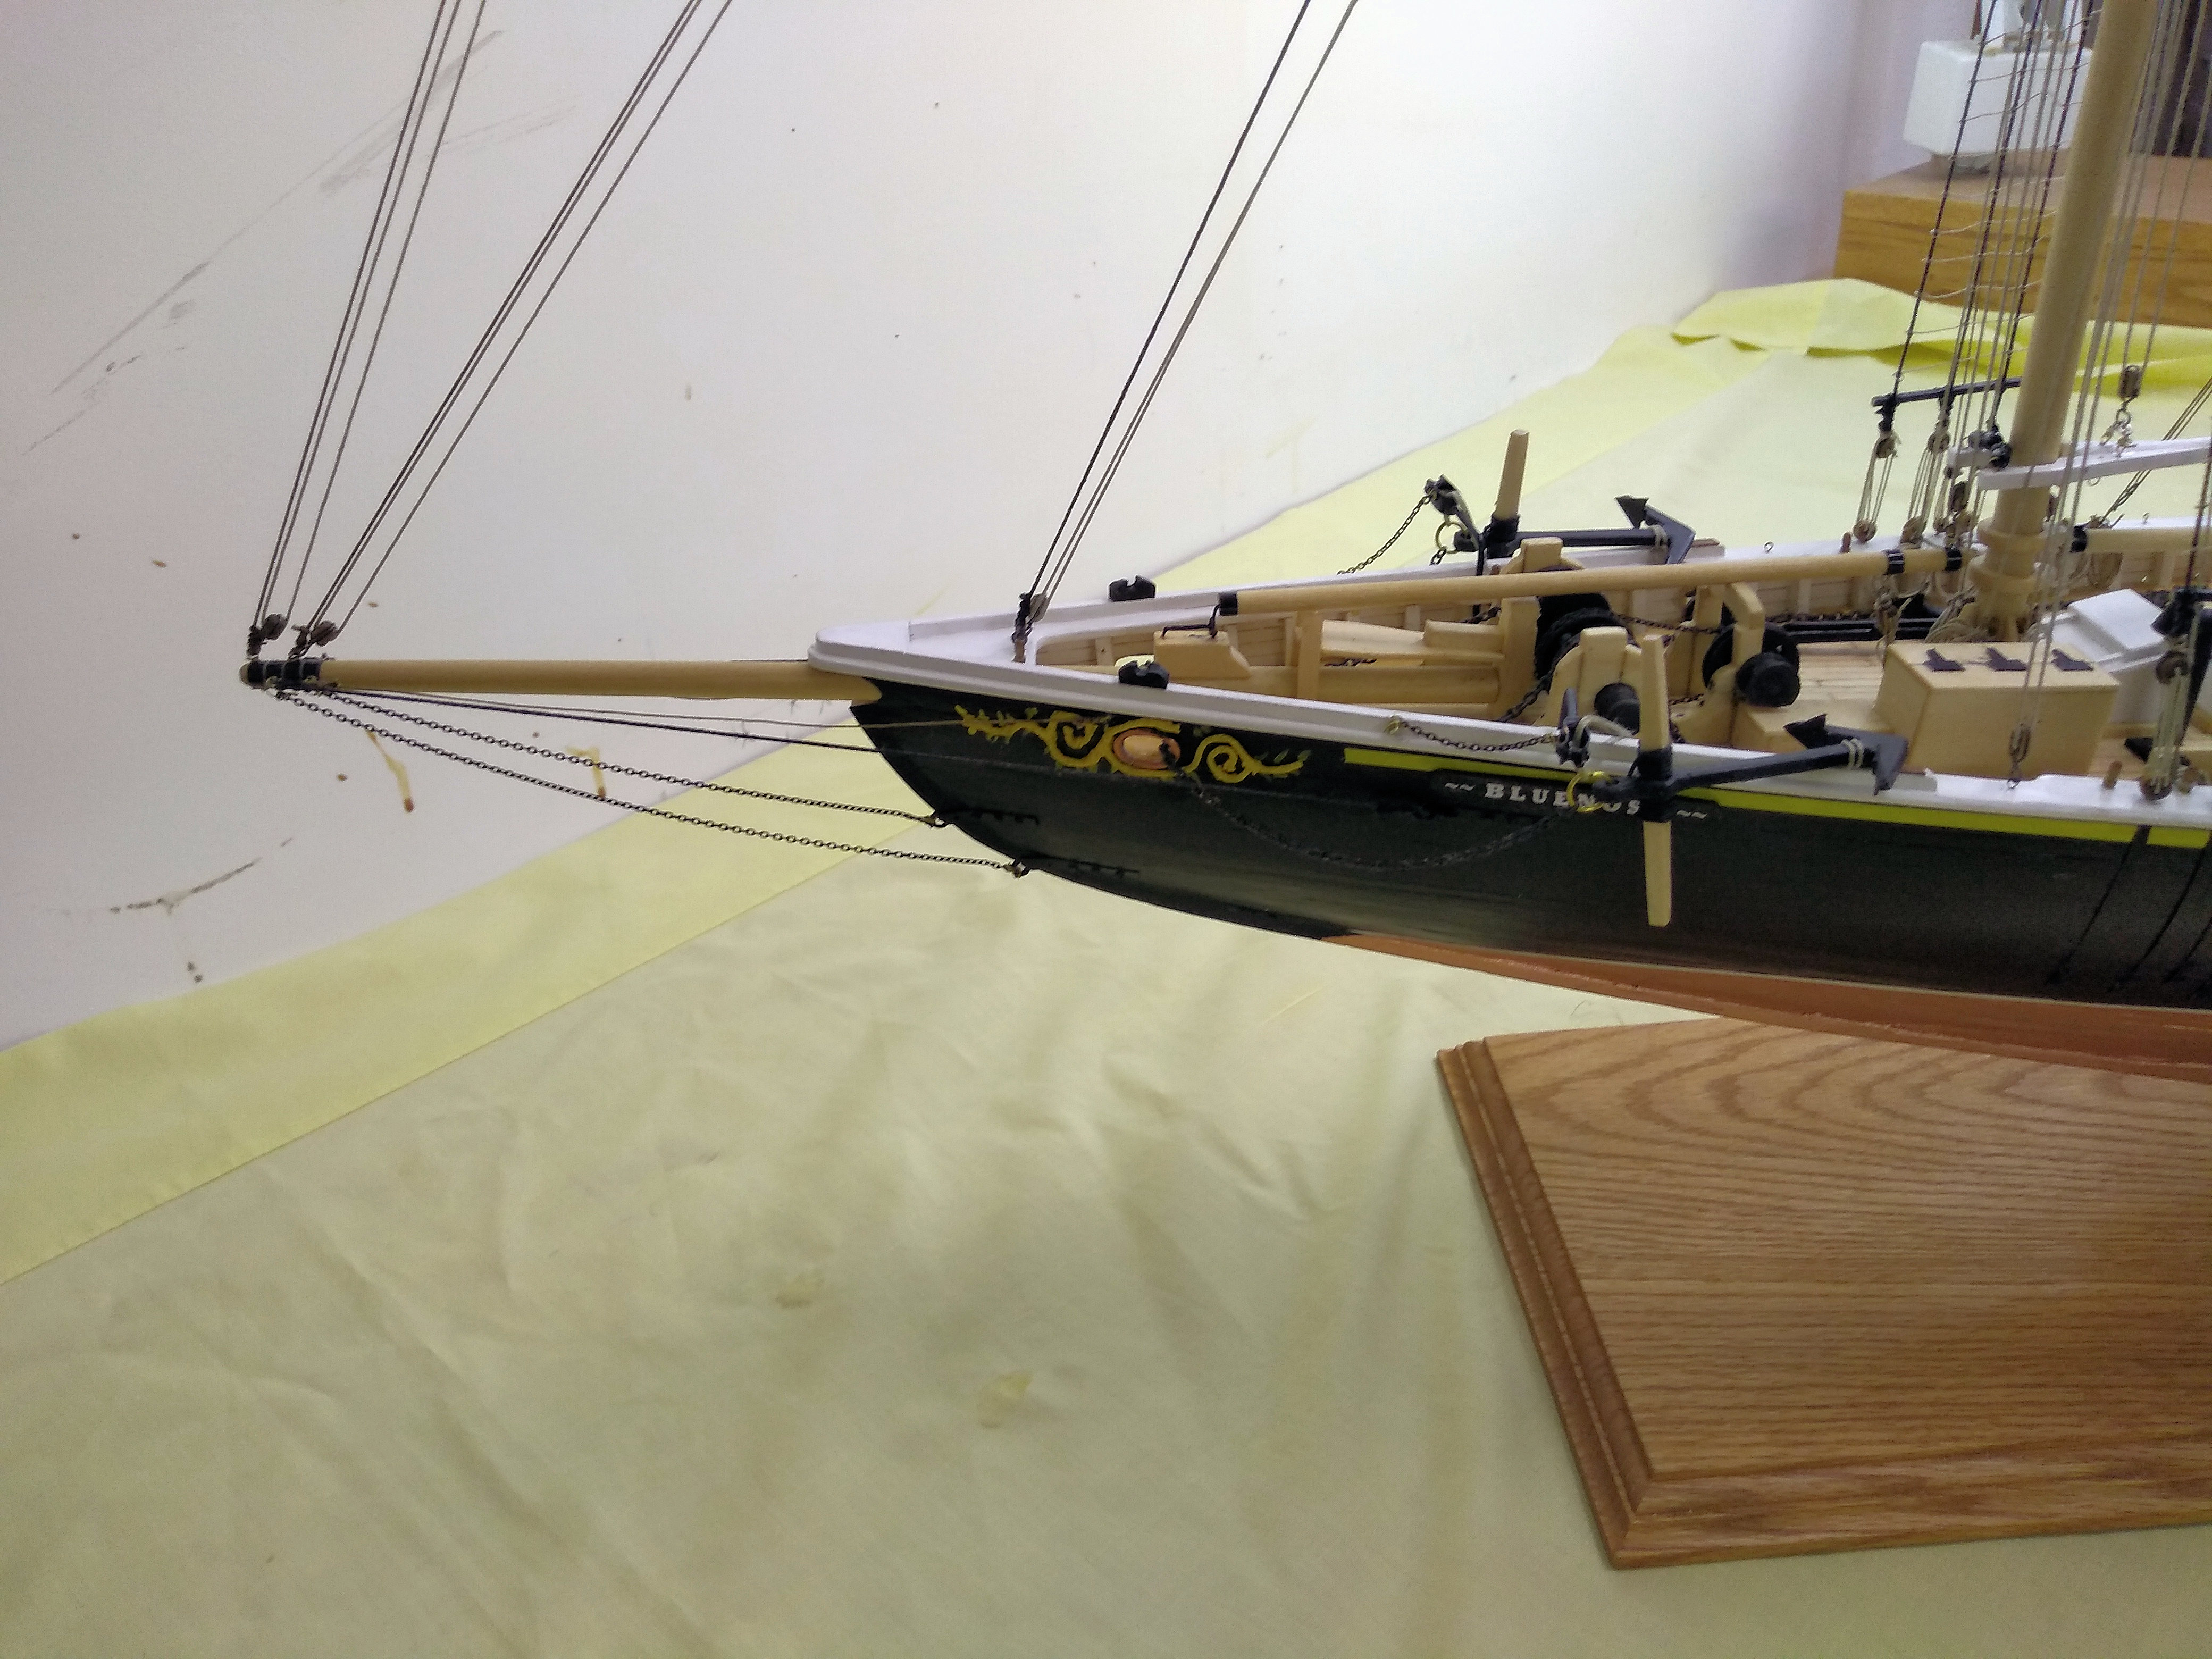
10-1/4"
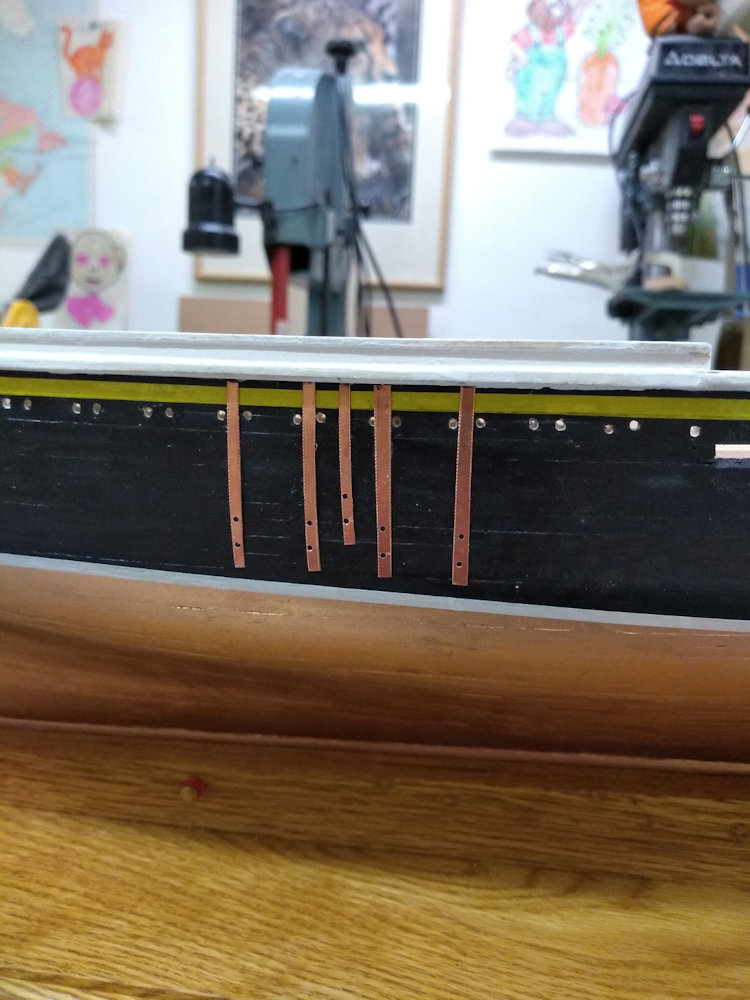
26 cm
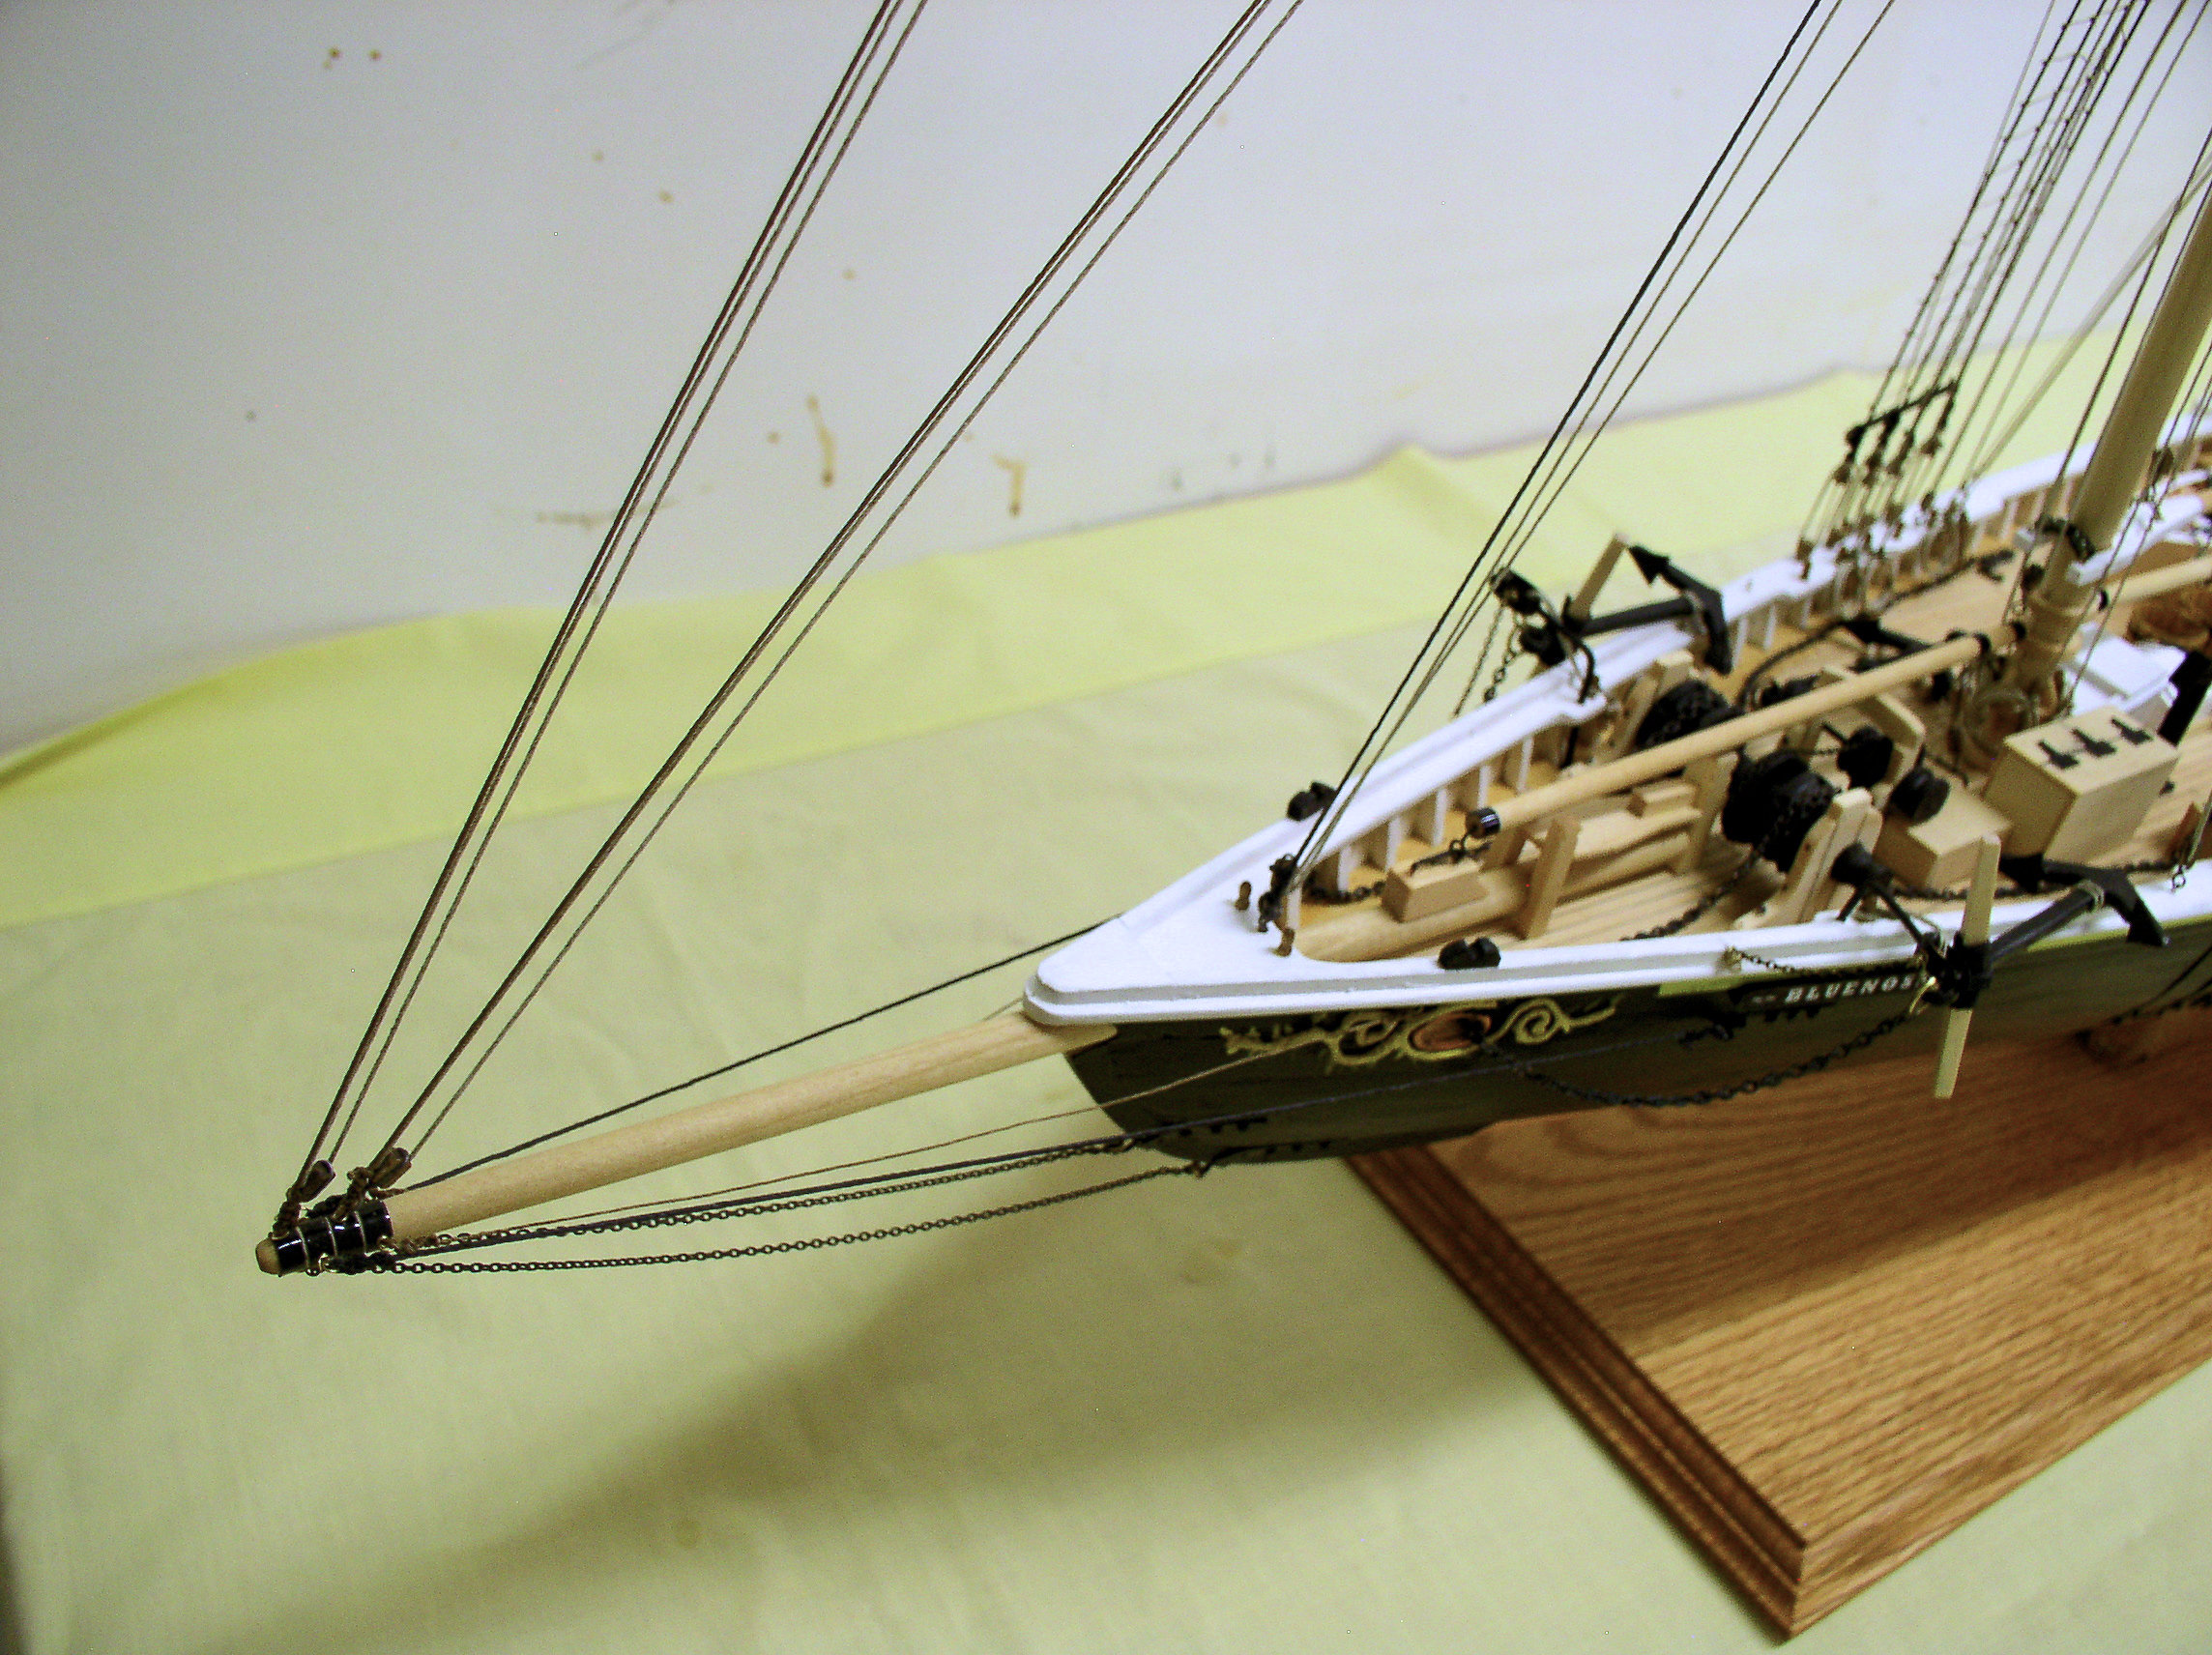
Bowsprit, projection
17' 6"
4-3/8"
11.1 cm
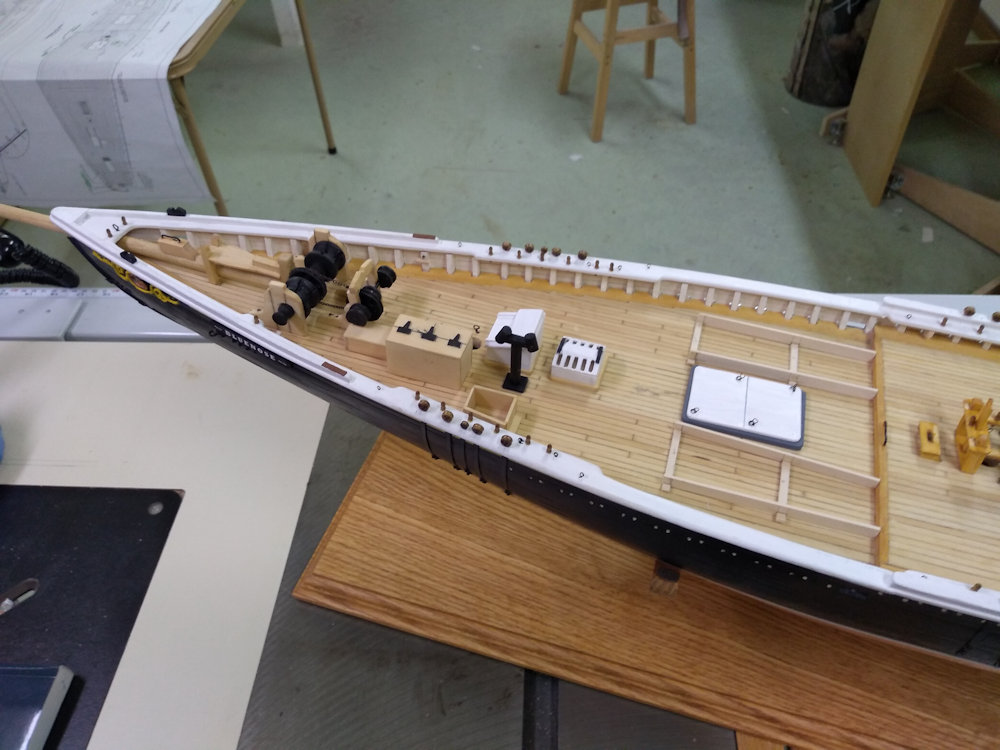
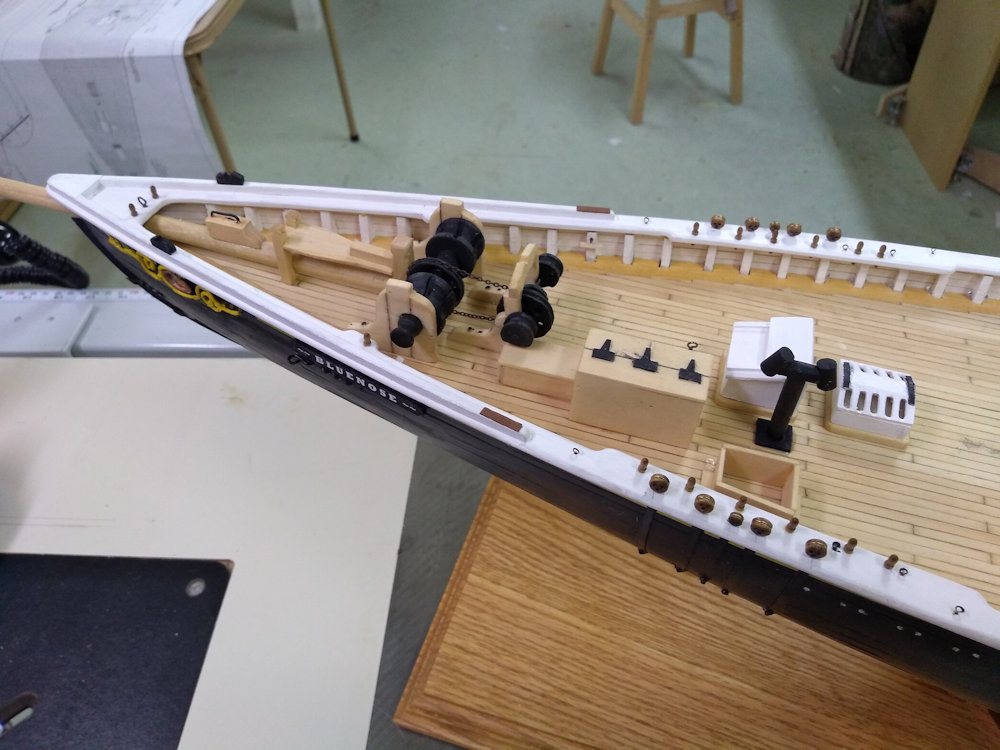
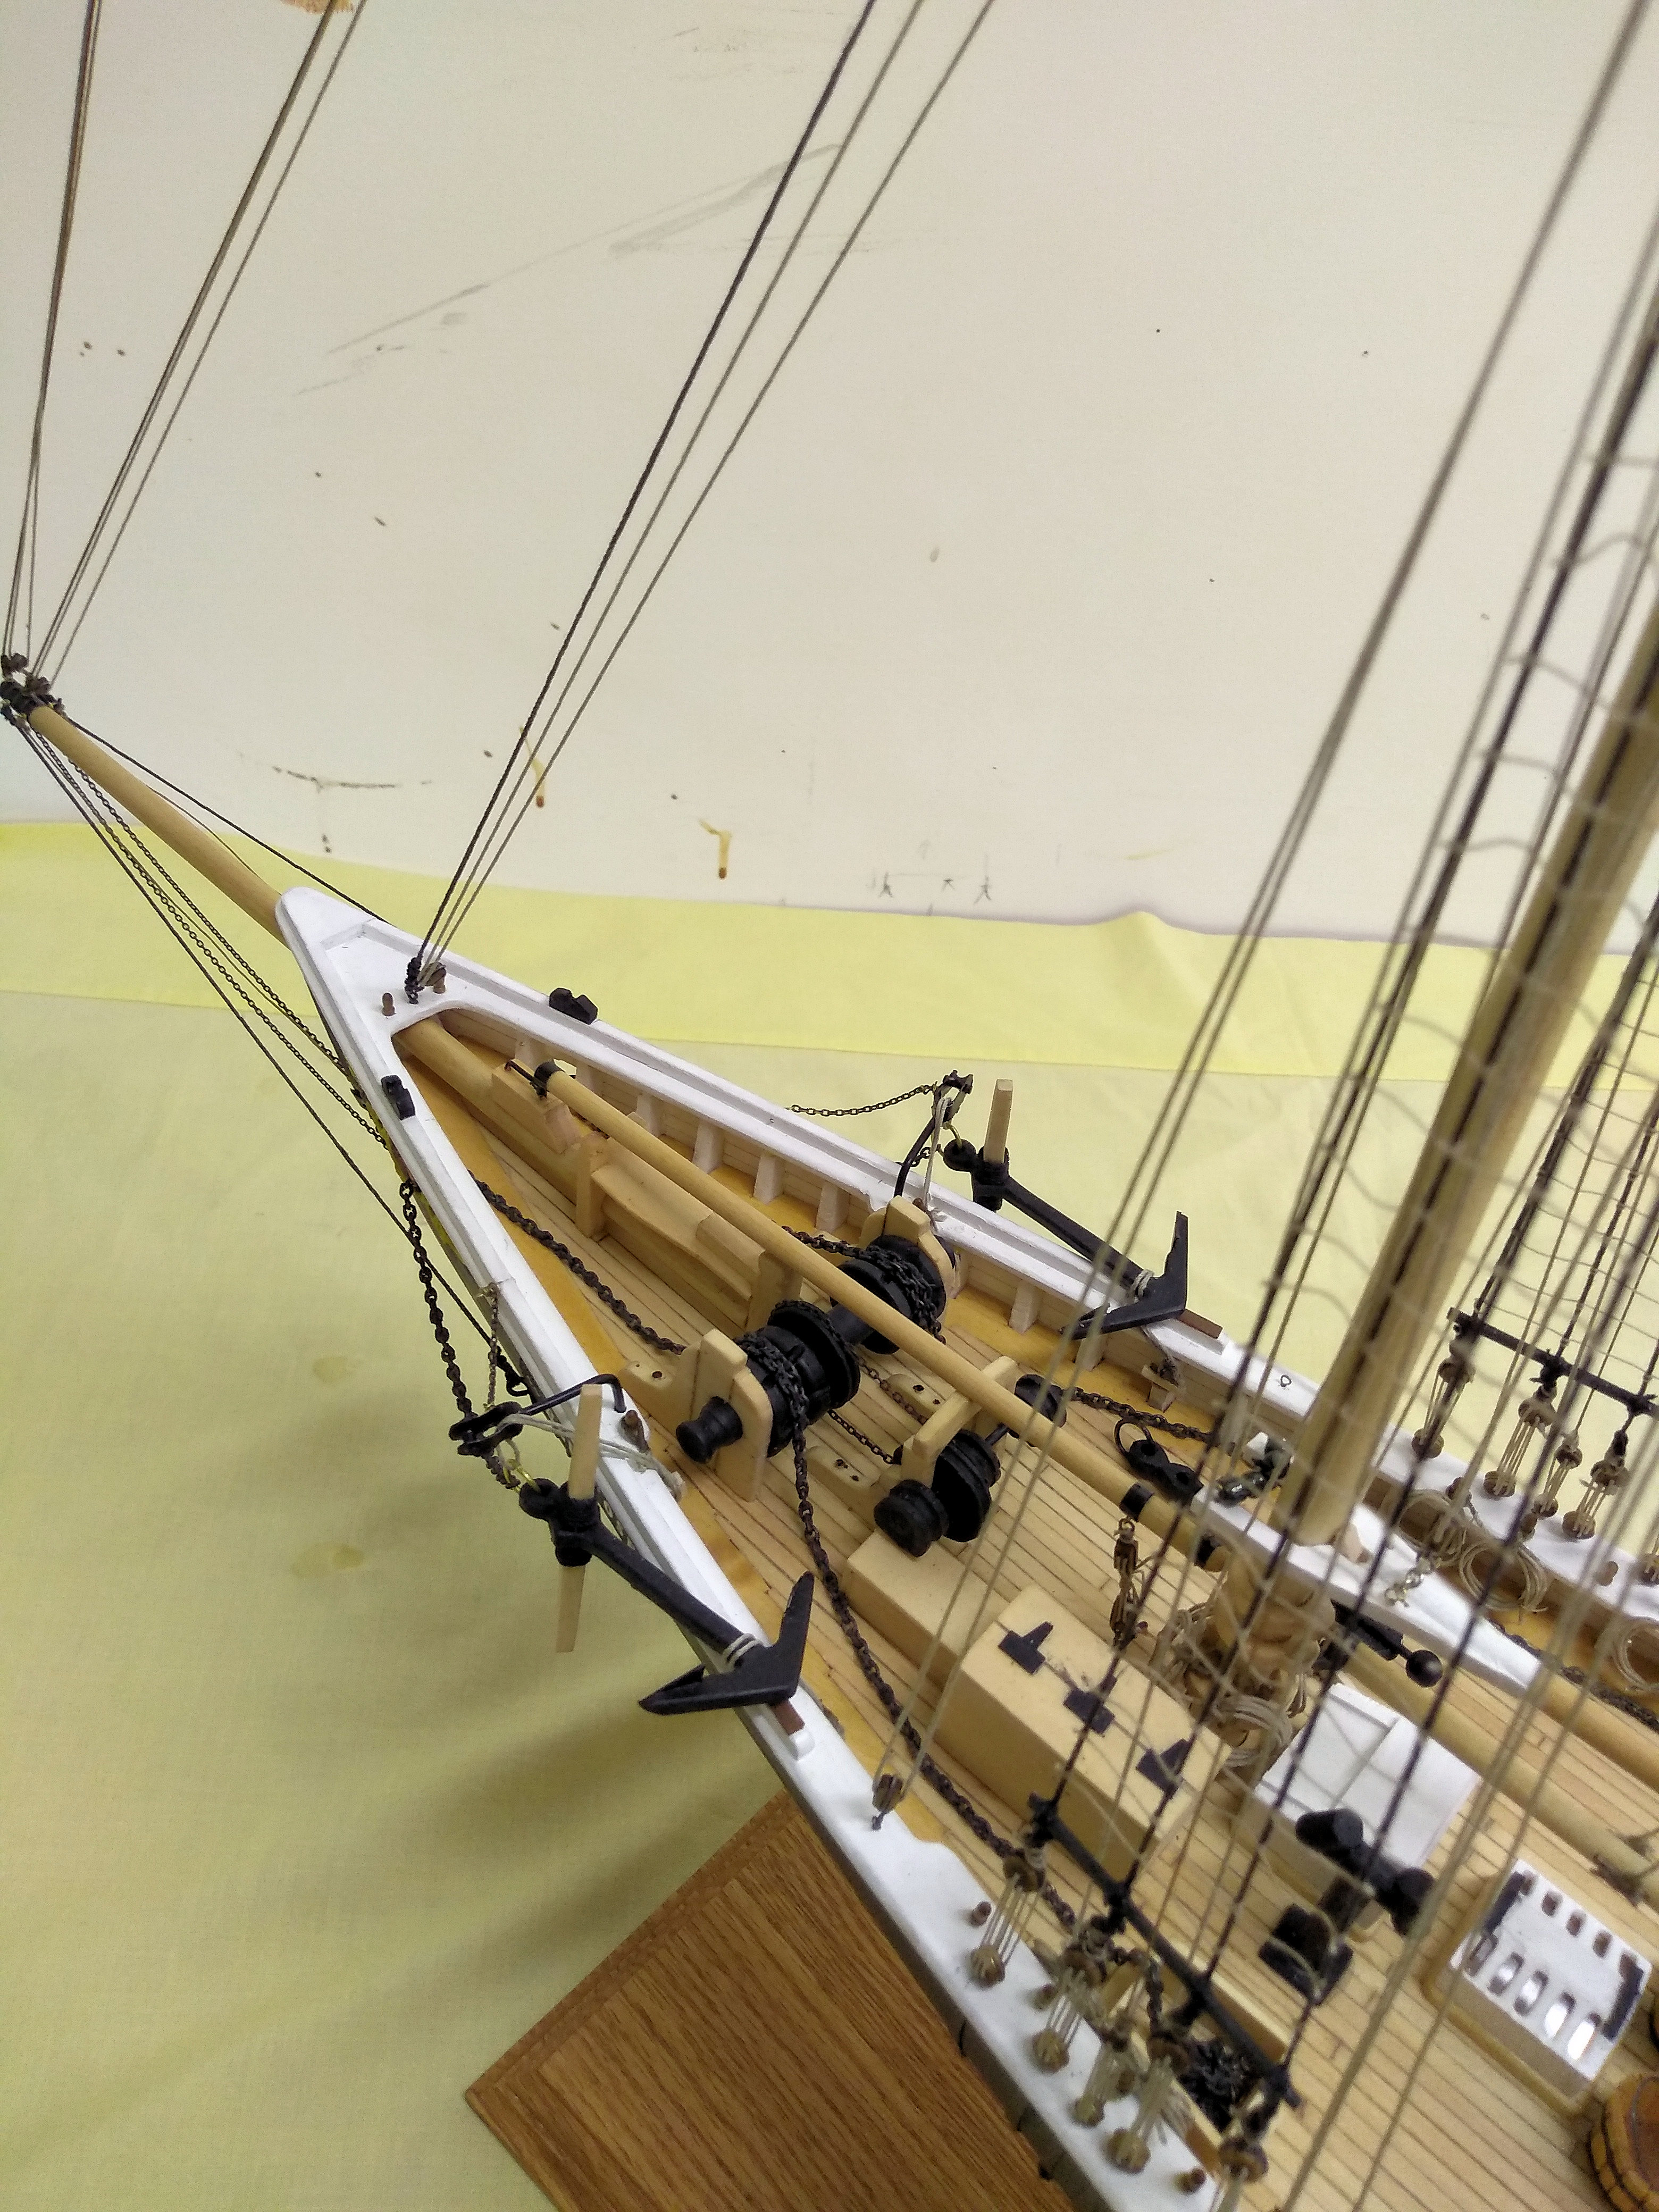
17' 6"
4-3/8"
11.1 cm
Main breadth to outside of planks (beam)
27'
6-3/4"
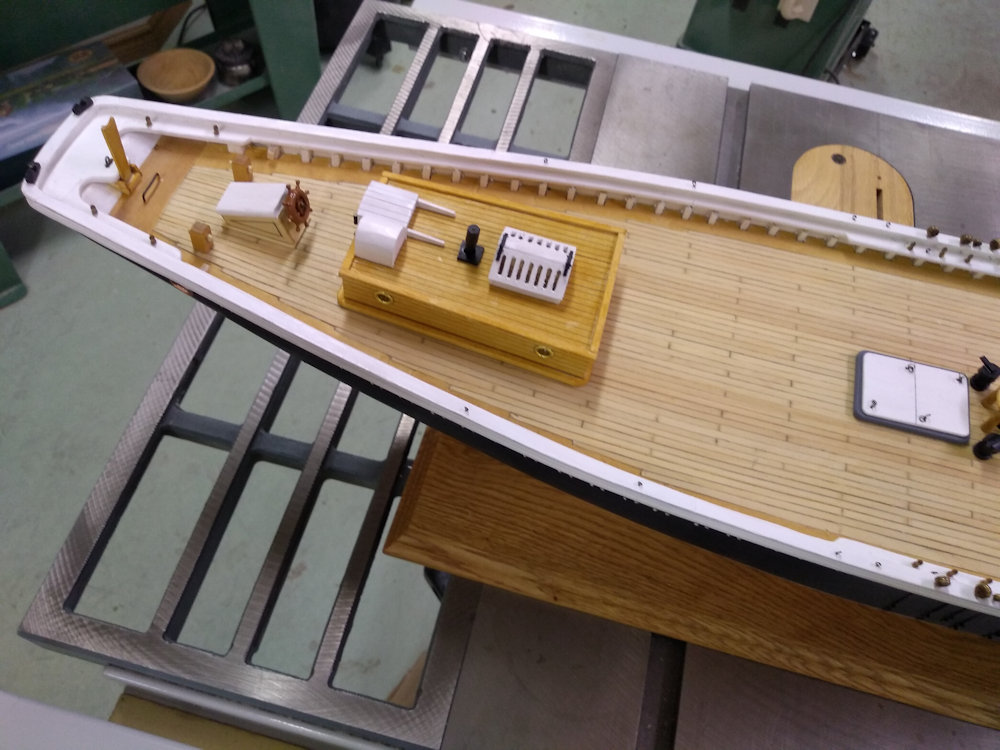
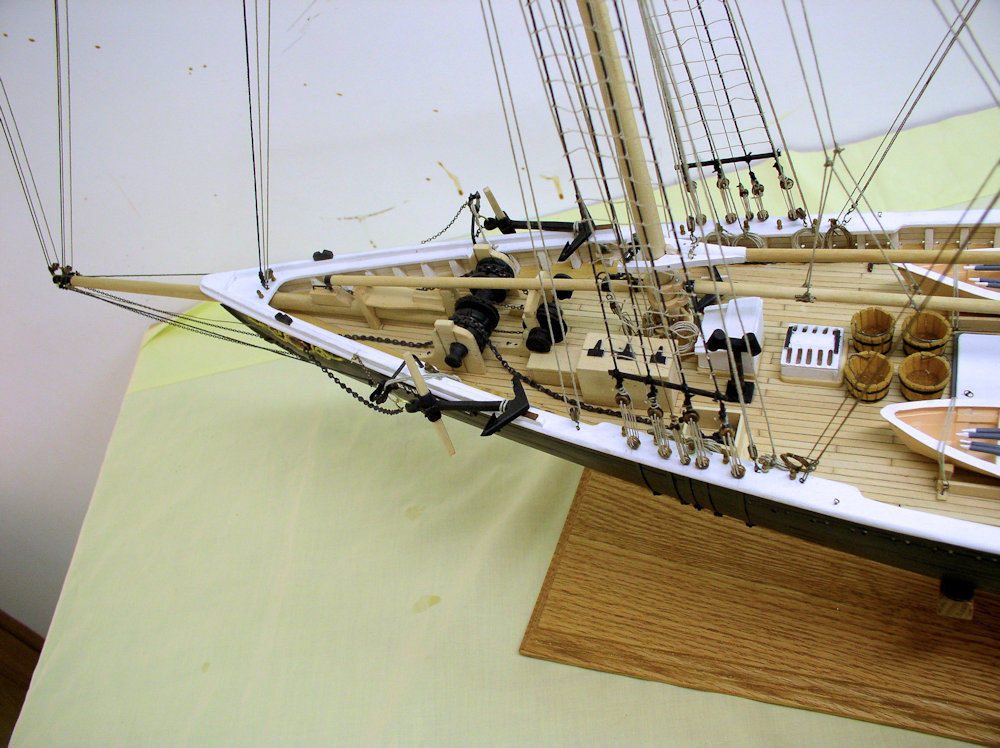
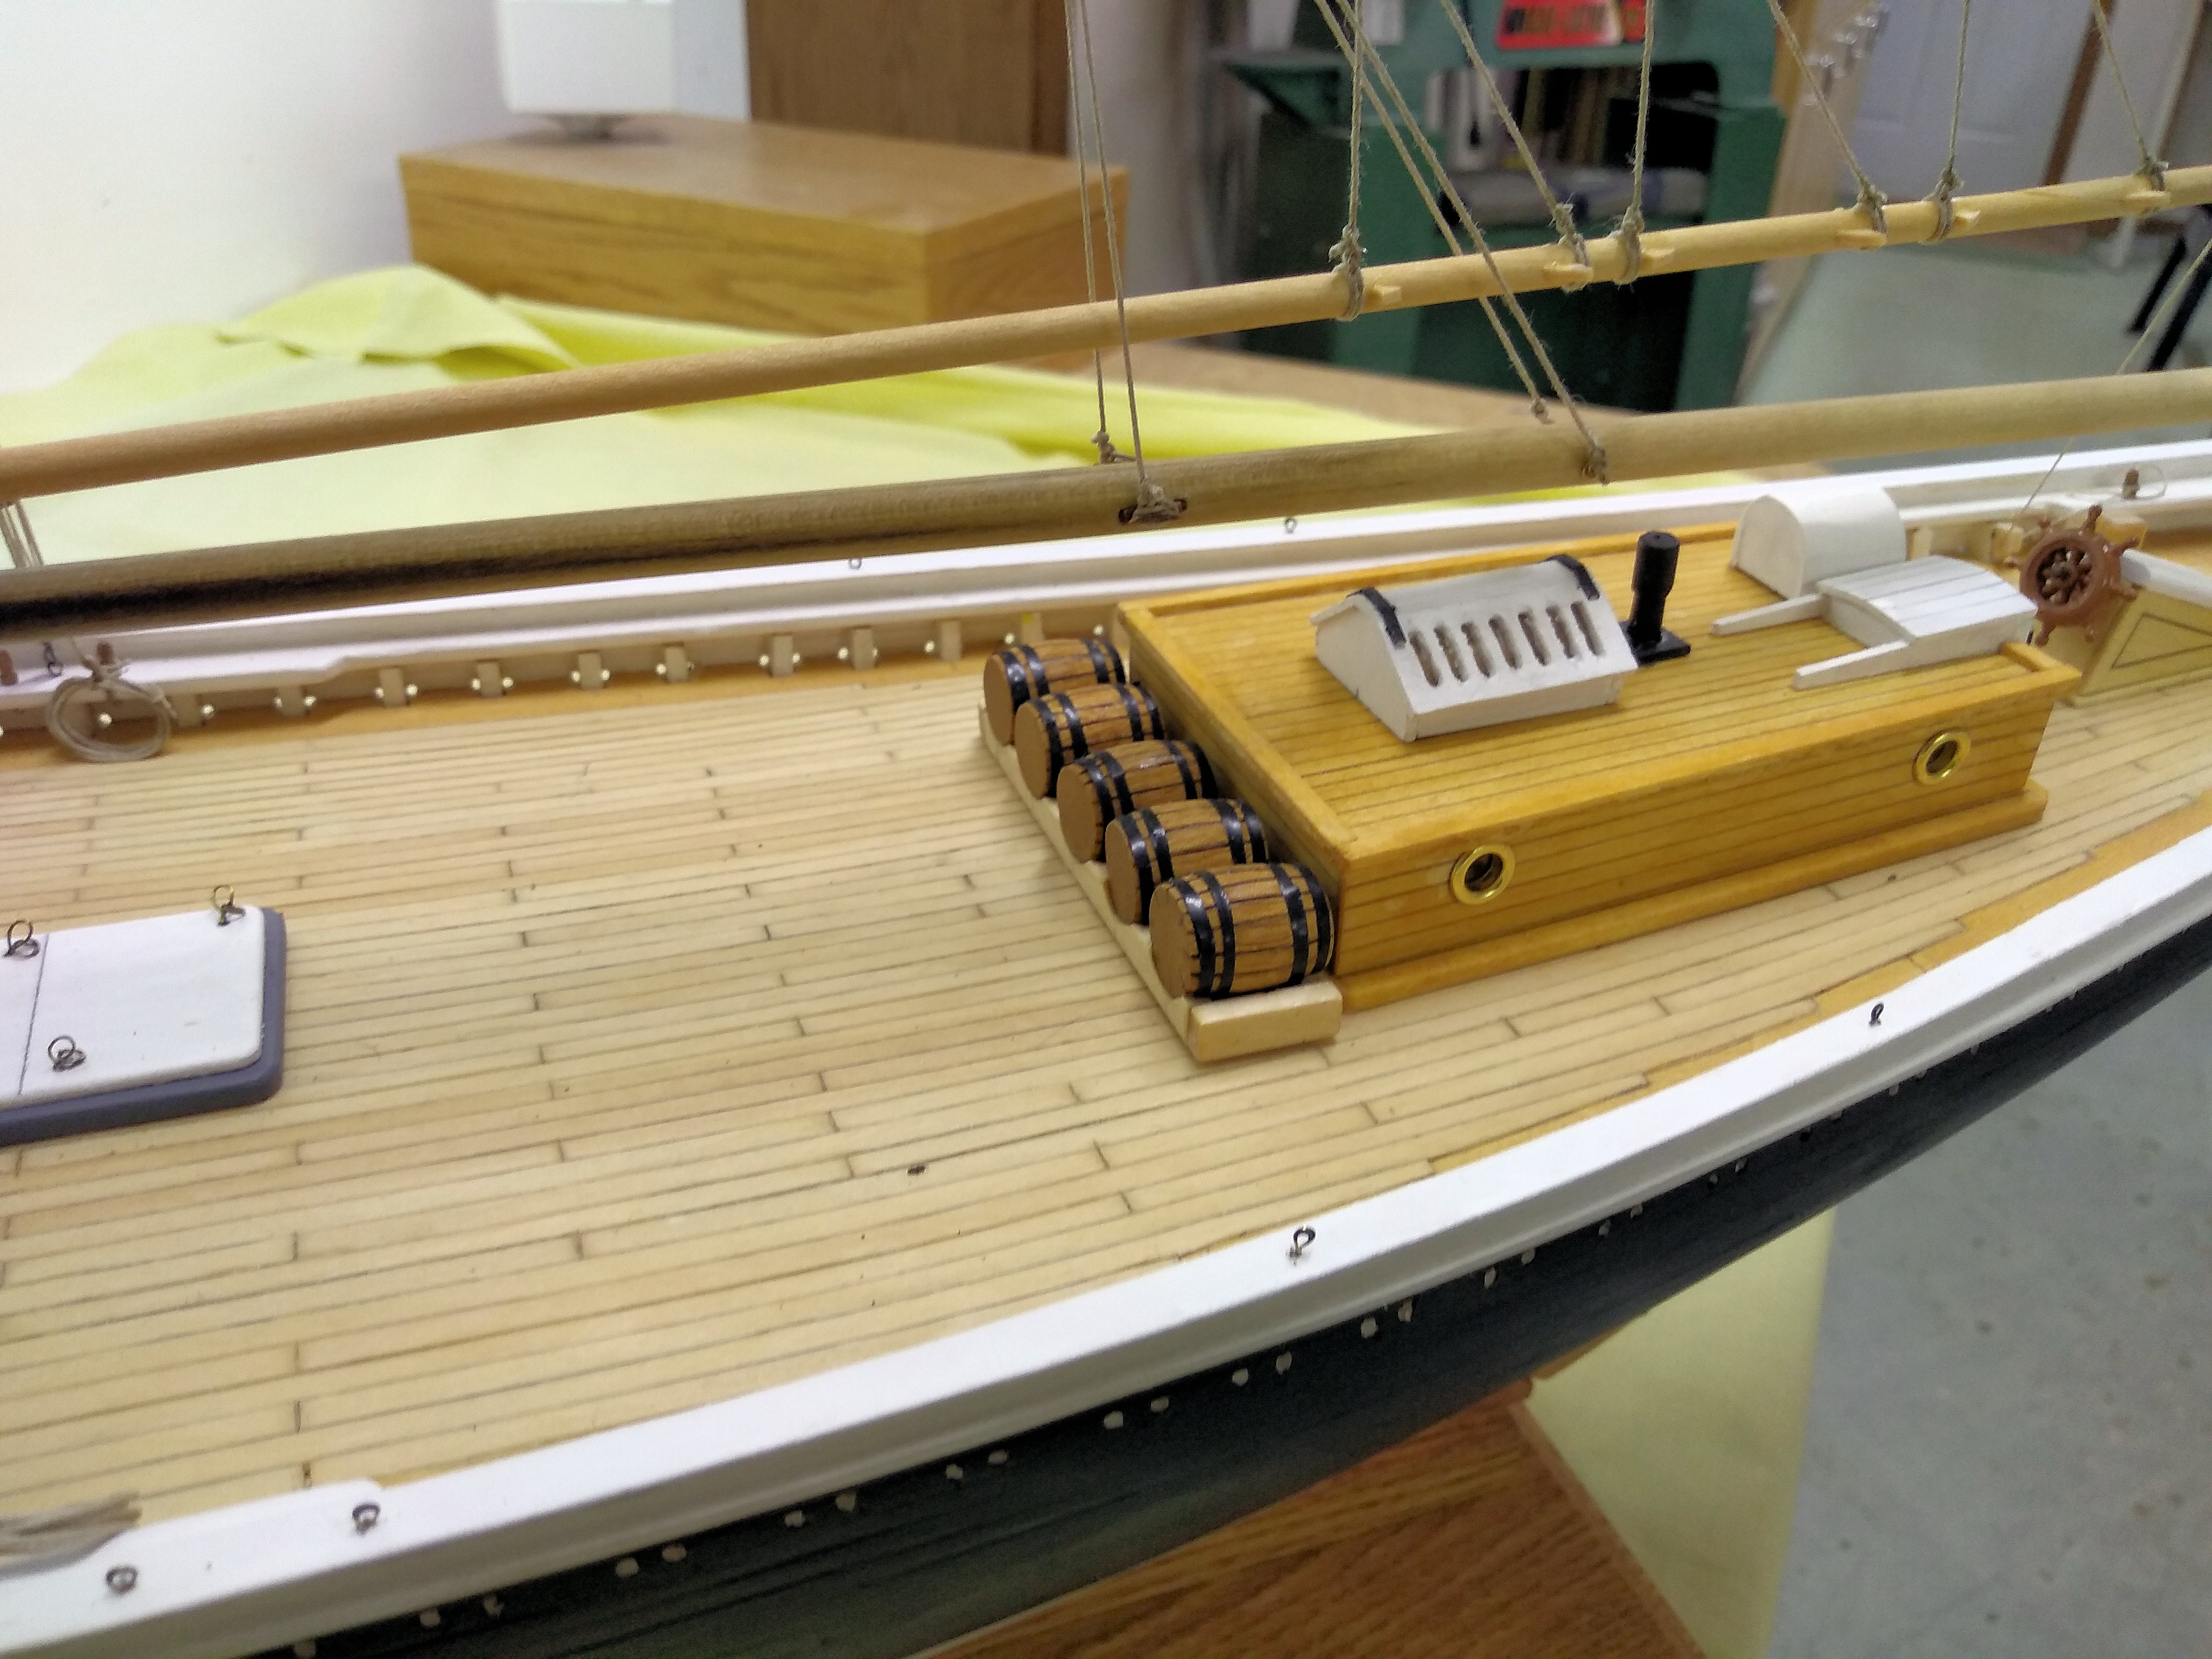
17.1 cm
27'
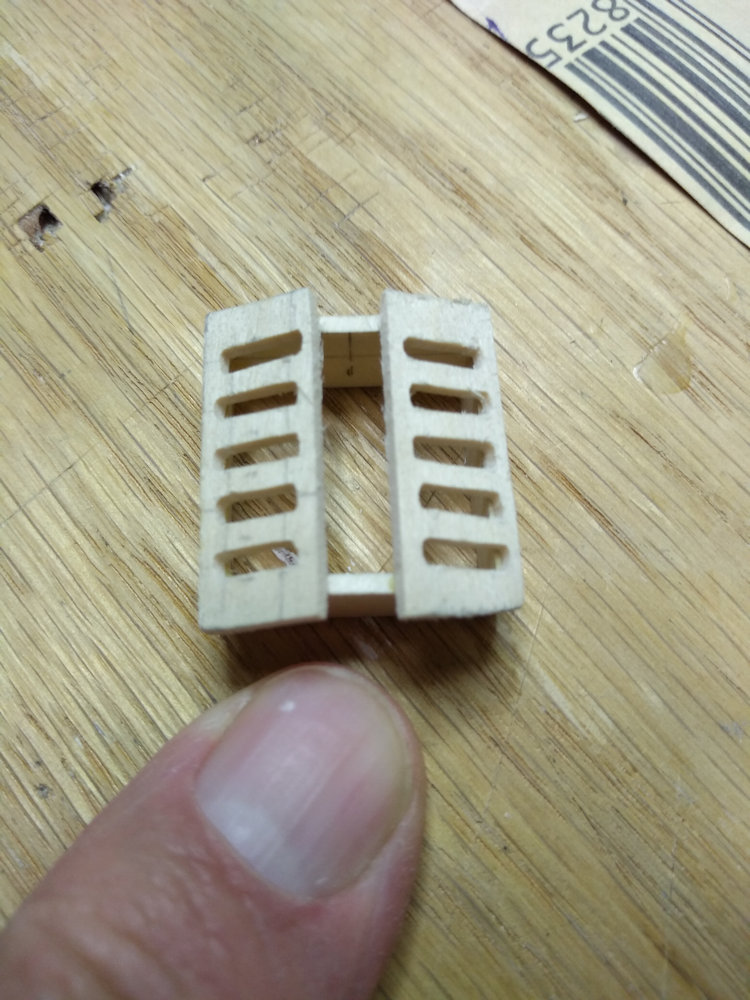
6-3/4"
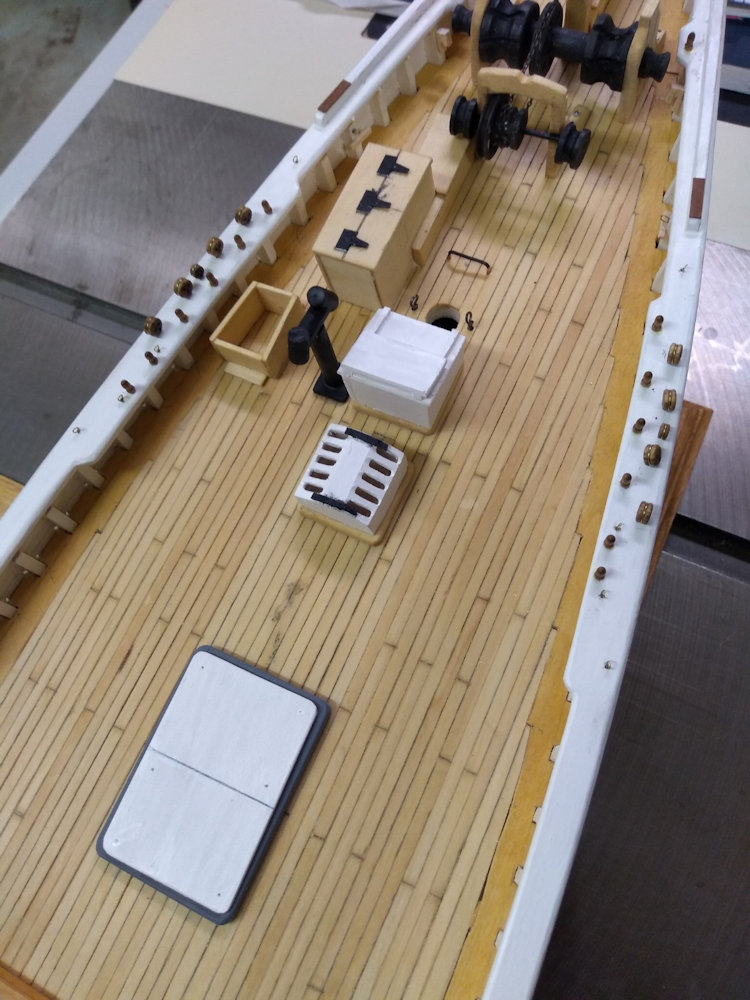
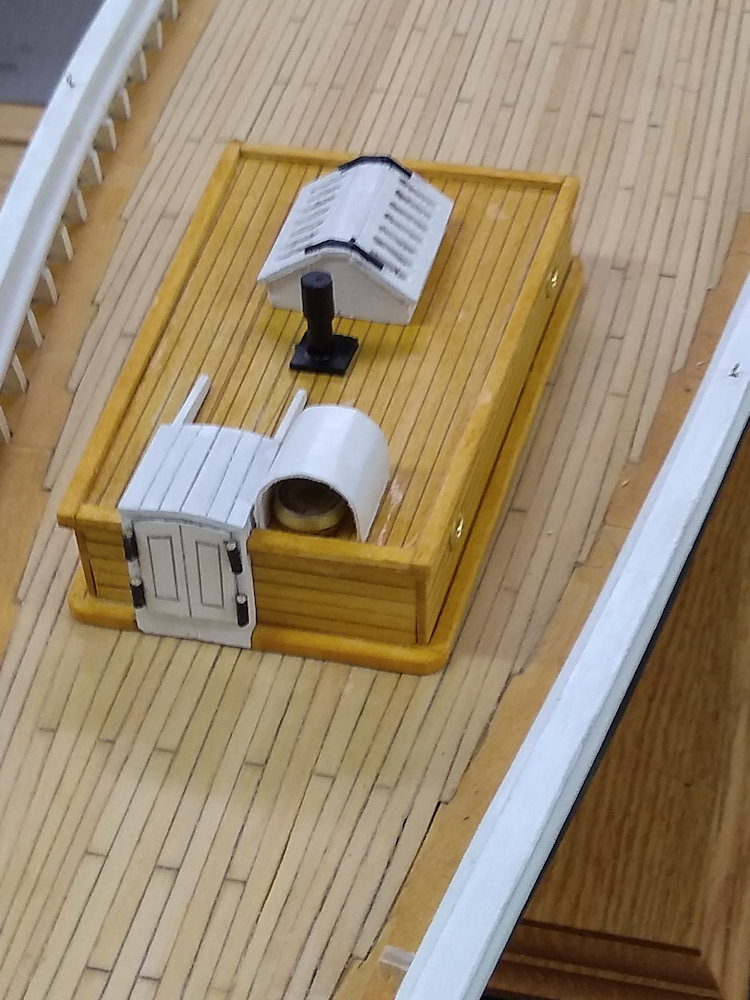
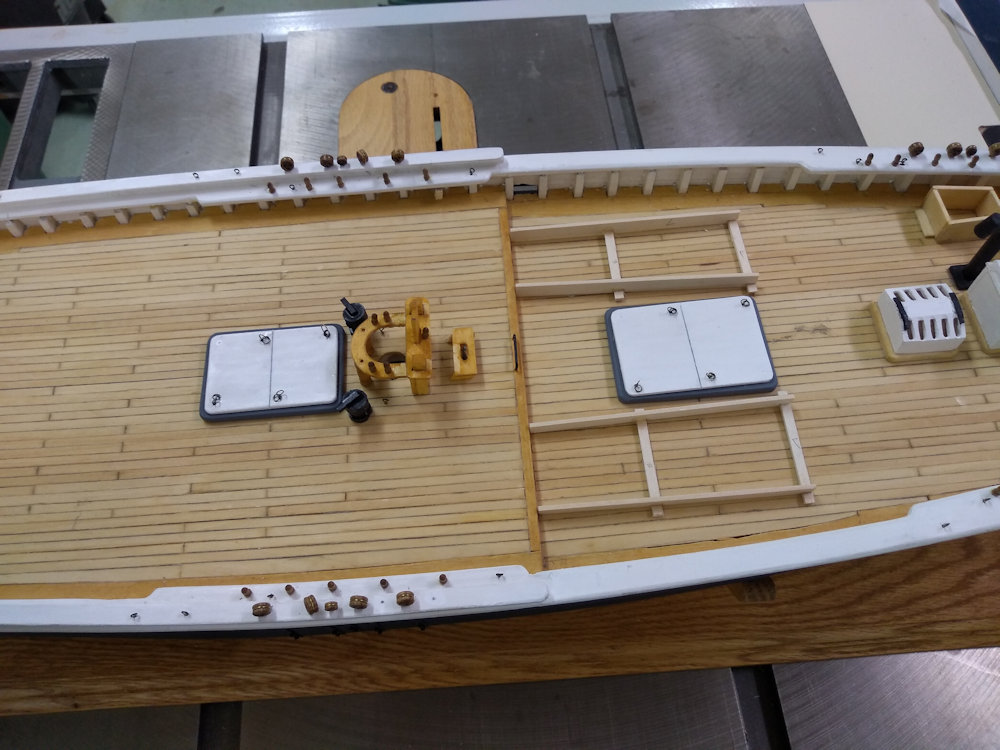
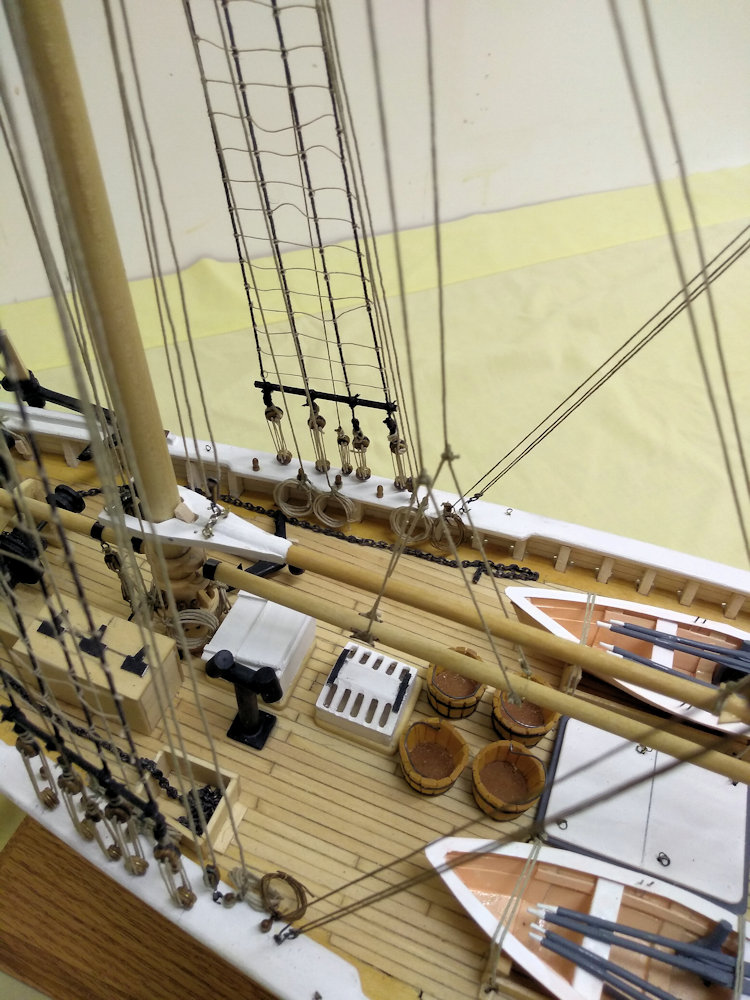
17.1 cm
Load draught
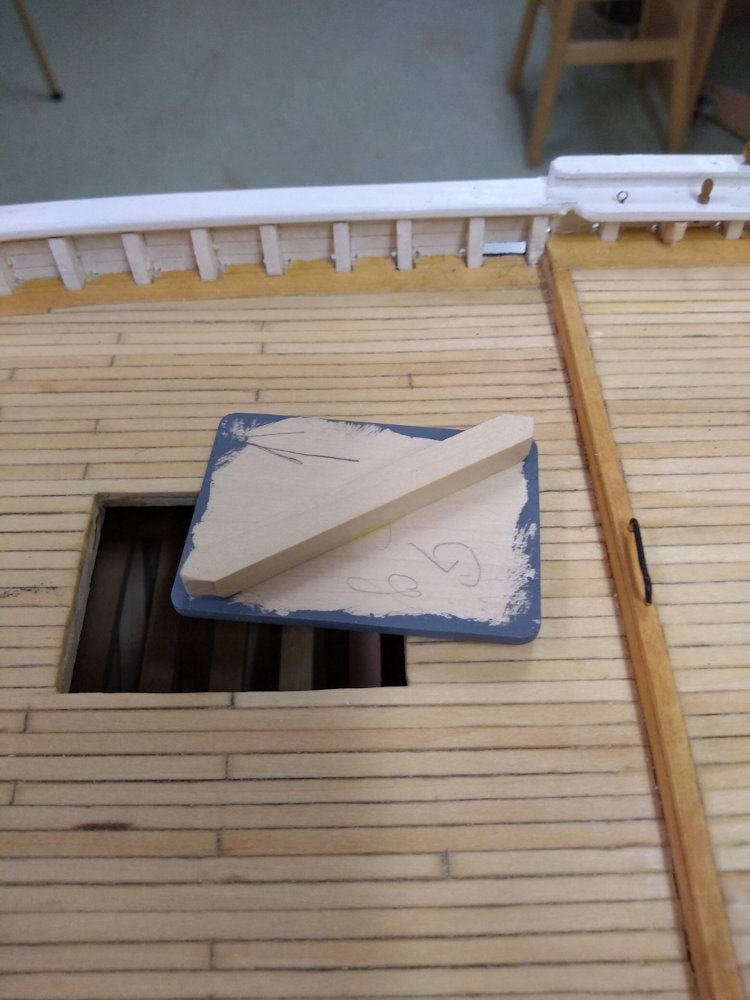
16' 6"
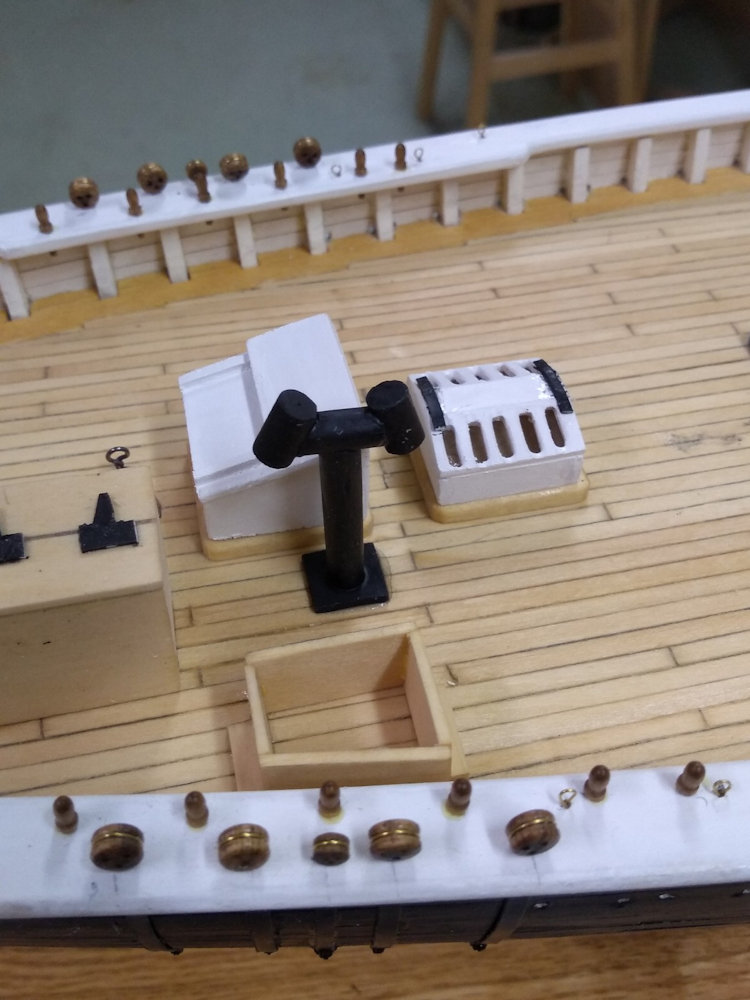
4-1/8"
10.5 cm
15' 10"
3-15/16"
10.1 cm
Height from base line to top of bow
29' 8"
7-5/16"
18.6 cm
28'
7"
17.8 cm
Height from base line to lowest rail point
22' 10"
5-9/16"
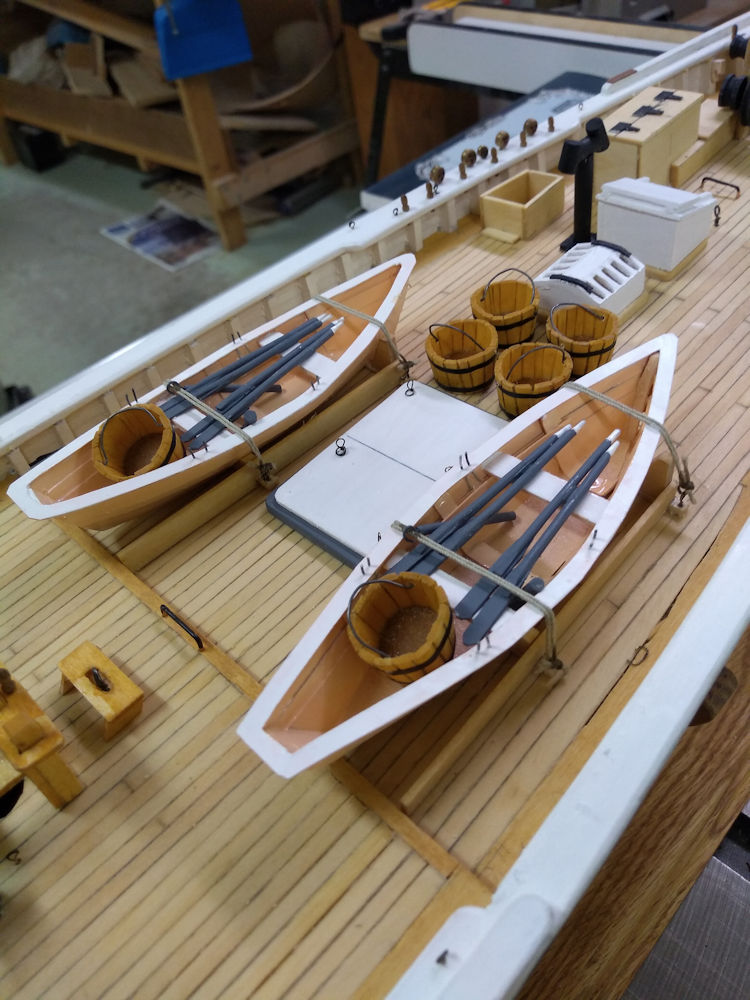
14.2 cm
21' 1/2"
5-3/8"
13.7 cm
Height from base line to top of stern
24'
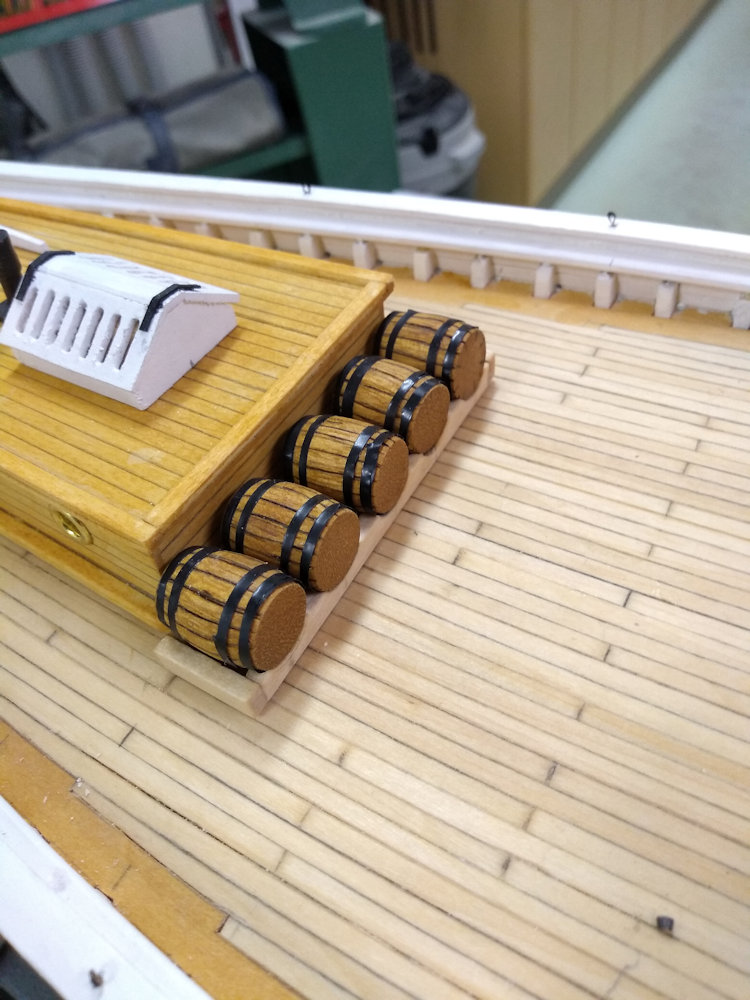
6"
15.2 cm
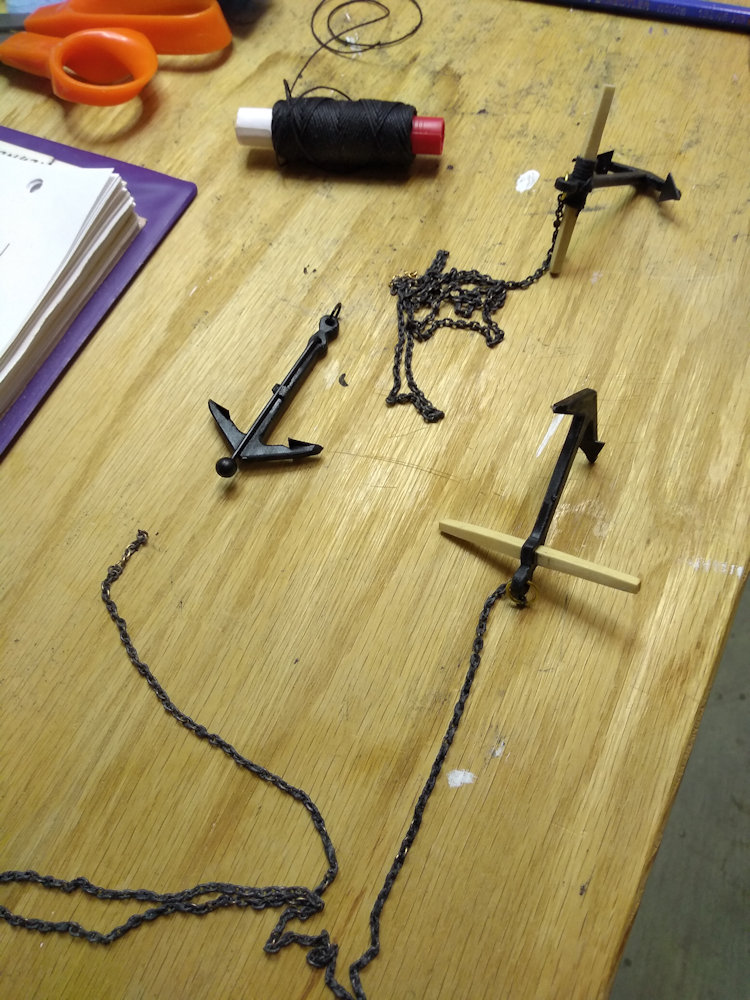
23' 6"
5-7/8"
14.9 cm
Overall length of ship (hull + projections)
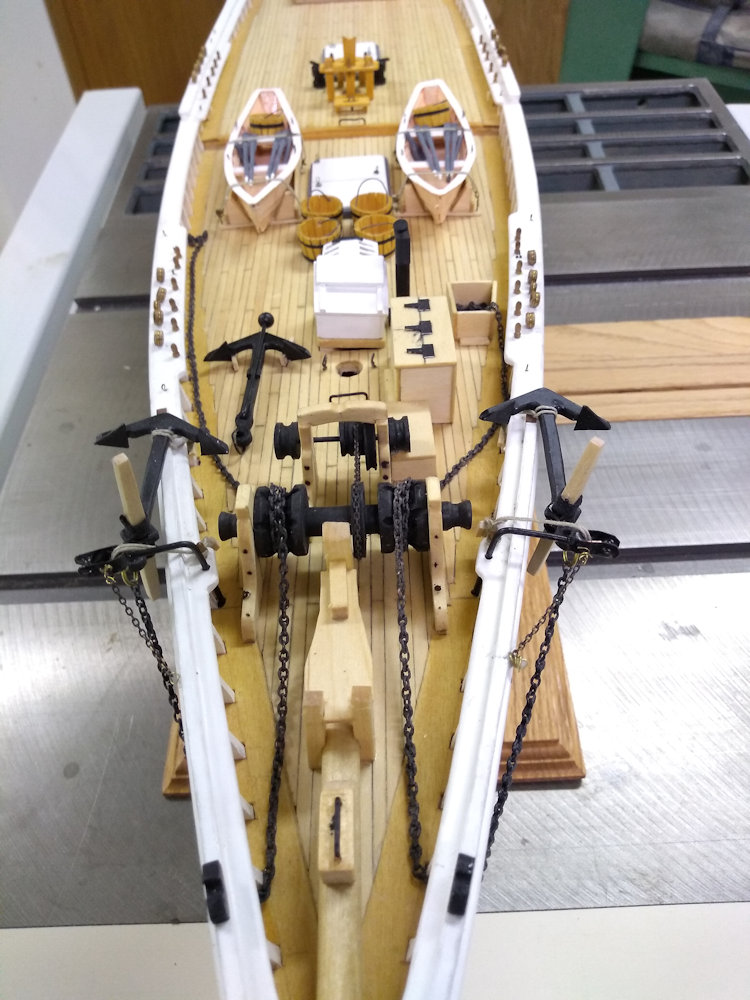
177' 11"
44-1/2"
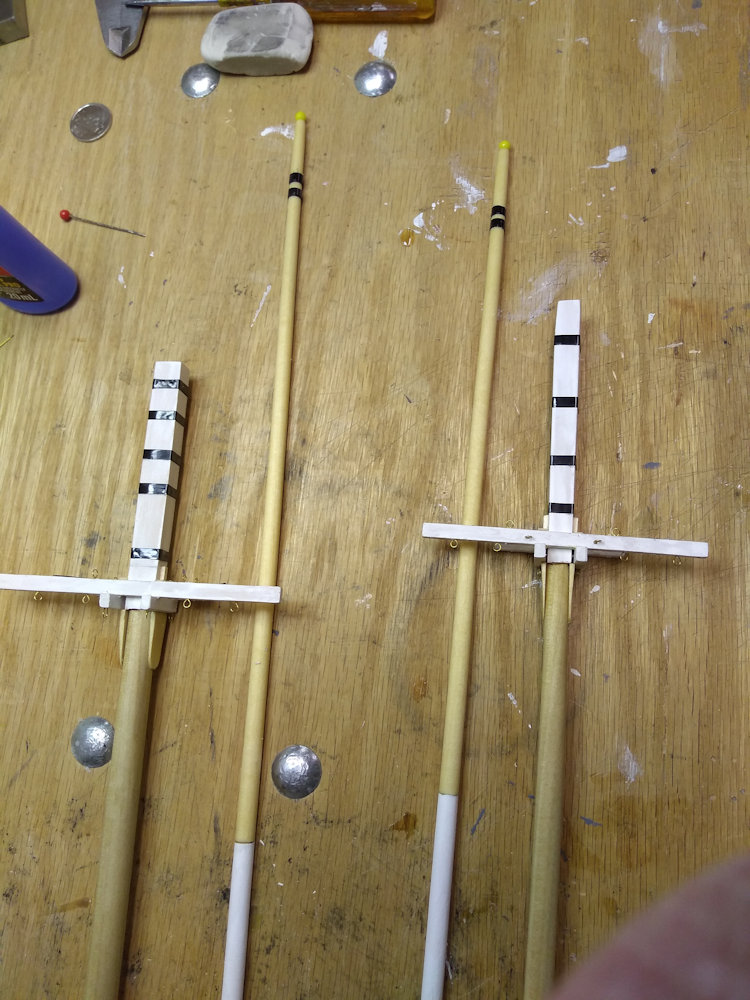
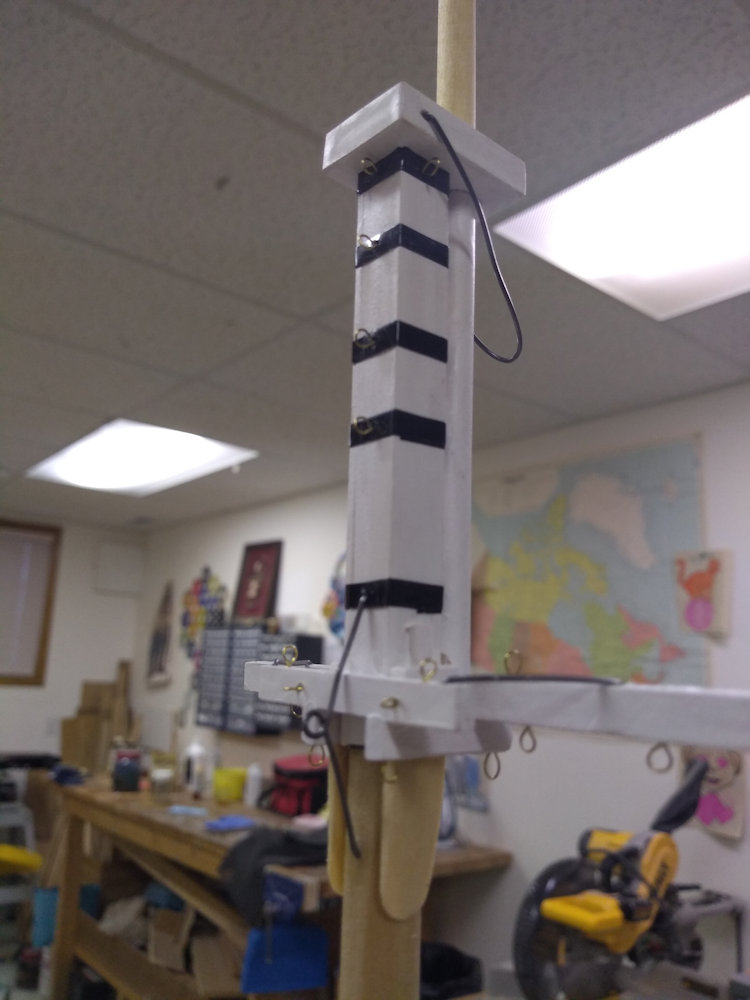
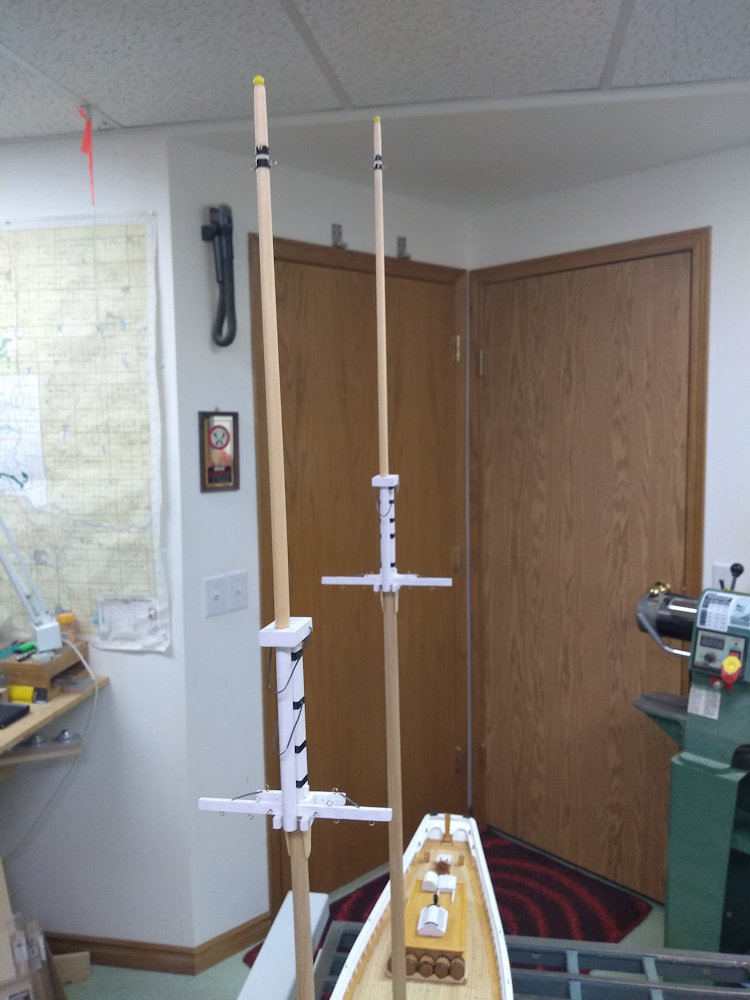
113 cm
176'
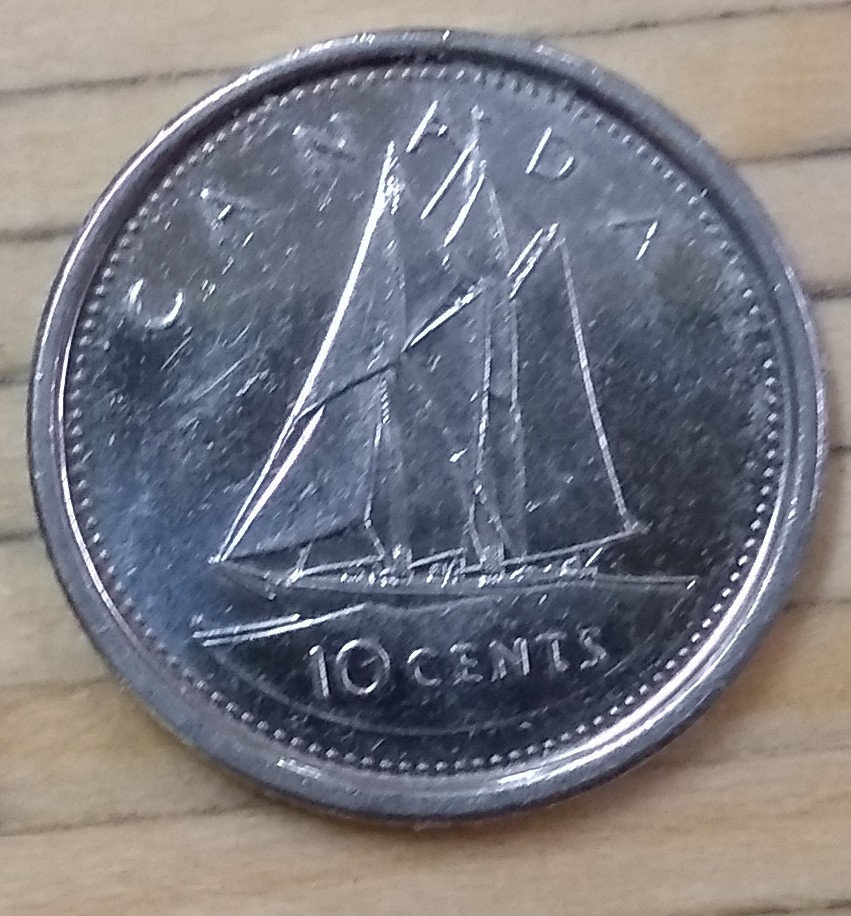
44"
112 cm
Mast Dimensions
Mainmast, diameter at step
22"
7/16"
1.2 cm
22"
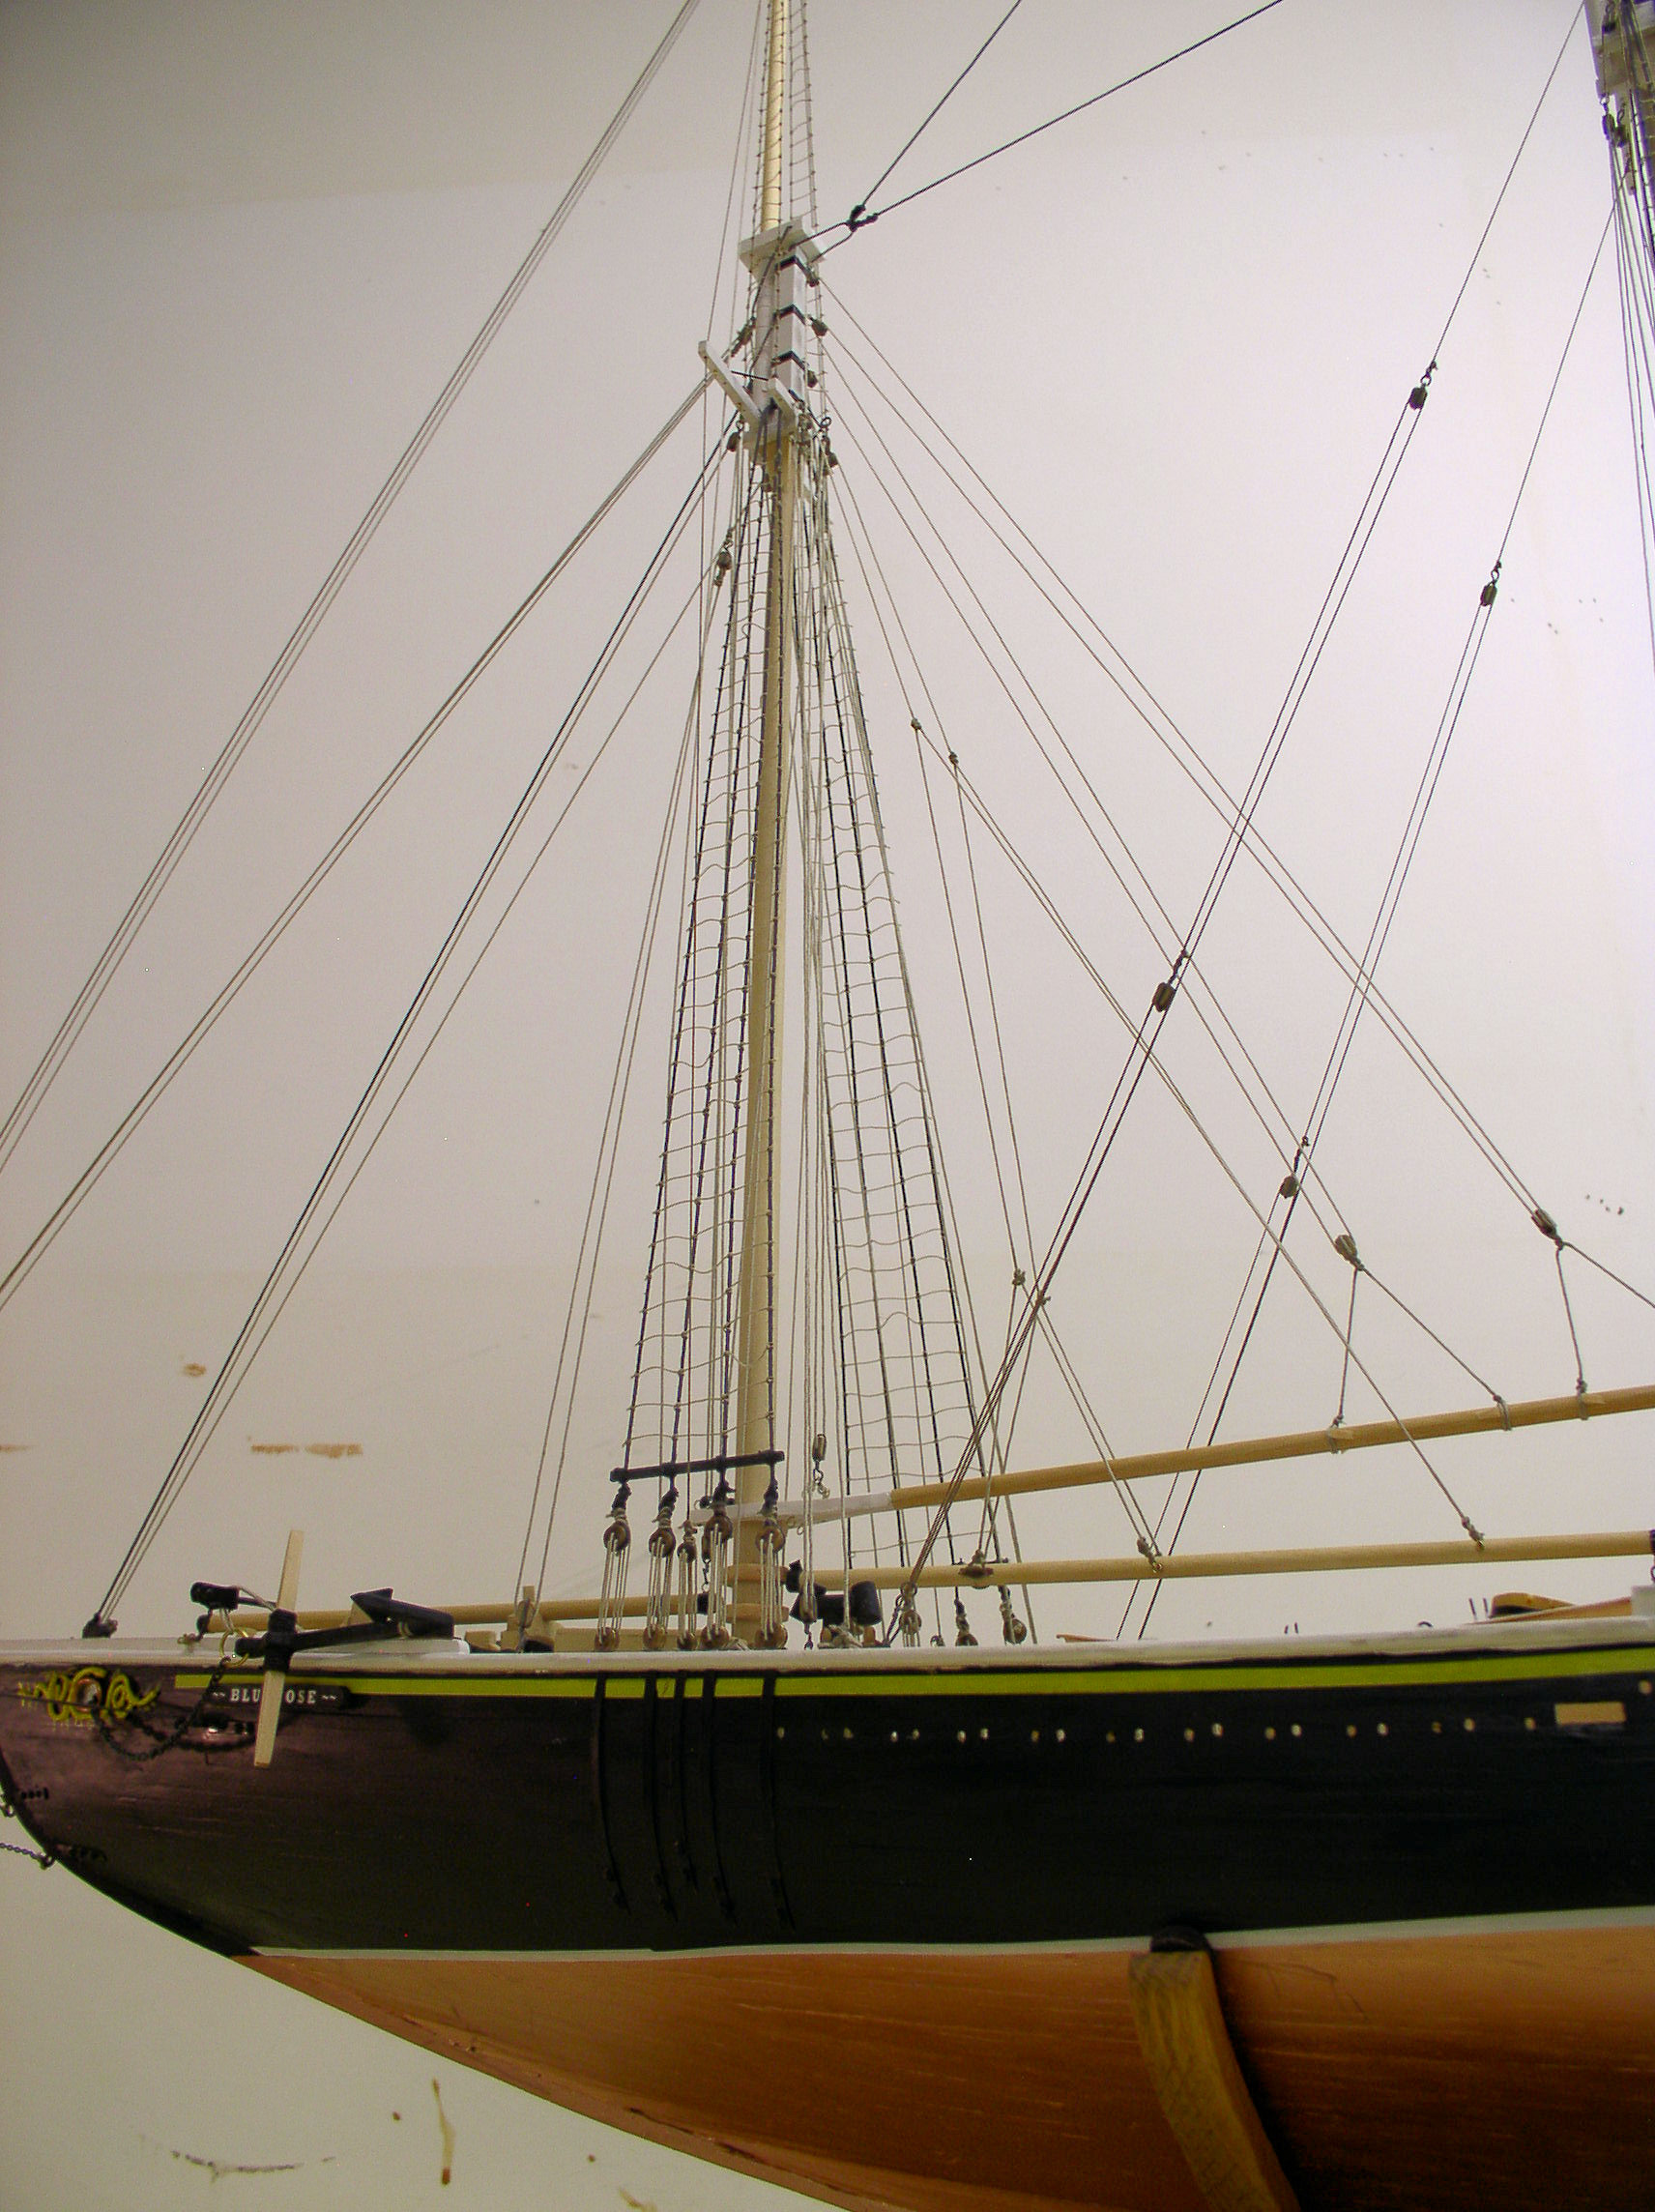
7/16"
1.2 cm
Mainmast, heel to head
96' 2"
24-1/16"
61.1 cm
94'
23-1/2"
59.7 cm
Main Topmast
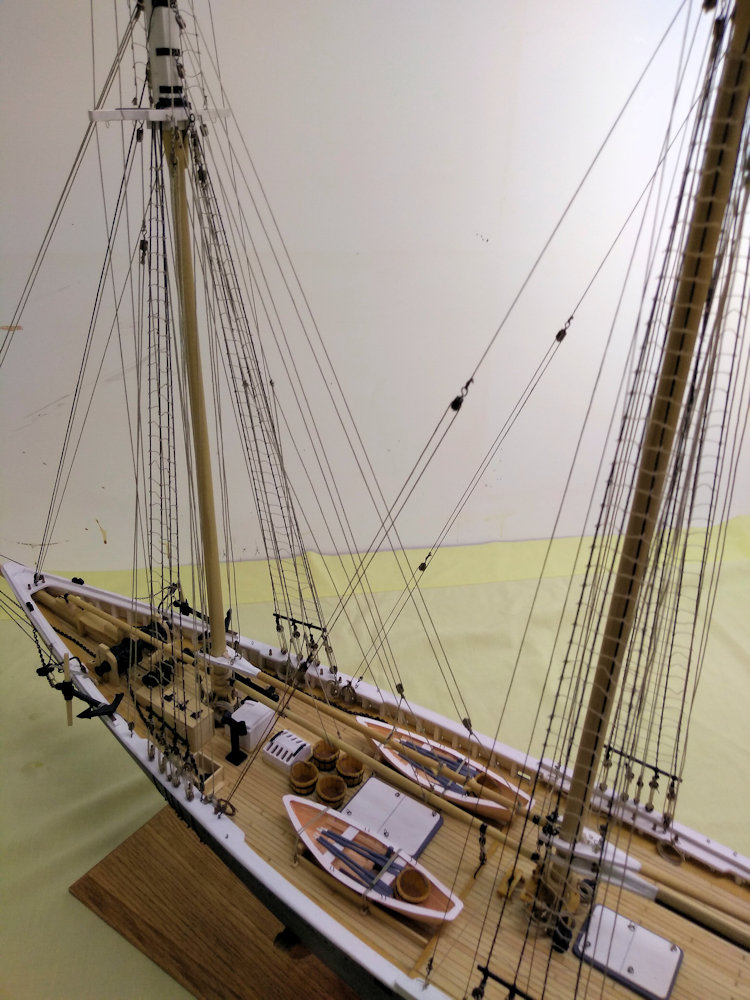
52' 5"
13-1/8"
33.5 cm
53' 6"
13-3/8"
34 cm
Main boom, length
80' 11"
20-1/4"
51.5 cm
81'
20-1/4"
51.4 cm
Main boom, projection
17' 5"
4-3/8"
11.1 cm
15' 6"
3-7/8"
9.8 cm
Main gaff (early Bluenose 46')
52' 5"
13-1/8"
33.5
51'
12-3/4"
32.4 cm
Height from deck to truck of main topmast
121' 6"
30-3/8"
77 cm
120' 6"
30-1/8"
76.5 cm
Height from base line to deck at mainmast
20' 6"
5-1/8"
13 cm
21' 3"
5-5/16"
13.5 cm
Overall height of ship at mainmast
142'
35-1/2"
90 cm
141' 9"
35-7/16"
90 cm
Foremast, diameter at step
20"
7/16"
1.1 cm
20"
7/16"
1.1 cm
Foremast, heel to head
82' 2"
20-9/16"
52.2 cm
83' 3"
20-13/16"
52.9 cm
Fore Topmast
50' 3"
12-9/16"
31.9 cm
48' 6"
12-1/8"
30.8 cm
Fore boom
32' 10"
8-3/16"
20.8 cm
32' 6"
8-1/8"
20.6 cm
Fore gaff
33' 2"
8-5/16"
21.1 cm
32' 6"
8-1/8"
20.6 cm
Height from deck to truck of fore topmast
108'
27"
68.6 cm
107' 6"
26-7/8"
68.3 cm
Height from base line to deck at foremast
21' 6"
5-3/8"
13.7 cm
23'
5-3/4"
14.6 cm
Overall height of ship at fore mast
129' 6"
32-3/4"
83.2 cm
130' 6"
32-5/8"
82.9 cm
Stern to centre mainmast (Bluenose sheets 2 & 3)
64' 6"
16-1/8"
41.1 cm
66' 3"
16-9/16"
42.1 cm
Stern to breakbeam between quarter and main decks
70' 5"
17-5/8"
44.7 cm
71'
17-3/4"
45.1 cm
Stern to centre foremast (Bluenose sheets 2 & 3)
99' 9"
24-15/16"
63.3 cm
102'
25-1/2"
64.8 cm
Tonnage
Displacement Tonnage
285 tons
Net Register Tonnage
96.48 tons
Engines & Generators
Engines, 180 hp Caterpillar Diesel
(2)
Feathering Propellers
(2)
Generator, 75 KW Caterpillar Diesel
(1)
Generator, 50 KW Caterpillar Diesel
(1)
Speeds
All sails, wind 90 mph, max logged, unofficial
21 knots
All sails, wind 55 mph, max logged, official
18 knots
Under power, max logged
9 knots
Crew
Master
(1)
First Officer
(1)
Chief Engineer
(1)
Boatswain
(1)
Cook
(1)
Seamen
(7)
Messboy
(1)
Total crew
(13)
Passenger capacity
(10)
(0)
Add percentage difference. As we are building the Bluenose we use those measurements as given.
SAYING -- IGNORANCE IS BLISS. The real difficulty starts where multiple sources on the same subject/project give different information.
The measurements of the Bluenose and Bluenose II are supposed to be the same, or very close, but they are not. There are differences of up to 2 feet or 1/2" in scale measurements.
The Eisnor blueprint state that the overall hull length is 143' which should be 35-3/4" in scale measurement. I measured the hull lengths on all drawings and the maximum length I measured is 35-3/8", i.e. 1'6" shorter in real life size. I doubt that the blueprints has shrunk that much.
Bluenose or Bluenose II, comparison, discussion, modeling plan
I bought L.B. Jenson's book in 2010, and put it away after a quick scan for a future project. I picked it up again this year (2017) and read it from cover to cover, and I was hooked.
The only difference of the Bluenose II from the original Bluenose are in (tourist) accommodations & stowage and the addition of modern navigation devices and safety equipment required for sea-going certification including carrying tourists.
MY STARTING POINT -- Initially I wanted to build the Bluenose II in a scale of 1cm = 1foot (scale 1:30), because I wanted to model the whole interior too and needed the space to do that; basically true replica inside and outside of the Bluenose/ Bluenose II. The deck would be removeable otherwise what is the point, right. I want to build the model from scratch.
SCALE -- The scale of 1cm=1' (1:30) would result in a model of about 70" (197cm) long and 57" (144cm) height. We have a big house, but I would need a boathouse to display it. 1/4"=1' (1:48) is typically the largest size used in ship modeling, so that is what I will use.
MODELING THE INTERIOR -- Since I wanted to model the full rigging, including the sails, making the deck removable would be a challenge. The deck would be in sections and joints are bound to take away from the beauty of the ship. I will satisfy myself by making some top structures removable and thus allowing a peek inside instead.
KIT OR SCRATCH BUILD -- I built models of the Cutty Sark in 1990 and the Blue Shadow in 2003, both from a kit using planks on frames. I feel that I have the skills to build from scratch. And of course it will be planks on frame construction. If need be, I found online stores where I can buy modeling material.
RAKE OF MASTS -- Studying the drawings I noticed that the masts are either drawn perpendicular to the keel (3° rake) or perpendicular to the base line (0° rake). The actual rake is determined by the master of the ship. So I figure that the rake of the masts on the model can be anywhere between 0° and 3°
POSITION OF MASTS -- The Eisnor blueprints has a discrepancy in the position of the mast. Sheets 2 and 3 show the centres of the mainmast and foremast at about 16-1/2" and 25-1/2" from the stern, while Jenson's book and Eisnor sheet 6 show them at about 16" and 25". Tough decision, but considering that the Bluenose specs (Jenson, page 18) specifies "Deck to overlap for four feet ahead of mast" make the mast position of sheet 2 and 3 more appropriate.
RABBIT IN KEEL -- That is where the hull planking meets the keel. Eisnor sheet 6 and Jenson pages 23, 38 and 39 show the rabbit in the second keel. Eisnor sheet 7 and Jenson pages 40 an 42 show the rabbit in the first keel. Will make the decision at a later point in time.
BLUENOSE OR BLUENOSE II -- I have no choice but to use Eisnor's Bluenose blueprints. So I am modeling the Bluenose, but I will augment those with the details from Jenson's book.
MODELING PLAN -- I will use the Eisnor blueprints and the Bodnar modeling instructions. That combination is exactly what I intend to achieve. In addition I will use Jenson's book to view modeling details, and the modeling tips and tricks from Hubert Sicard's website Wooden Ship Modeling for Dummies (see References).
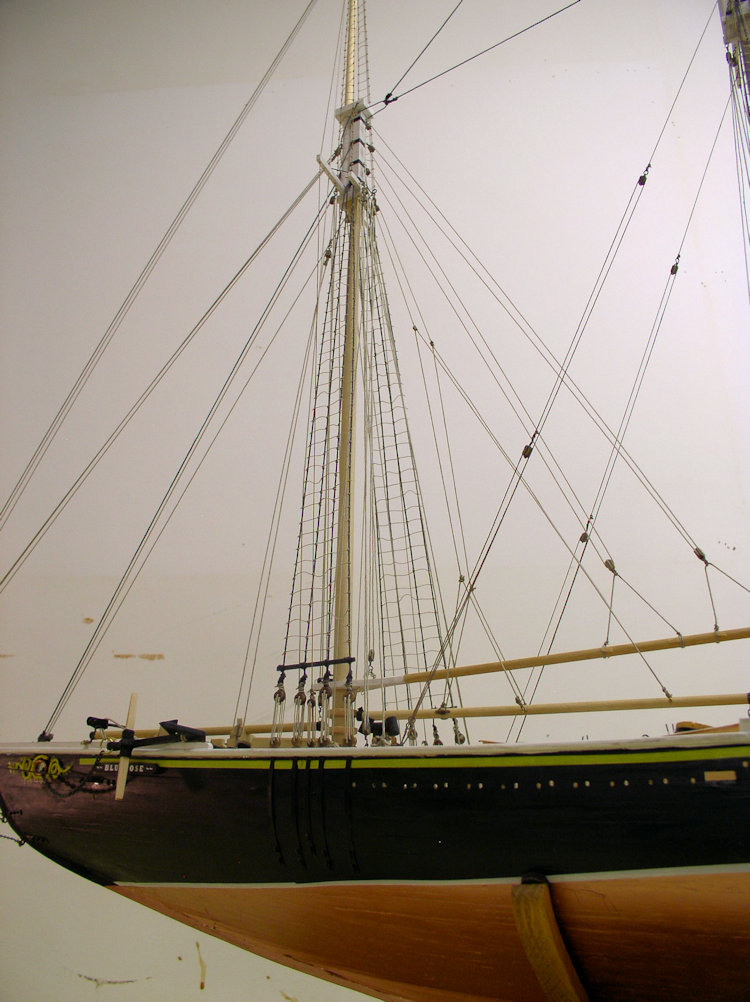
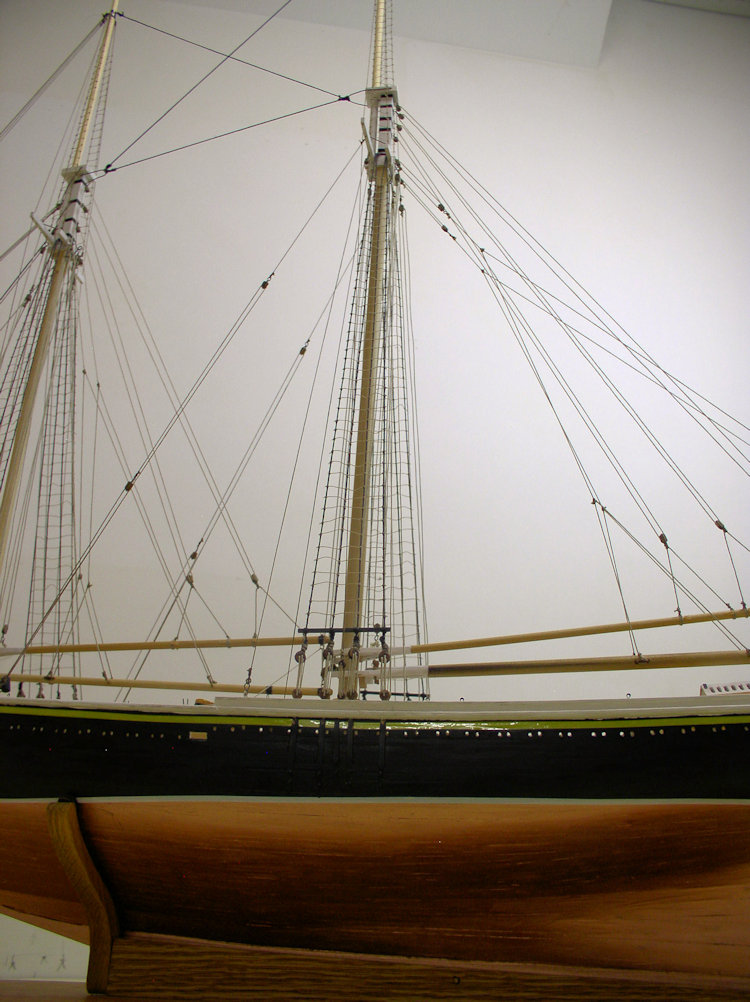
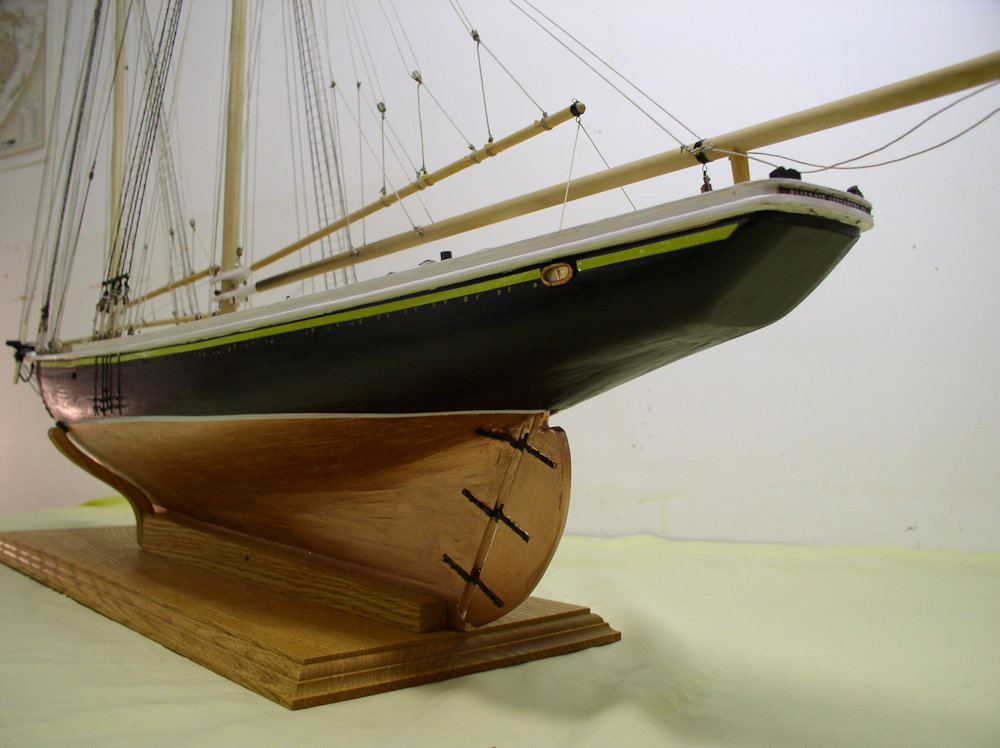
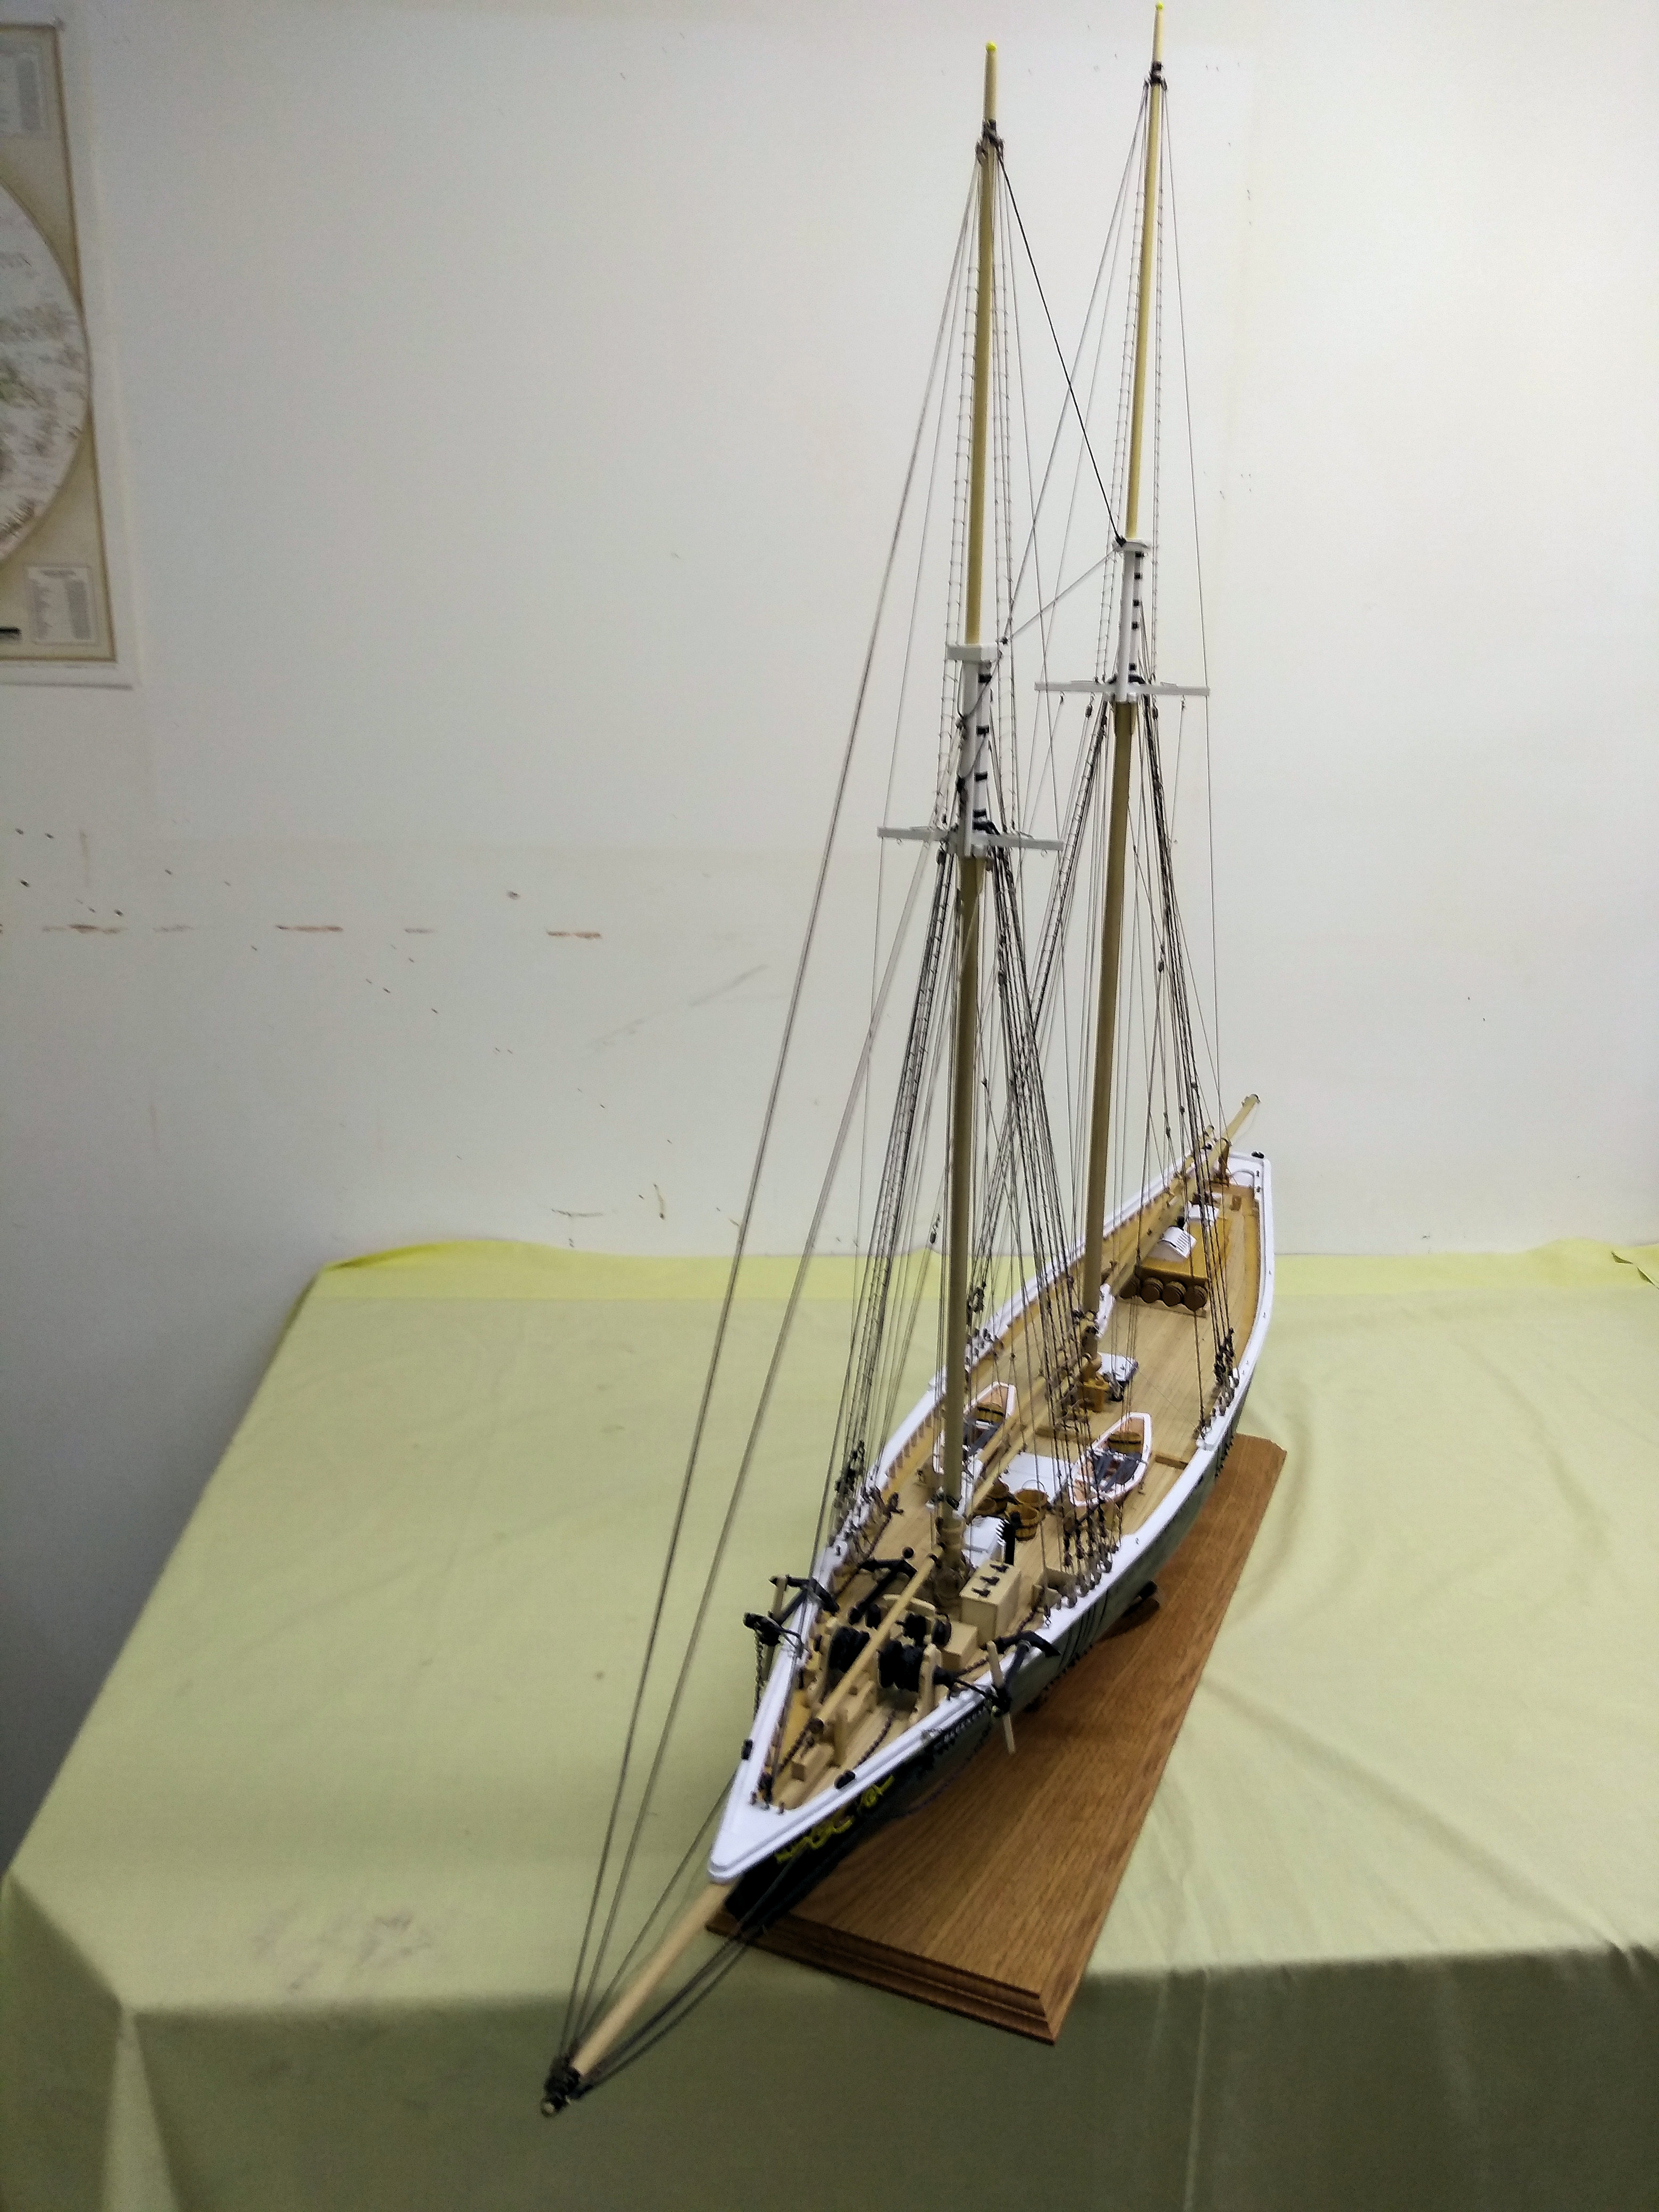
Pictures
Click on a thumbnail to get a larger picture and then used the back button of the browser to return.
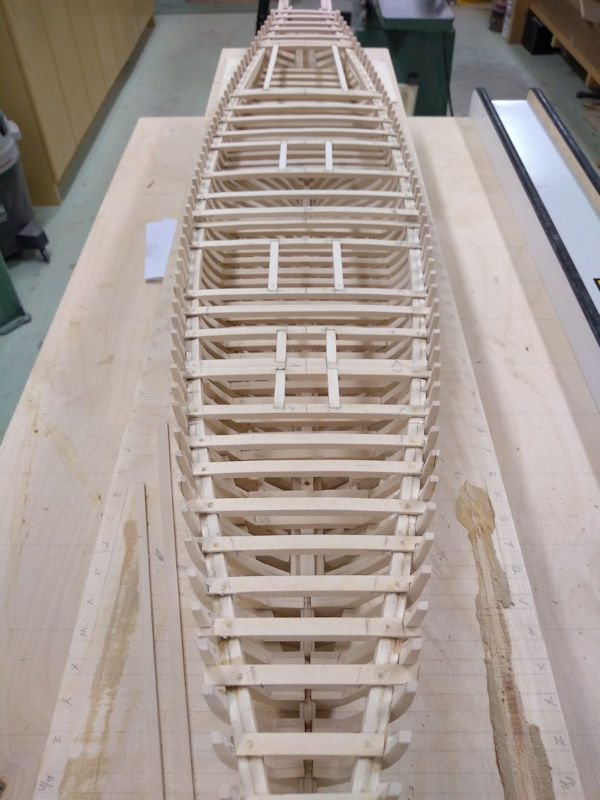
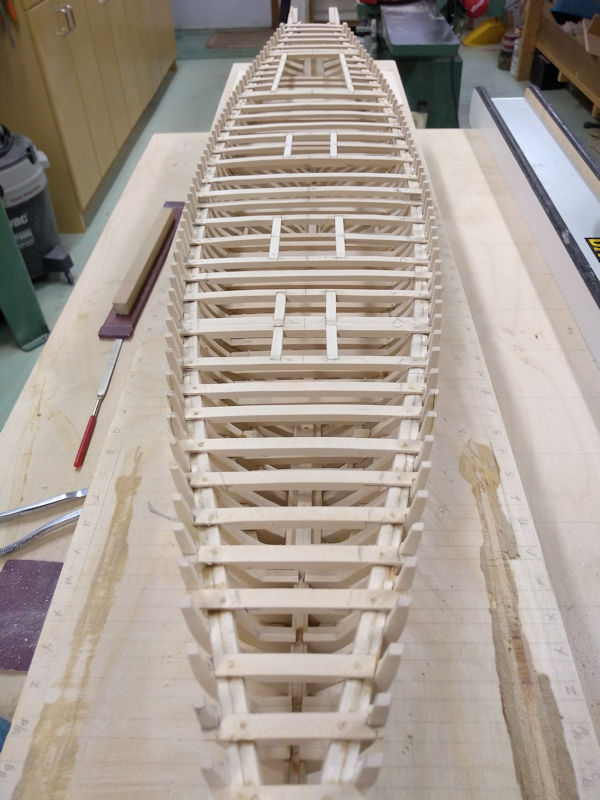
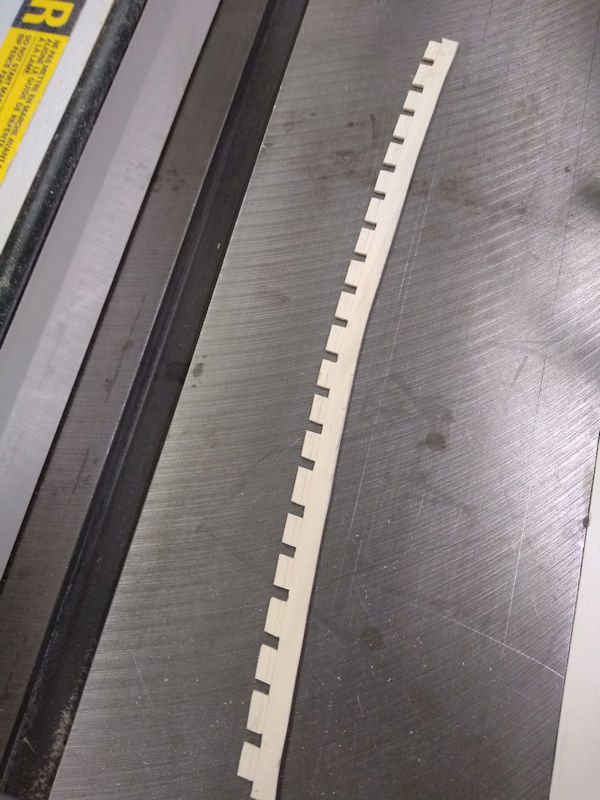
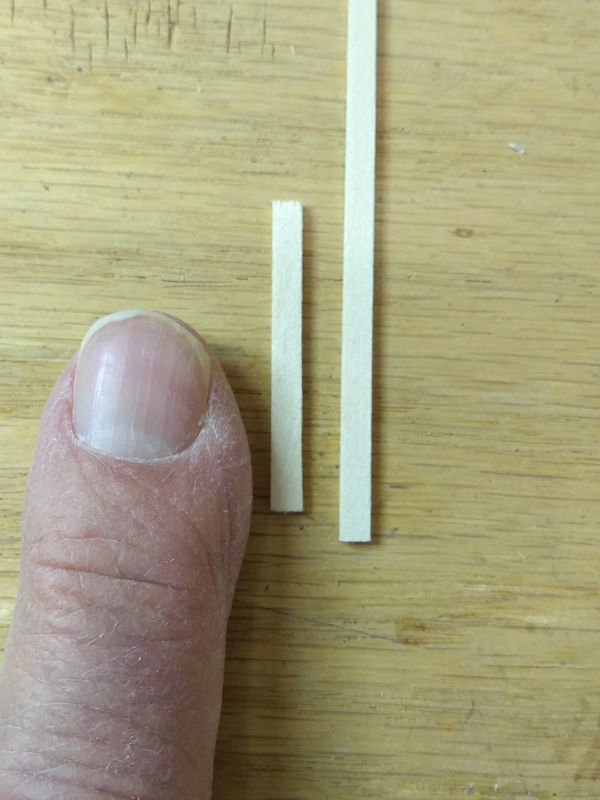
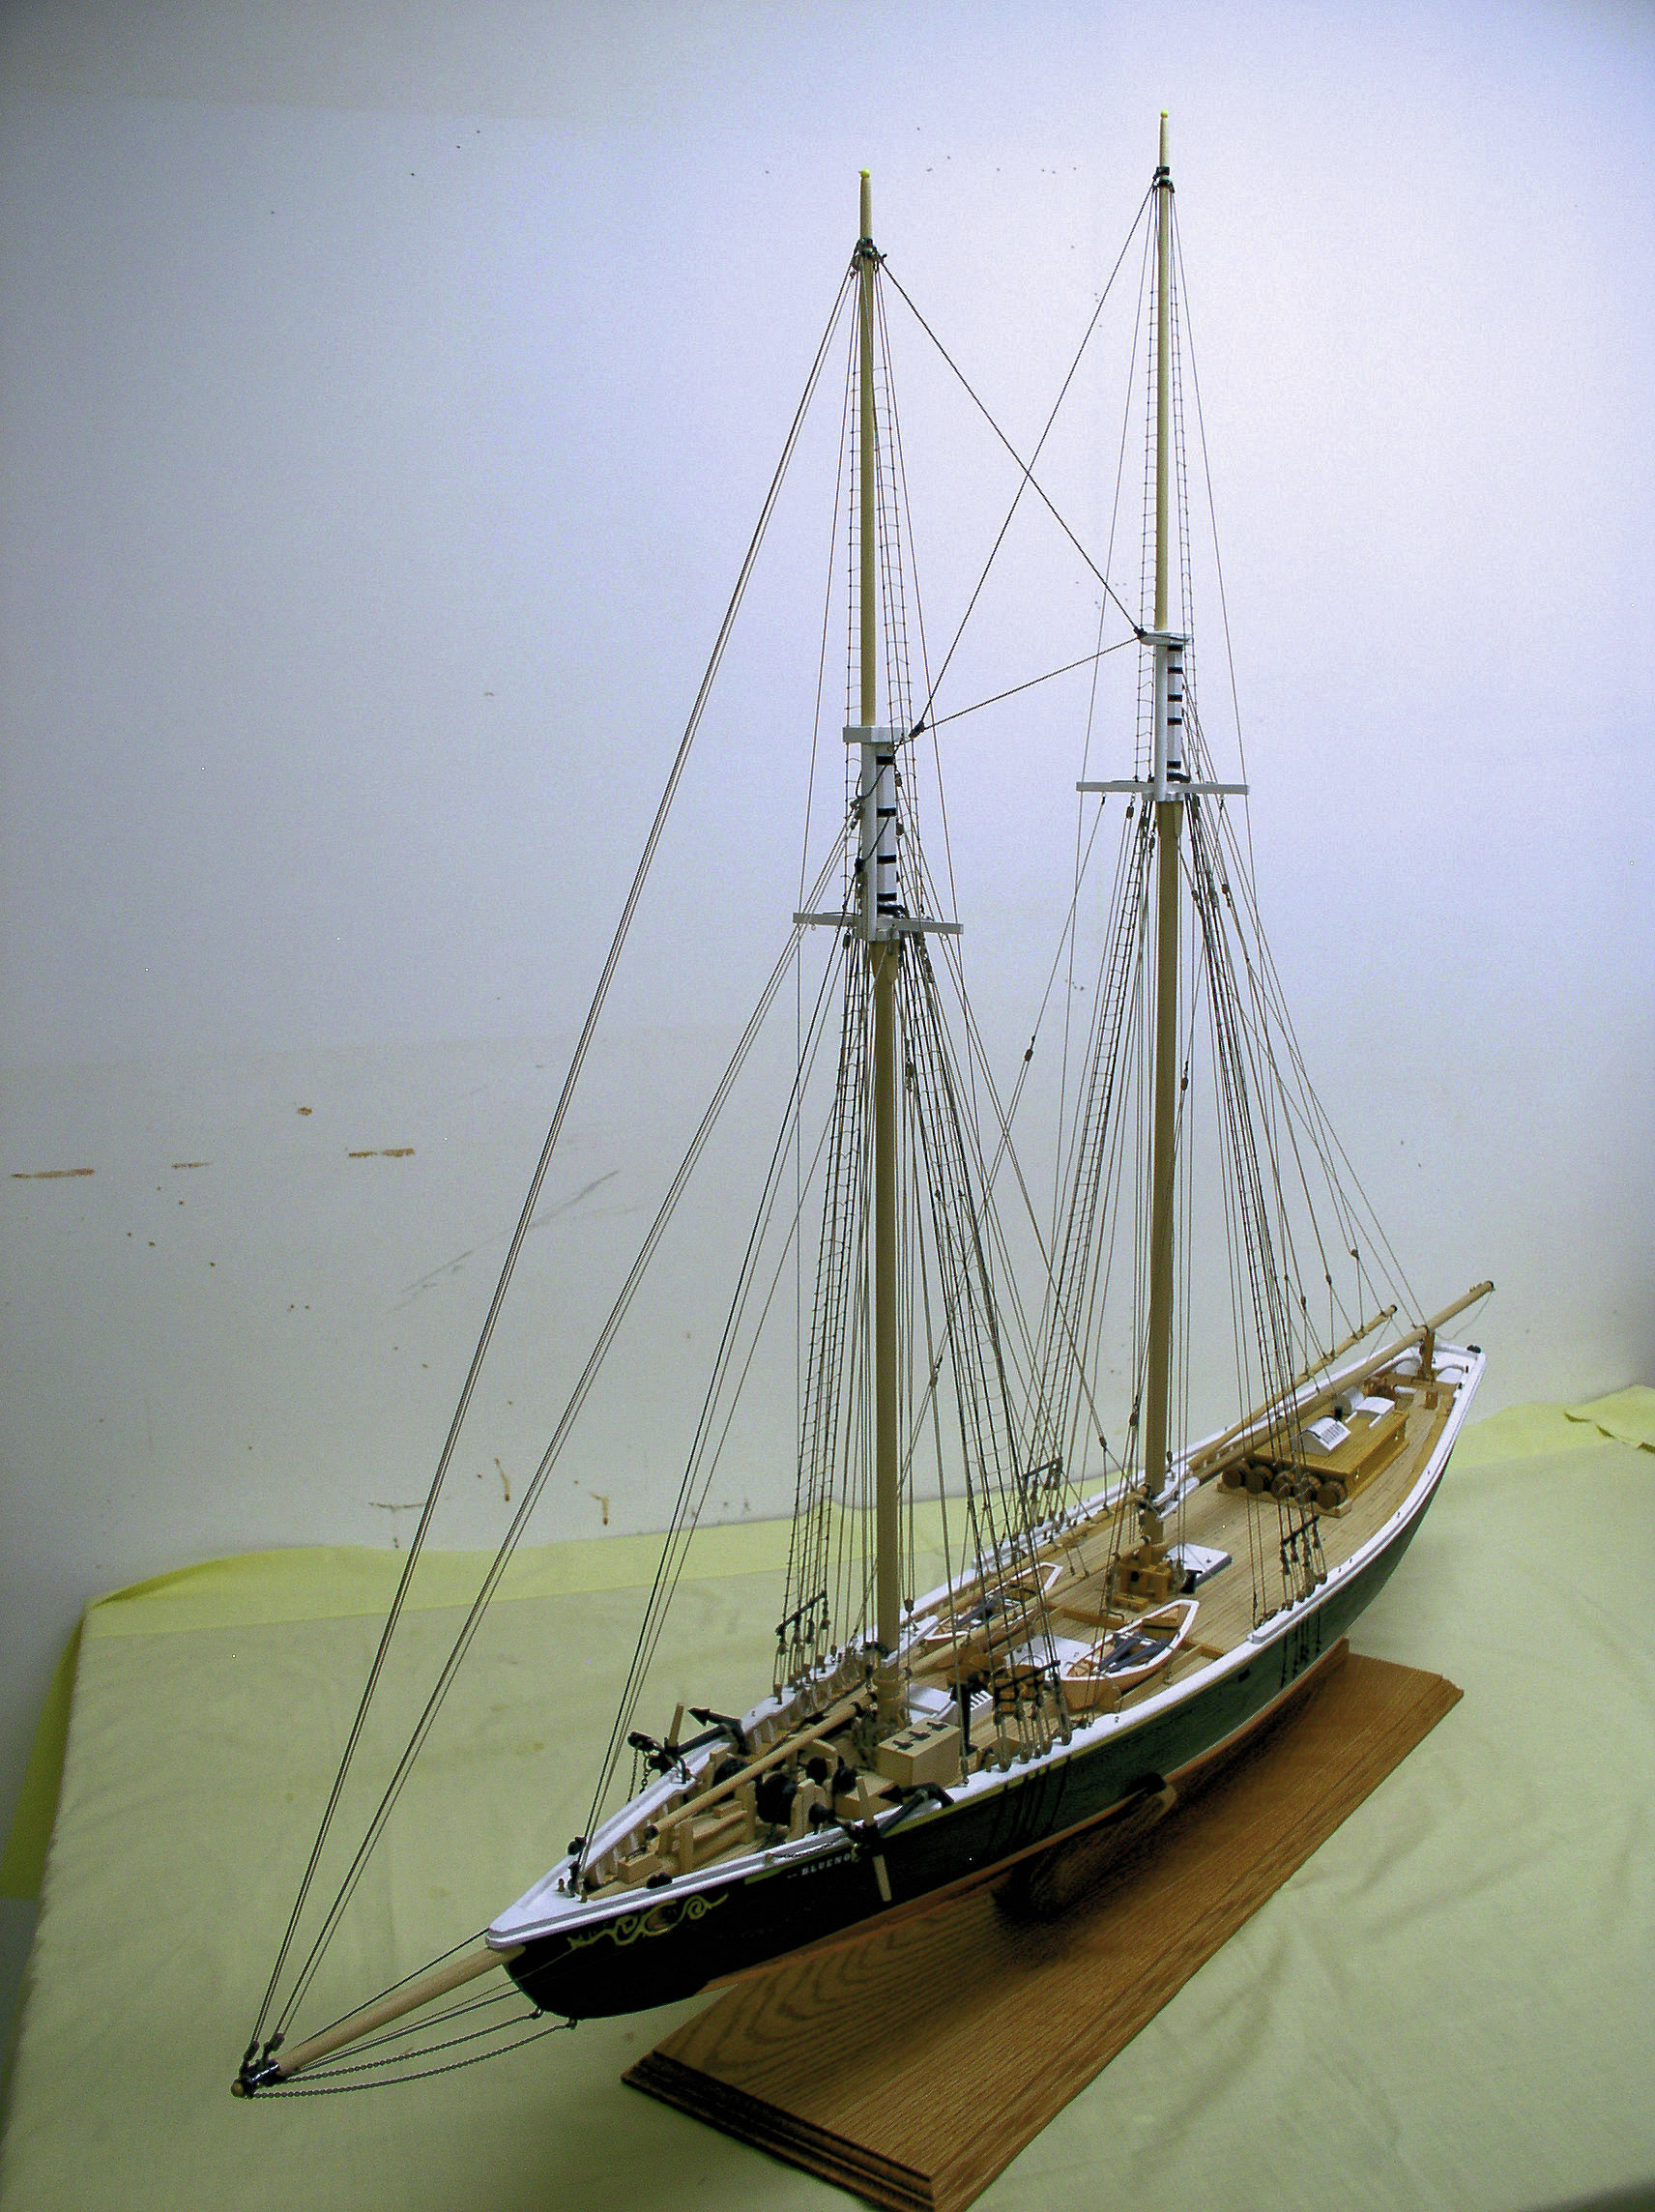
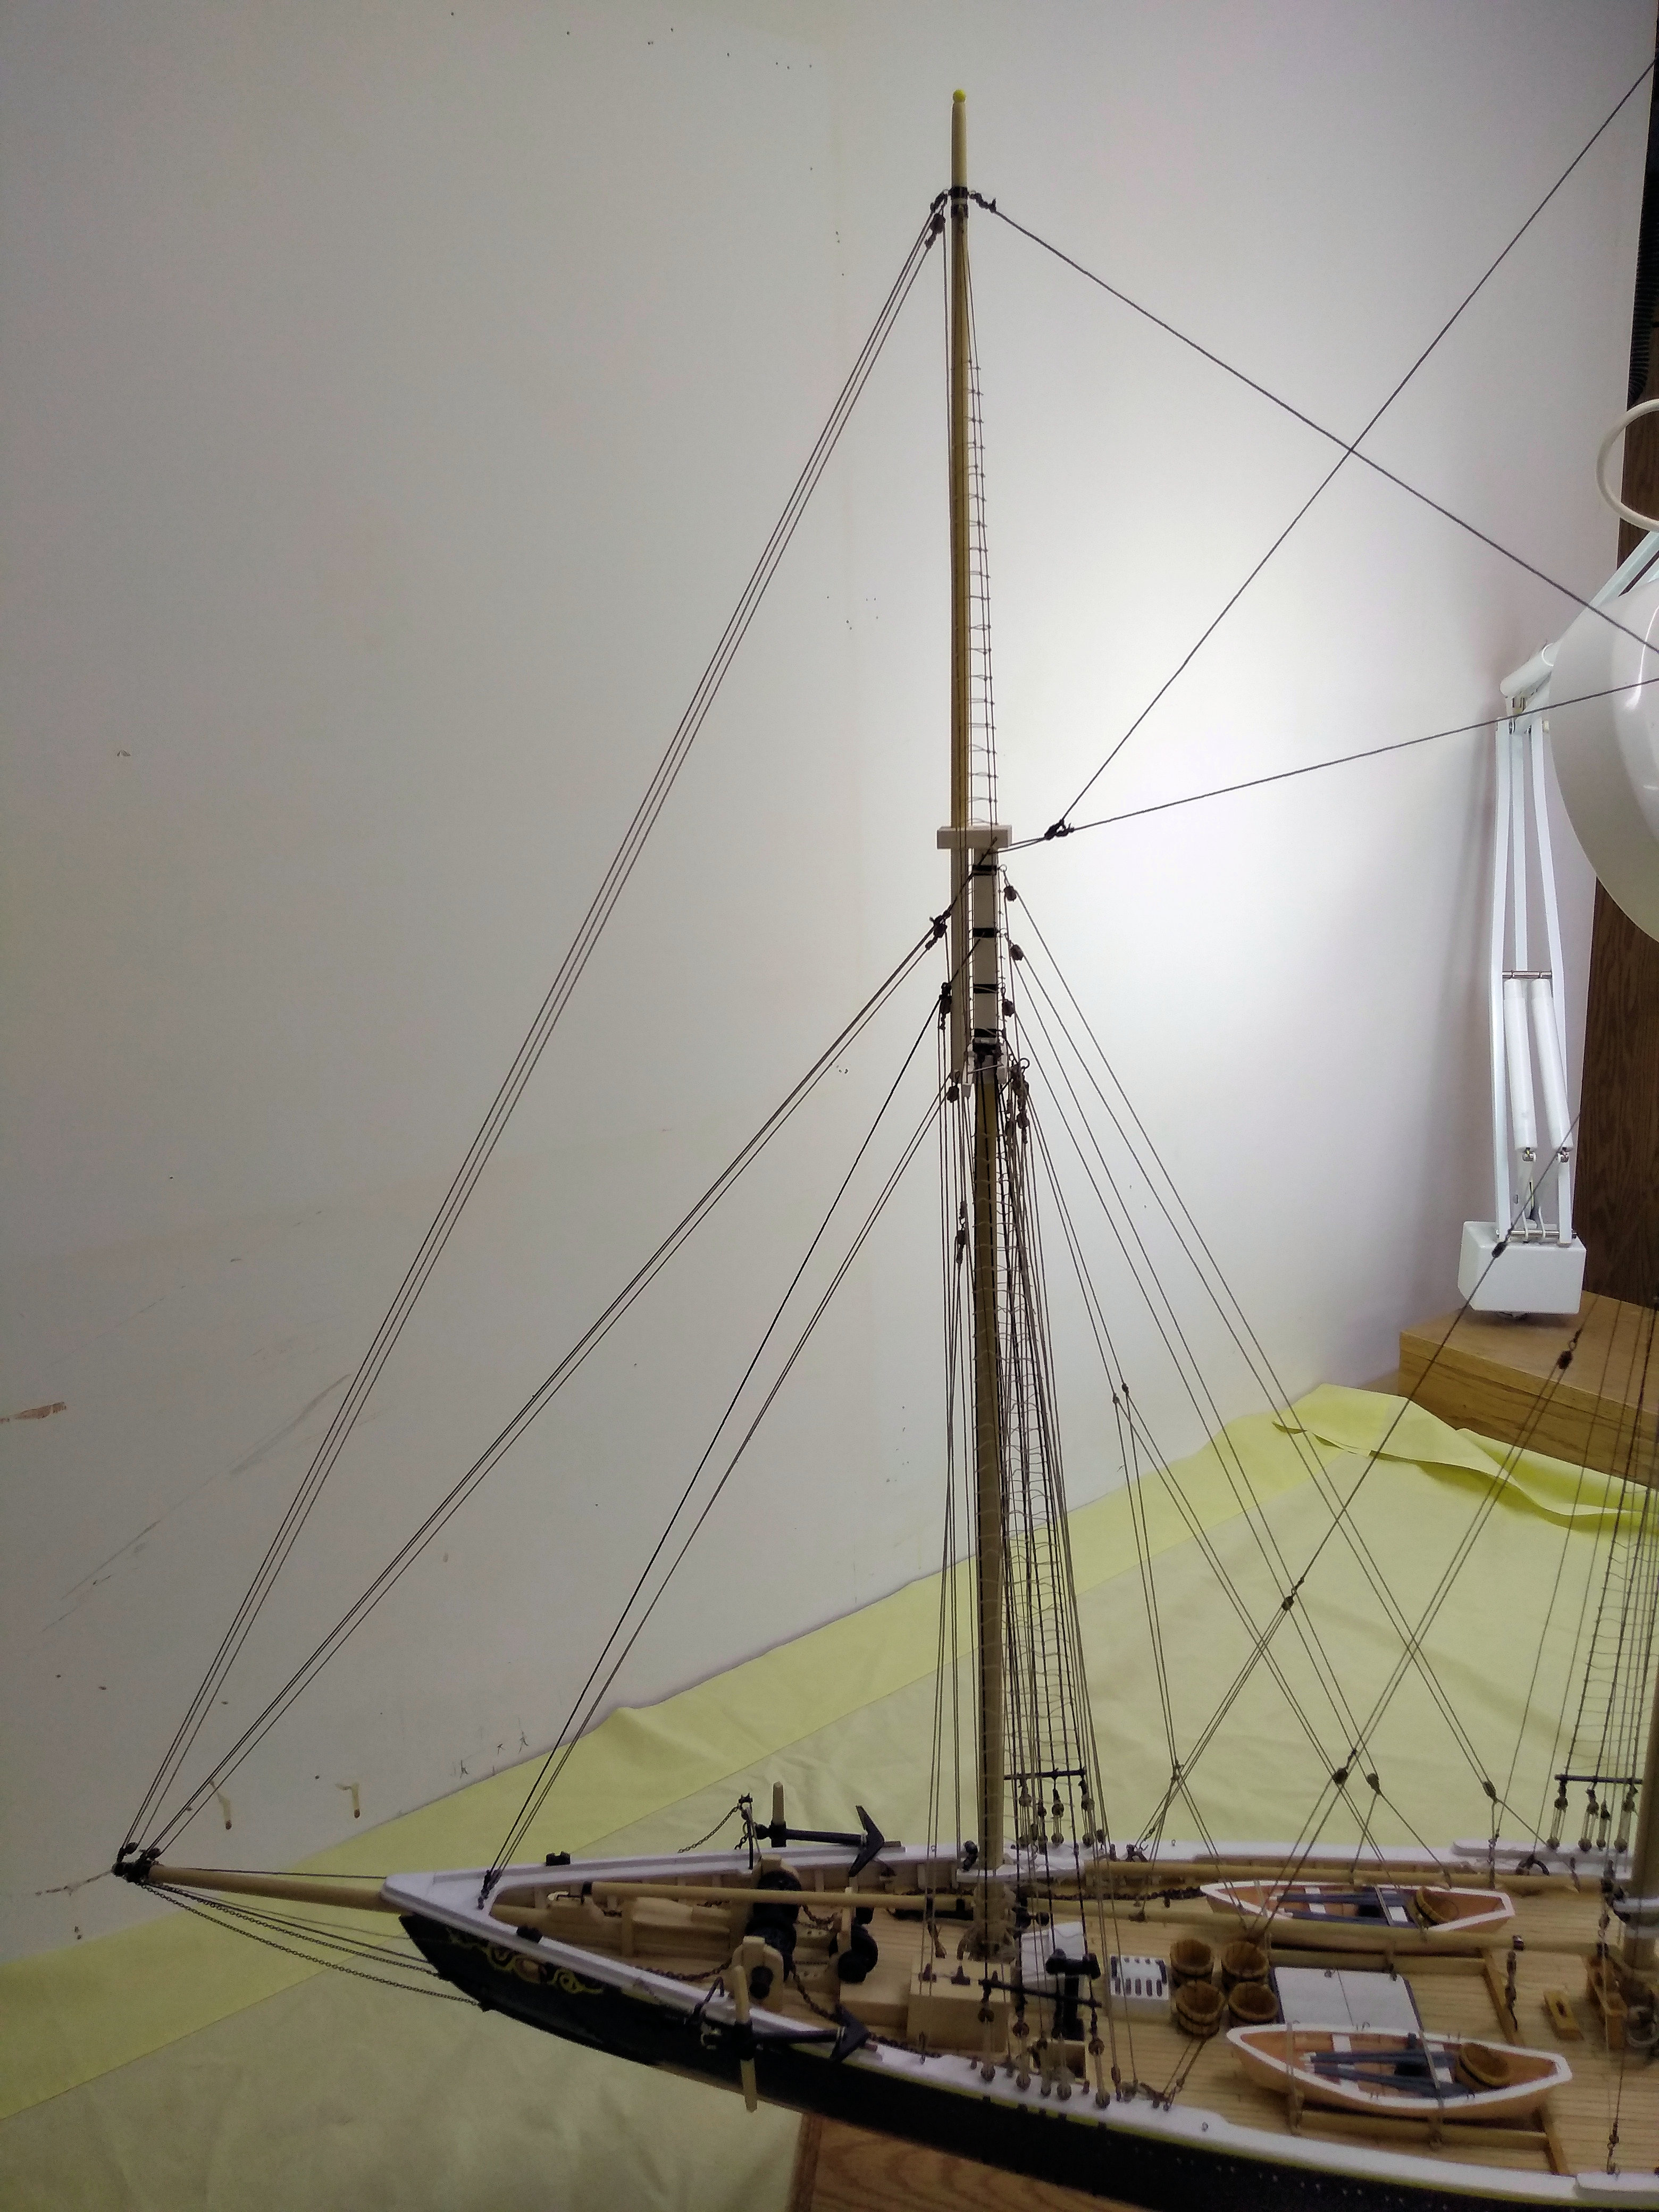
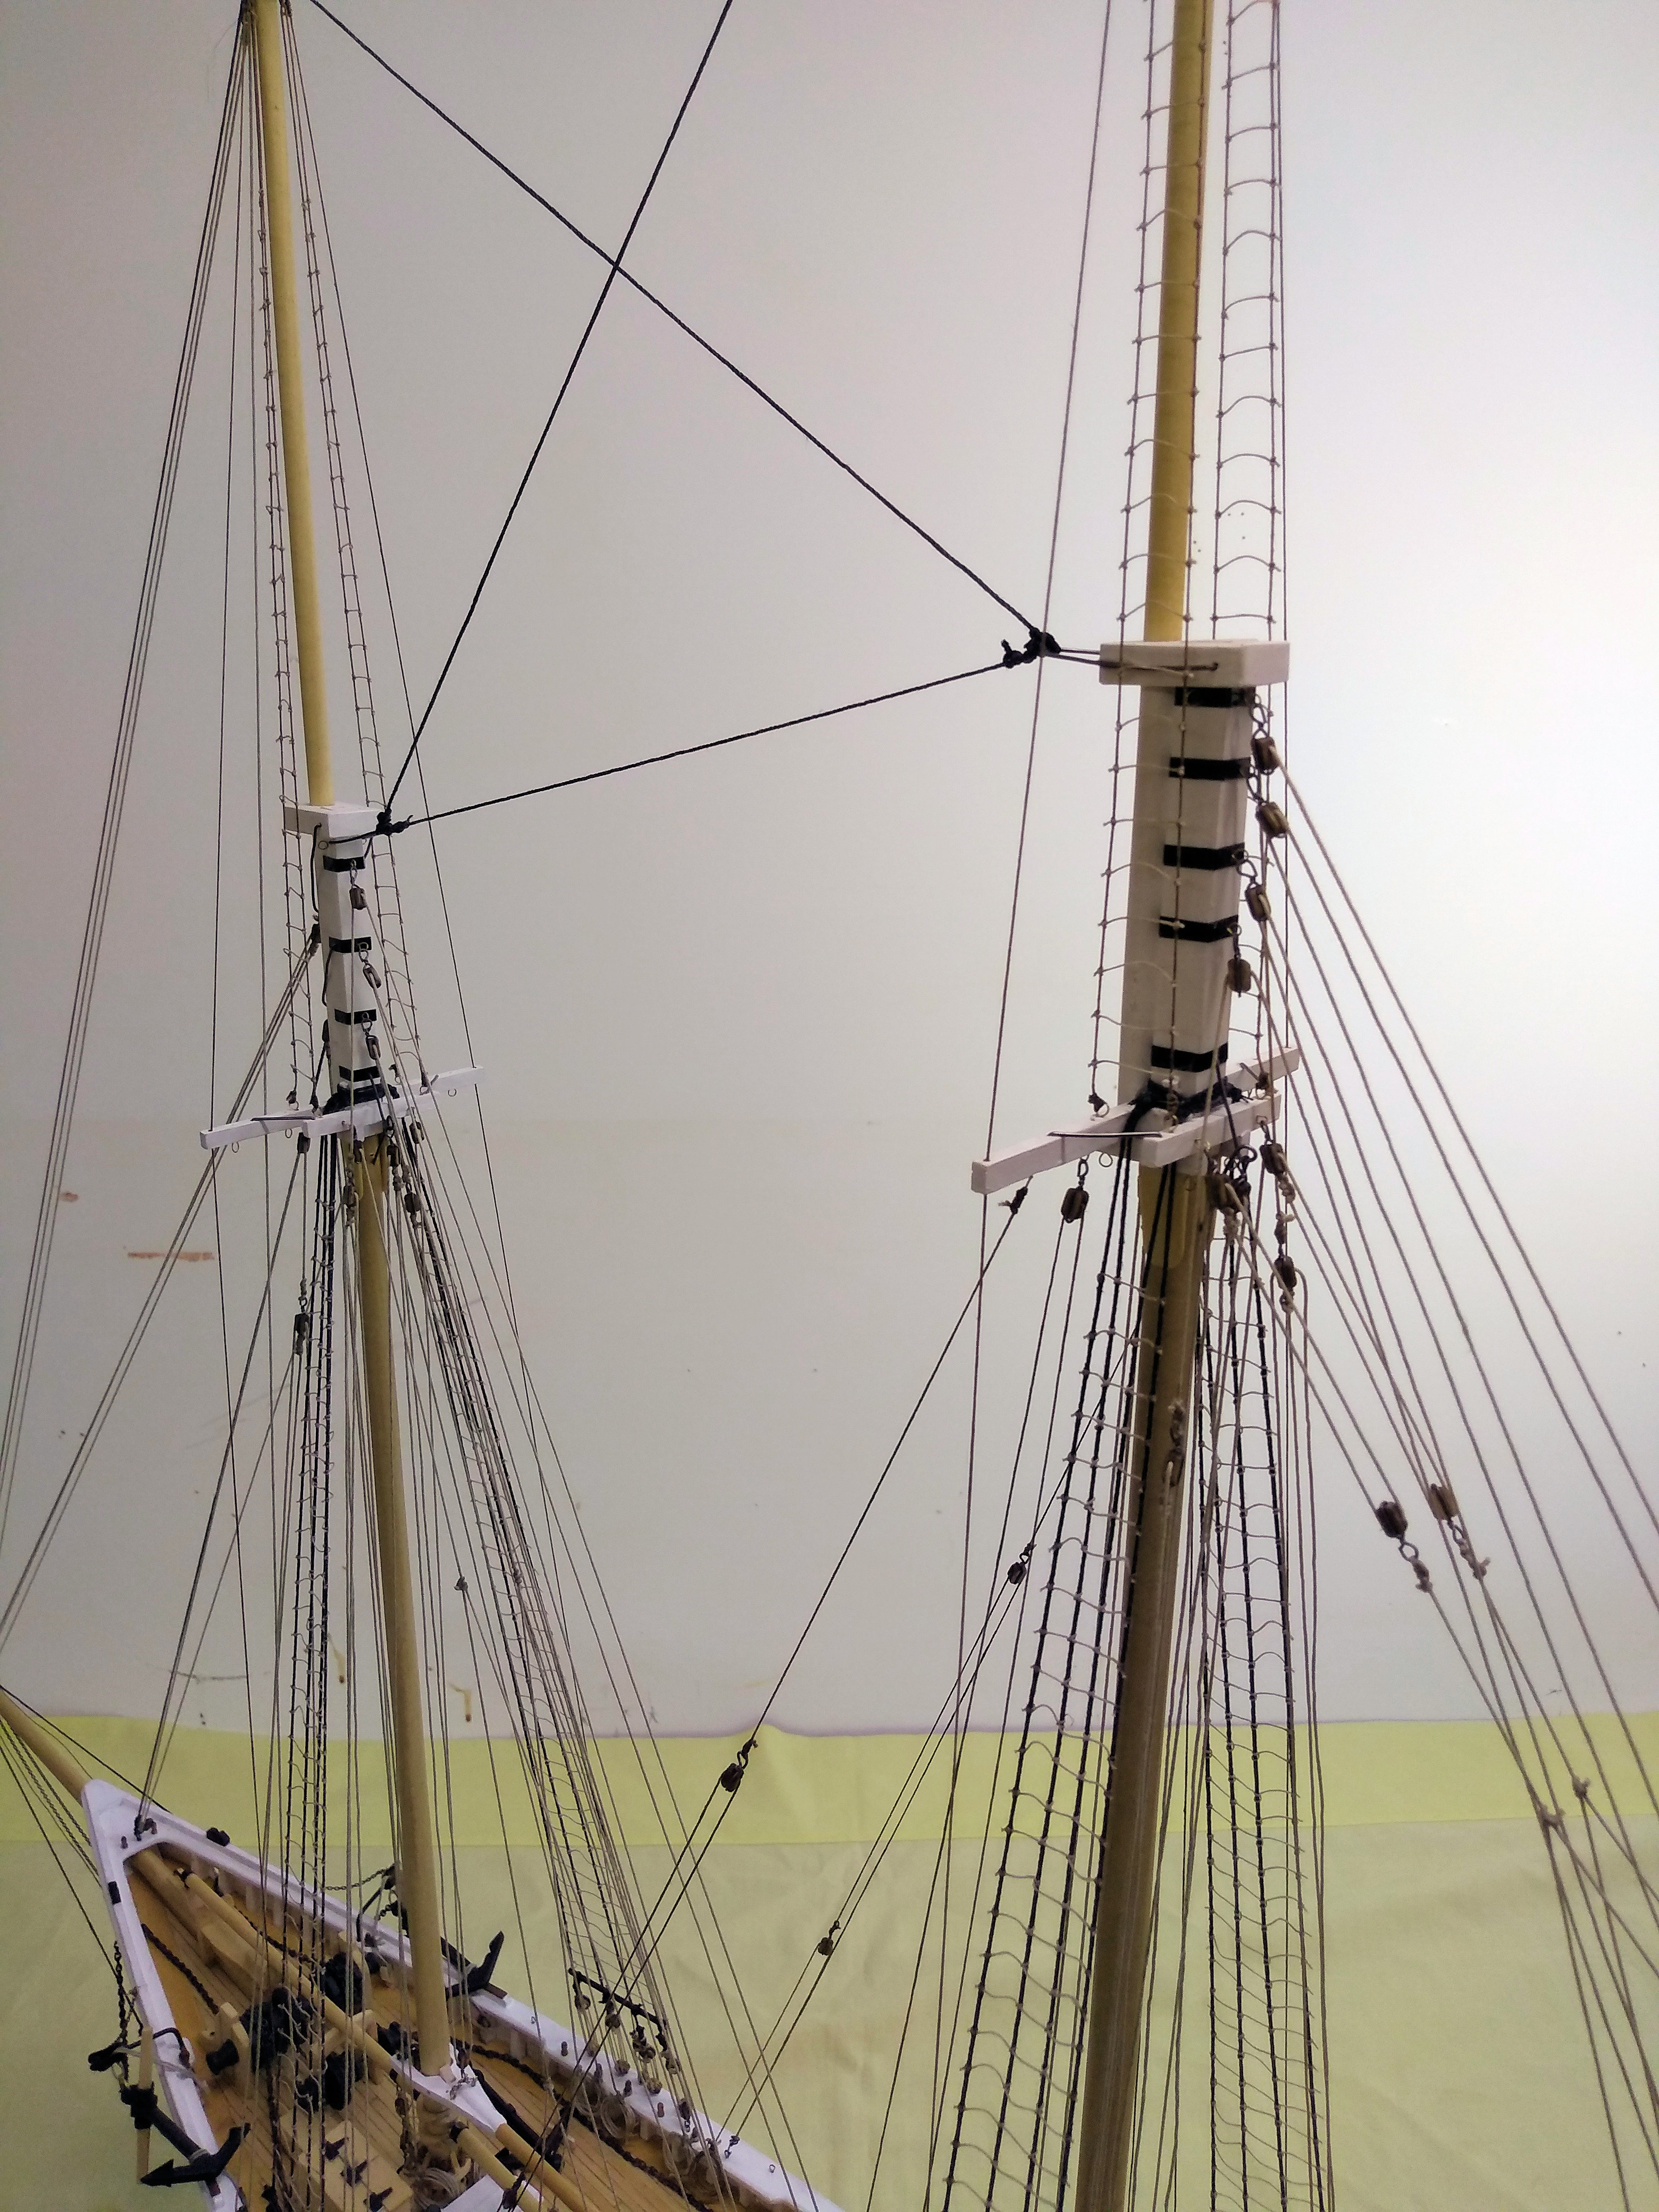
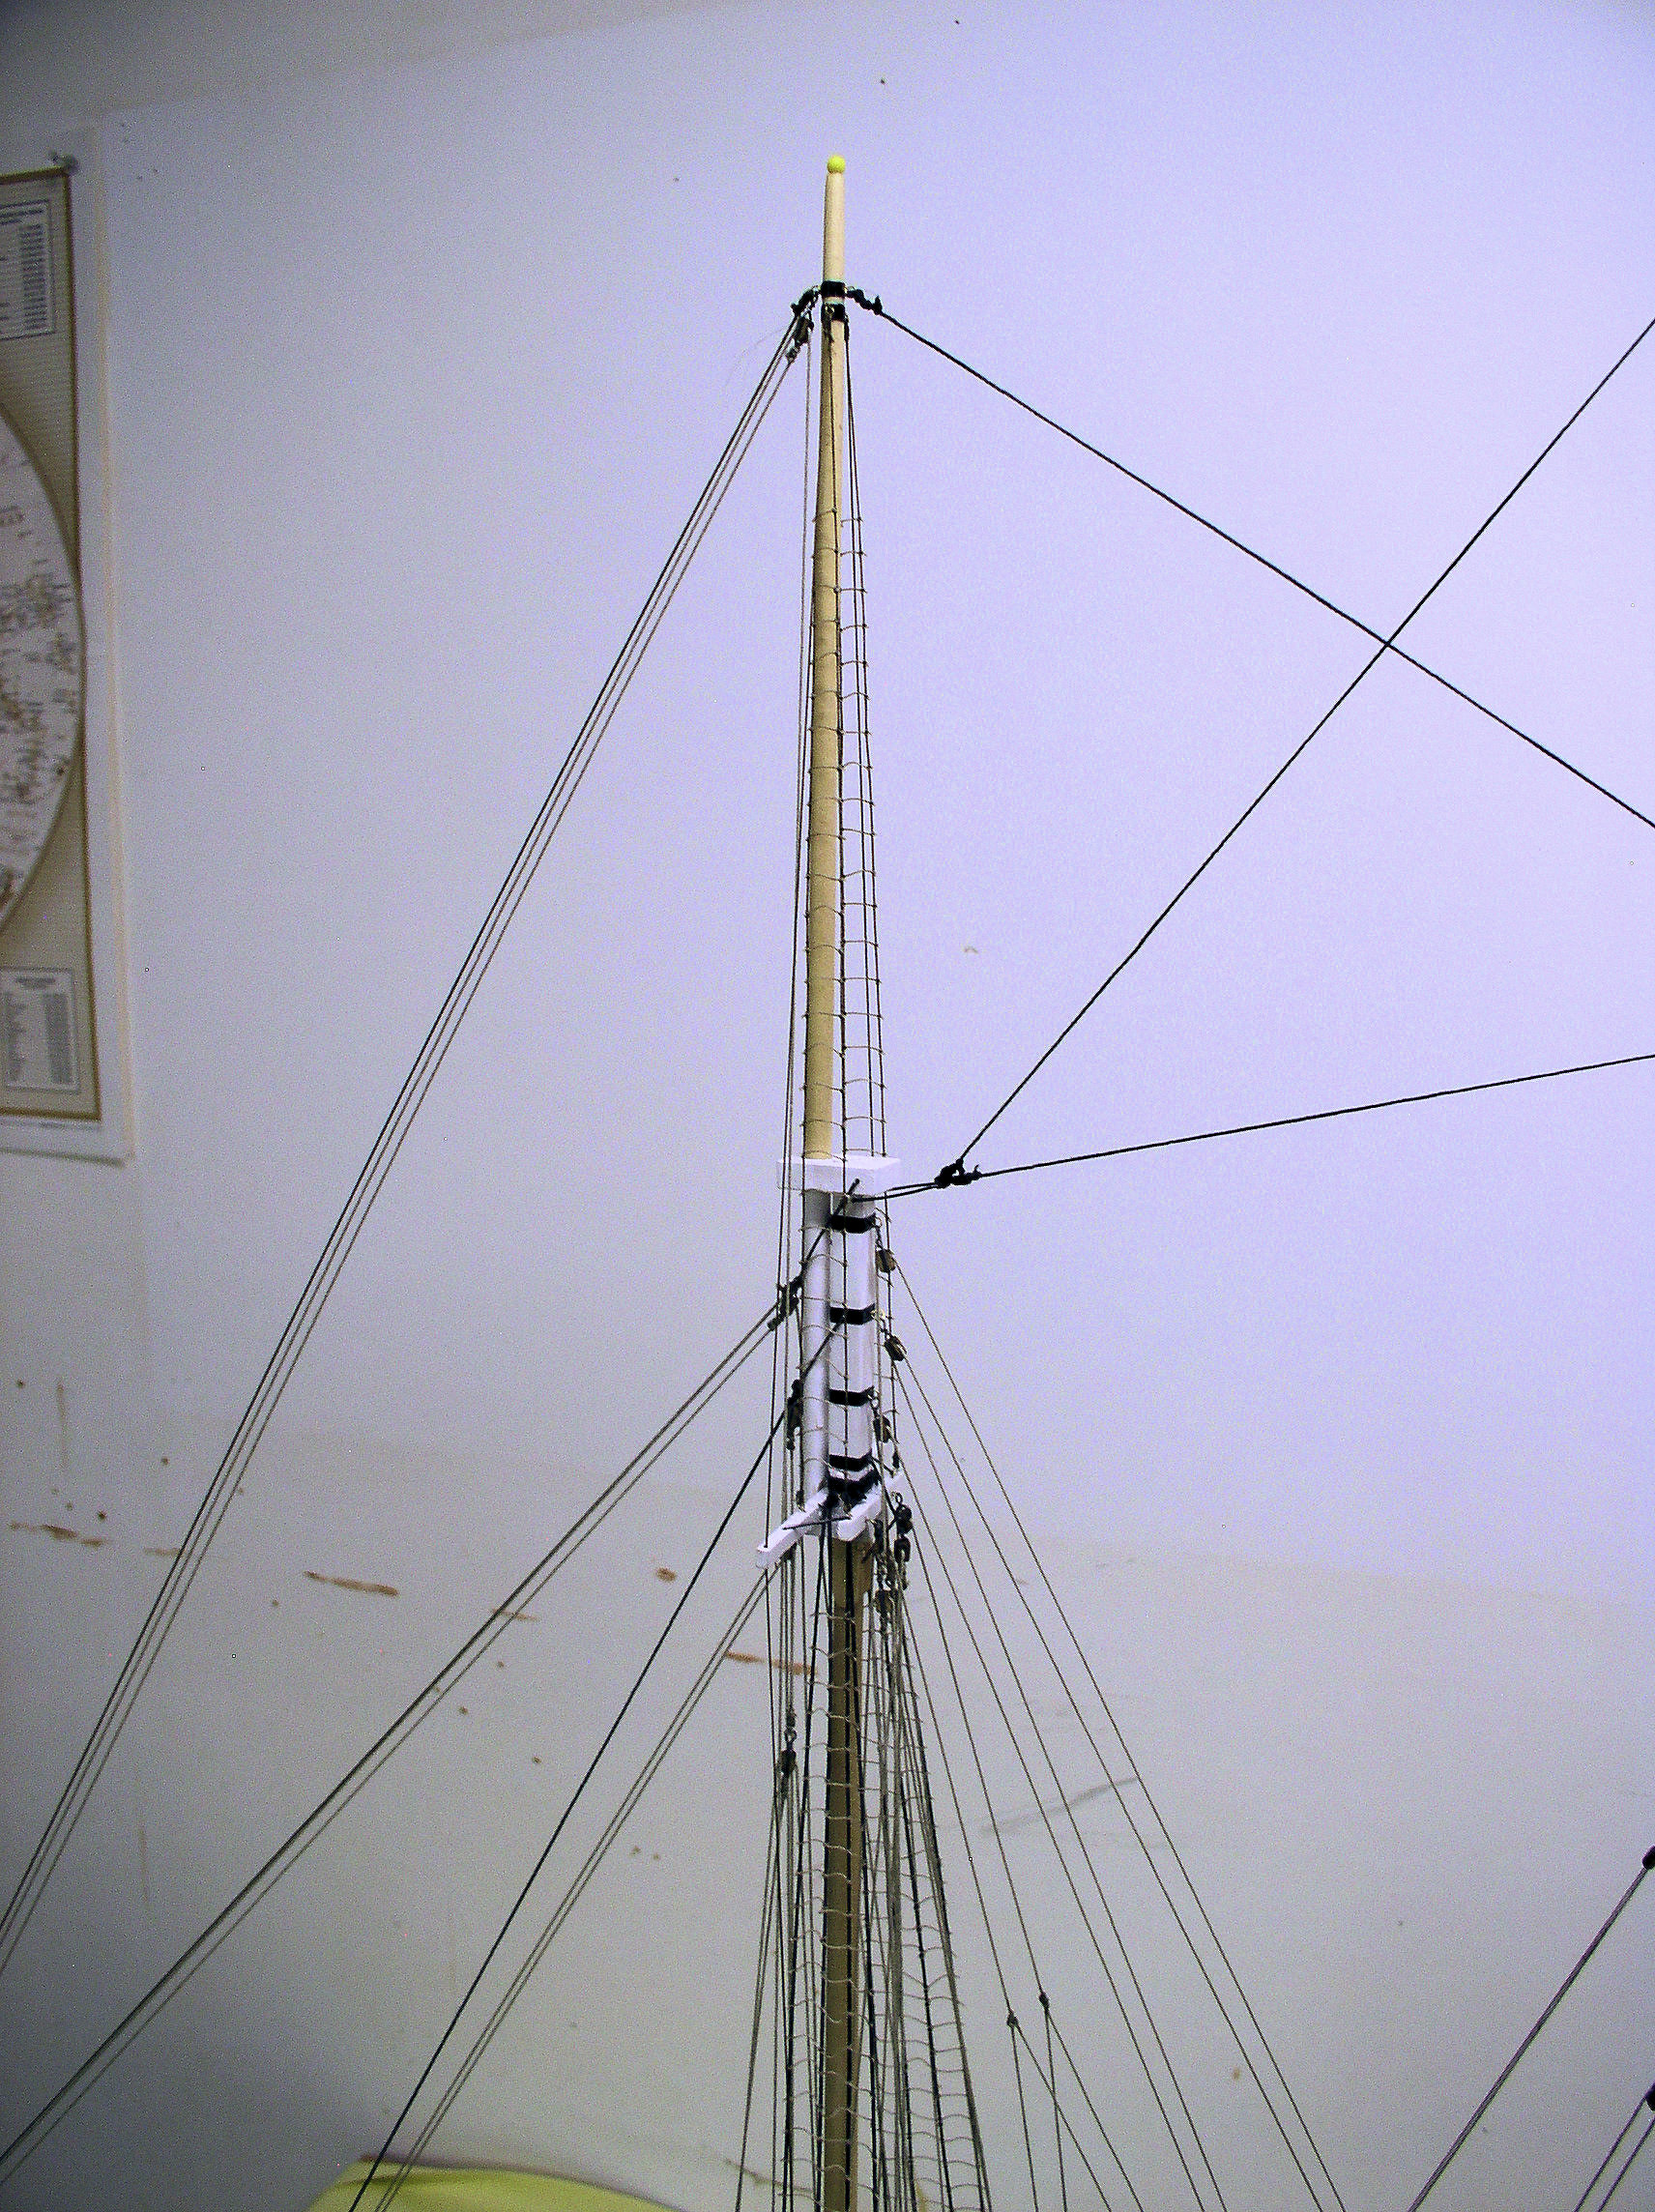
1: Bluenose II, Saga of the Great Fishing Schooners, measured drawings, by L. B. Jenson, 1994, ISBN 1-55109-063-5, 140 pages.2: Bluenose Model Ship Plans, scale1/4"=1', by P.F. Eisnor, 7 sheets, Can$85.00 plus S&H.3: Bluenose Practicum by Gene Bodnar, PDF, 14 MB, 138 pages4: Blank framing grid sheet (PDF) Print full size5: Frame Spacing Table (PDF)6: Base and slip7: Framing jigs in place (stern to bow)8: Framing jigs in place (starboard to port)9: Keel Assembly10: Centre frame OX in place of framing jig11: General hobby corner setup. Having everything close together saves lots of time.12: Fore site of frame glued together. Using a seringe to apply glue to the tiny surfaces is a must!13: Using lightbox to verify lofted frame fits on wood14: Aft and fore of frame glued and clamped15: Frames 9, OX, M and U in place16: Template cemented to frame. Note the squares cut out on the left and right top.17: All aft square frames installed18: All 31 square frames installed, viewed from aft to fore19: All 31 square frames installed, viewed from fore to aft20: Toothpicks L:9.5cm, T:2.0mm, and draw plate21: Keelson with dowels in every other square frame22: View front half frames (imperfections will be corrected later)23: Last front half frame glued in place24: Part of jig removed so that deck clamps can be glued in place25: Deck clamps extended to the front26: Half frames installed aft27: Horn timber and half frames installed28: Deck clamps extended aft29: Ship lifted out of jig30: Rear view of hull31: Frames patched and sanded32: Frames patched and sanded33: Frames patched and sanded34: Frames patched and sanded35: Lower deck beams aft36: Lower deck beams front37: Bow38: Transom39: Spacers and sanding tool40: Stanchions trimmed41: Jig to mark depth stanchion top42: Stanchions top trimmed43: Stanchions top trimmed44: Main beam for openings45: Openings finished46: Remaining deck beams finished47: Carlings completed, mast partners done48: Straker with the location of the stanchions cut out49: Straker dry-fitted50: Comparing my finger with a deck plank51: Start deck planking in the centre52: Deck planking glued and clamped with baby clothespins53: Deck planking completed for about a third54: Deck planking almost done55: Deck planking completed56: Deck planking varnished57: Bow with slot for bow sprit58: Transom made thicker59: First hull strake aft60: First hull strake bow61: Keel with garboard62: Keel with garboard63: Top four hull strakes64: Top four hull strakes65: Top four hull strakes66: Aft and bow railings glued together67: Full template of the railings, railings glued together and painted68: 8 hull strakes top and 3 hull strakes above the garboard69: 8 hull strakes top and 3 hull strakes above the garboard70: 11 hull strakes top (before sanding) and 5 hull strakes above the garboard71: 11 hull strakes top (before sanding) and 5 hull strakes above the garboard72: 11 hull strakes top (before sanding; just above the water of the framing jig) and 5 hull strakes above the garboard73: Missed the widening of the main railing at the back (fixing)74: Bluenose in framing jig with main railing glued to the hull75: Bluenose in framing jig with main railing glued to the hull76: Bluenose in framing jig with main railing glued to the hull77: Bluenose in framing jig with main railing glued to the hull78: Top hull strakes with first coat of paint79: Bow with hawse hole80: Aft with hawse hole and scruppers. Note work under the transom.81: Bow with hawse hole and scruppers82: Fish gurry sluice in centre and scruppers83: Hull planking under transom completed84: Hull planking under transom completed85: Phew, 10 more hull strakes to close the hole...86: Only 2 more hull strakes to close the hole...87: Only 2 more hull strakes to close the hole...88: Only 2 more hull strakes to close the hole...89: Only 2 more hull strakes to close the hole...90: Hull closed91: Hull closed92: Hull closed93: Display stand94: Display stand completed95: Display stand completed96: Black paint above waterline97: Black paint above waterline98: Copper metalic below waterline99: Copper metalic below waterline100: Rudder101: Name on the back102: Name and scroll decoration on the bow103: Chain plates, waterline and yellow cove104: Bowsprit shroud plates and bobstay plates105: All that remains is painting the plates black106: All that remains is painting the plates black107: All that remains is painting the plates black108: Bowsprit installed with bowsprit bitts and Samson post109: Snatches and anchor Fluke Falls110: Chocks111: View of front with masts112: View of front with masts113: Pins, eyebolts, deadeyes (fasten with wire rather then thread)114: Windlass and winch engine housing115: Windlass and winch engine housing116: Foc's'le skylight compared to my finger117: Chain box (left), Foc's'le companionway, foc's'le skylight, main hatch118: Another view point119: Base of aft hatch (and other structures) has a diagonal bar on the underside. The bar fits in the opening in the deck and allows the removal of the structure for a peek below deck.120: Main cabin121: Mainmast fife rail122: View to the bow123: View to the aft124: Starboard view bow section. Dory cradles await completion once dories are made.125: Starboard view midship section126: Starboard view aft section127: Port view bow section128: Port view bow section129: Port view midship section130: Port view aft section, note steering box and wheel131: Port view aft section, note steering box and wheel132: Jig to make dories133: Dory made from cardboard and a few pieces of basswood134: Dories painted with the wrong colour (supply issue)135: Dories on deck136: Dories on deck with white railings and thwart boards. Looks better!137: Dories fully equiped. NOTE: here the buckets are already made.138: Making barrels and buckets139: Making barrels and buckets140: Making barrels and buckets141: Aft without the barrel rack and barrels142: Aft with the barrel rack and barrels143: Two Grand Banks anchors and one Folding Stock Fisherman's anchor144: Idem145: Catheads and anchors installed146: Catheads and anchors installed147: All deck fixtures installed. Note how busy it is.148: Fixing square heads of undermasts149: Mainmast, topmasts, foremast150: Mainmast with trestletrees151: Dime used under mainmast for good luck152: Foremast with topmast153: Mainmast with topmast154: Masts viewing aft155: Main boom, main gaff, fore boom, fore gaff, jumbo jib club156: View of bow section157: View of mid section158: View of aft section158A: Needle threader159: Lower shrouds on mainmast160: Lower shrouds on masts161: Lower shrouds on mainmast162: Lower shrouds with deadeyes163: Lower shrouds installed164: Lower shrouds installed165: Sheer poles and template for ratlines166: Ratlines on lower shrouds (difficult to see)167: Ratlines on lower shrouds168: Deadeyes shrouds169: Standing rigging170: Running rigging171: Running rigging172: Running rigging completed
Eisnor Blueprints -- As from the discussion in the introduction we decided to build the 1:48 scale model of the Bluenose using the blueprints of P.F. Eisnor, and augment that with details from the book of L.B. Jenson.
Jenson, pages 17-20 -- Specifications, real sizes of timber and rigging; pages 18-19 are Bluenose specific
Jenson, pages 35-37 -- Rigging arrangement
Jenson, page 39 -- Beams
Jenson, pages 40-41 -- Construction of stern and bow
Jenson, page 42 -- Cross section of schooner at break beam
Gene Bodnar Bluenose Practicum -- The Bluenose Practicum was developed by modeler Gene Bodnar and outlines the process in detail of building a (museum quality) model of this famous schooner based on Philip Eisnors plans.
Materials List
Approximate list of raw material bought for this project. Where possible I use leftover material from previous projects too; those are not listed here such as for base board and framing jigs.
Material that I bought from Fast Track, Home Depot, Ages of Sail, Michael's, Lee Valley, Super Drugs:
quantity
description
thickness x width x length
comment
3
basswood sheet
1/4" x 4" x 12"
15
basswood sheet
1/8" x 4" x 24"
18
basswood sheet
1/16" x 4" x 12"
8
basswood strip
1/4" x 1/4" x 16"
6
basswood strip
5/24" x 5/24" x 16"
1
dowel rod
7/16" x 36"
1
dowel rod
3/8" x 36"
1
dowel rod
5/16" x 48"
1
dowel rod
1/4" x 36"
4
dowel rod
3/16" x 12"
32
dead eye
5 mm
8
dead eye
3.5 mm
8
belaying pin
14 mm
12 mm not available
25
belaying pin
10 mm
12 mm not available
1
chain
1.5 mm x 1 meter
1
chain
3.5 mm x 1 meter
1
copper sheet
0.25 mm x 2" x 16"
chain plates
3
self-adhesive white, yellow & black tape
3 mm wide
only available in 72 yard rolls!!!
1
steering wheel
20 mm
6
anvil cleat
7 mm
1
brass sheave
6 mm
48
single block
5 mm
8
double block
6 mm
12
parrels (beads)
#6
could not find smaller ones
2
natural hemp rigging line
0.25 mm
beige, spool
2
natural hemp rigging line
0.5 mm
beige, spool
3
natural hemp rigging line
0.75 mm
beige, spool
1
natural hemp rigging line
1.0 mm
black, spool
2
Testor paint, white, flat
0.25 fl.oz
2
Testor paint, black, semi gloss
0.25 fl.oz
1
Testor paint, copper metallic
0.25 fl.oz
1
Testor paint, grey, flat
0.25 fl.oz
1
Testor paint, yellow, flat
0.25 fl.oz
1
Testor paint, light beige, flat
0.25 fl.oz
1
clear nail polish
to secure rigging knots
1
Sure grip pro wood glue
1
LePage super glue
miscellaneous wire sizes from workshop stock
for blocks and eyes
beewax natural and dark oak from workshop stock
to wax (and colour) rigging
various grids of sandpaper from workshop stock
Required Tools
Power tools -- table saw, scroll saw, mini belt sander, mini drill, lathe or drill press to shape mast, boom and gaffs
Hand tools -- Carving knifes, Xacto knife, various tweezers, small pliers, mini cloth pins
Drill bits -- small drills and small diamand grinder bits
Miscellaneous -- metal ruler, vernier caliper, Veritas Standard Wheel Marking Gauge, colour pencils, Testor paint brushes
Construction
We will follow the Bodnar Bluenose Practicum (construction guide). Deviations we made will be highlighted in this text.
It is critical that you are working as accurate as you possibly can -- up to the point of paranoia -- as base board, framing jigs, keel and frames are the basis of a perfect model.
Our headings follow the headings of Bodnar's Bluenose Practicum.
1-Feb-2018 to 3-Mar-2018 -- For all intents and purposes the actual start of the modeling.
25-Mar-2019 to May-2019 -- Project is resumed after my wife passed away on 27-Nov-2018.
25-Jan-2020 to Apr-2020 -- Project continuation.
Oct-2020 to Apr-2021 -- Project continuation.
Sep-2021 to Mar-2022 -- Project continuation. Hull and deck completed.
Oct-2022 to 24-Nov-2022 -- Project continuation. Deck fittings completed.
25-Nov-2022 to 13-Jan-2023 -- Project continuation. Standing and Running Rigging completed, and the end of the project.
To give an idea of the required construction and finishing time:
Activity
hours
Framing jigs & slip
19¾
Lofting & building keel
23½
Lofting & building square and cant frames
99¼
Deck clamps & shelves, trim stanchions, bow, transom, lower & main deck beams, openings, carlings
The project was considered completed on 13-Jan-2023.
Ongoing Notes
Random notes as I find information.
Rule of thumb: block size is 12 times the line diameter.
There are 4 frames per 9 feet, hence 4 frames per 2-1/4" on the model.
(18) chainplate shroud, deadeye 3/16", line 0.032"
(4) chainplate back stay, deadeye 9/64", line 0.021"
Lofting Frames (Bodnar, page 15)
Draw the 57 frames onto Eisnor sheet 1. picture 5 gives you access to a PDF table with frame spacing. We used a 12" metal ruler. Place that one on the drawing and don't move it until you have marked all frames along the ruler. In that way your marking errors are minimized. I coloured the centre frame green, every 5th frame orange and the rest of the frames yellow as Bodnar recommended. It helps you to avoid mistakes!
The Framing Grid Sheet at the end of Bodnar's Practicum is no good, so we made our own. Go to picture 4, click on it and you get the PDF file of the grid that you need to print true size. Check the measurements to ensure that all sizes are correct. Use this template to loft the square frames. We did one square frame by hand to learn how to do it, and then did all the others with our DesignCAD 3D MAX program.
Bodnar, page 18 -- "Now mark the bottom edge of the keel on your grid, which is found by placing the dividers on the Hull Profile Plan at the baseline at the Midship Frame and extending the dividers open to the bottom of the keel."
"bottom of the keel" is not correct. It should be top of keel or bottom of frame because the square frames rest on the keel!
Lofting the Building Board Plan (Bodnar, page 24)
Slip -- From absolute flat furniture quality 3/4" plywood (multiplex) cut a board of 18"x38"; i.e. the base board. Lengthwise draw the centre line on it. Draw a crosswise line at 17" from the stern end which we will call the "centre line". Draw more crosswise section lines at 2-1/4" intervals starting at the centre line.
Our base board is bigger than Bodnar's 8"x36". We did that because it allows us better use of squares so that we can position the Framing Jigs later.
Next take a piece of scrapwood 18-1/2" long, 1" wide, and taper it at 3° where the stern end is 1/4" thick; the actual slip piece. Cut a 1/4" wide slot in the centre of the top, and 3/16" deep. Mark the centre at 9-1/4". Finally glue and nail the slip piece on the centre lines of the base board (picture 6).
Whole idea is to build the keel in the slip slot to get the correct angle and to be able to place the cross sections (frames) at the right location and height above the baseboard.
Lofting the Framing Jigs and Assembling Them (Bodnar, page 26)
The Main Framing Jig is 8"x36". The Stern Secondary Framing jig is 8"x7-5/8" as from the aft side of frame 16 and the Bow Secondary Framing Jig is 8"x11-9/16" as from the fore side of frame Q. We used 1/4" furniture quality birch plywood. For the rest follow Bodnar's instructions. Make sure that the a top of the Main Framing Jig is at Load Water Level (LWL), i.e. 9.75 cm above the base board! See pictures 7 and 8.
The size of the Secondary Framing Jigs are different from Bodnar's. The stern one is definitely wrong!
Lofting the Keel Assembly (Bodnar, page 22)
Followed the instructions.
Building the Keel Assembly and Installing in the Framing Jig (Bodnar, page 29)
The Veritas standard wheel marking gauge is very handy to mark the slot depth on the edge of the keel assembly where the half frames come.
On hindsight I belief that cutting the rabbet in the keel should be done when your are ready to plank the hull towards the keel.
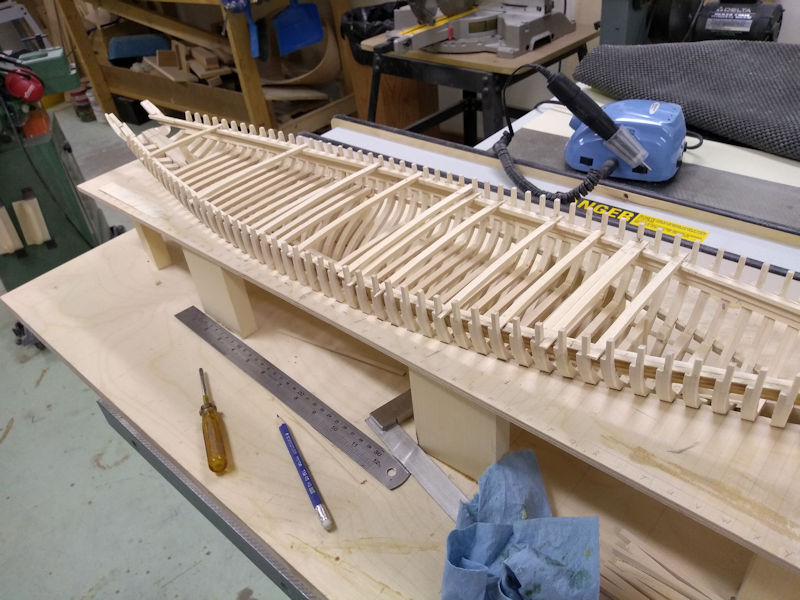
Building the Square Frames (Bodnar, page 34)
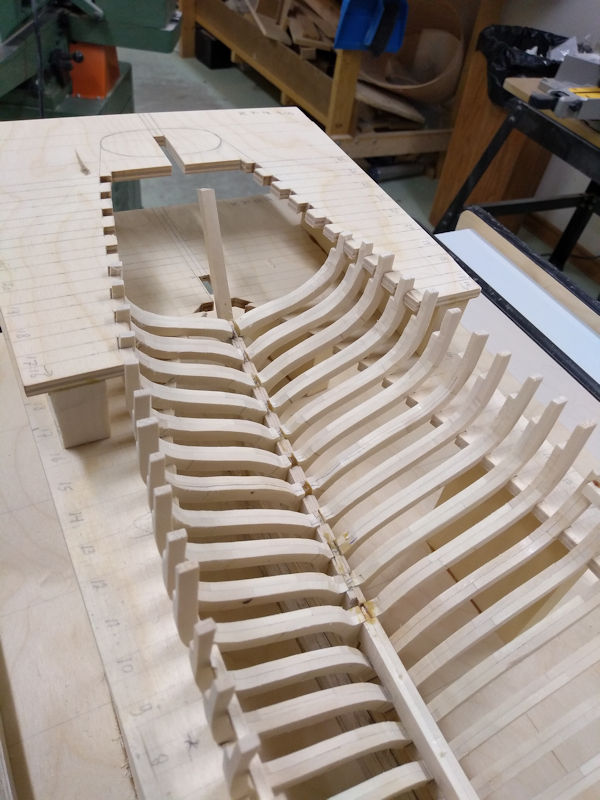
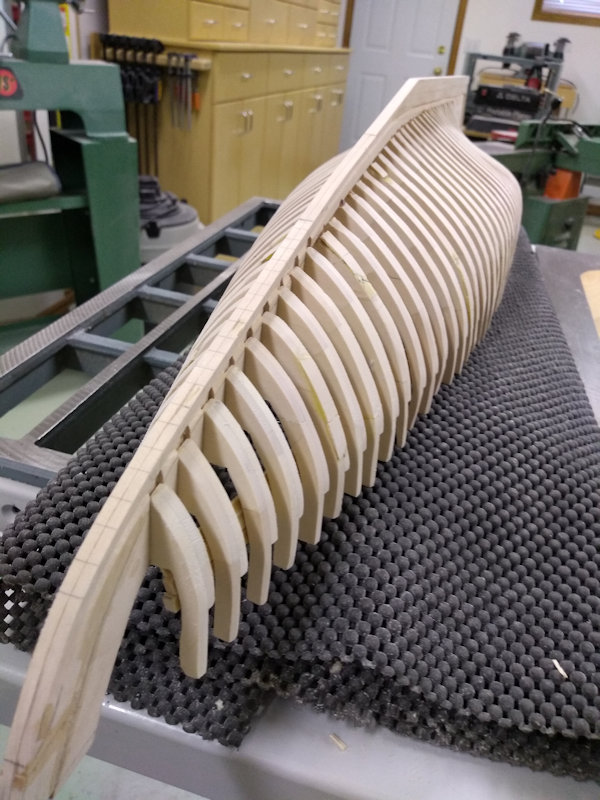
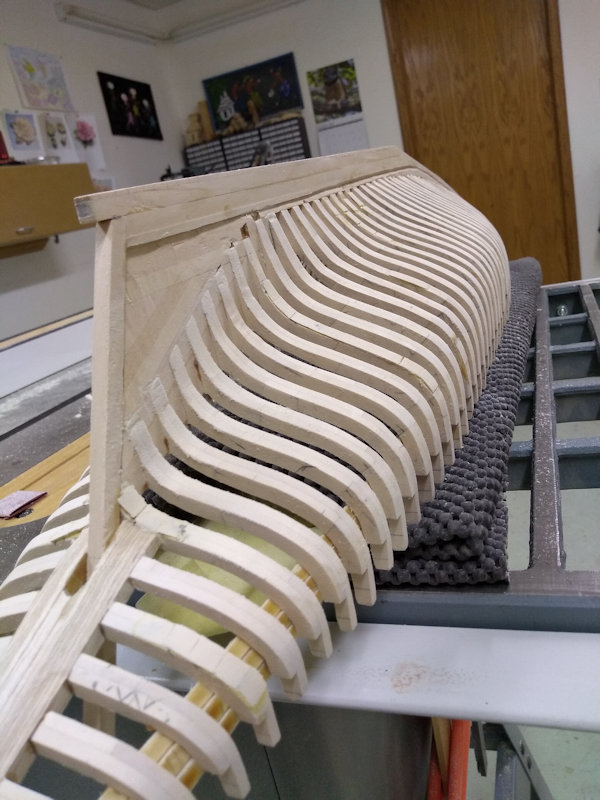
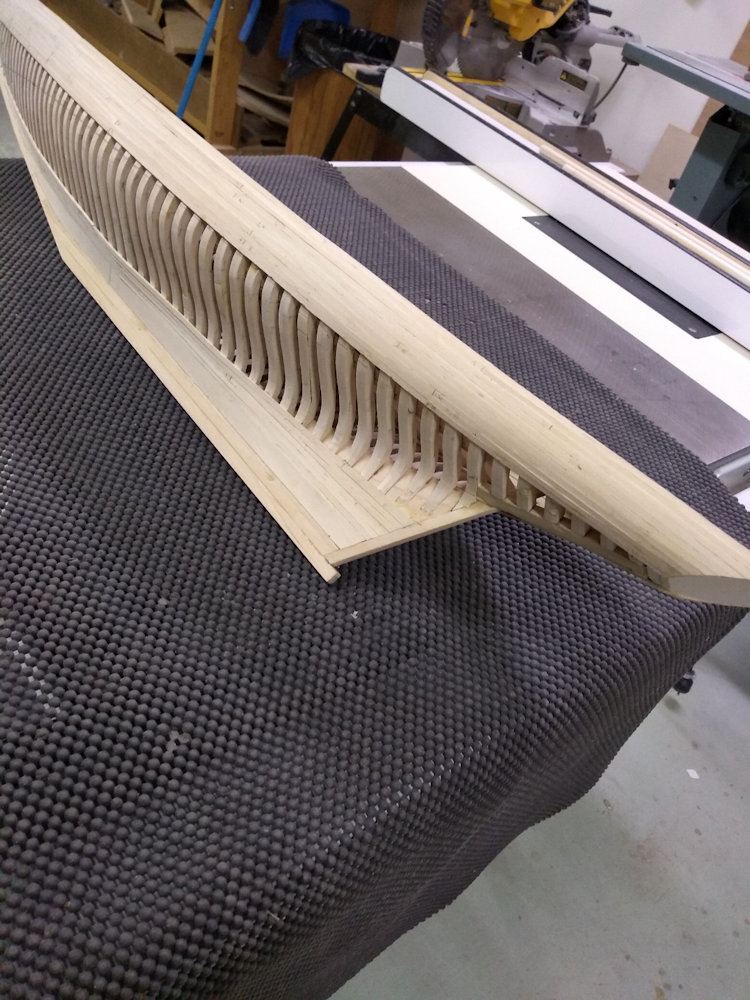
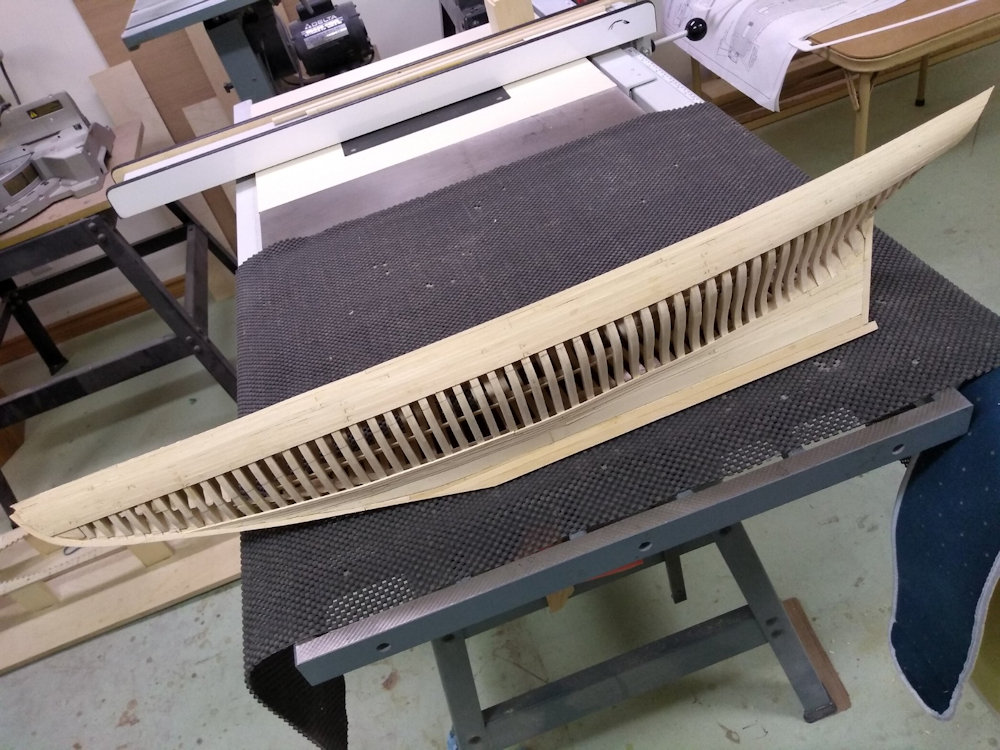
Followed the instructions. As the frames will not be visible I did not do the trenailing; a huge time saver. However, I did pin the frames to the keel as the contact surface is so small. See pictures 10 to 19.
Cutting strips from 1/8" boards is easy when you use the Veritas Standard Wheel Marking Gauge from Lee Valley to score and then use a utility knife to cut through.
To make a square frame takes approximately 90 minutes of work and a minimum of 120 minutes of glue drying, once you get the hang of it.
I started with square frames OX, 9, M and U. I couldn't get frame U fitted properly, and had to inverstigate what had gone wrong.
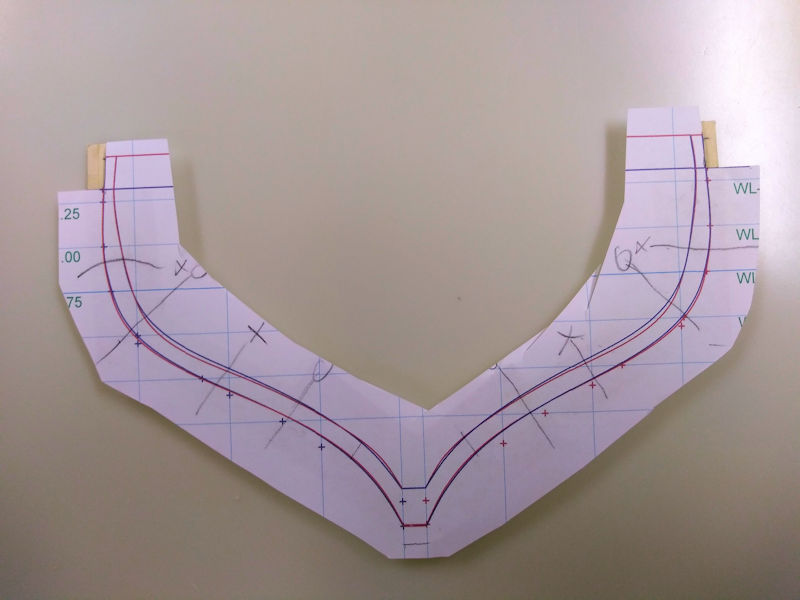
It turned out that I made the Framing Jig based on WL-4, which is correct.
When lofting the U frame, like all the other frames, you have many more points of course. When you start curve fitting it becomes obvious that not all points fit on the smooth curve. Blueprint sheet #1 has the Starboard Hull Profile where the waterlines WL-1 to WL-6 are supposed to be at 6.00, 7.25, 8.50, 9.75, 11.00 and 12.25 cm from the reference line. The Halfbreadth Plan has the buttock lines BL-1 to BL-3 which are supposed to be at 2.5, 5.0 and 7.5 cm from the centre line. Go to your blueprint sheet #1, check those measurements and you will find that the blueprint is not accurate at all with errors up to 1.5 mm !!!!!
Lines are 0.5 mm wide, so measure from centre of line to centre of line; that is the best you can do. Secondly, make sure to incorprate the WL-4 points in the curve fitting and adjust the other points accordingly. Finally, in my experience, if points BL-1, BL-2 and/or BL-3 do not fit the curve fitting them leave them out.
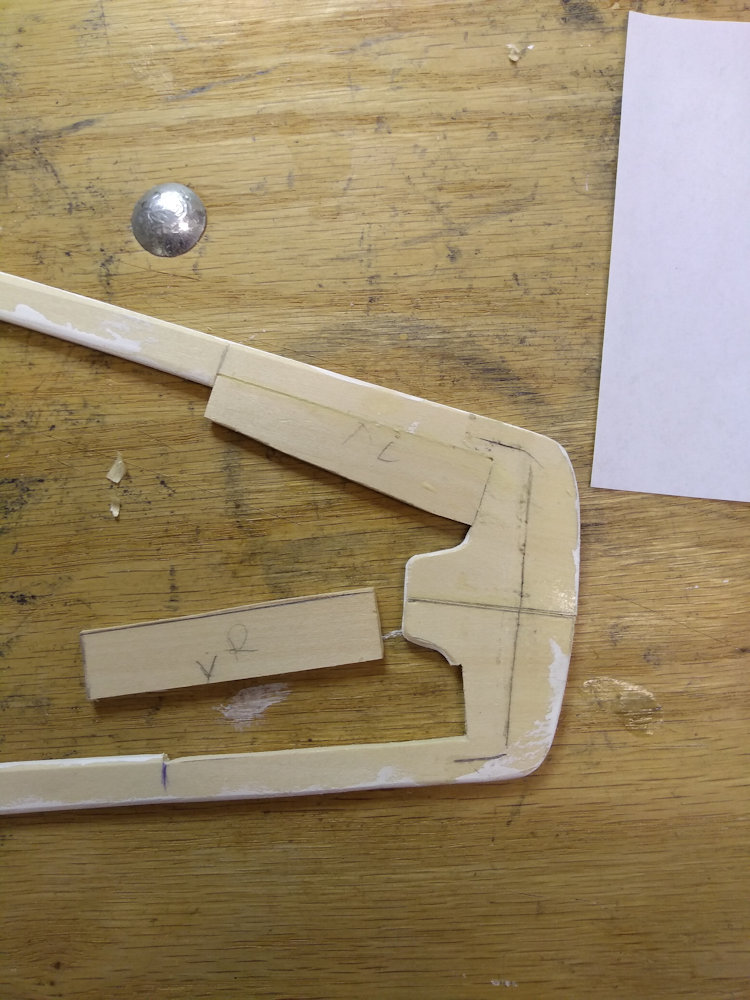
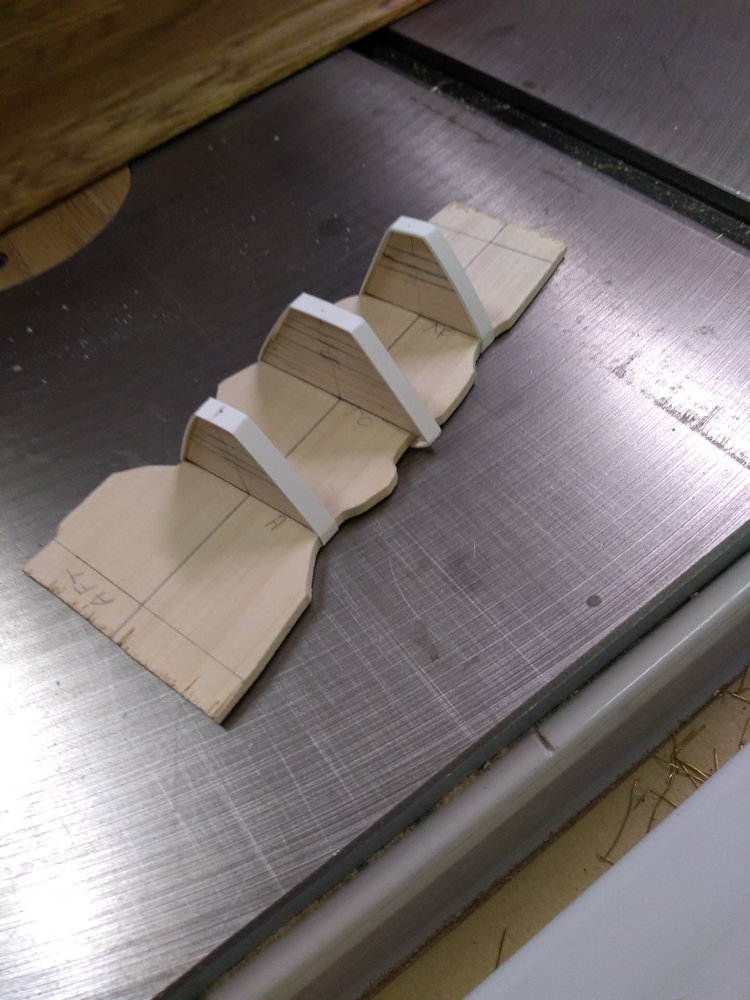
It took me several square frames before I got in the rhythm. Each frame consists of two layers, and aft layer that goes up to under the deck and fore layer that reaches higher up to under the rail. Both layers should be made a bit higher for later trimming.
The fore layer consist of a floor timber and 2nd, 4th and 6th futtocks on the left and right. The aft layer consists of the 1st, 3rd and 5th futtocks on the left and right. The glue joints of the fore and aft layers should NOT coincide. On the framing sheet custom fit the floor timber and the 2nd futtocks and then glue them together on a flat surface and let it dry. Do the same with the 1st futtocks. Next custom fit the 4th futtocks and glue, and the 3rd futtocks and glue. And finally add the 6th futtocks and the 5th futtocks which should be left a bit longer than needed. Lightly sand the inside surfaces of the two layers.
Take frame sheet and cut out the left top corner made by the outside of the stanchion (fore layer) and the under deck line. Do the same with the right top corner. Place the fore layer on your lightbox and position the frame sheet on top so that the frame fits the layer. Then trace the two cutout corners, i.e. the under deck, the outside stanchion and also the under rail. Take off the frame sheet and extend the traced lines. Do the same with the aft layer, i.e. the under deck and the outside stanchion. Obviously no under rail line.
Finally trim the excess above the under deck line from the aft layer. Glue the aft and fore layers together using the above markings to line them up properly. Clamp and let dry. After that use the scrollsaw to cut out the frame, etc.
Dowel Frames, Install Keelson and Deck Clamps (Bodnar, page 40)
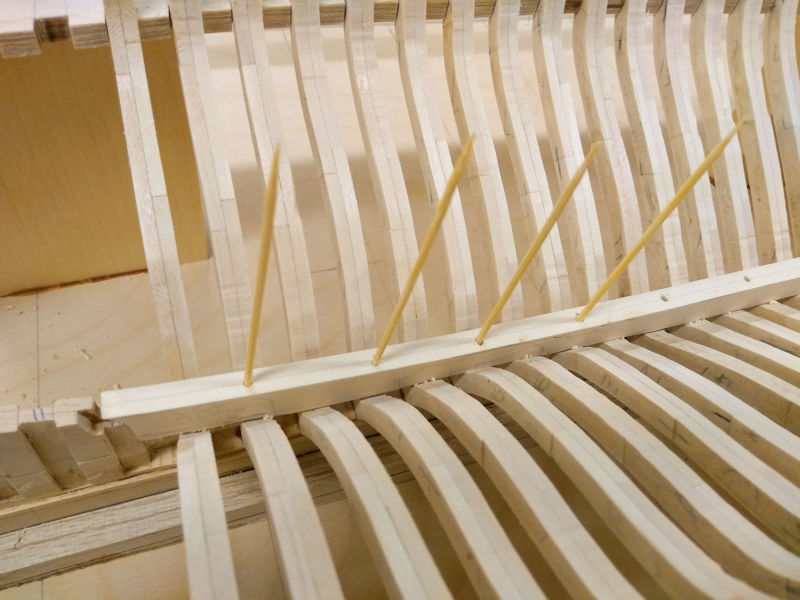
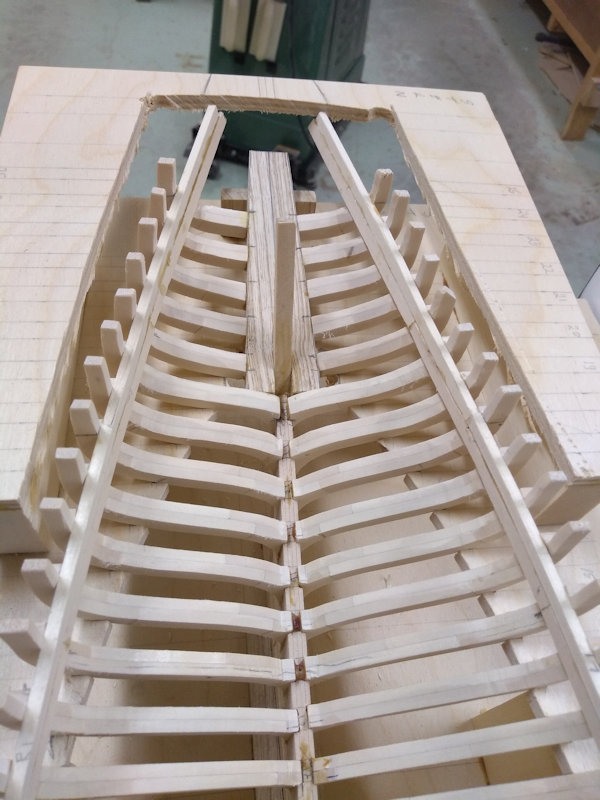
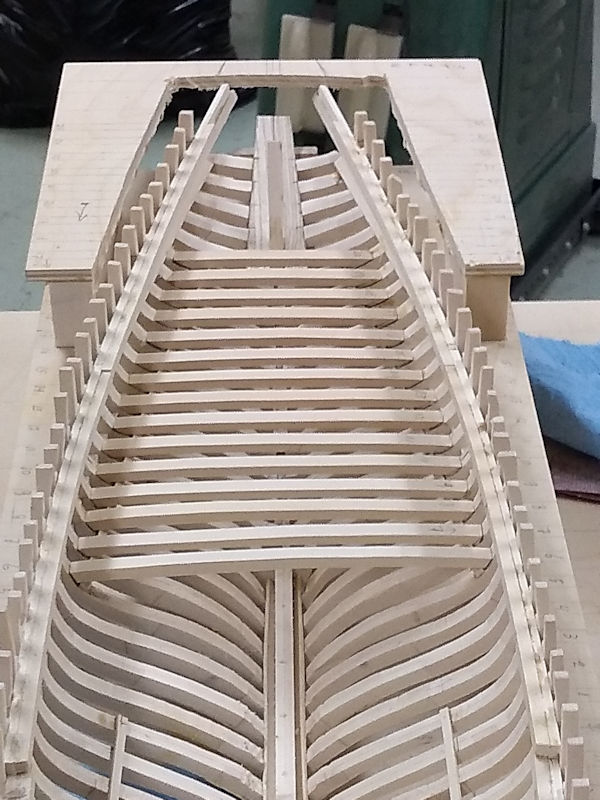
I used 9.5cm toothpicks as dowels to attached every other square frame from 9 till U. Using a #49 drill bit and pull the toothpicks through the draw plate so that they fit loosely in the #49 hole. Add a bit of glue to the end of a toothpick, put in the hole and cut excess off with nail clipper. See picture 20.
Custom fit the keelson and dowel it to every other frame from 8 to S. See picture 21.
Note that I cut some corners here with this never ending project, by using only one dowel per square frame.
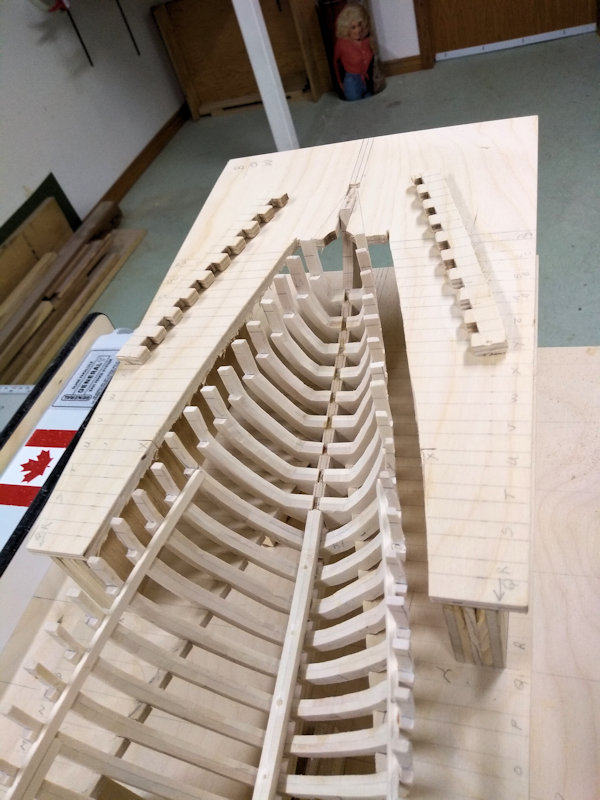
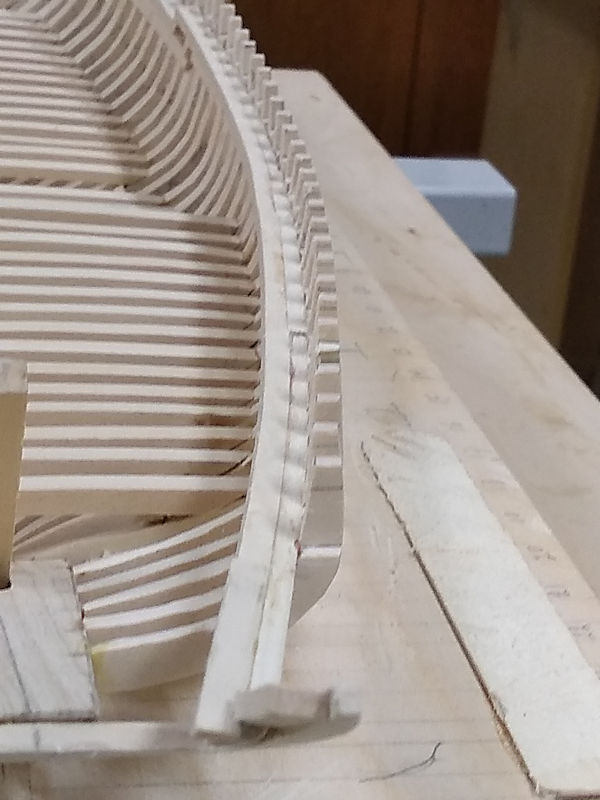
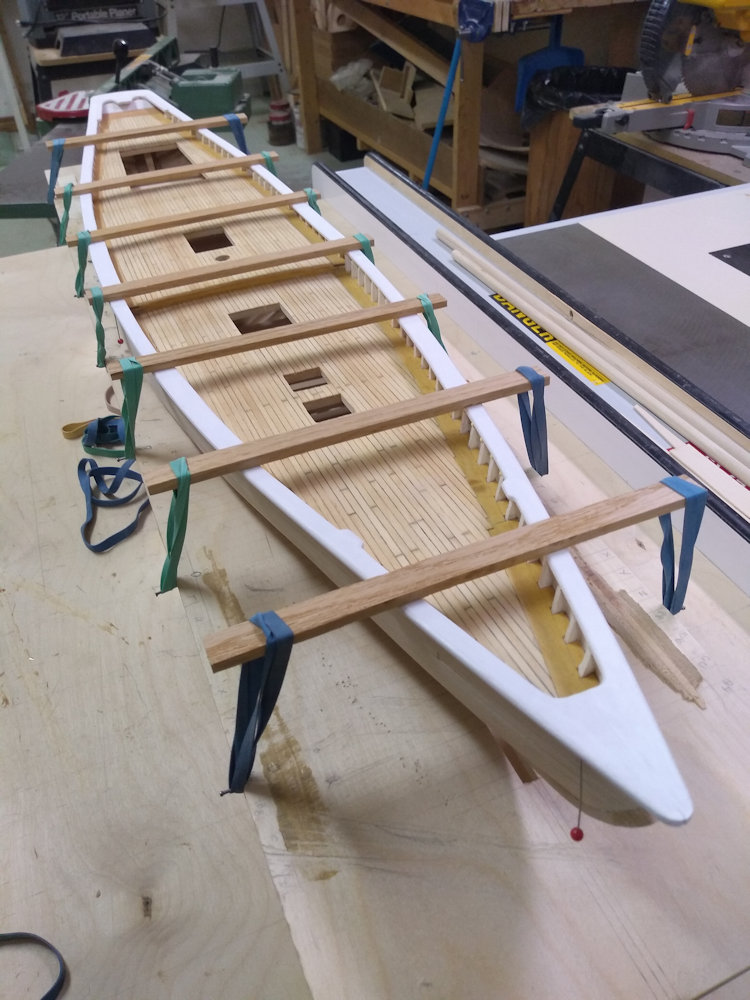
Follow the instructions for the deck clamps. The top of front part of the square frames signifies the bottom of the main deck, and the deck clamps should be 1/8" below that, because the main deck beams are 1/8" at the ends.
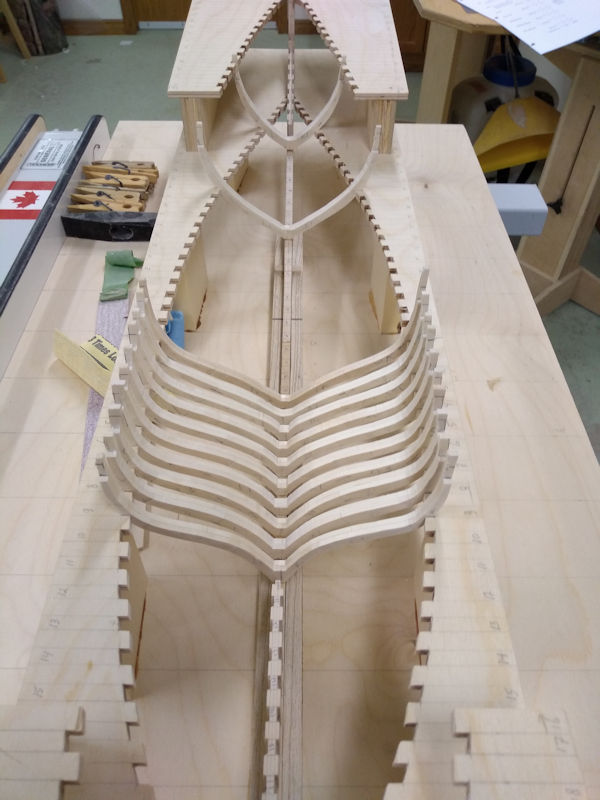
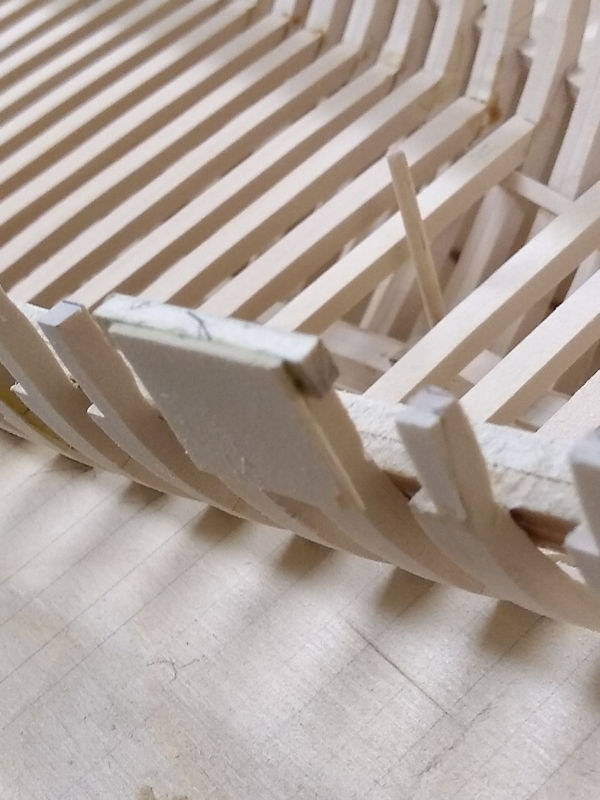
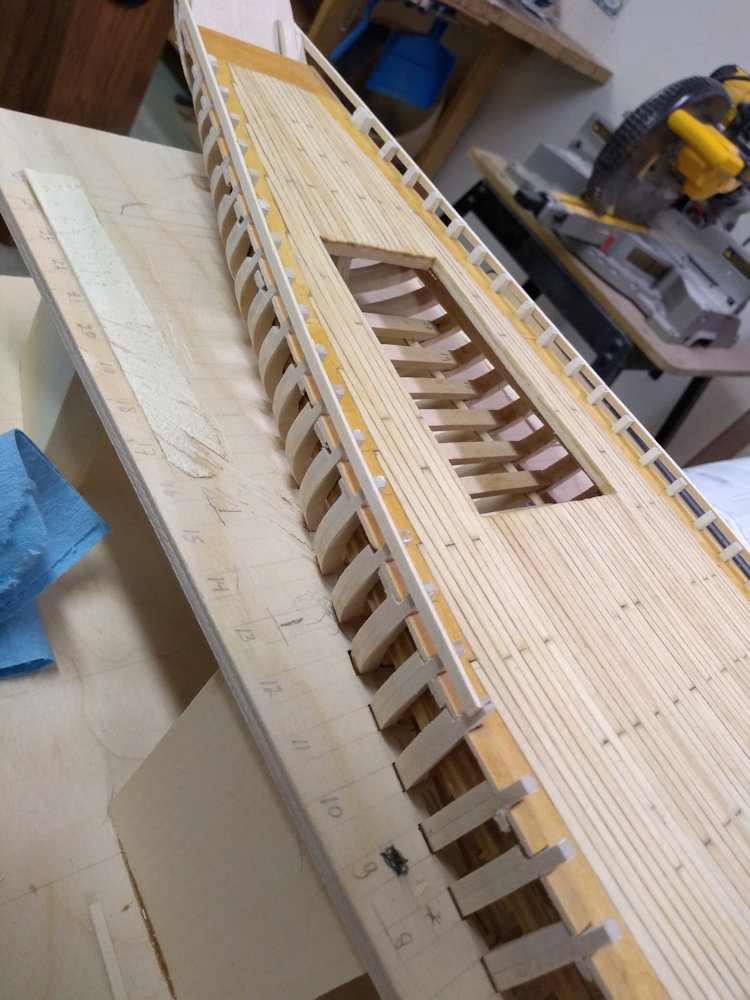
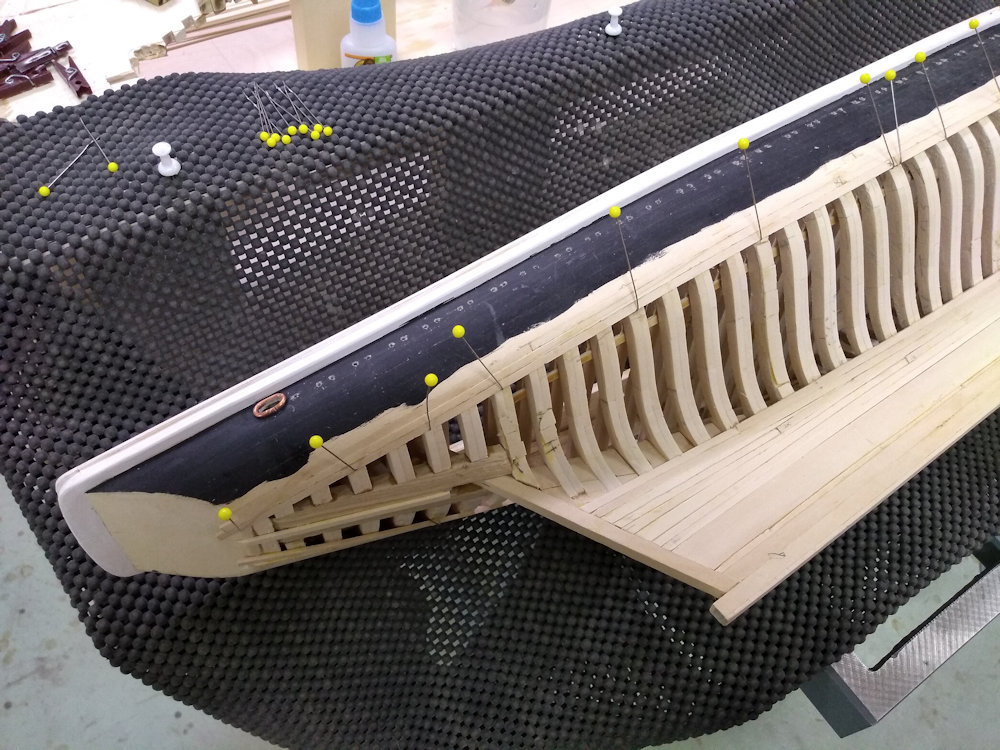
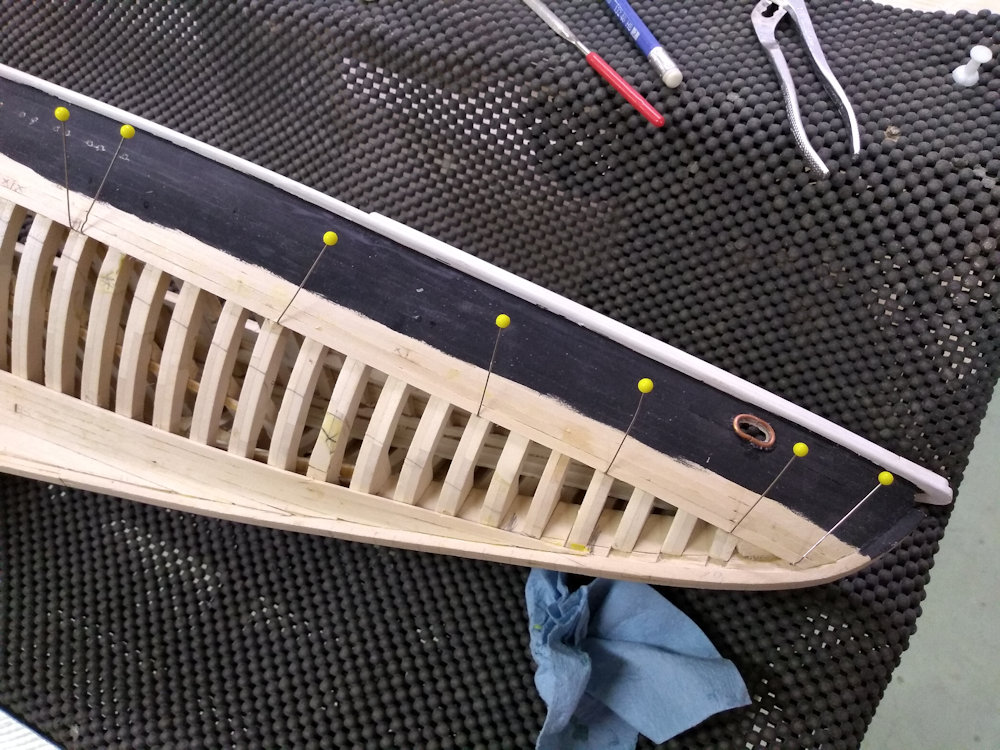
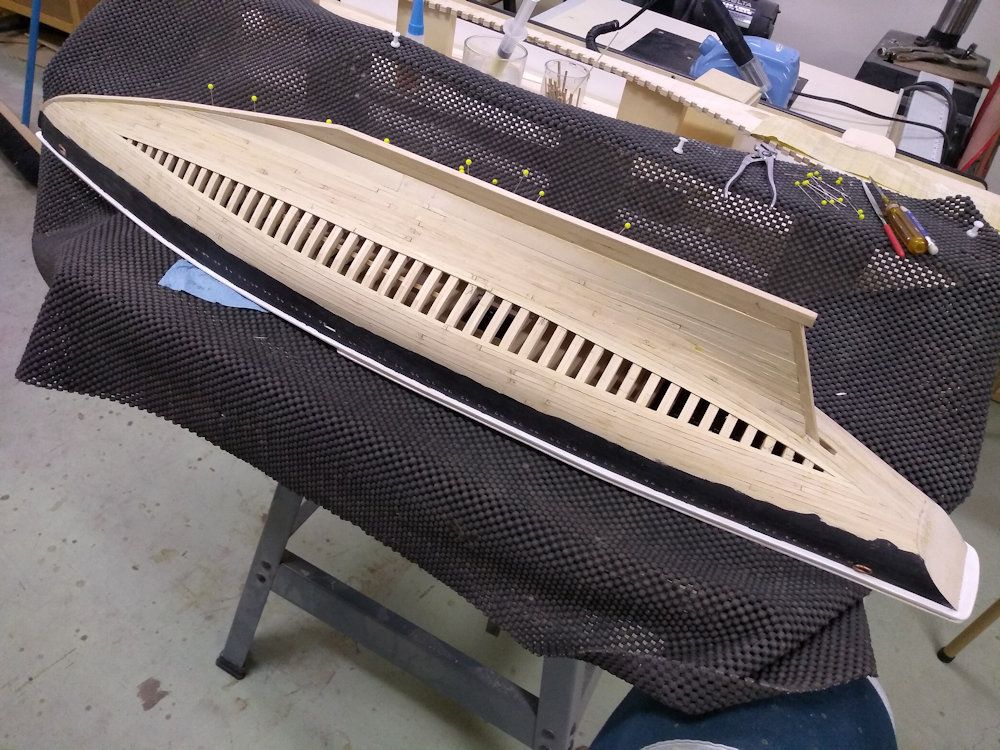
Building the Half Frames at the Bow (Bodnar, page 47)
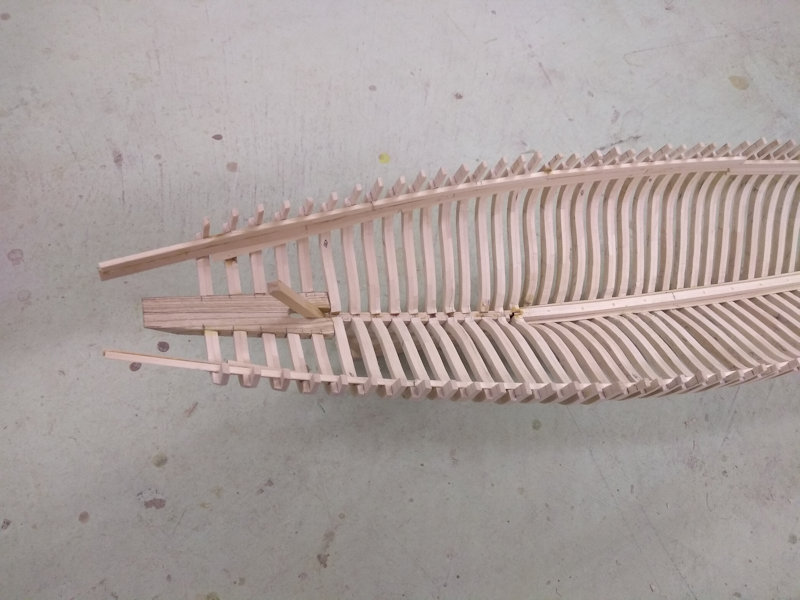
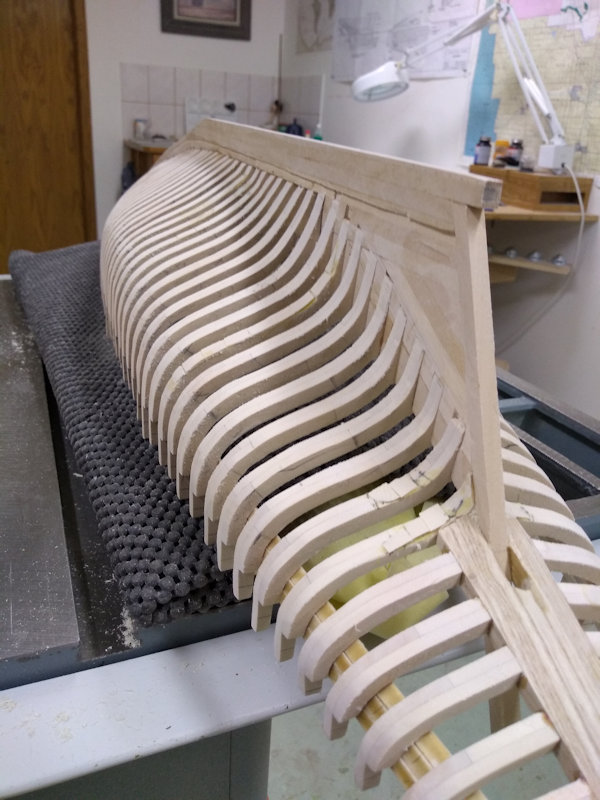
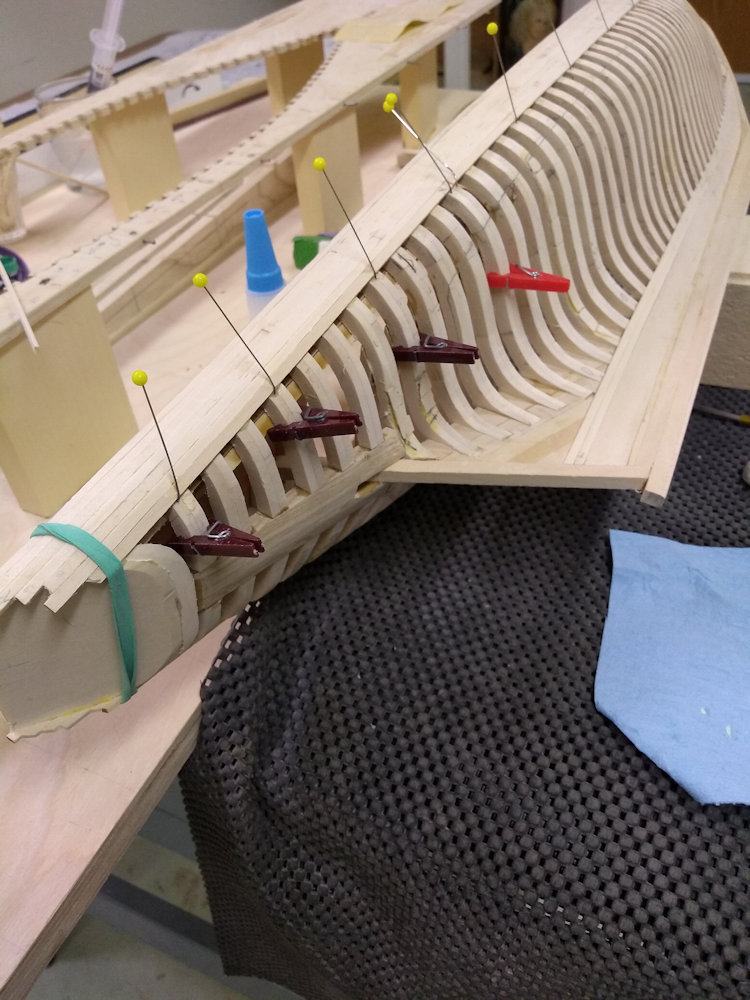
Followed the instructions. Basically the same as for the square frames. Frames V to DD. Once ready to custom fit the half frames in the jig and against the keel slots split the frame in the middle by cutting away 1/16". Once done add the deck clamps. See pictures 22 to 25.
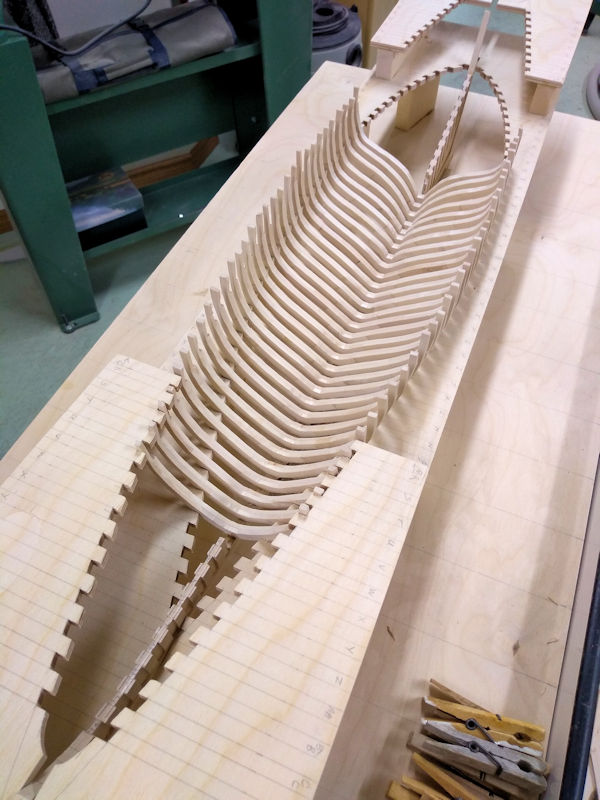
Building the Half Frames at the Stern (Bodnar, page 49)
Followed the instructions. Basically the same as for the square frames. Frames 10 to 20. Once ready to custom fit the half frames in the jig and against the keel slots split the frame in the middle by cutting away 1/16". See picture 26.
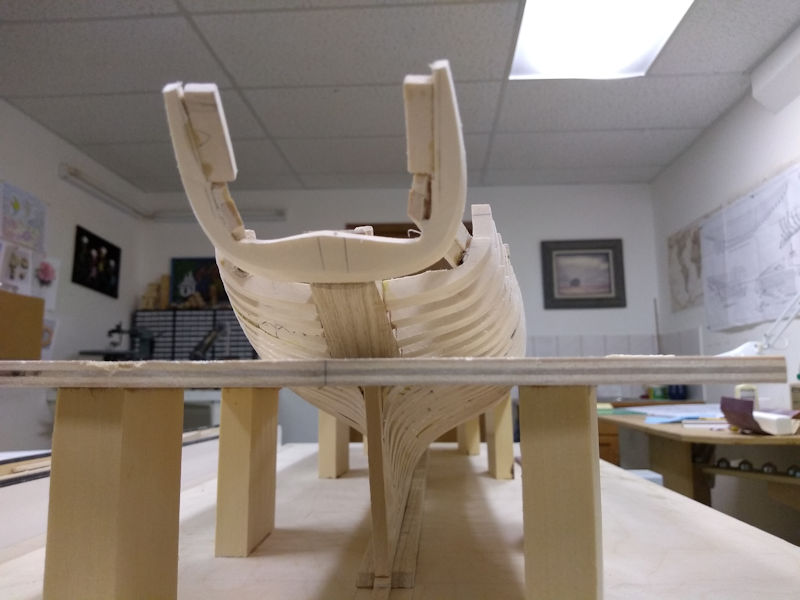
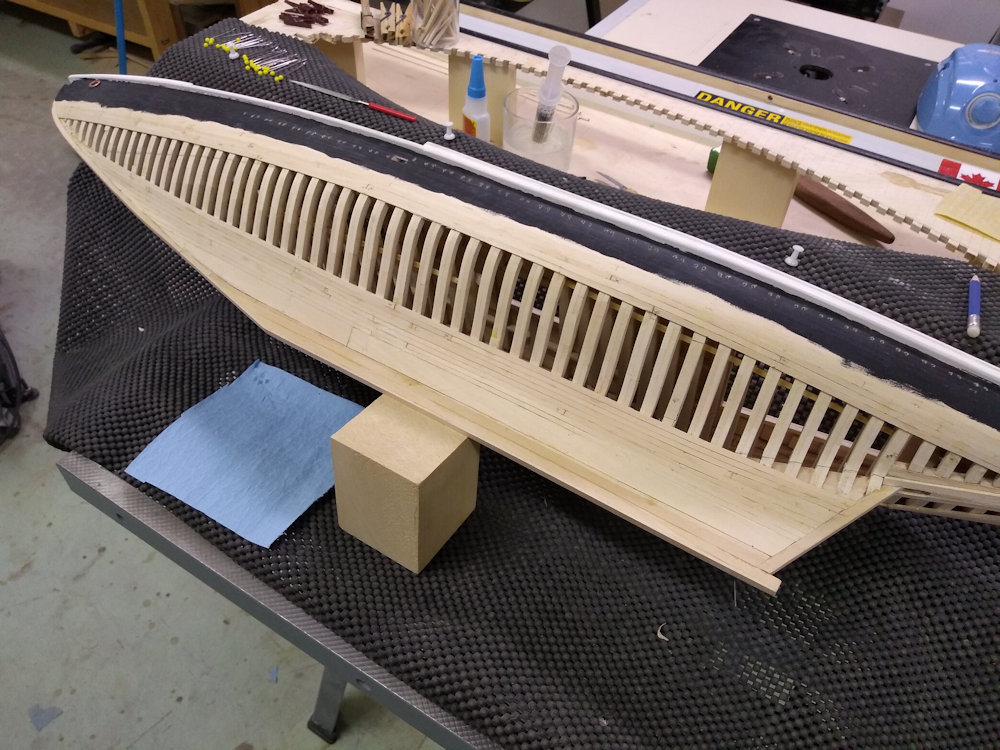
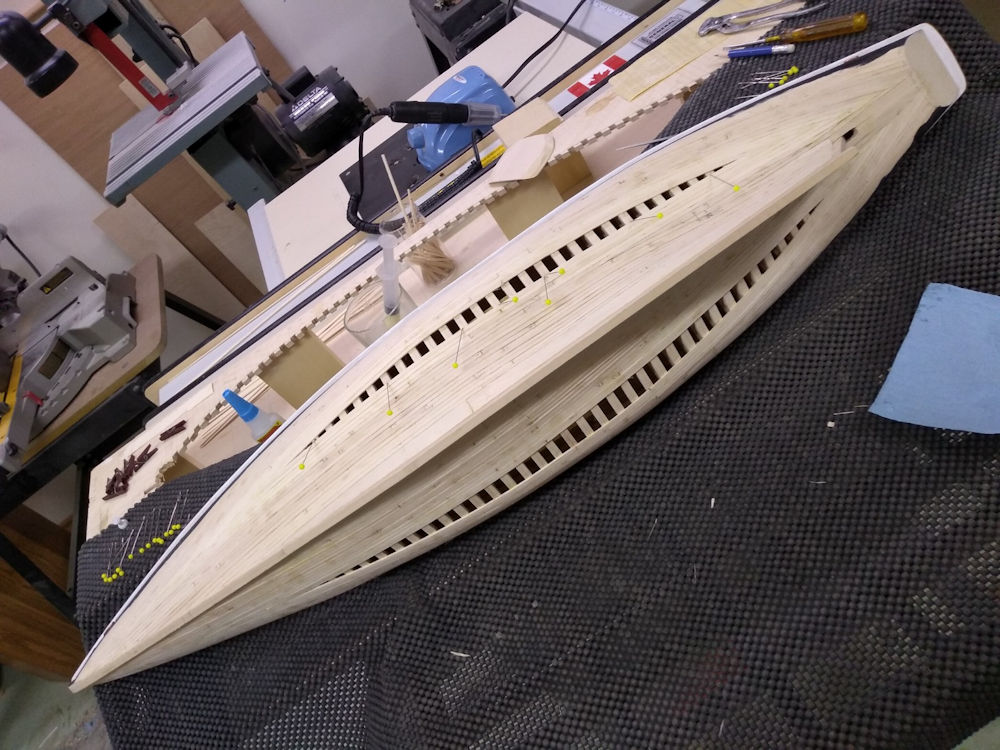
Building the Half Frames attached to the Horn Timber/Spider Legs (Bodnar, page 49)
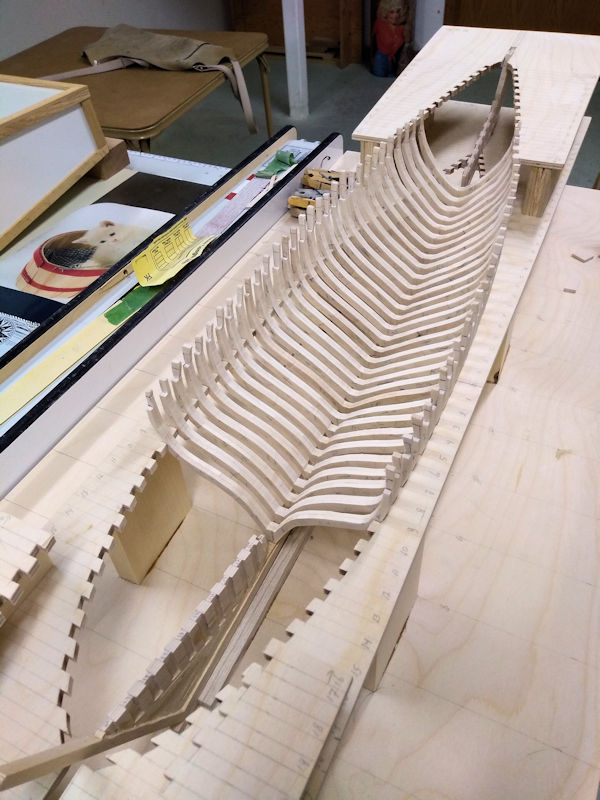
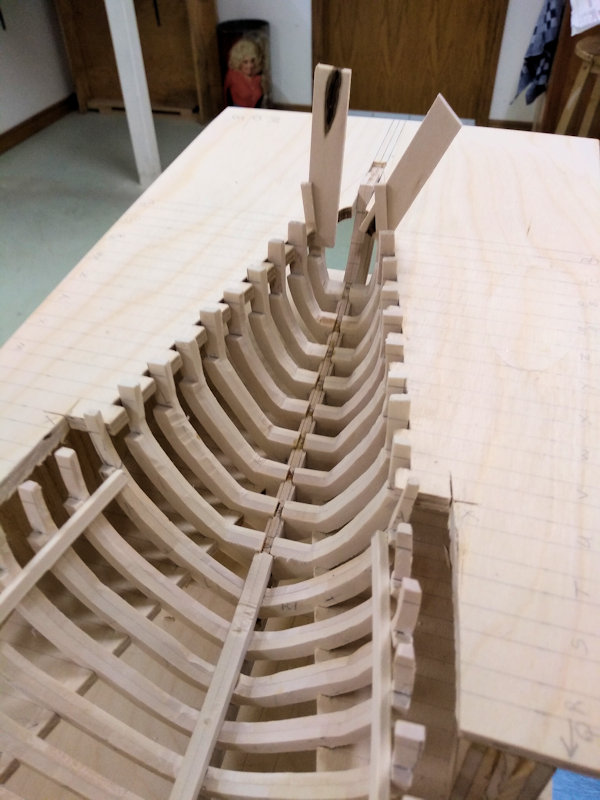
Followed the instructions. Basically the same as for the square frames. Frames 21 to 25. Once ready to custom fit the half frames in the jig and against the Timeber Horn split the frame in the middle by cutting away as much as you need. Once done add the deck clamps. See pictures 27 and 28.
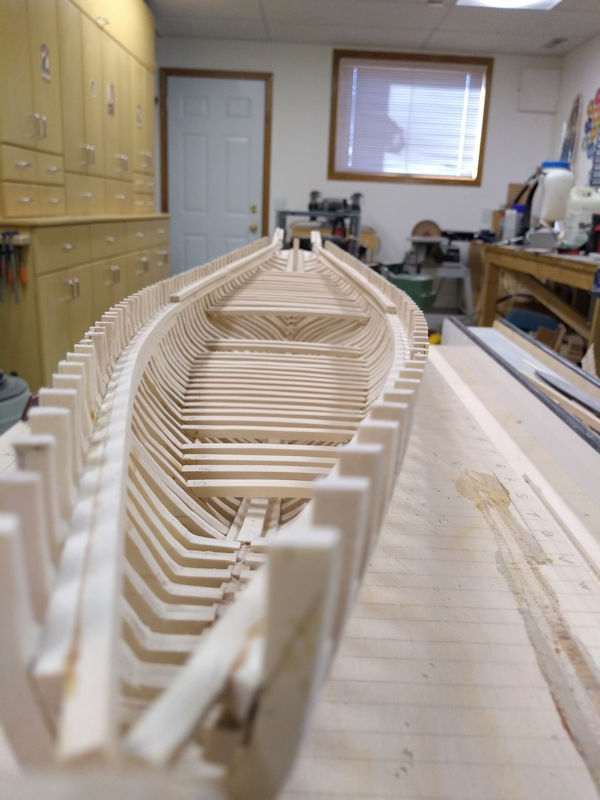
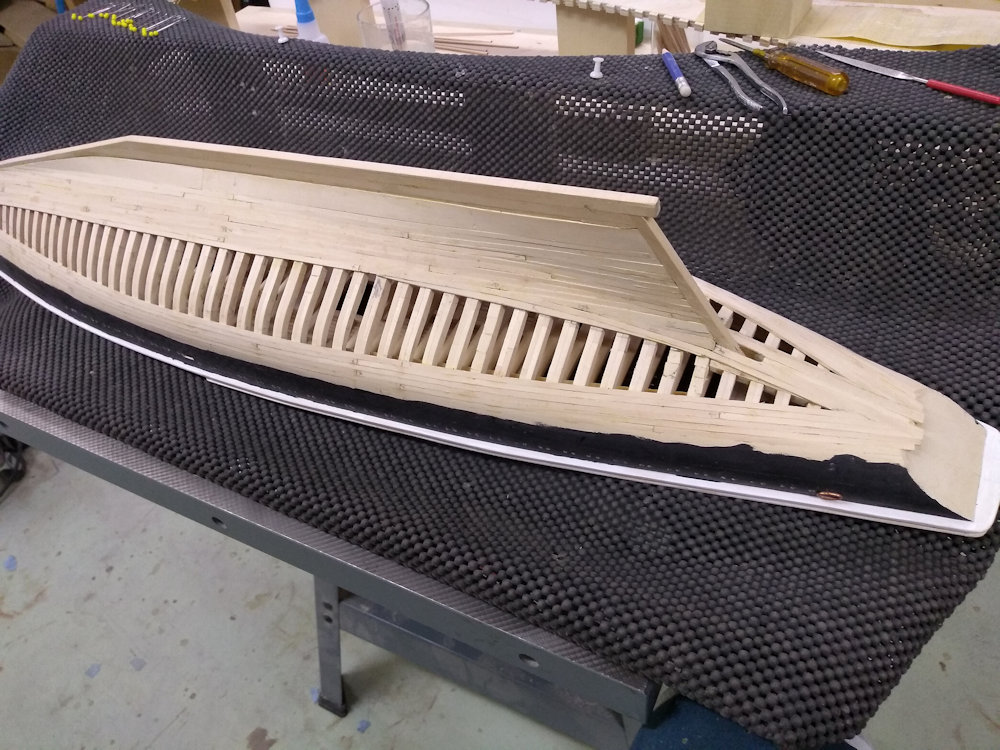
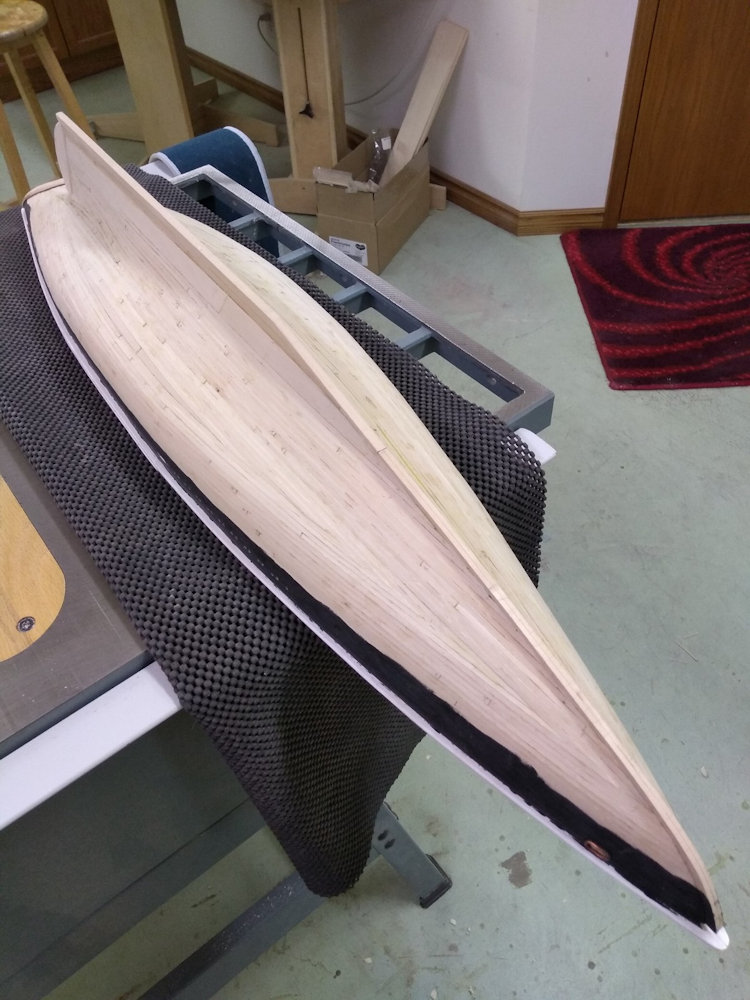
Sanding the exterior of the frames (Bodnar, page 44)
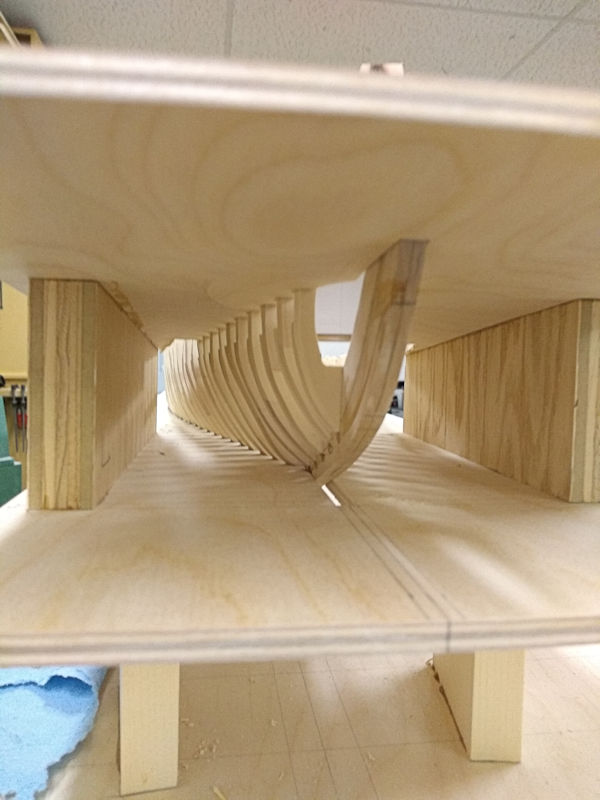
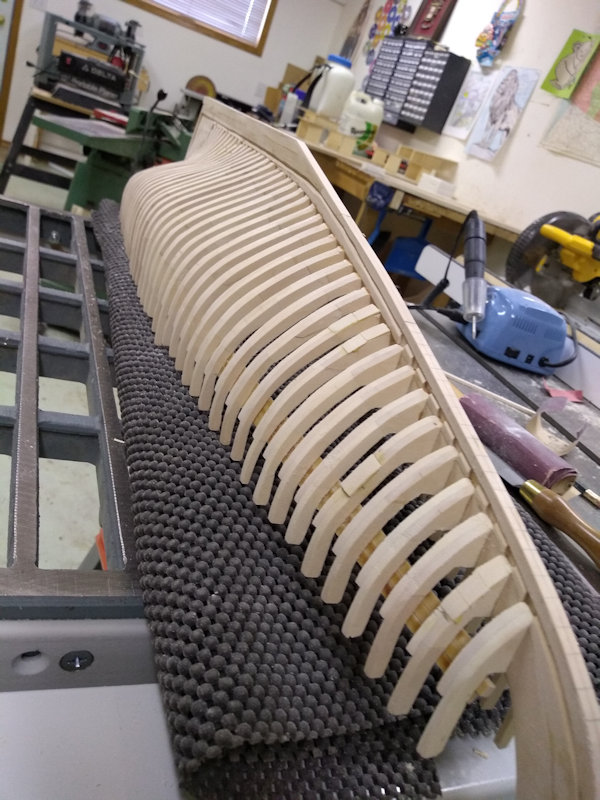
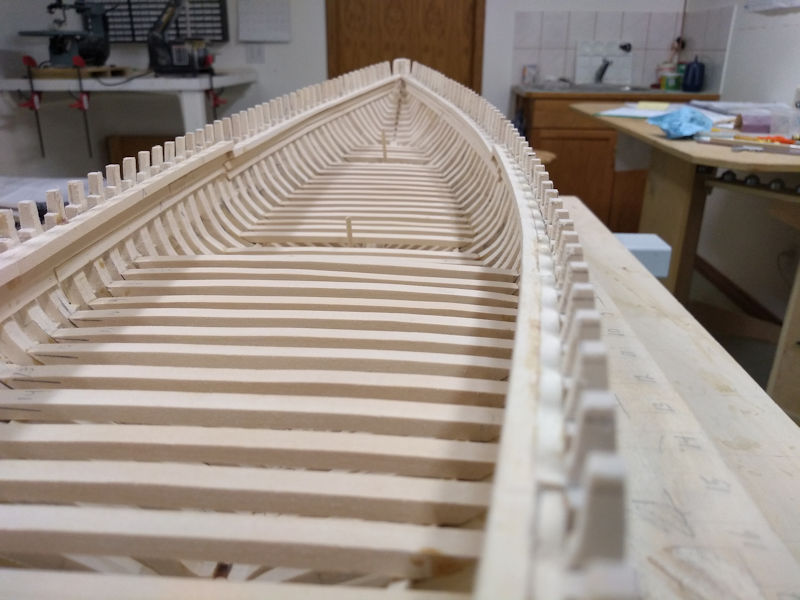
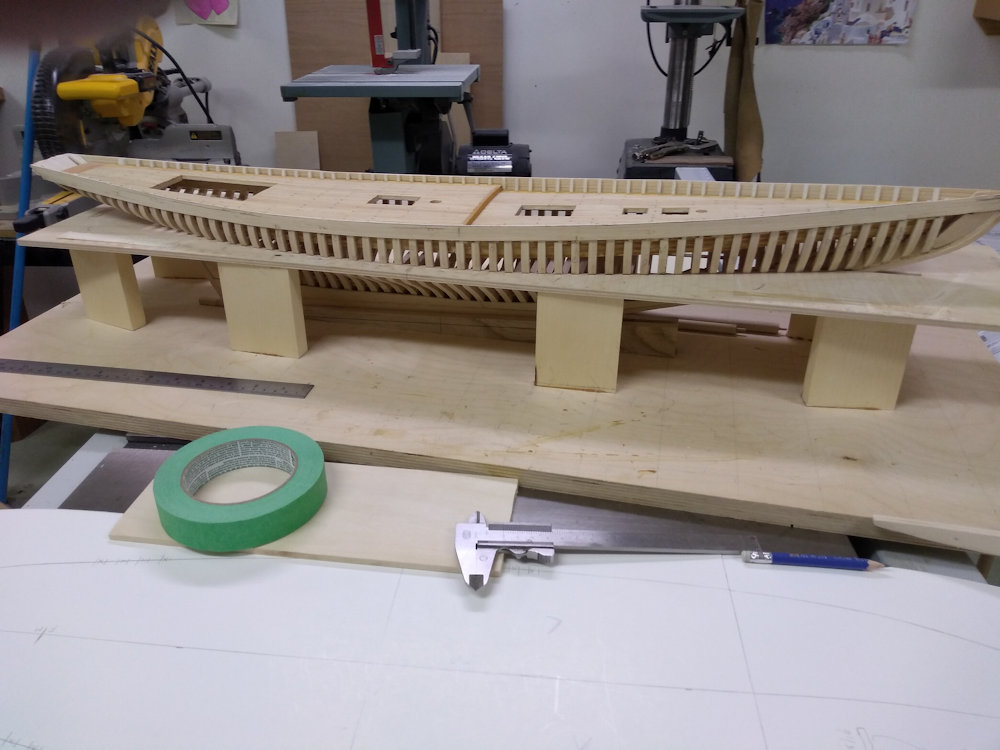
I decided to wait until all frames were installed and with the deck clamps in place for extra strength before lifting the hull out of the jig and sanding the exterior of the frames. It also revealed my sloppy work I did on the frames. Using a wood rasp I smoothed the frame parts that stuck out. Next I glued small 1/4" wide and 1/16" thick pieces of wood at the shallow spot on the frames. Repeat the sanding, etc. See pictures 29 and 34.
Mind you, I didn't care very much about the interior of the frames. Unlike Bodnar I have no intension to leave part of the hull visible for inspection of the interior.
Bodnar stated that the deck camber template is slightly more than 1/8" in the center. Very difficult to sand a perfect arch. I calculated the arch has a radius of 40-9/16". Works like a charm.
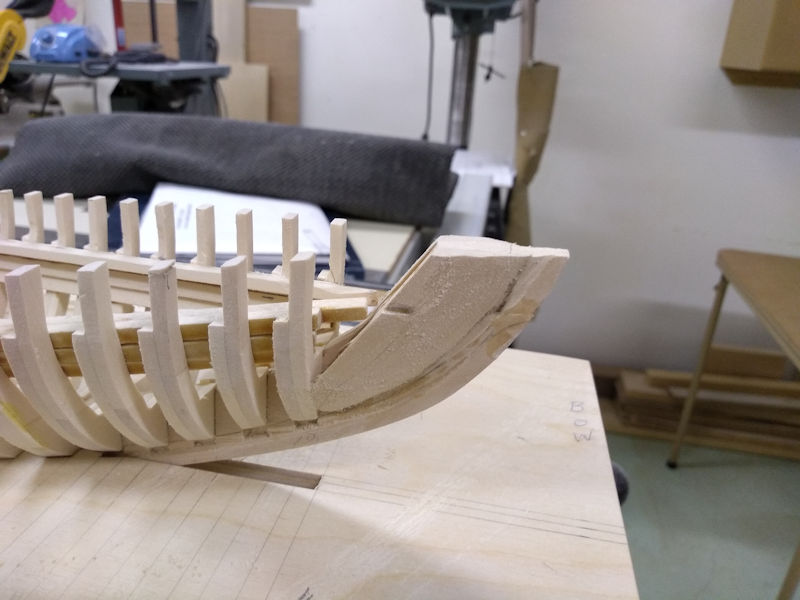
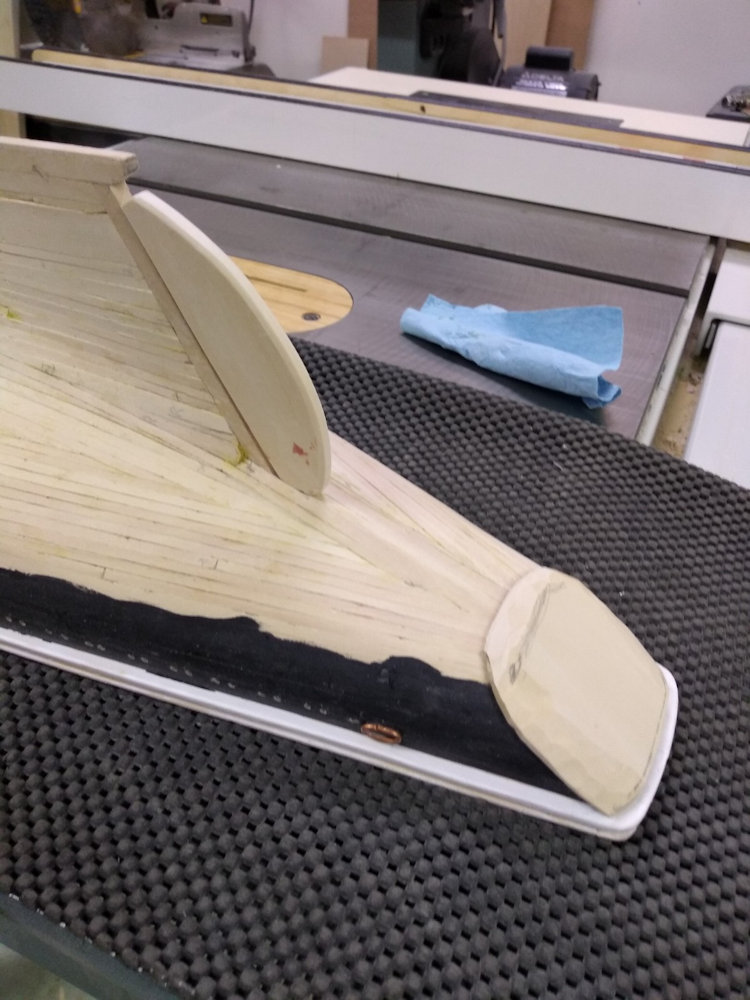
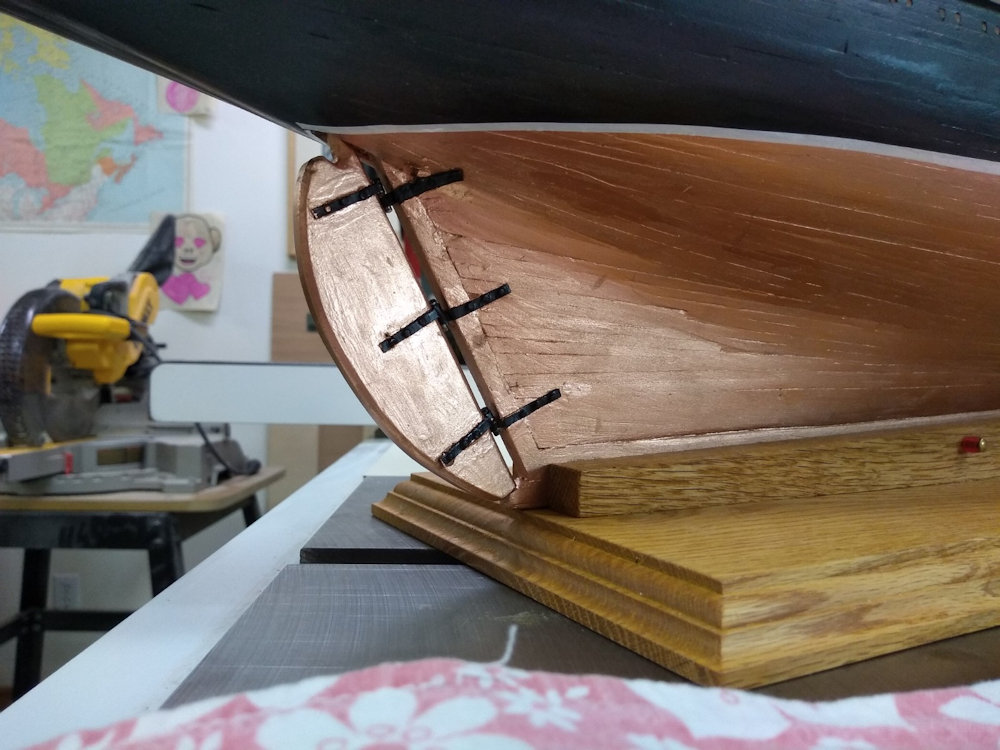
Finished Bow, Transome (Bodnar, page 61), Trim Tranchions
For the bow build-up filler pieces for both sides the keel. Then shape them using the shape of the front frames. See pictures 37.
For the Transom follow the instructions. See pictures 38.
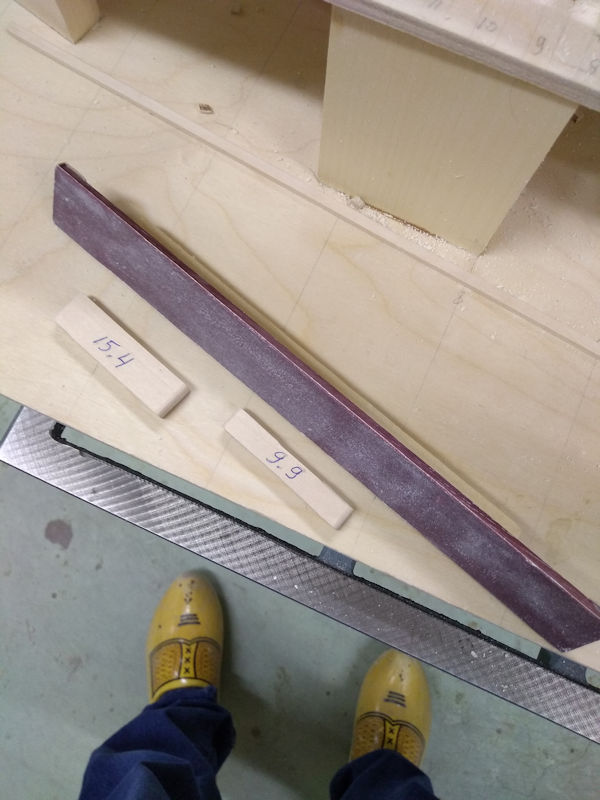
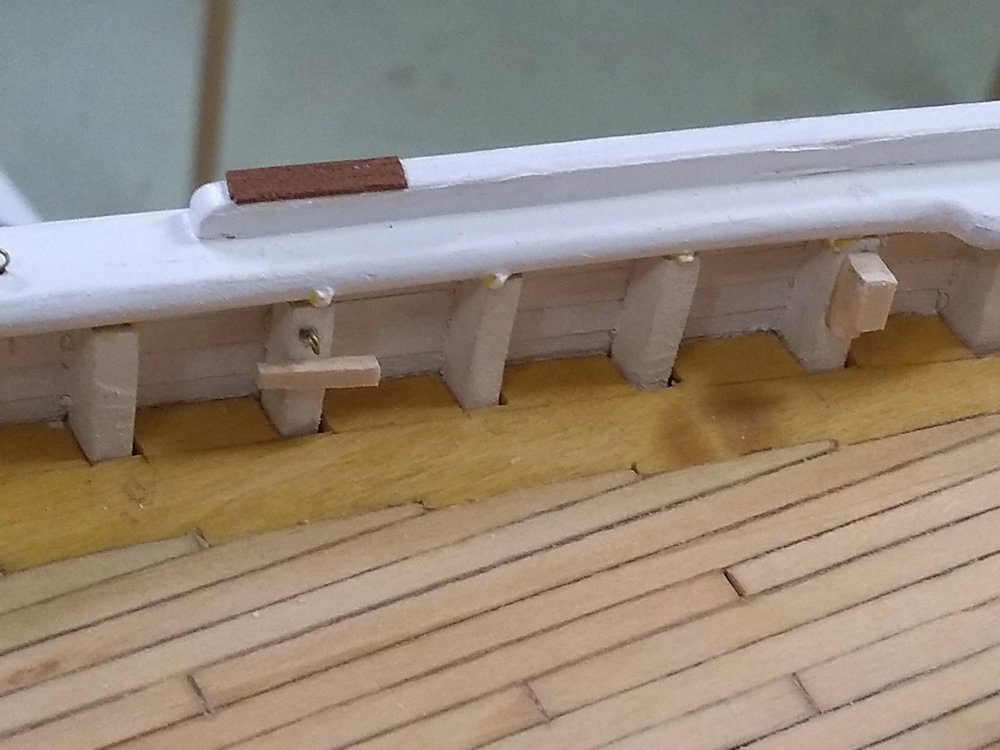
At this point I marked the height of the stanchions. In my case being 9.9mm and 15.4mm above the deck clamps/self, i.e. 6.7mm and 12.2mm above the deck, plus 3.2mm for 1/16" deck amd 1/16" tapered main deck beams. I trimmed the height of the stanchion. Followed but a final outside sanding. See pictures 39 and 40.
Next I made a jig to mark the top depth (1/8")of the stanchions. See pictures 41. Then I tapered the stanchions from the top to the outside edge of the deck clamps.
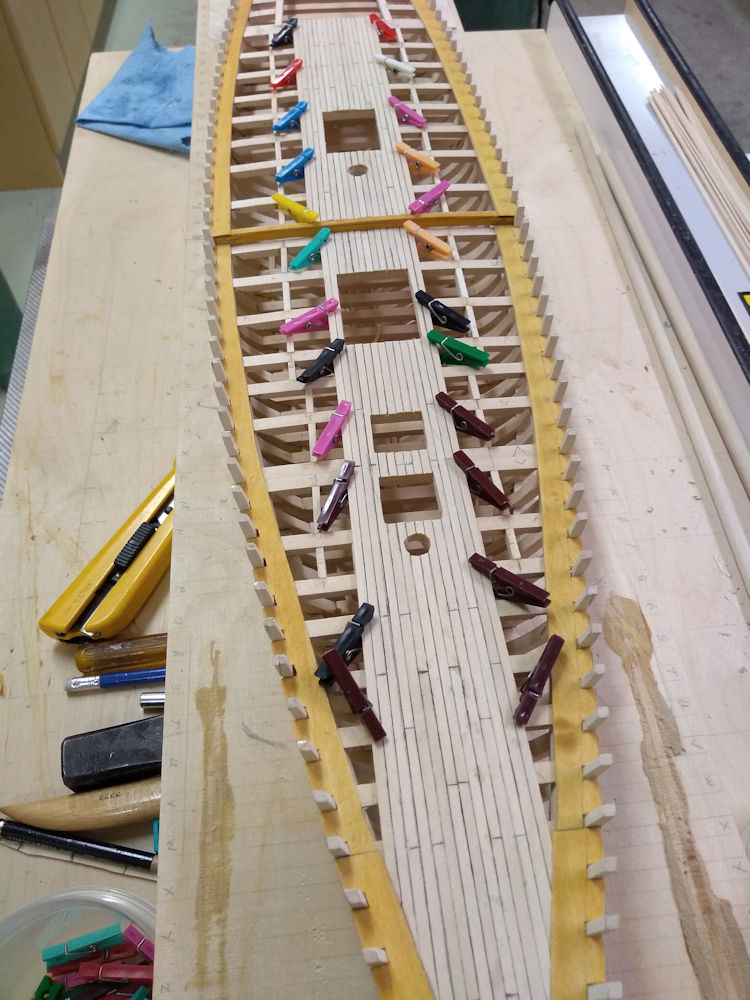
Main Deck Beams, Openings, Carlings (Bodnar, page 58-61)
Basically following the instructions. Due to difficulty obtaining the correct size wood I used the best size I had. See pictures 44 and 47.
While locating the deck openings using sheets 2 and 3 I had an unpleasant surprise. I didn't have enough space between frame C and the fore mast, so I moved the fore mast step from between frame O and P to frame P.
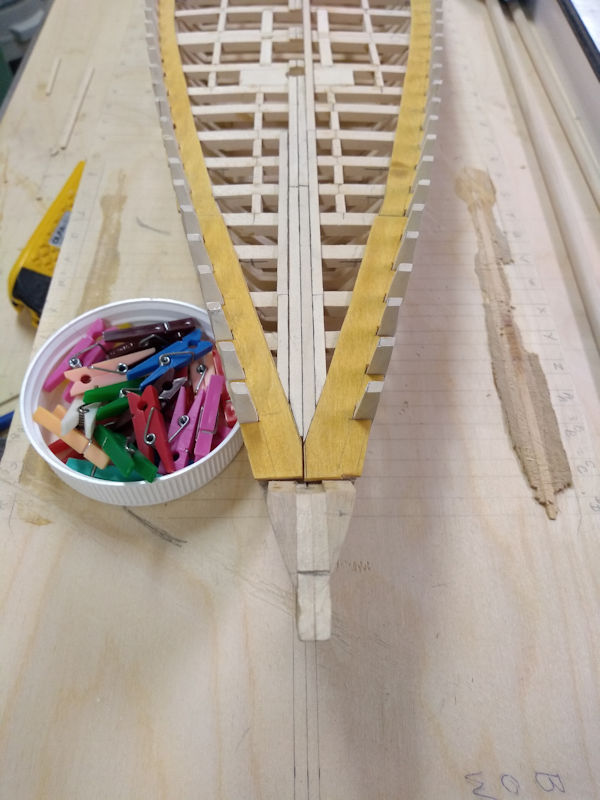
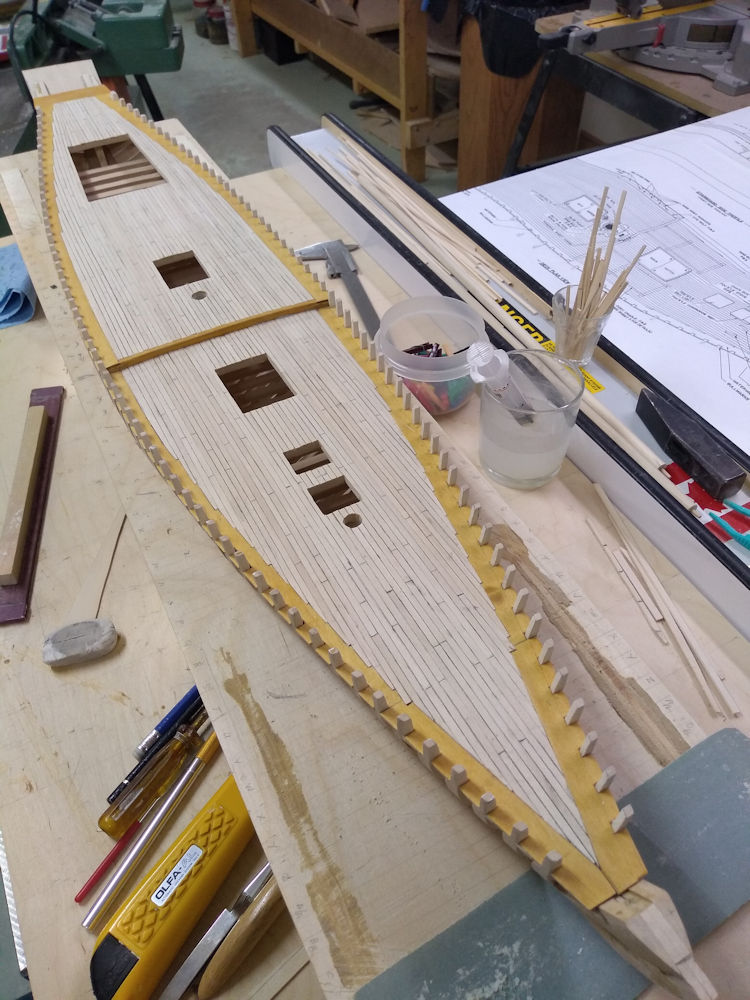
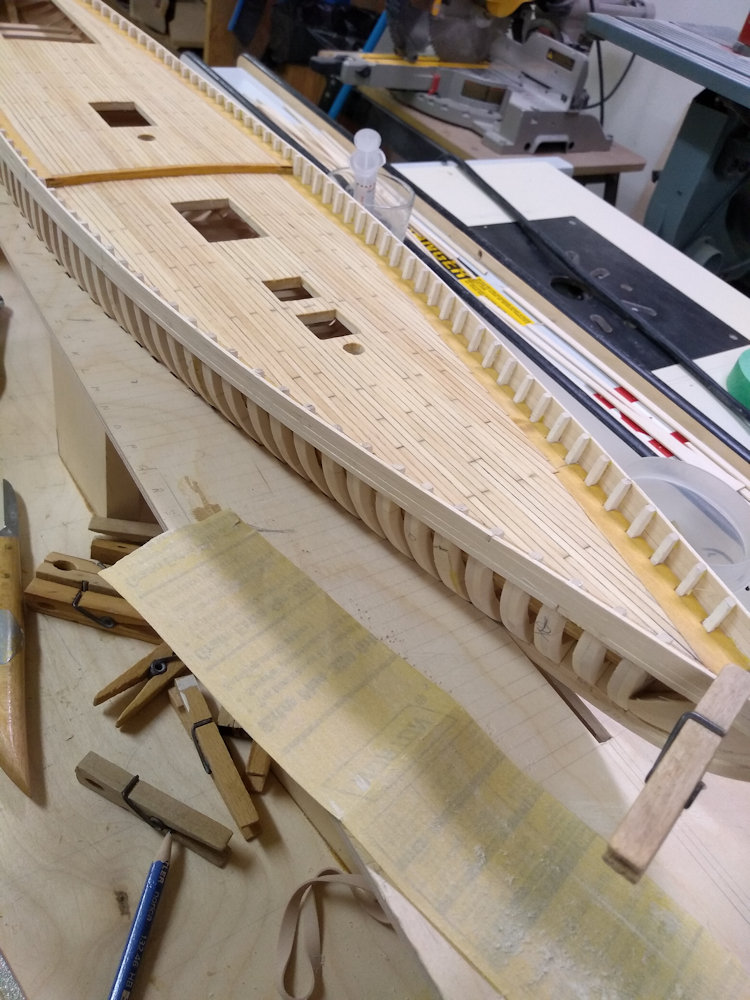
I made the strakes wide enough to cover the area between the stanchion also. Transferred the location of the stanchions onto the strakes and cut out the slots for the stanchions. Secondly, I did not do the nibbing as I felt that it would be very difficult to have a deck plank fit into the nibbing. Instead I glued the strakes in place. When doing the deck planking I would cut away the nibbing as needed for that particular deck plank. By the way, I used WATCO Danish Oil Finish Golden Oak for the strakes.
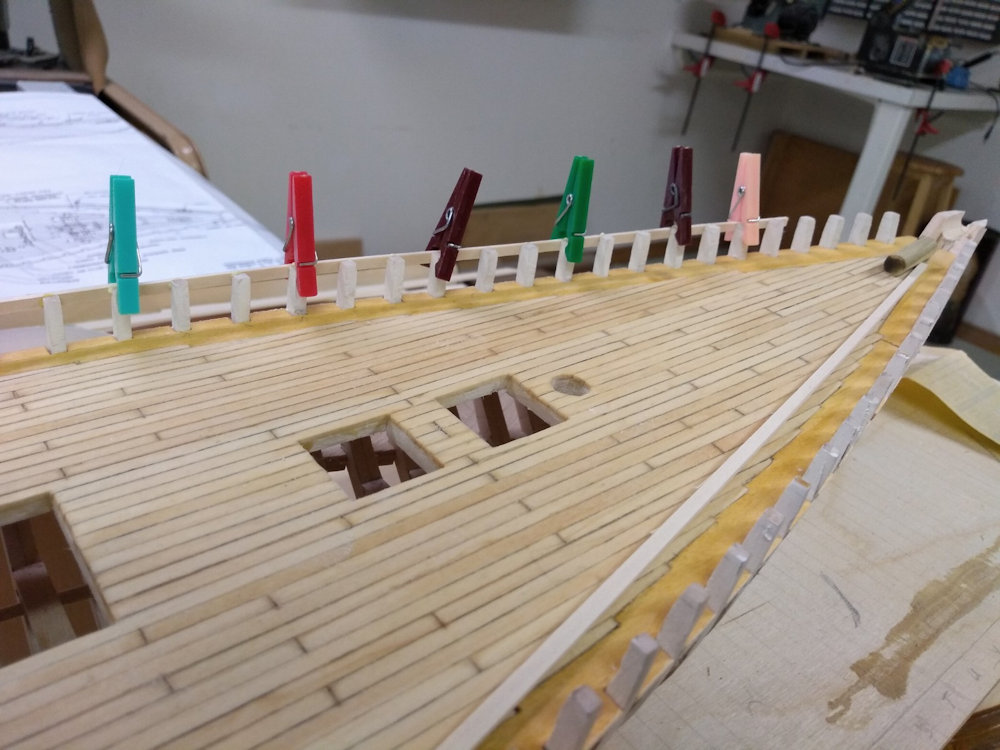
I cut the deck planks from 1/16" thick 12" by 4" sheets. Deck planks are suppose to be not longer than 4". I soon discover that gluing deck planks up to 12" is much easier. After the glue is dry use a knife to mark where the butt joins should be and darken the groove. Used WATCO Danish Oil Finish Natural.
Rails, Main, Buffalo, Monkey (Bodnar, page 66)
Before planking the Bluenose hull it pays off to familiarize yourself with the various techniques. See under Resources Simple Hull Planking Techniques for Beginners.
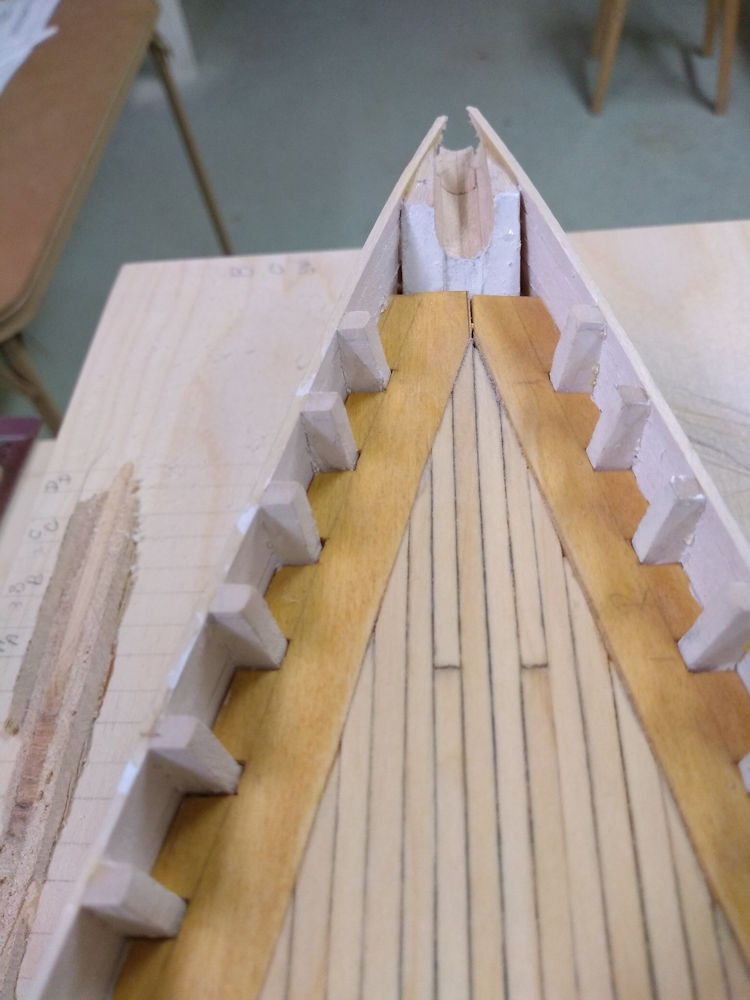
Bodnar did not go into any details, but make sure that you have a slot in the bow for the bow sprit. Secondly, finish the transom enough so that you can glue the hull planks to the transom. Let the the planks stick out towards the rear. See pictures 57 and 58.
As I decide to plank the whole hull I start obviously with the top 4 strakes. Followed the instructions. I left the ship in the framing jig which makes everything so much simpler. See pictures 59 to 65.
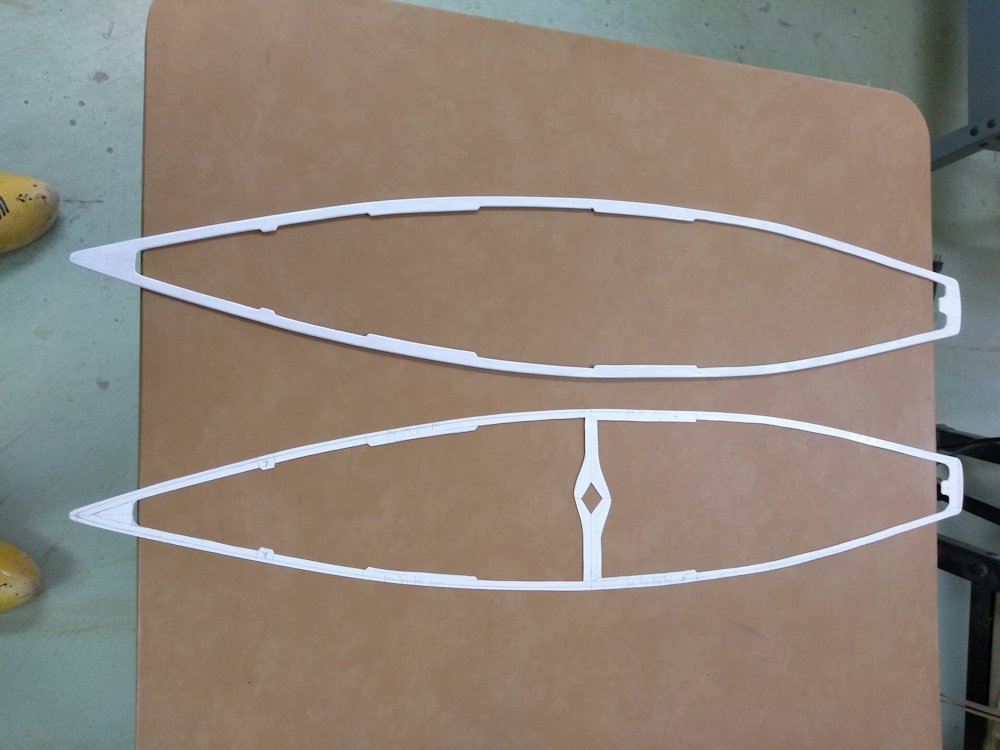
I then decide to turn the schip upside down and traced the outline in a sheet of light cardboard. Made a true template for the main rail and traced the template on four pieces of wood and cut that out. Glued the two rear piece together, did the same with the two front piece. Finally glued the back and front pieces together and painted it white. See pictures 66 and 67.
Planking the Hull (Bodnar, page 69)
I made the garboard above the kneel and continue doing the hull strakes from the top down and the keel up. BUT NOT PASSED THE WATERLINE. Why observing the waterline? Well, to be able to install the main rail in one go and being able to clamp it to hull while it is in the framing jig. See pictures 68 and 69.
To save time I did use long planks as the hull is painted black, so nobody will see it.
The top of the hull has 11 strakes and that was just above the waterline. There were 5 strakes above the keel. The top strakes were then sanded.
After the main, buffalo and monkey rails are installed the rest of the hull planking can be finished.
Rails, Main, Buffalo, Monkey (Bodnar, page 66)
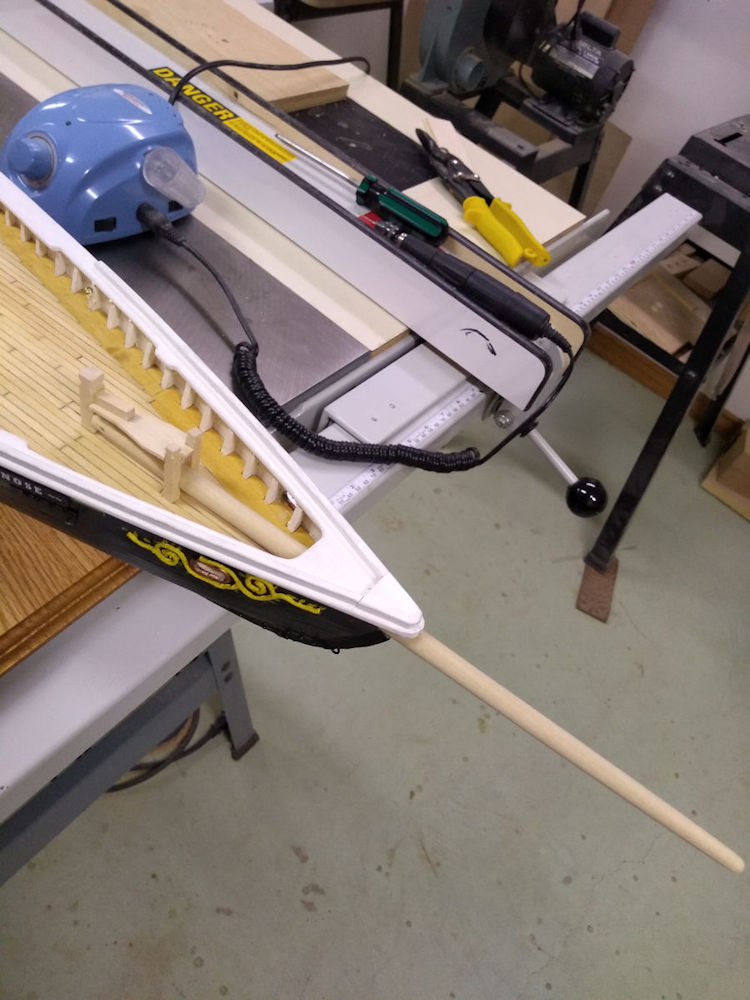
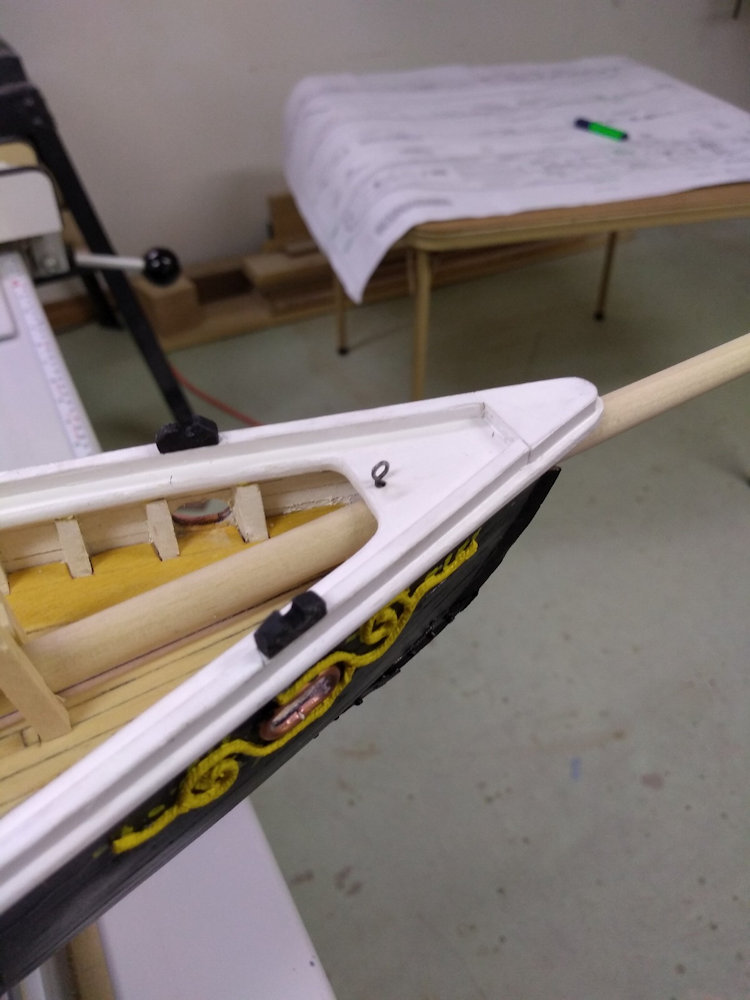
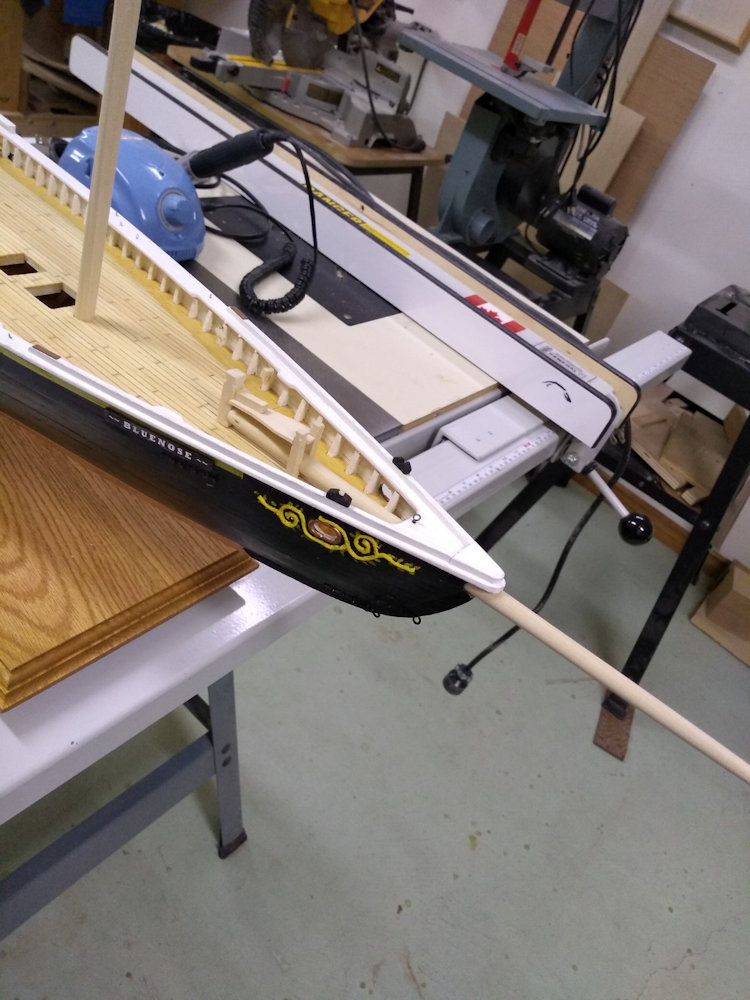
Before installing the railings it makes sense to create the opening for the bowsprit in the top of the bow.
Put the schip back in the framing jig. It was only then that I noticed that I had missed a widening of the main railing in the rear. Hence a fix was made; see picture 73.
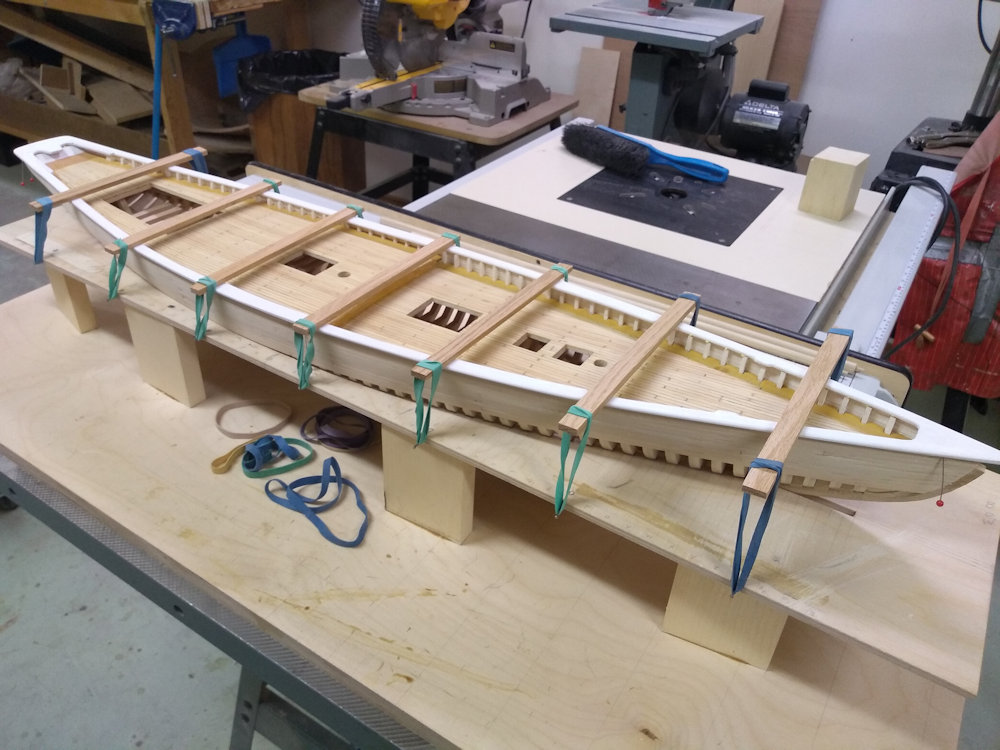
Next was gluing of the main railing to the hull. I used plastic head pins at the rear, middle and front to centre the main railing onto the hull. I had hammered nails on both sides of the framing jib at the waterline. I applied a drop of glue to each stanchion, the transom and the bow. Carefully positioned the main railing on the hull. Placed a piece of wood in the middle of the main railing and secured it with two rubber bands to the nails on the side of the framing jig. Repeated that with six more pieces of wood. See pictures 74 to 77.
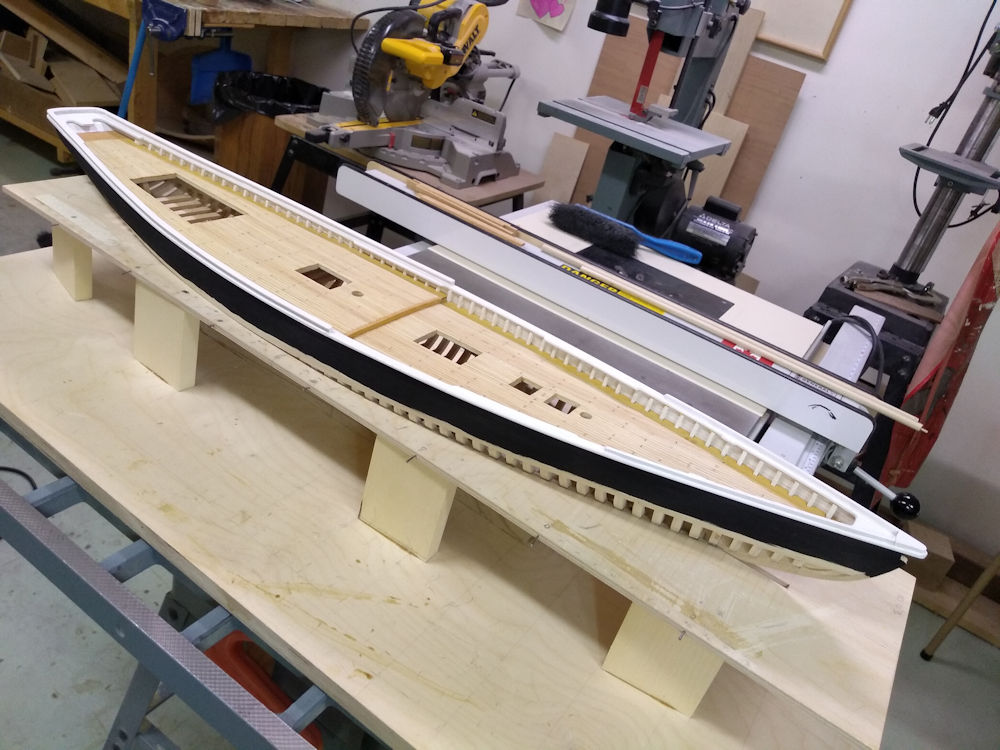
Next followed the instructions for the Buffalo and Monkey railings. Touched up the railings with white paint. Paint the top strakes black and create the scruppers, fish gurry sluices and hawse holes. See pictures 78 to 85.
Finally finish the planking of the hull. Followed with sanding the hull.
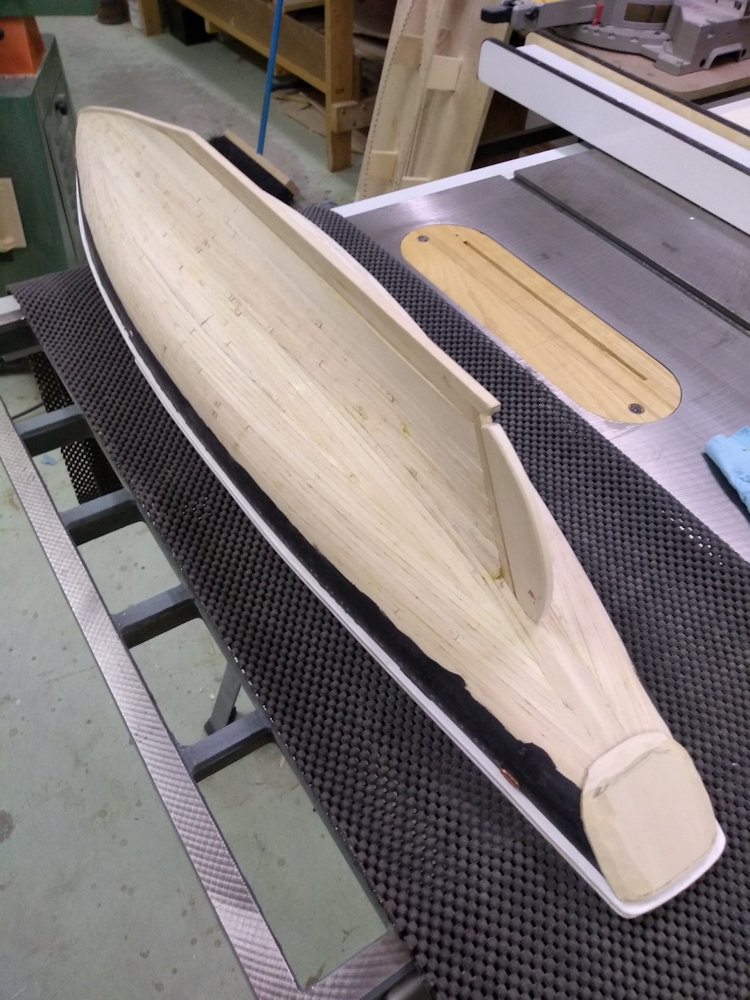
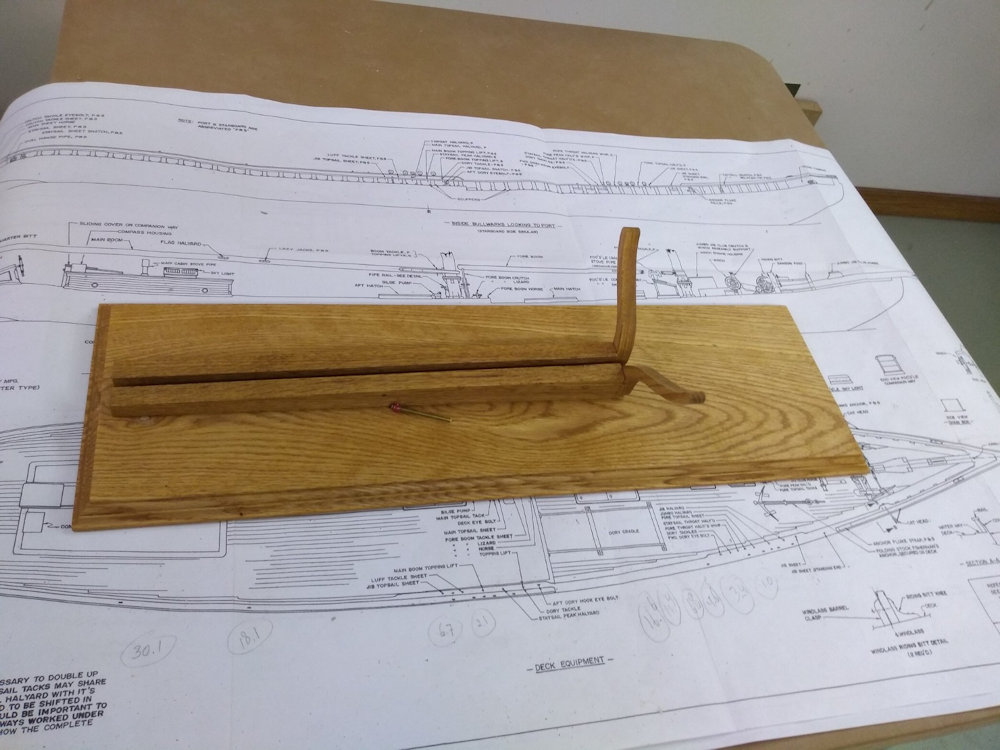
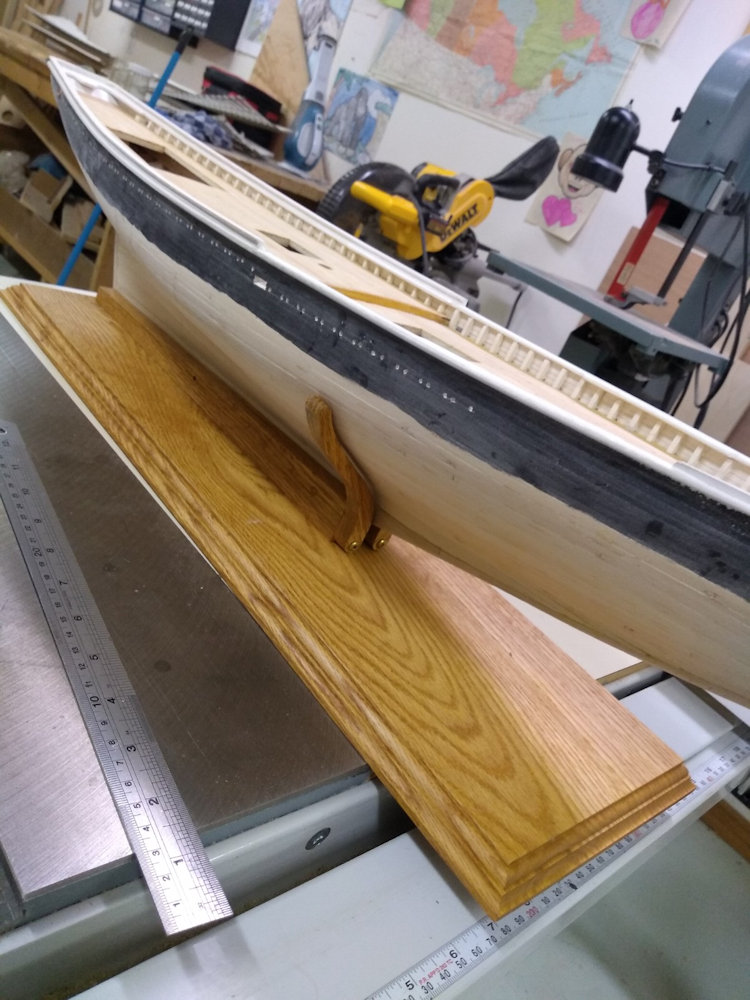
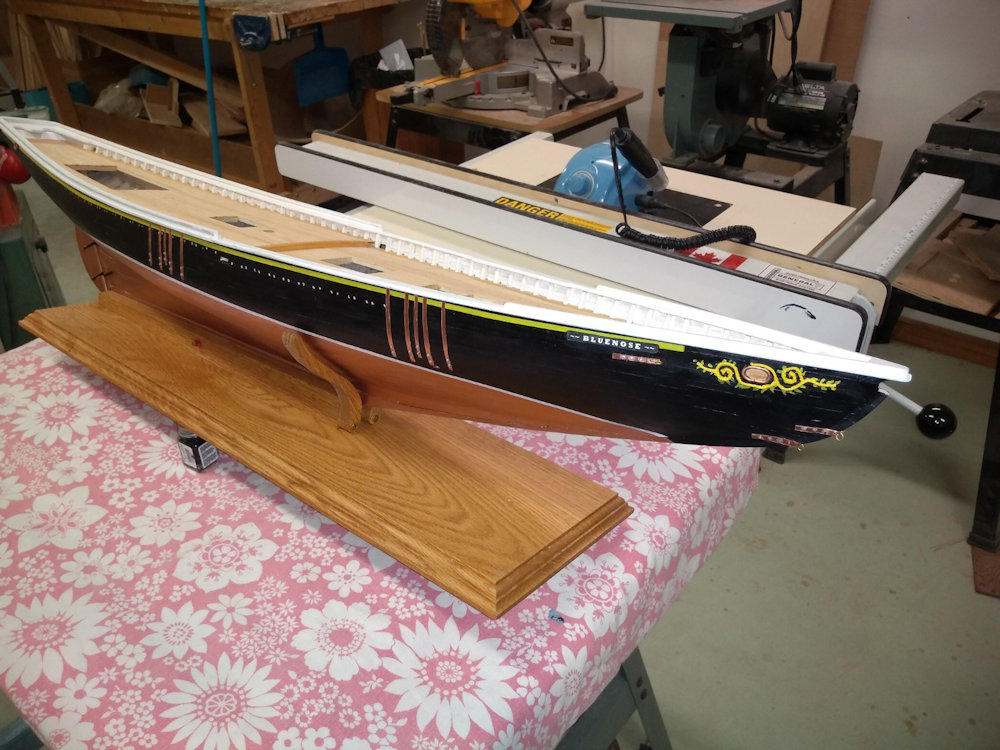
At this point make a display stand. I have plenty of leftover red oak. Select a piece for a nice baseboard. Used the example of the slip of the framing jig to support the keel. Used the outside of the "H" frame to give Bluenose sufficient support.
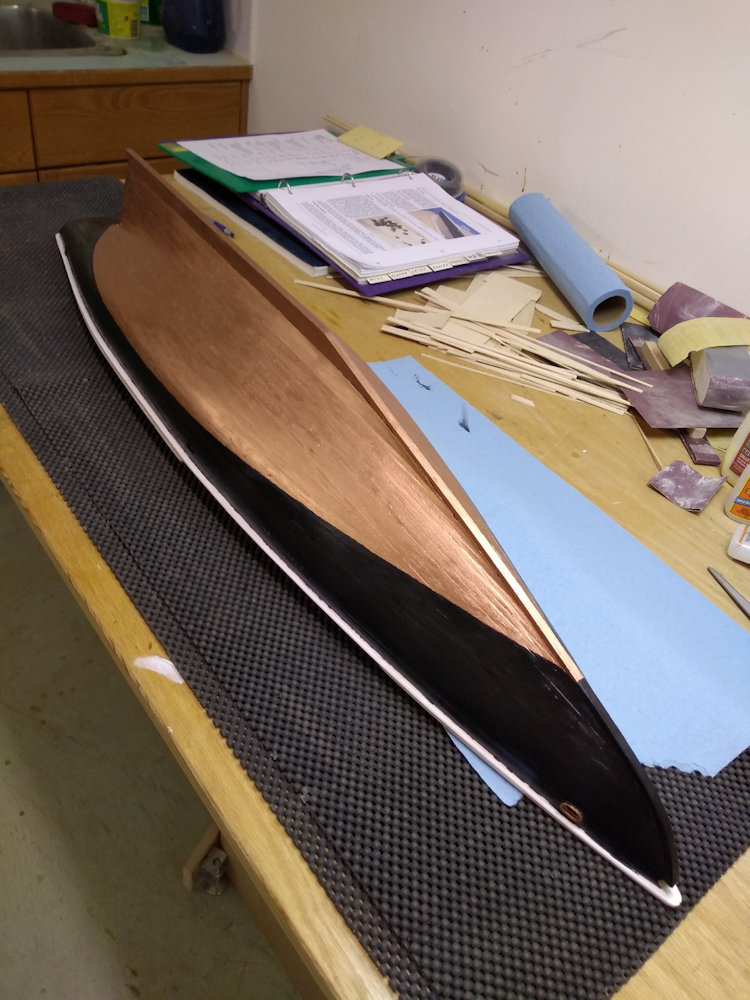
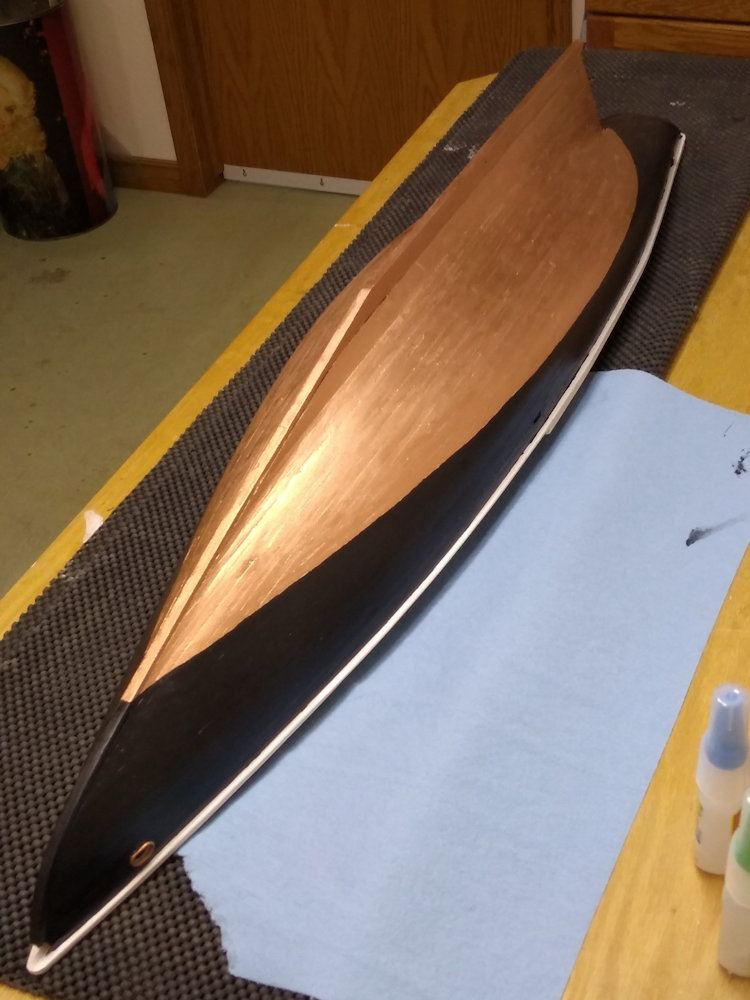
The Exterior Hull (Bodnar, page 69)
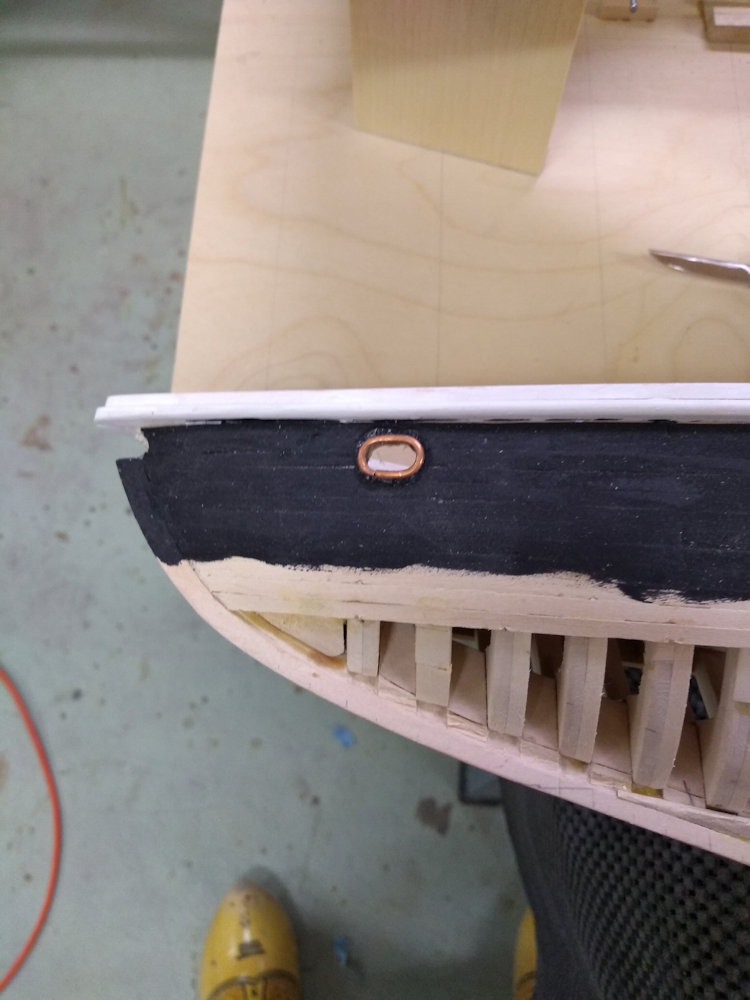
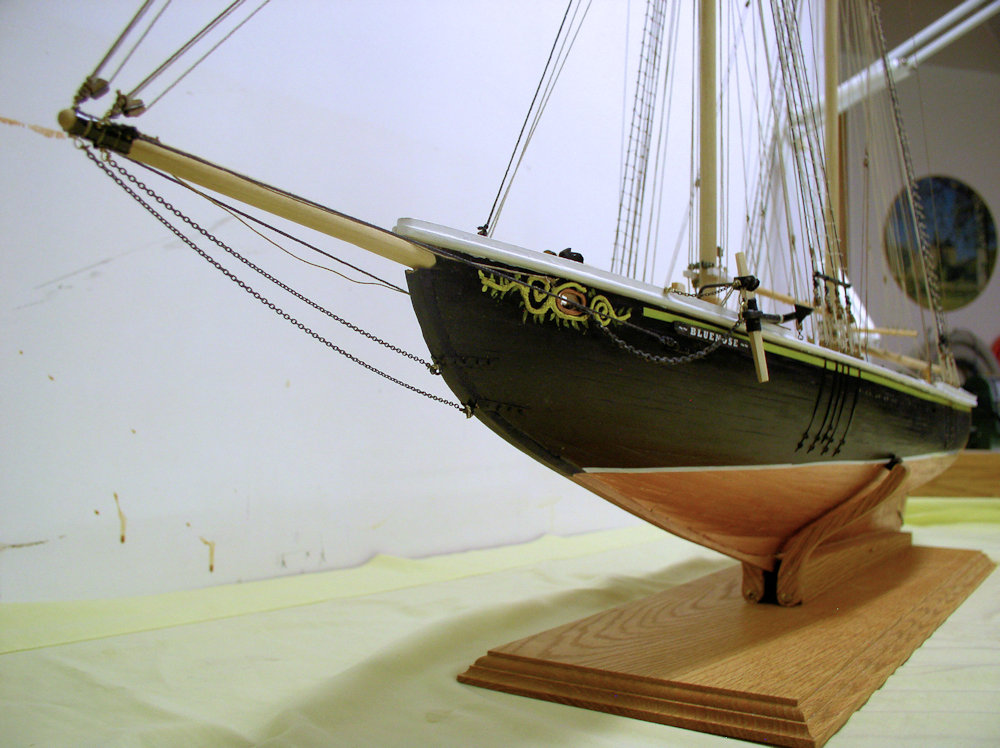
Follow the instructions for Scruppers, Marking Waterline, Installing Hawse Holes, Creating Scroll Decorations at the Bow, Cove Molding (pin stripes), Name Plate, Fish Gurry Sluice, Dead Eyes (not done at this point due to supply problems), Chain Plates, Rudder, Bowsprit Shroud Plates, and Bobstay Plates. See pictures 86 to 107.
This completed the whole hull after almost 360 hours of modeling.
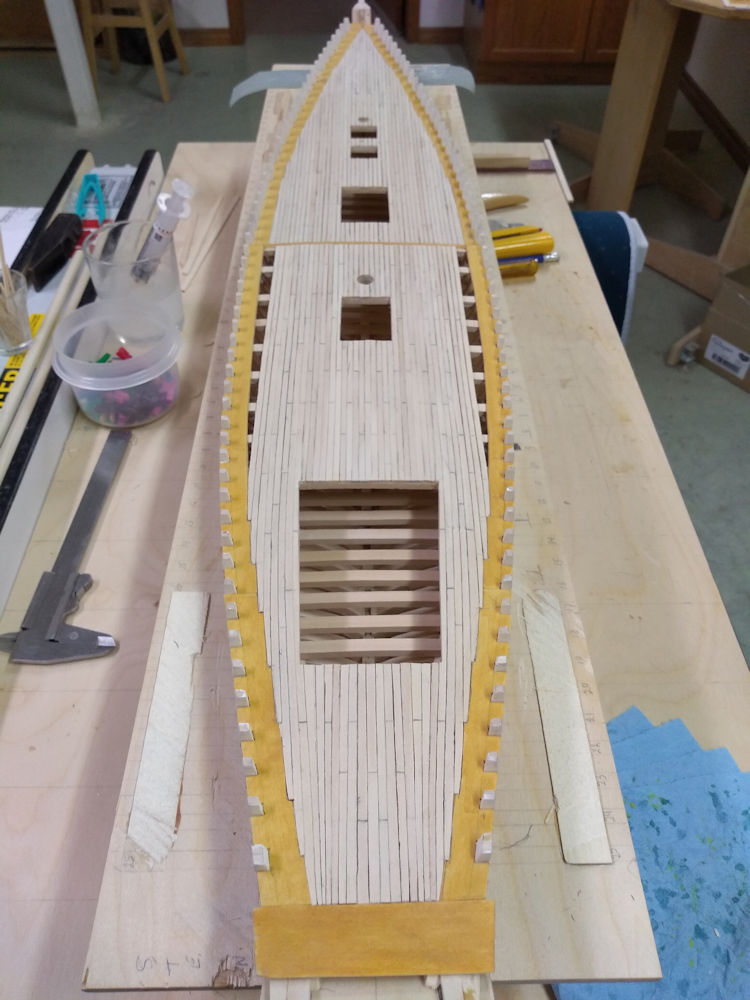
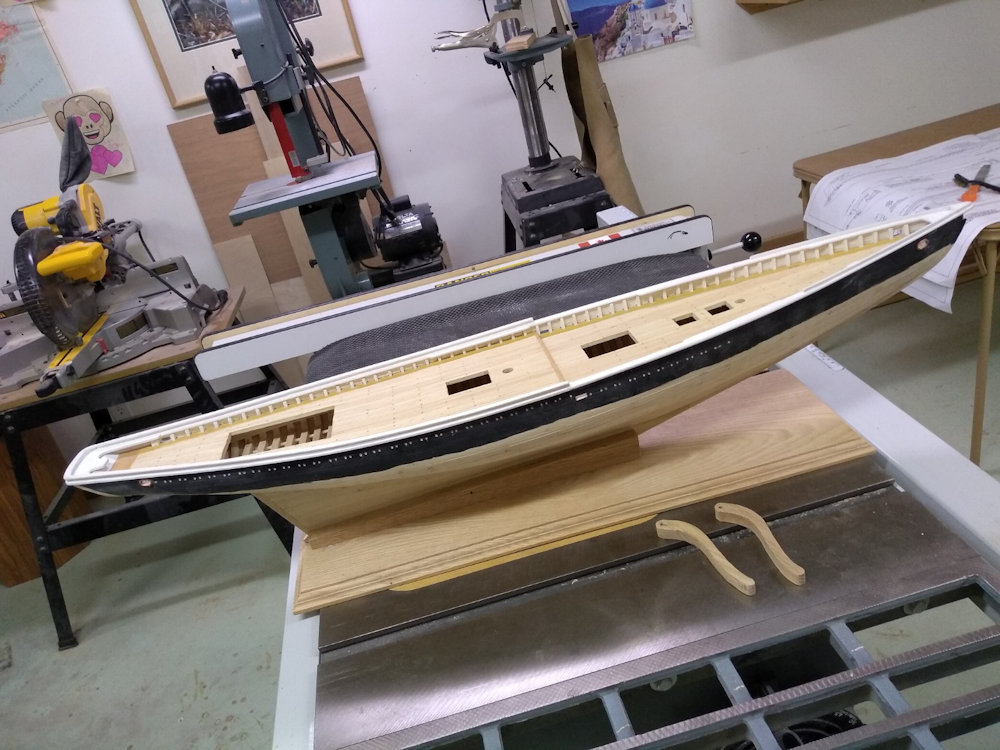
Deck Fittings (Bodnar, page 74)
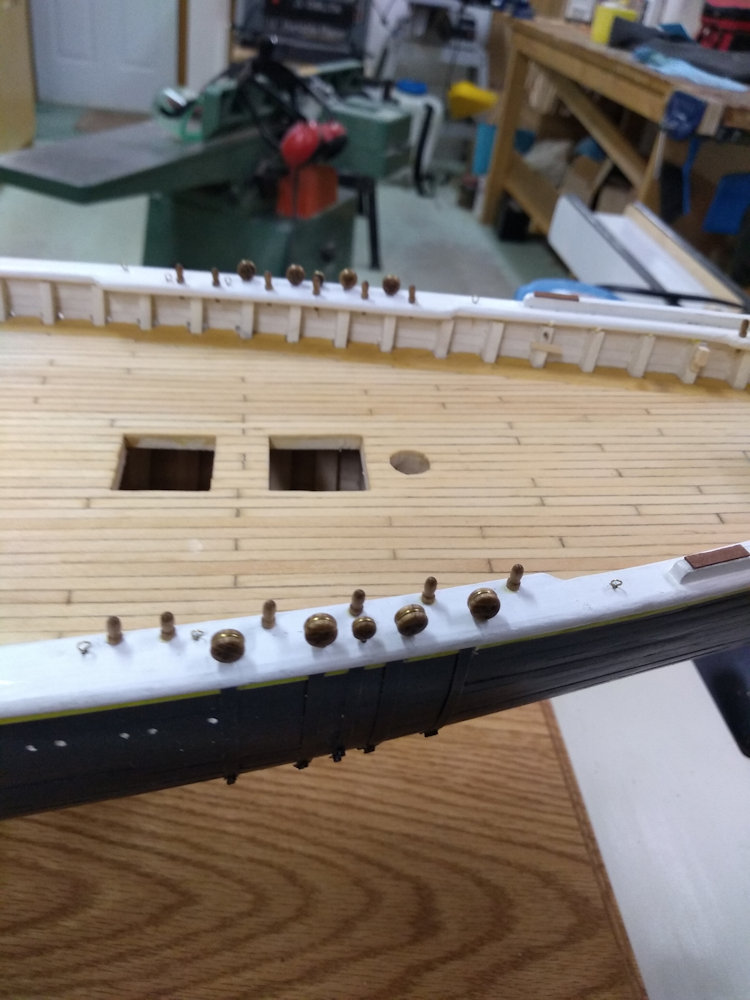
You may have noticed that there are openings in de deck for Foc's'le Companionway, Foc's'le Skylight, Main Hatch, Aft Hatch and Main Cabin. The idea is that those structures can be removed so that you can have a peek into the interior of the hull. Each of these structures have a base that covers the opening. Under the base is a diagonal ¼"x¼" piece of wood that fit precisely diagonally in the opening.
The Hatches and Dory Cradles require eyebolts with rings. The instructions for the Main Hatch explains how to make those (Bodnar, page 81). I find that too difficult to make. I wrap 28 gauge wire around a 1/16" nail and let the wire ends overlap a bit, like a keychain ring. Then put the wire for the eyebolt throught the ring and twist the ends of the eyebolt.
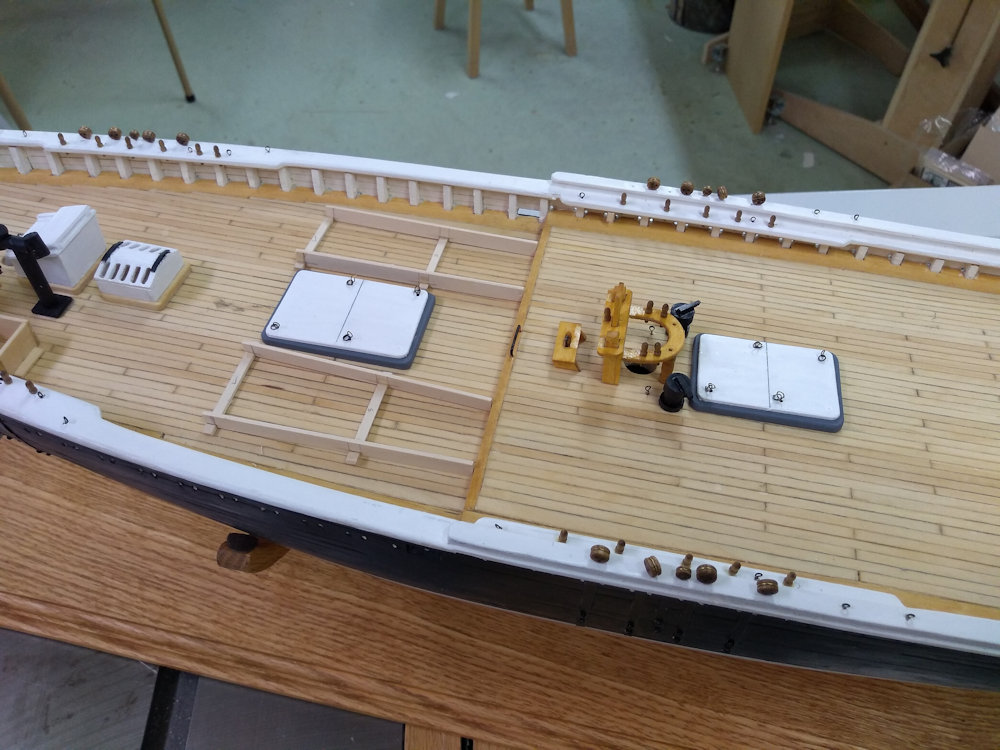
Basically following the instructions for front deck structures. (Bodnar, page 77)
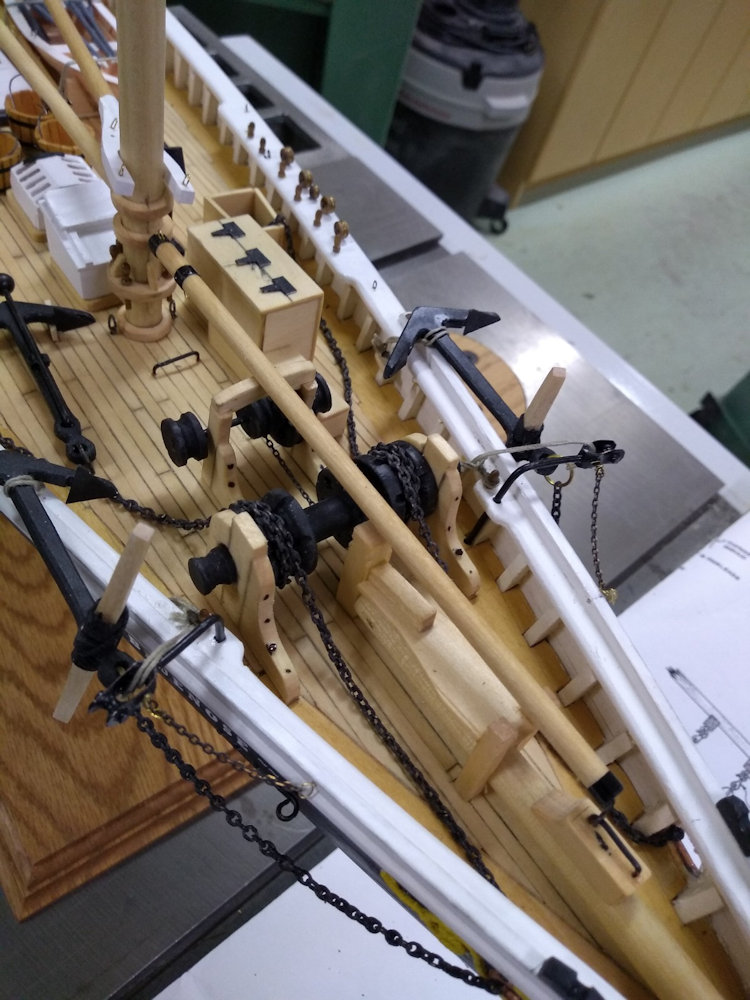
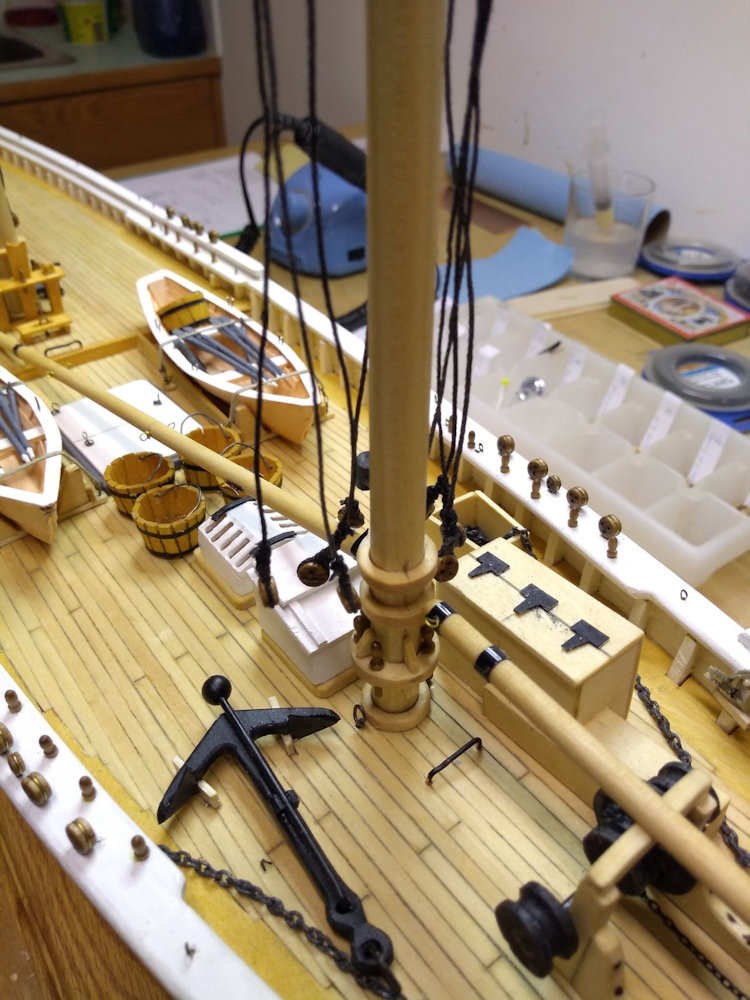
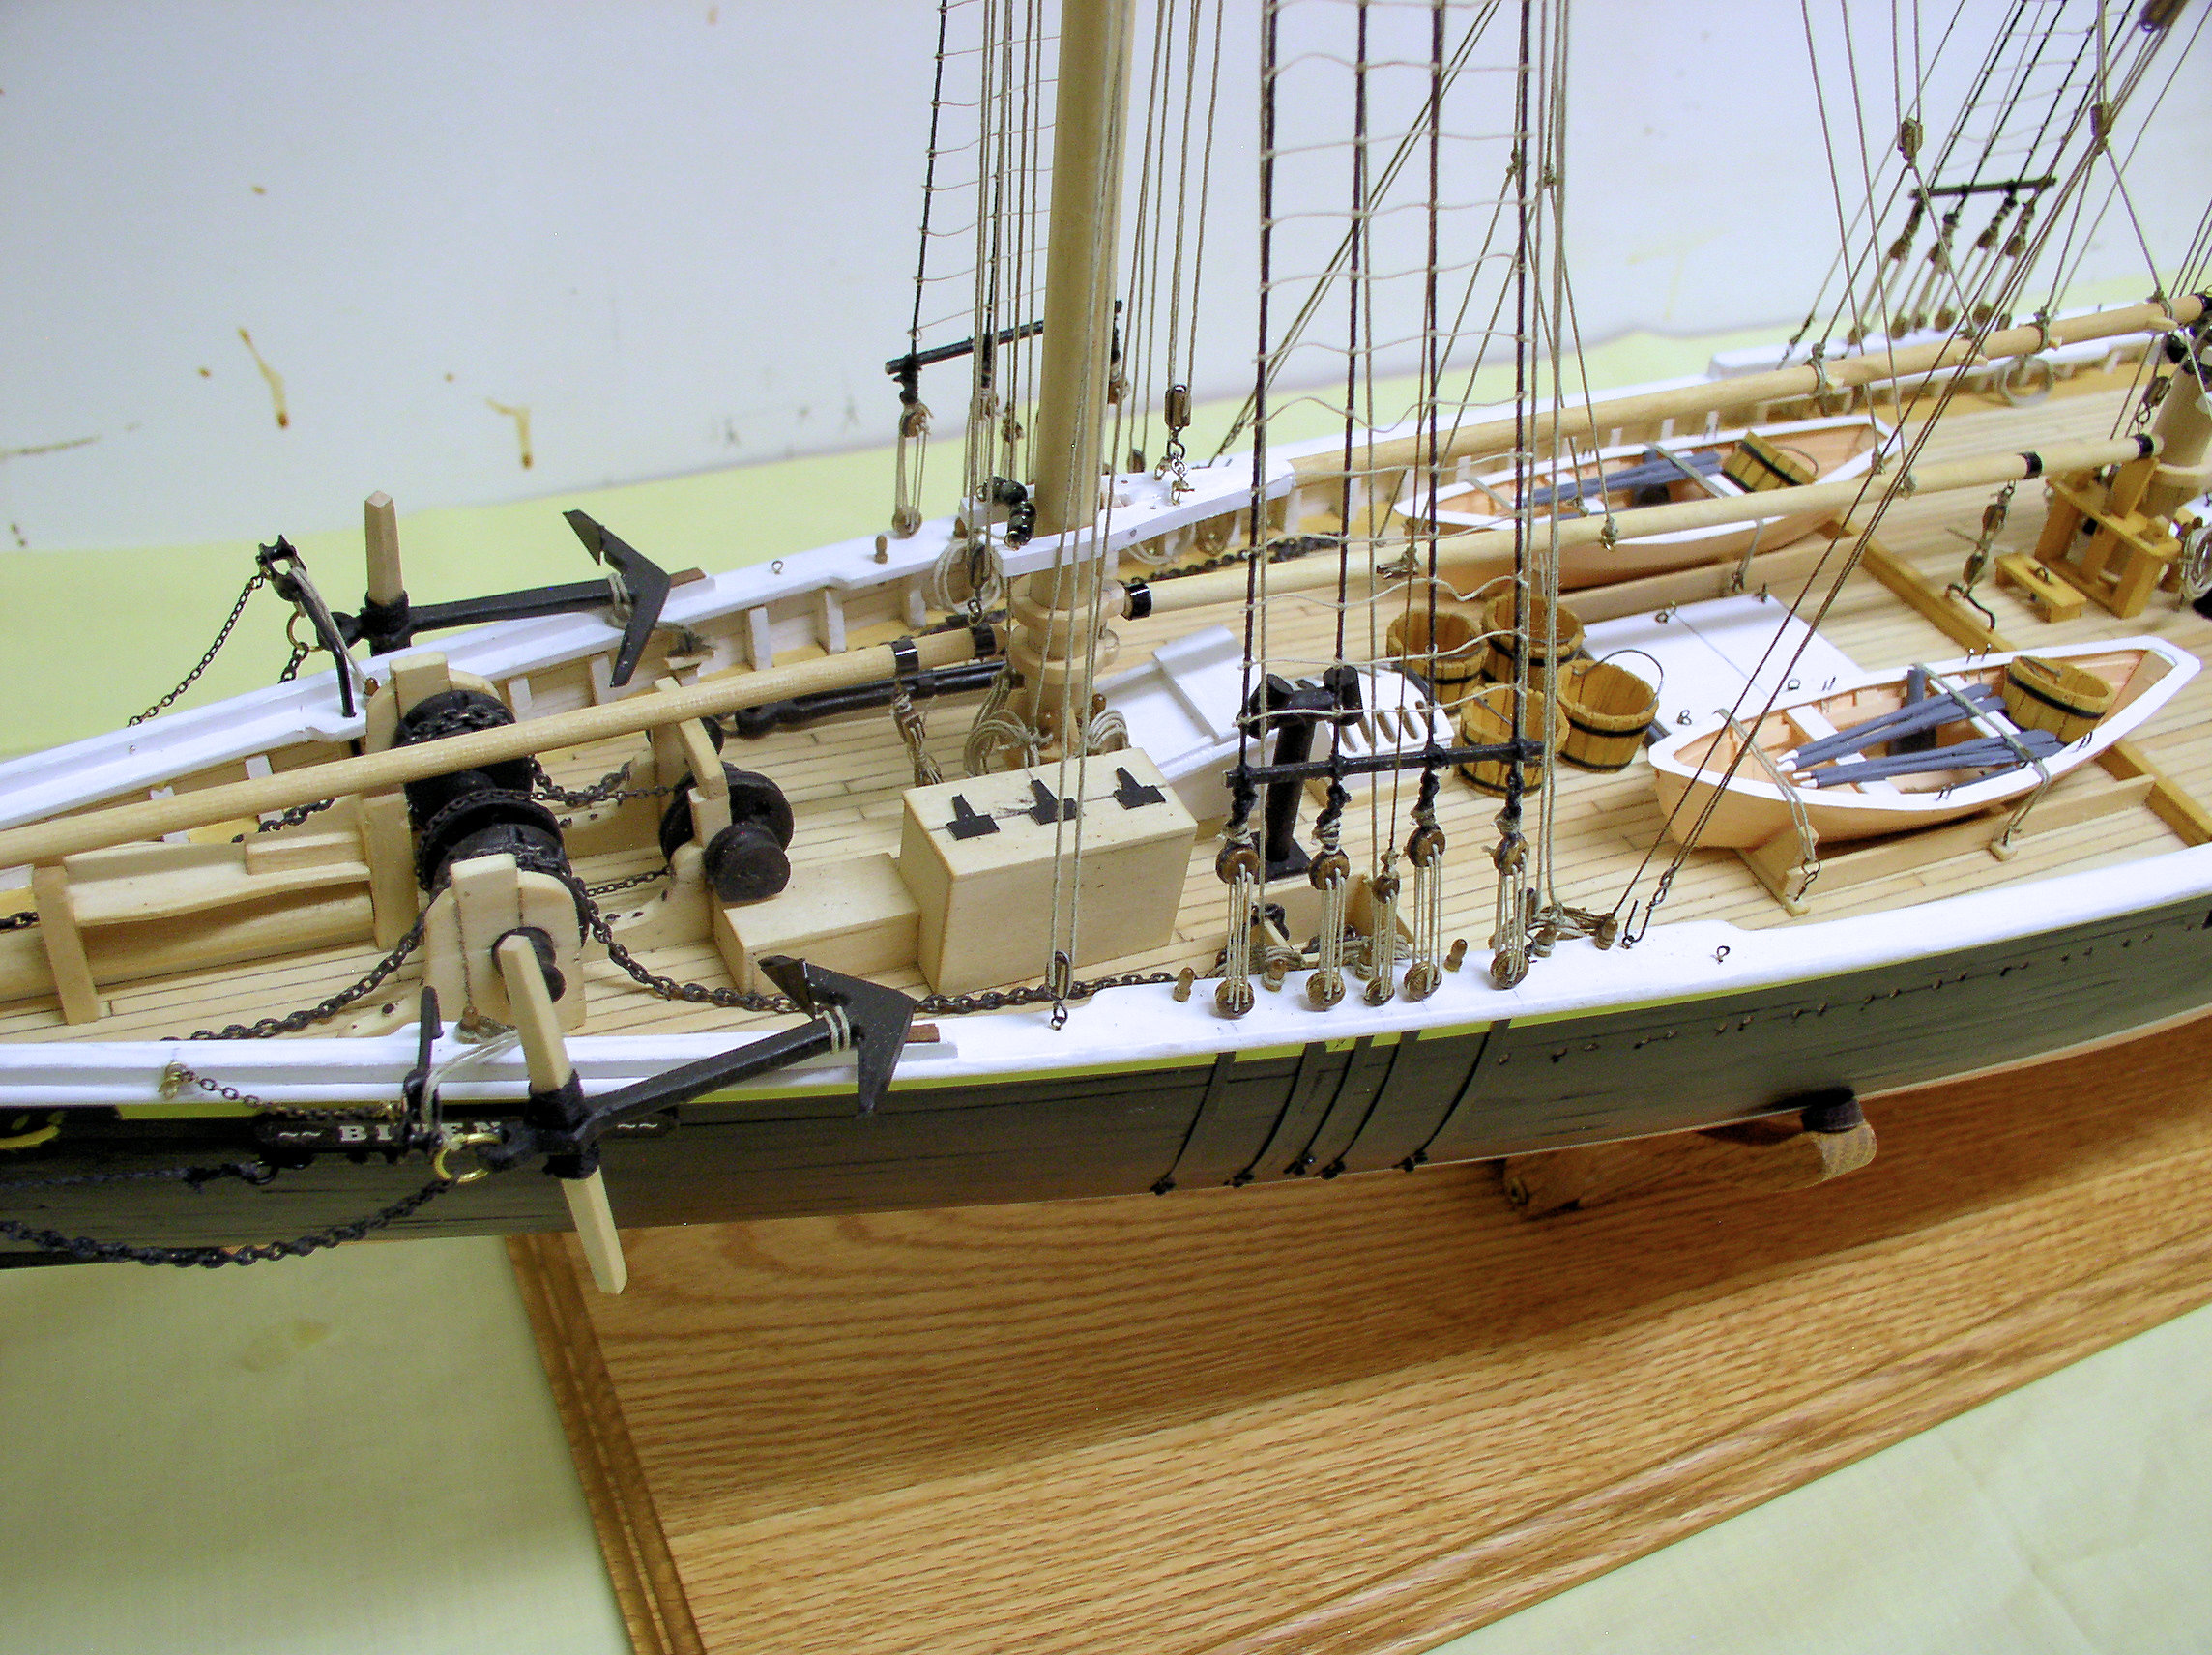
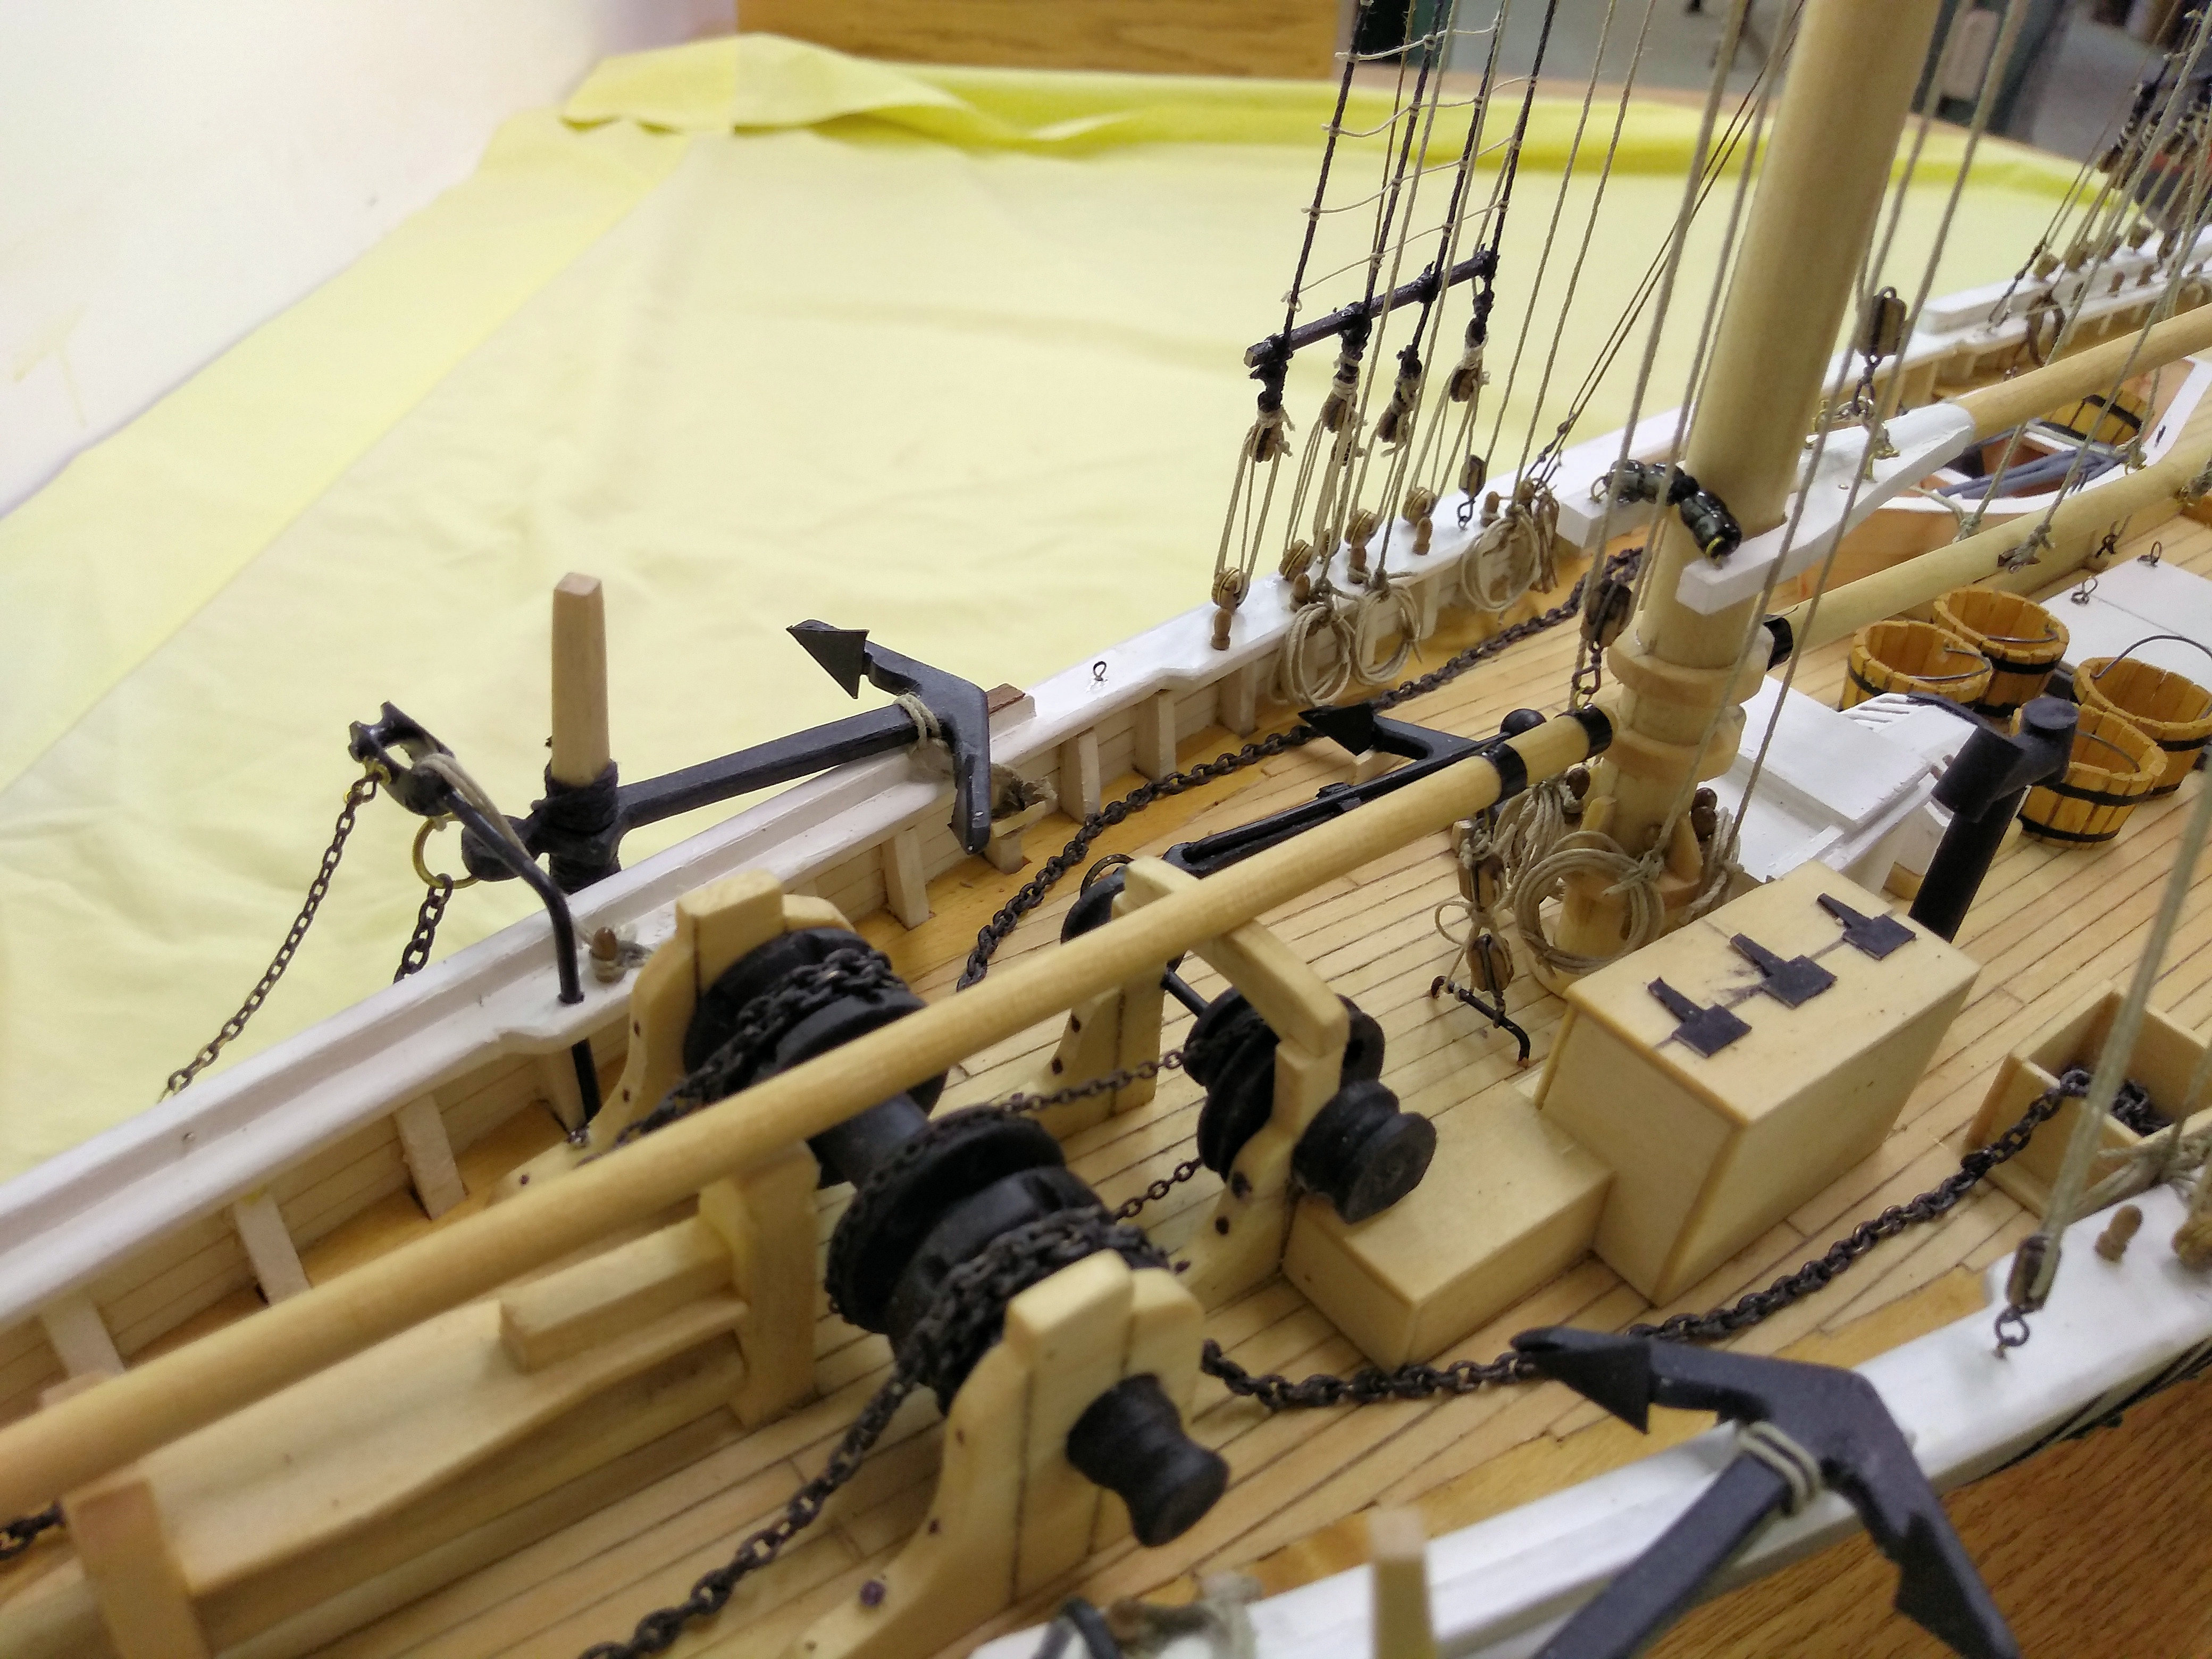
Install eyebolts, belaying pins, snatches, chocks and anchor fluke falls.
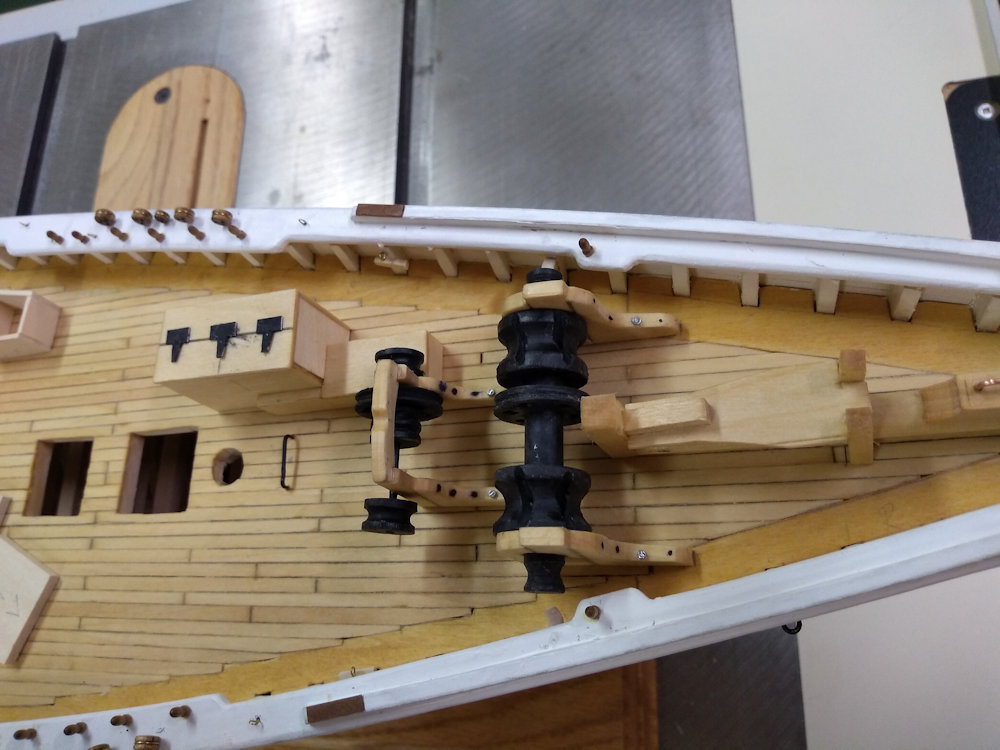
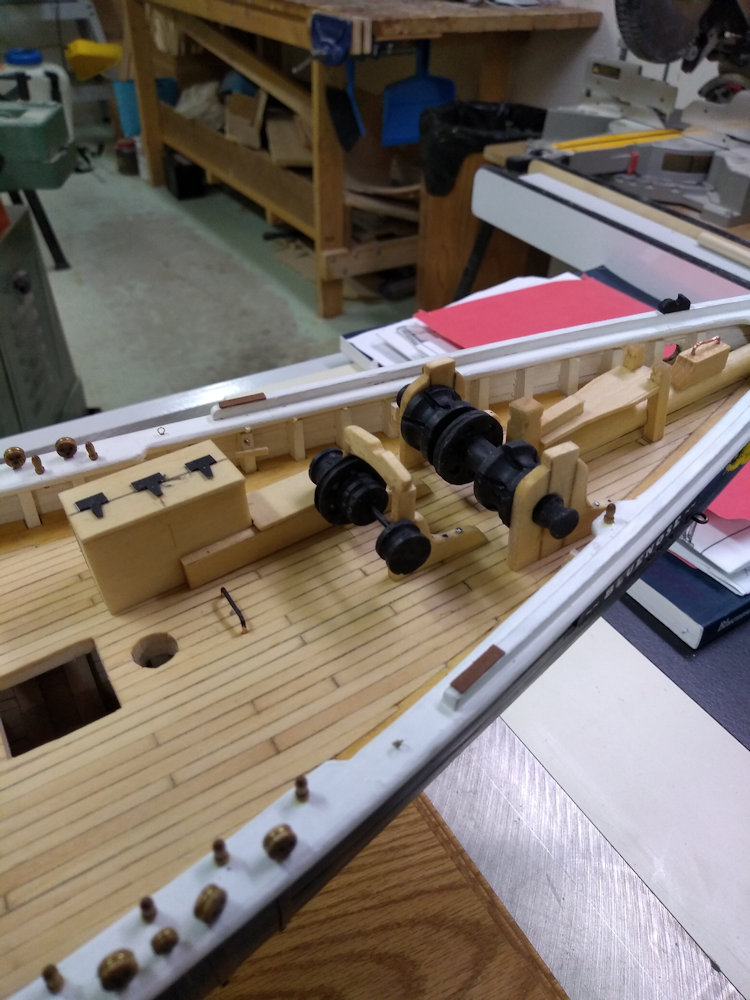
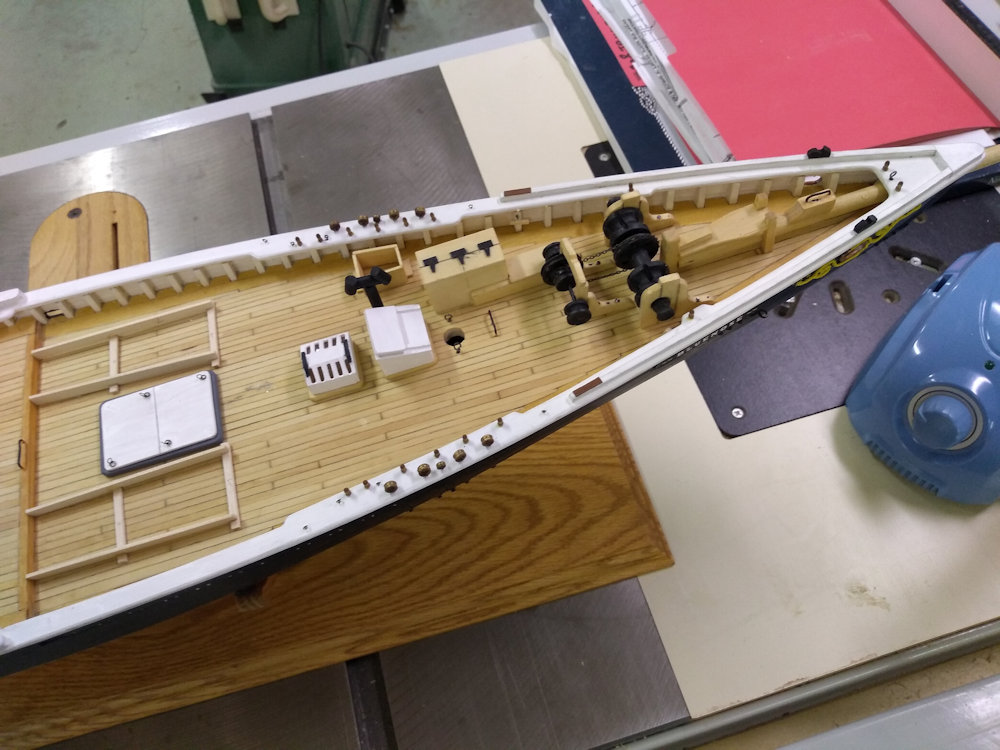
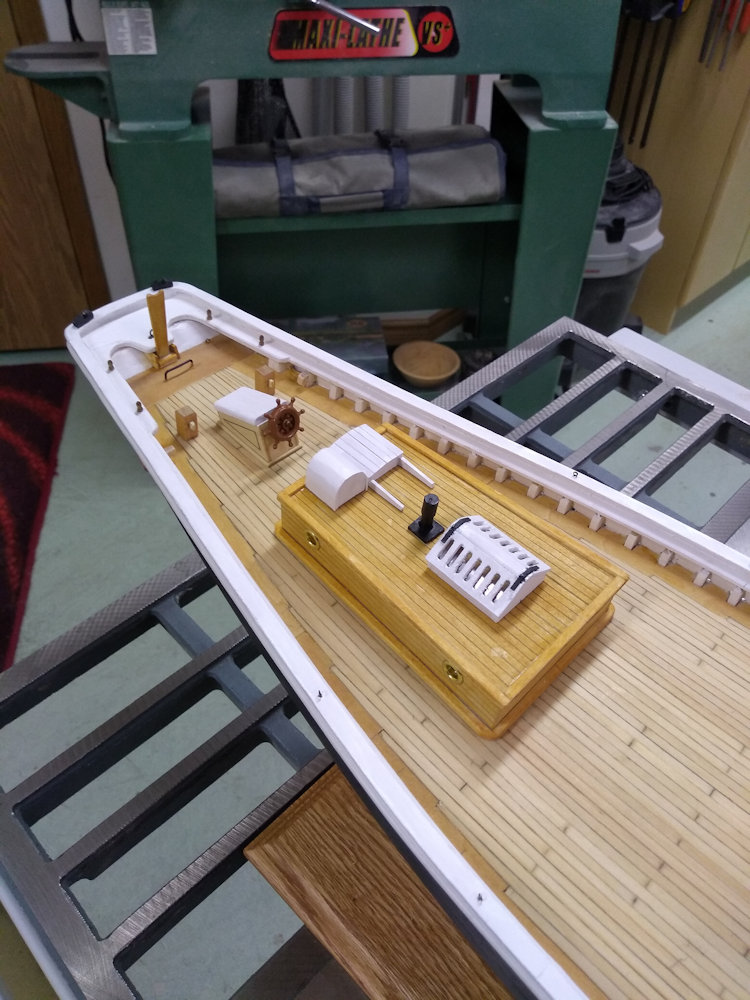
Install Windlass, Winch Support, Winch Engine Housing and Chain Box. See pictures 114 and 115.
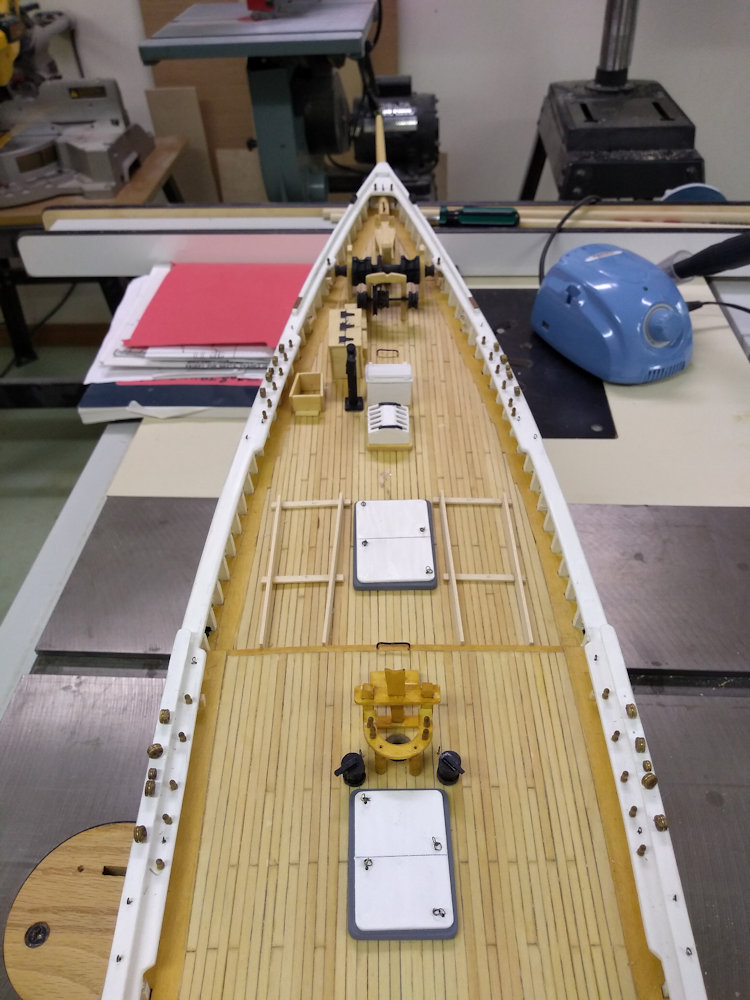
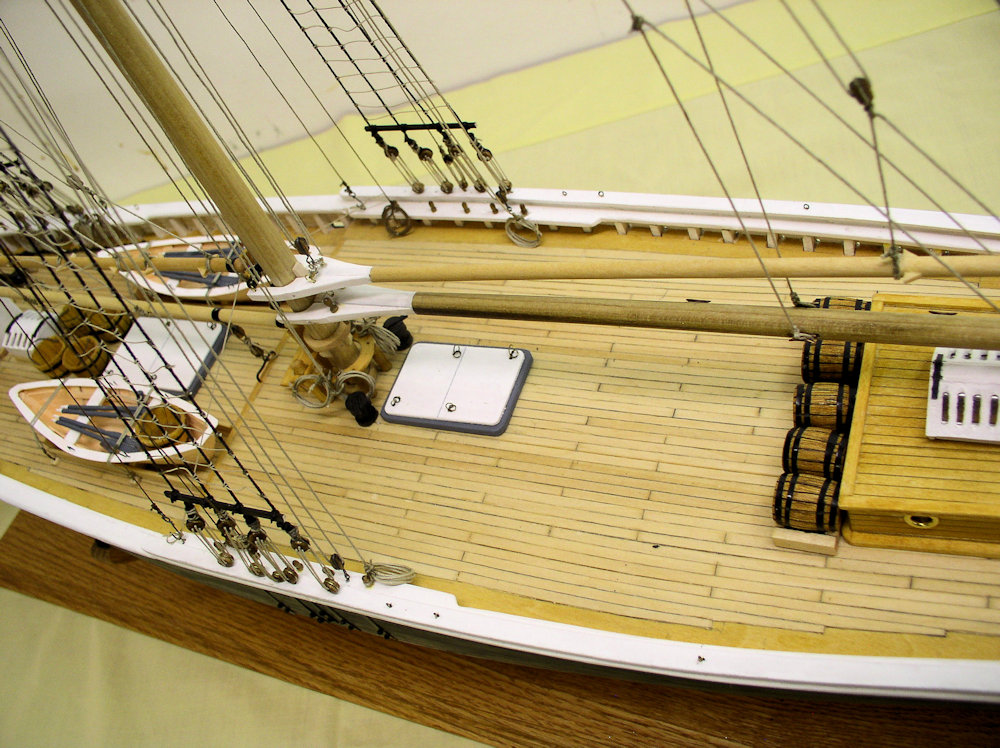
Install Foc's'le Companionway, Jumbo Jib Club Horse and Eyebolts, Foc's'le Skylight, Main Hatch, Foc's'le Stove Pipe and Dory Cradles. See pictures 116 to 118.
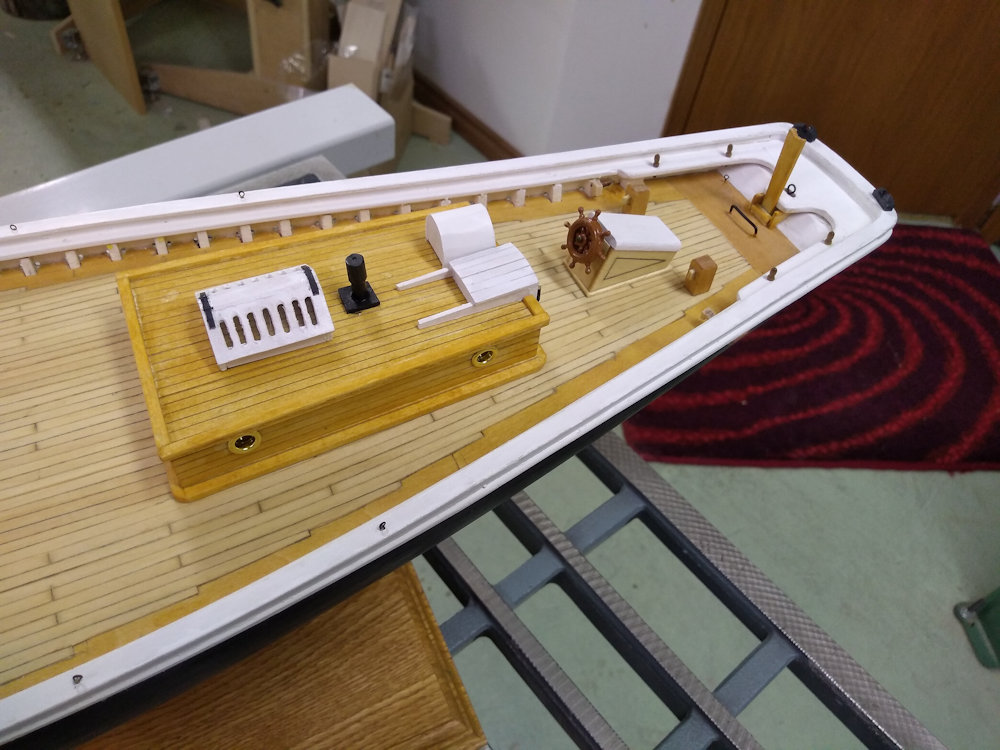
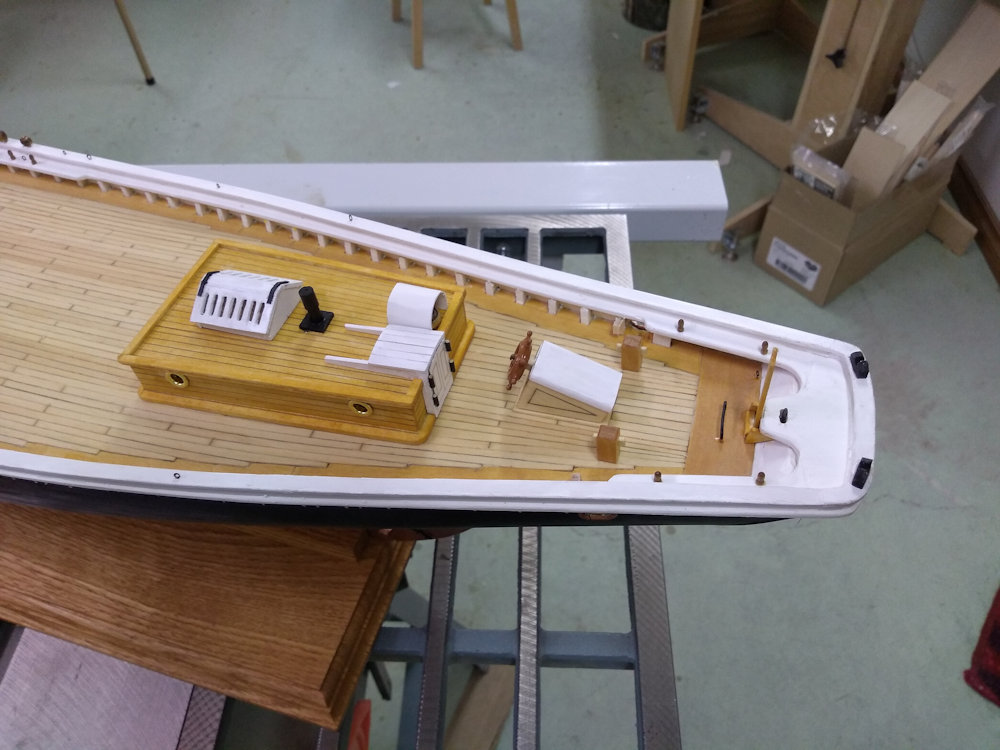
Basically following the instructions for rear deck structures. (Bodnar, page 82)
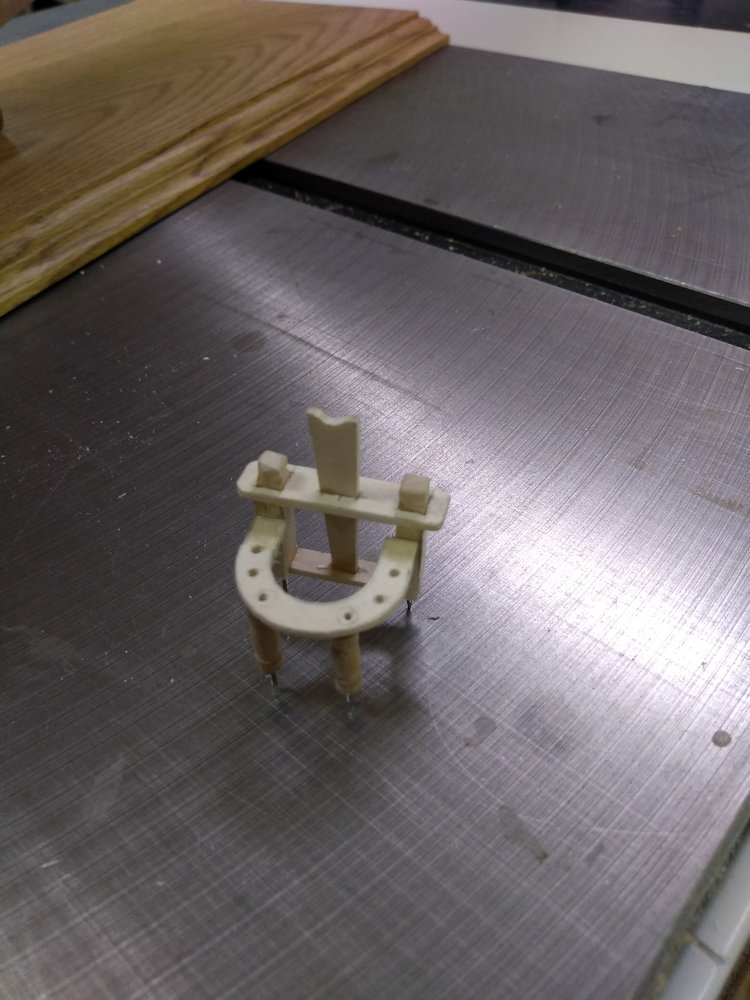
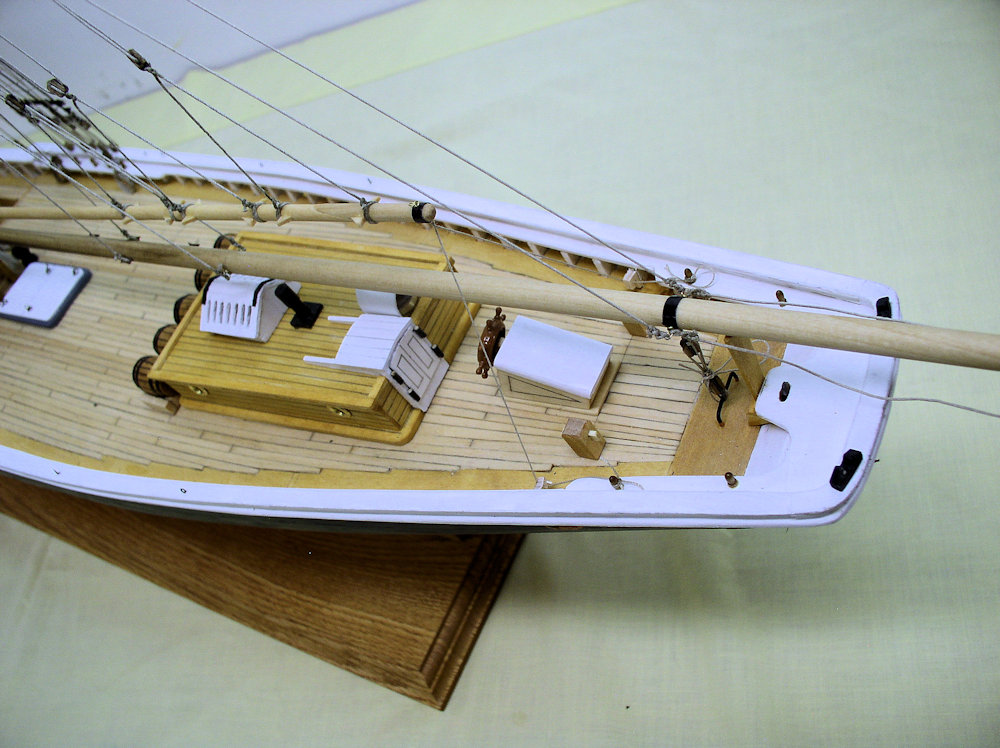
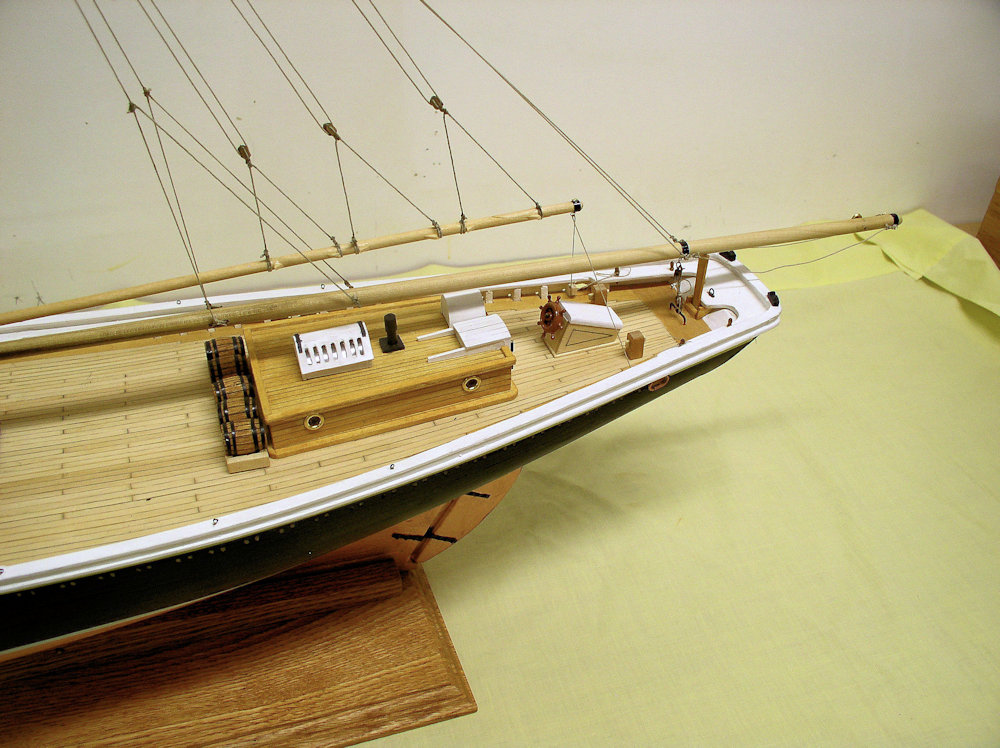
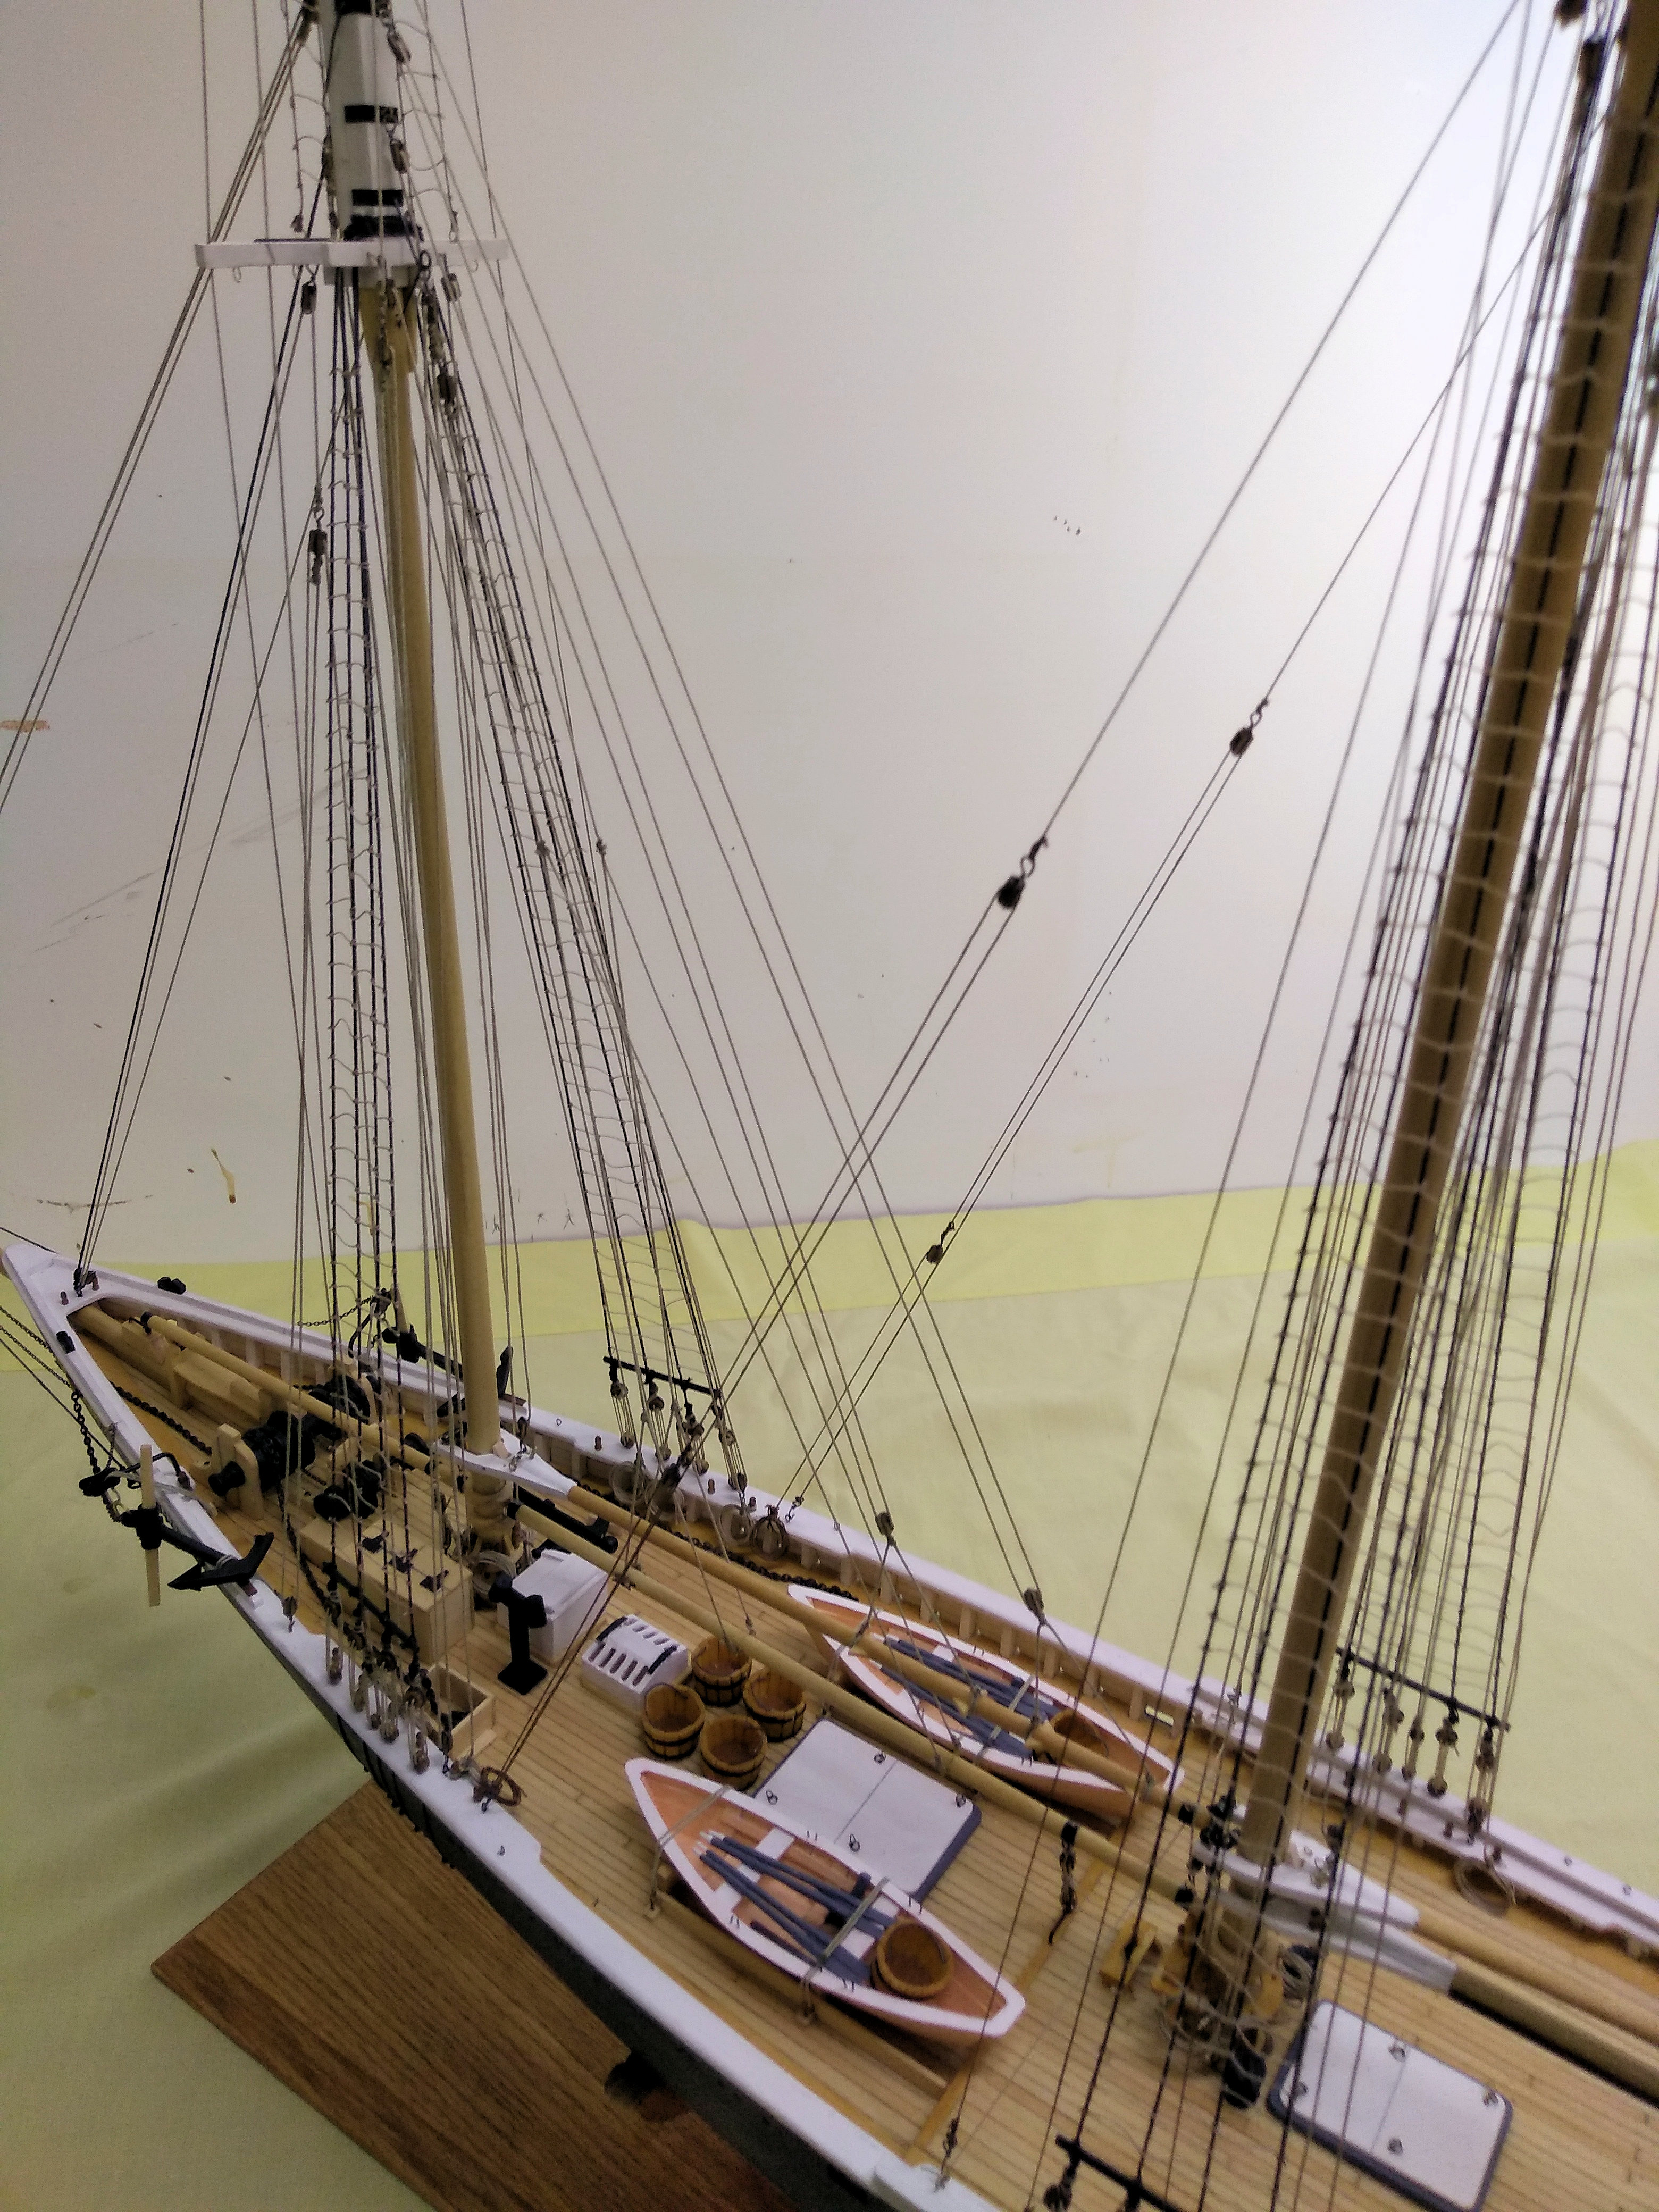
Mainmast Fife Rail, Fore Boom Horse, Fore Boom Lizard, Eyebolts, Bilge Pumps, Aft Hatch, Main Cabin, Steering Box and Ship's Wheel. See pictures 119 to 131.
The instructions for the two Main Sheet Bitts are missing (Bodnar, page 86)
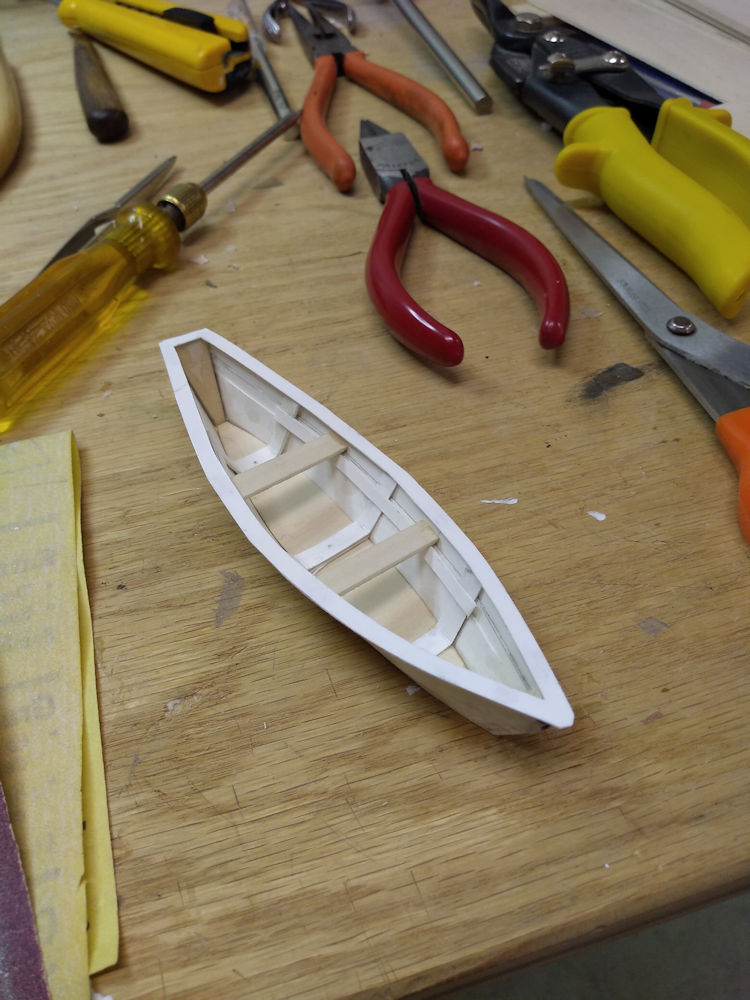
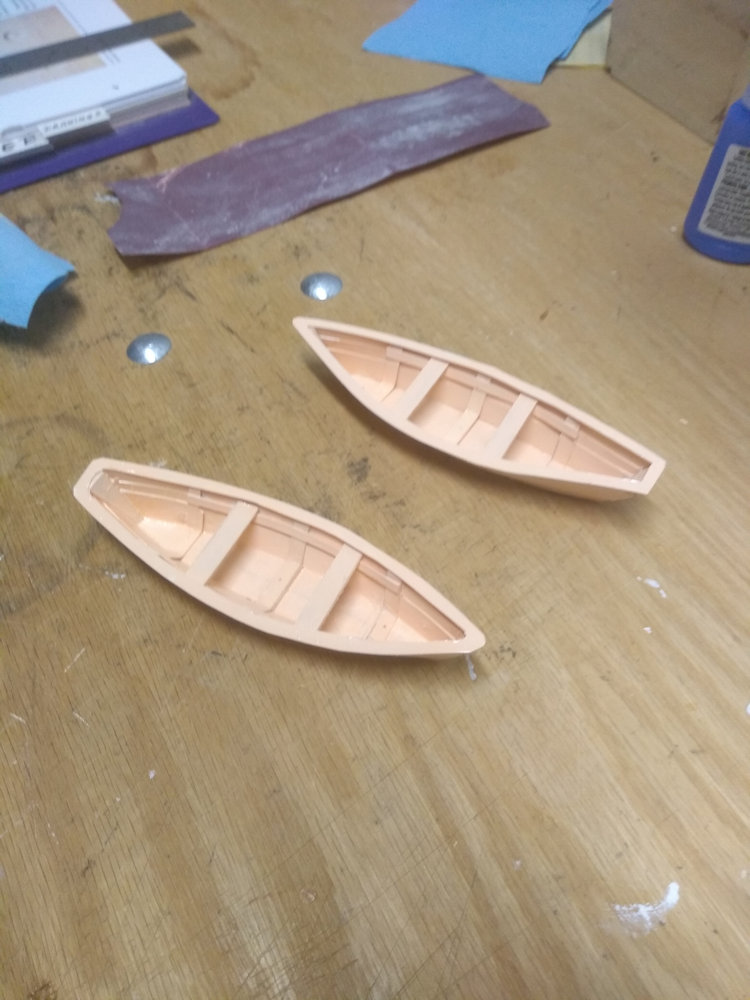
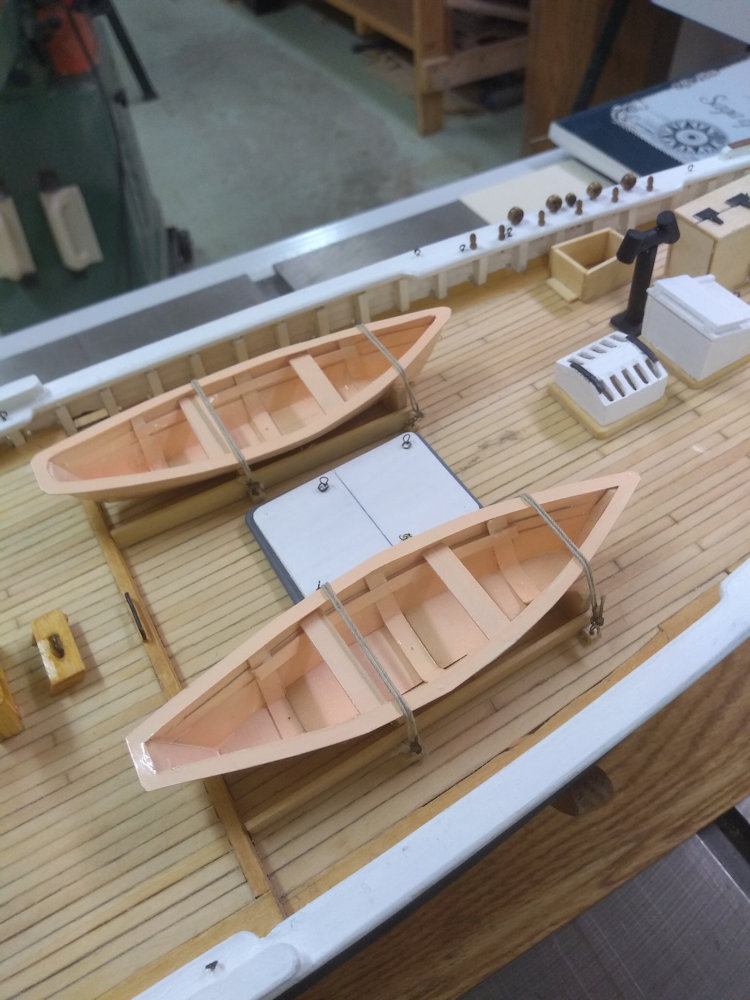
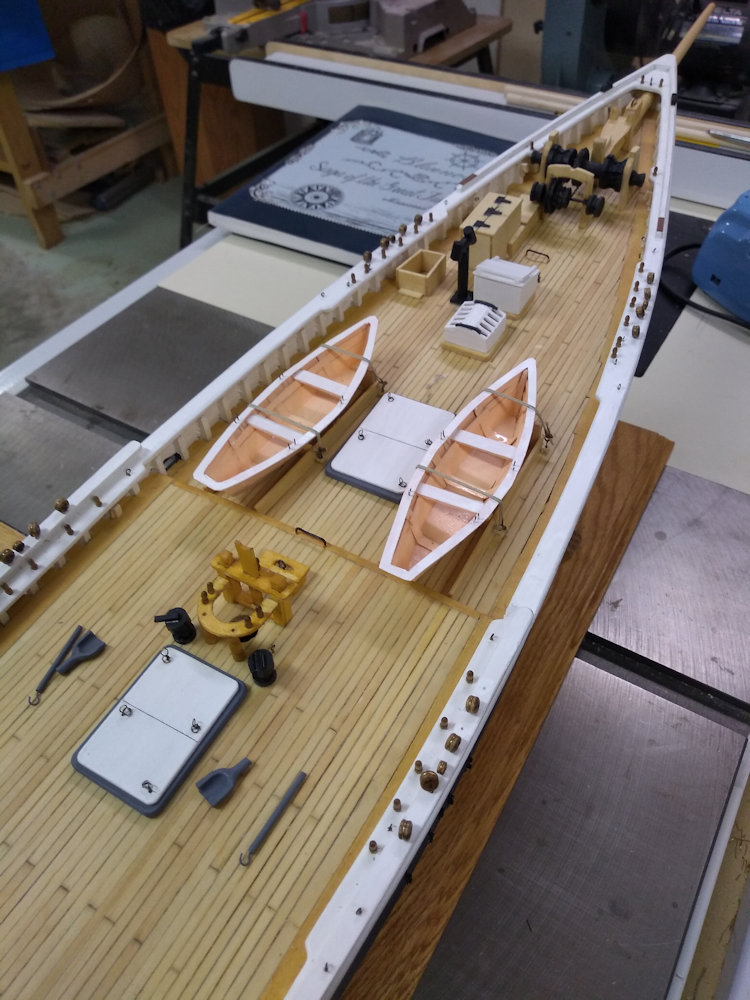
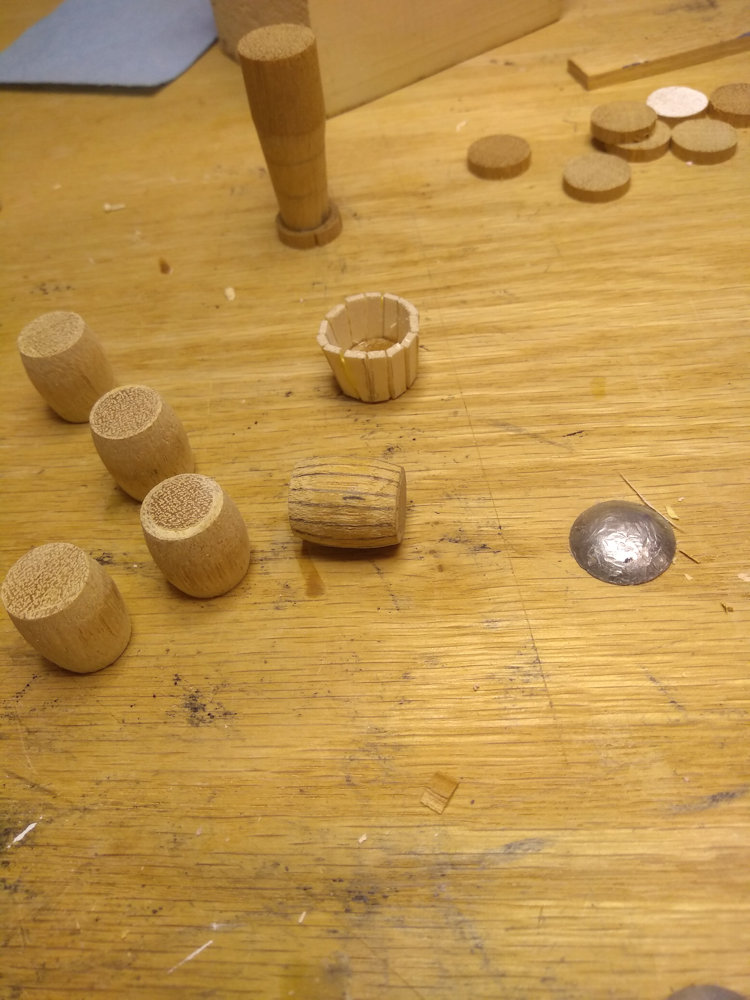
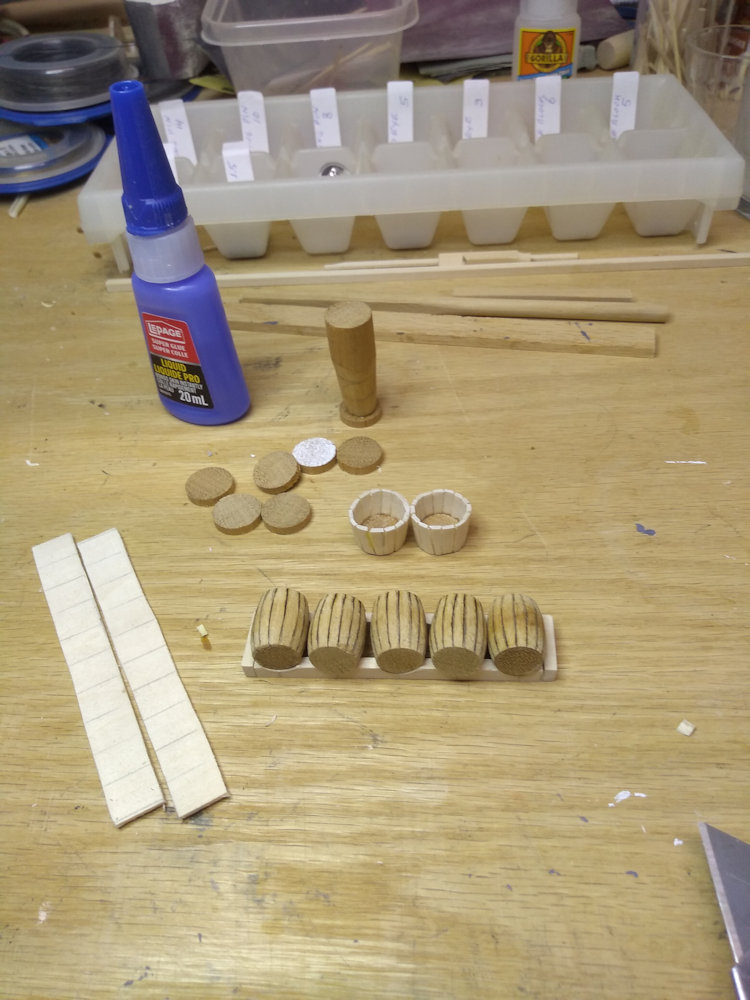
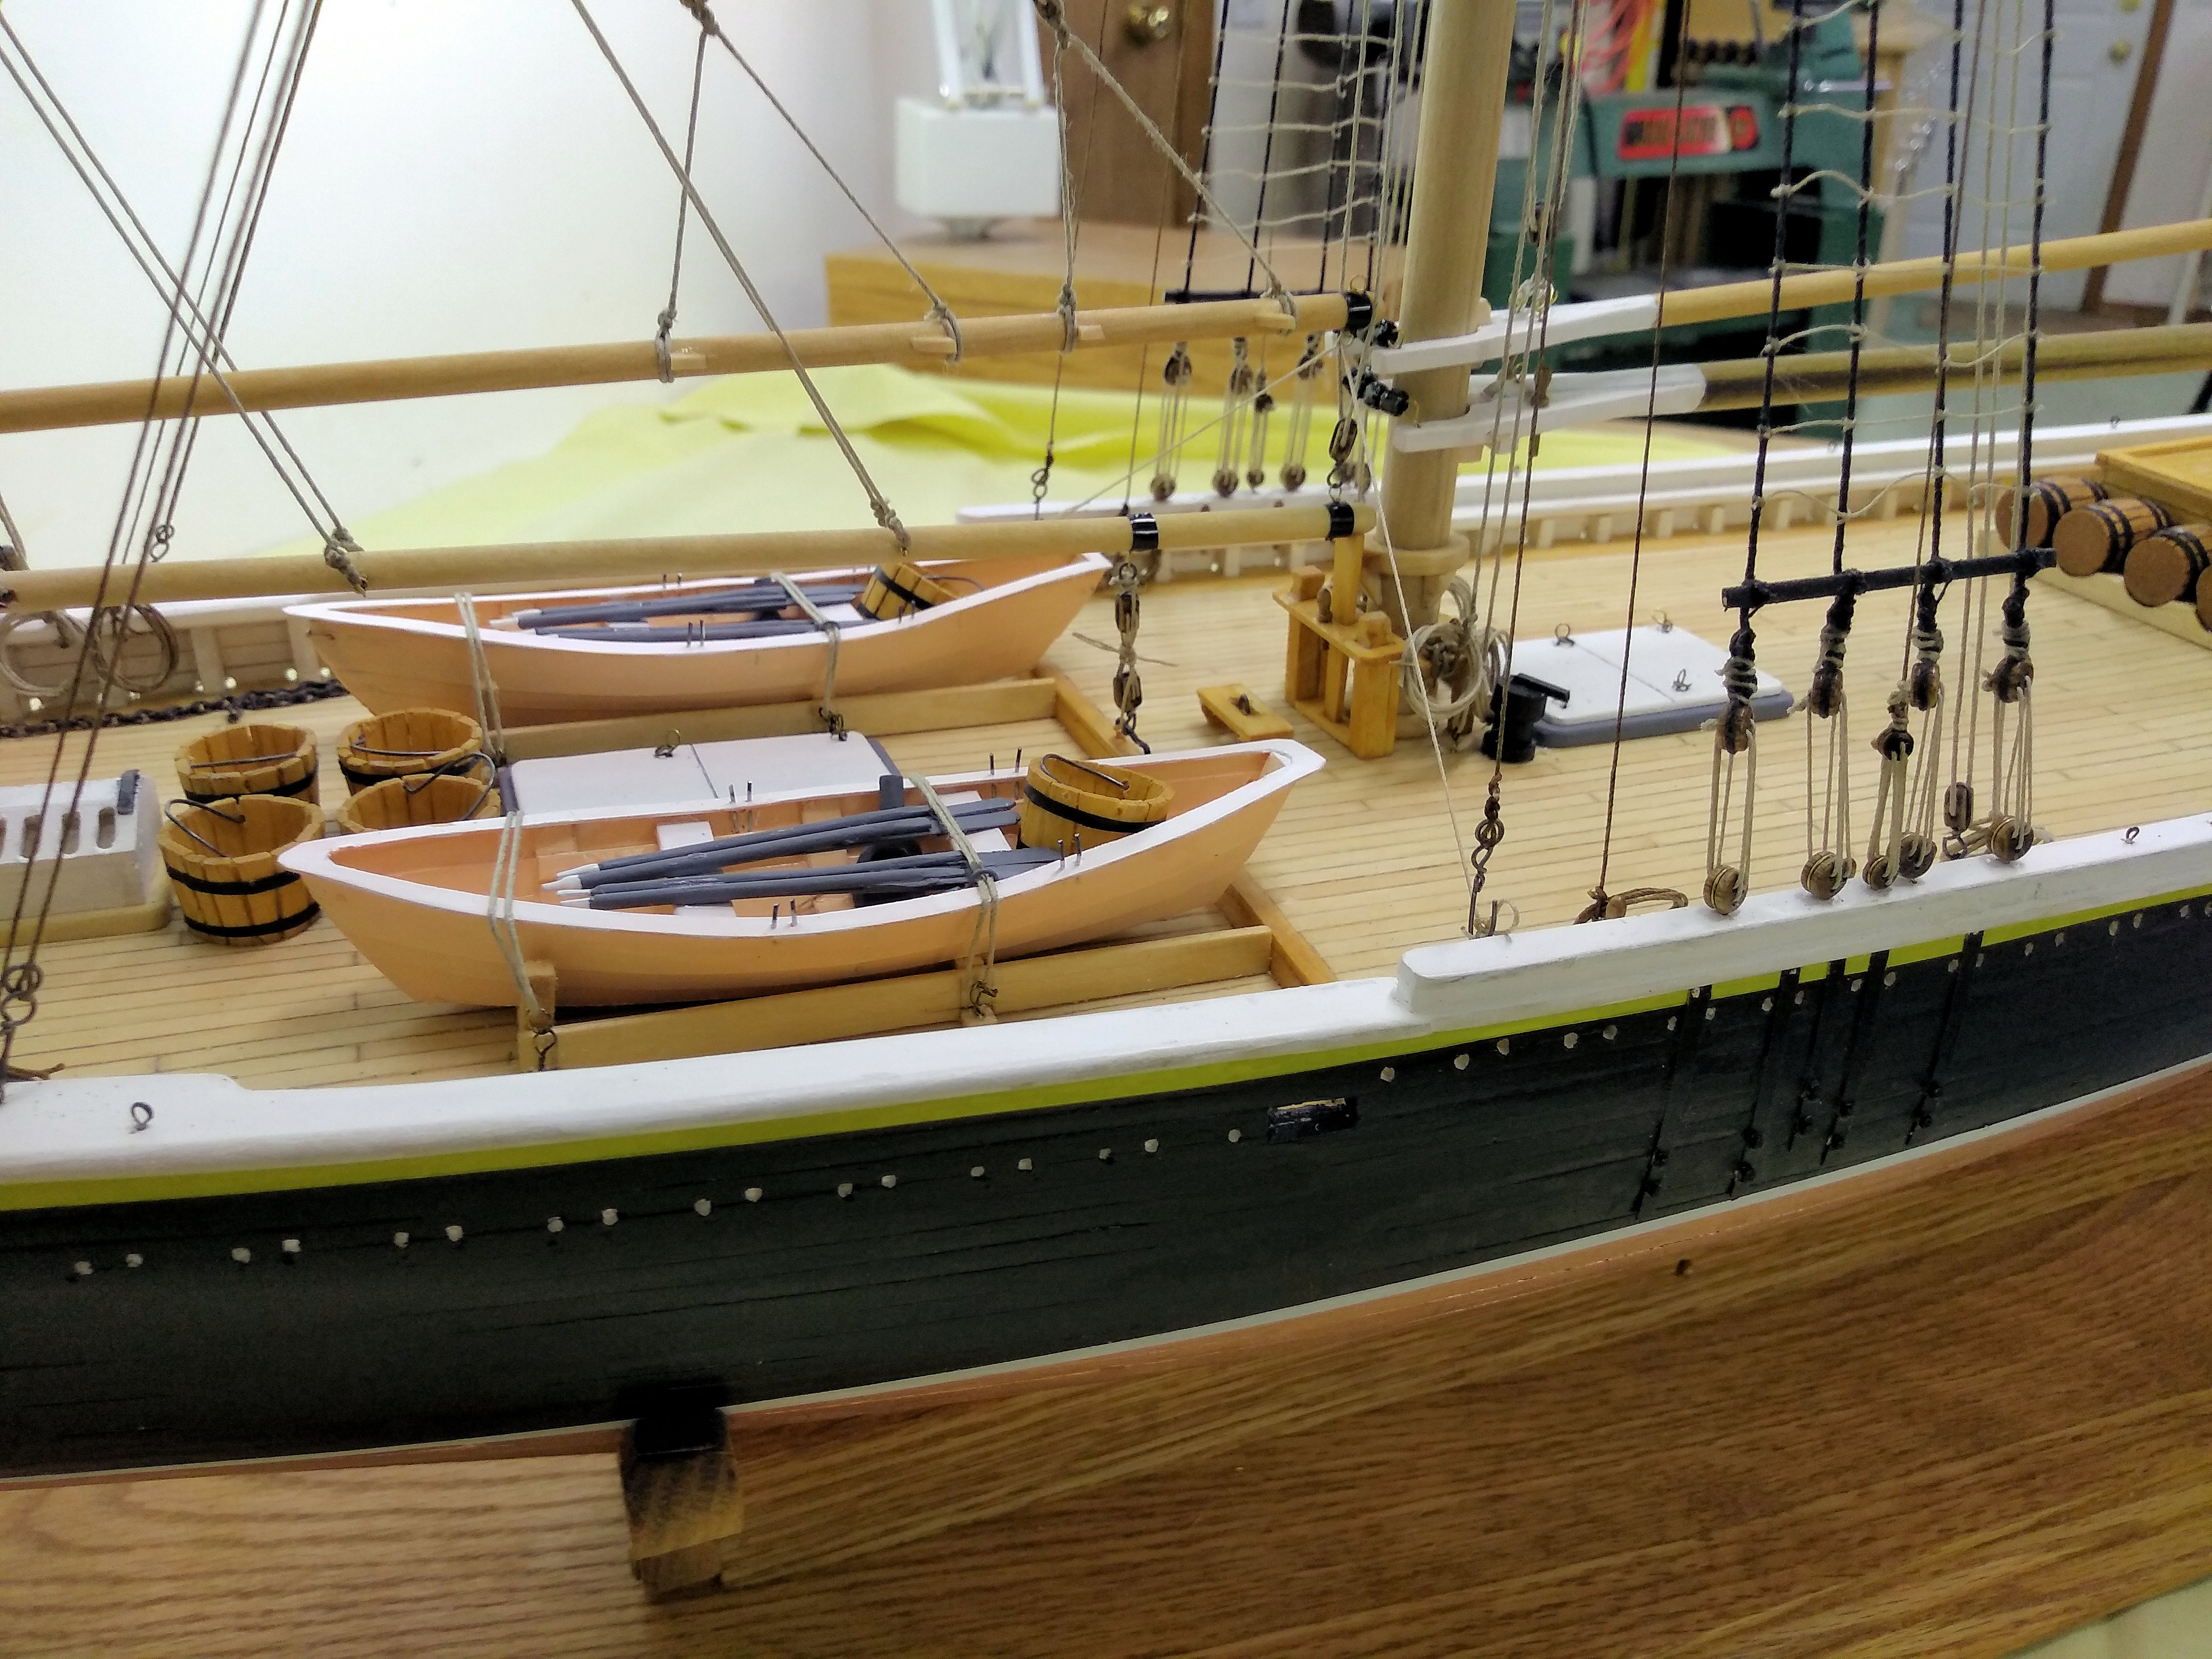
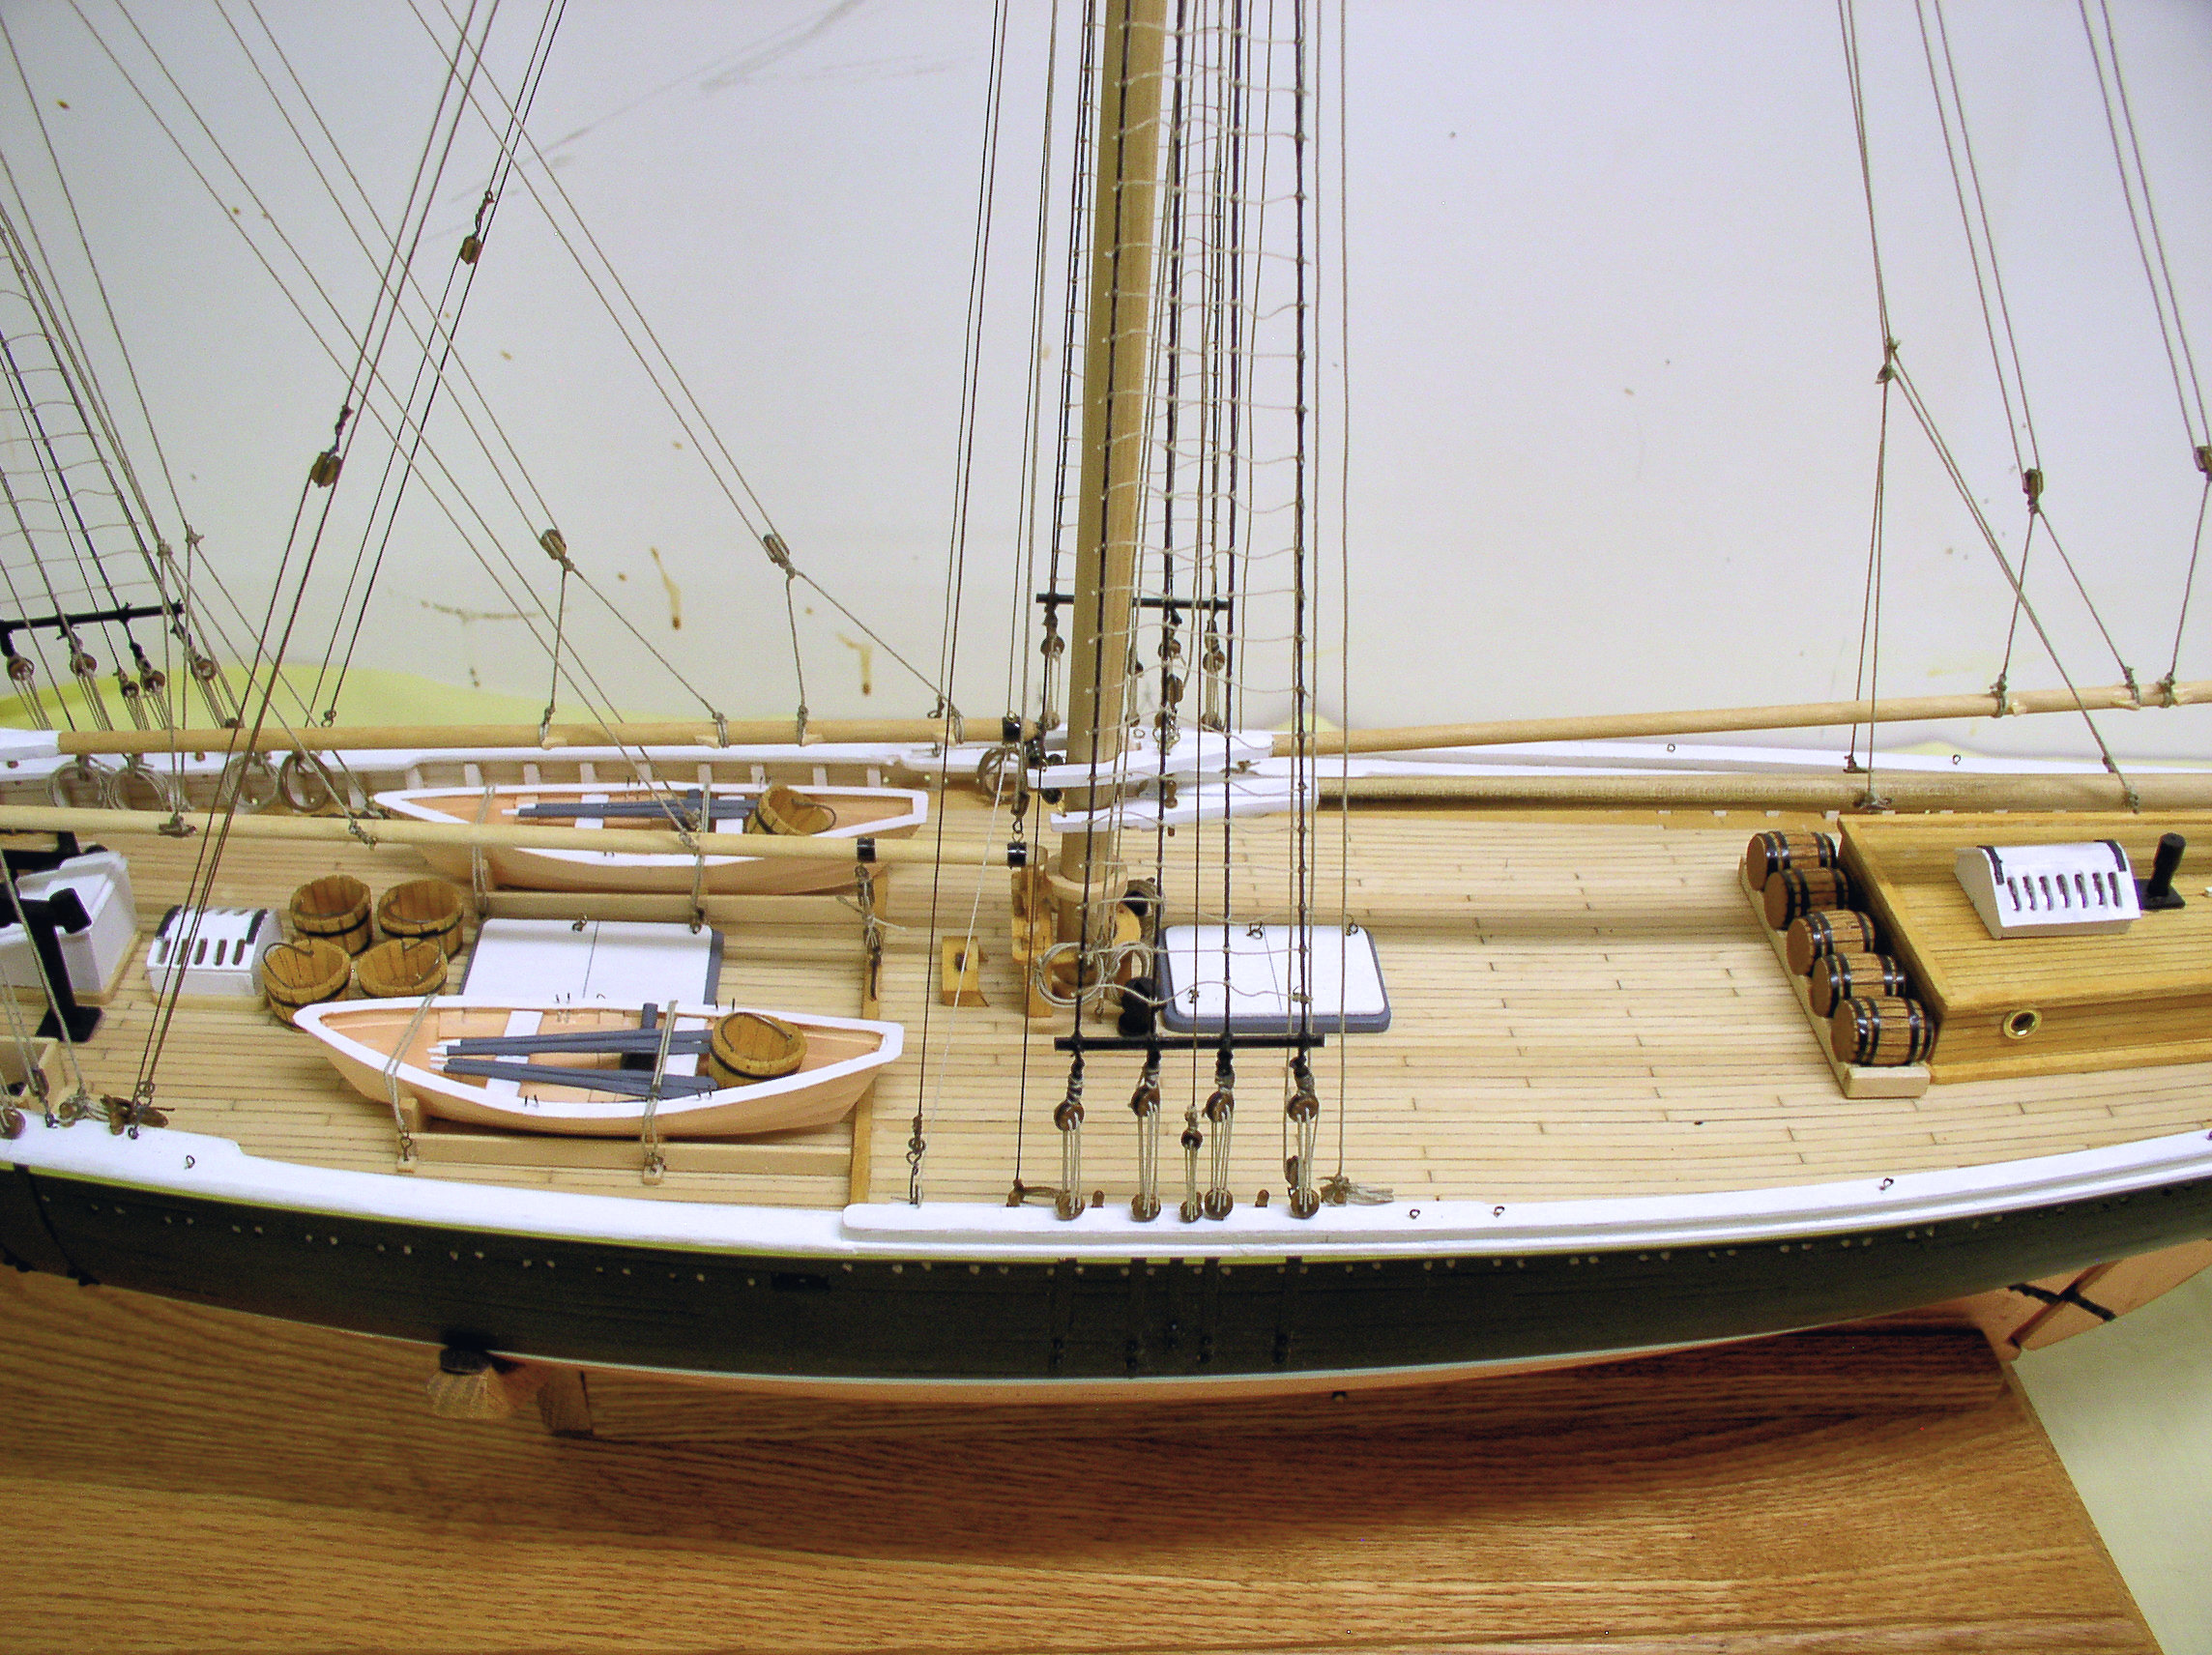
Dories, buckets, barrels, barrel rack (Bodnar, page 86). See pictures 132 to 142.
Bodnar trimmed the buckets and barrels using thin cardboard strips. As I have tons of 3 mm colour tape I split same black tape into two strips of 1.5 mm and taped those on the buckets en barrel. The small strips barely held, so overlap the small strip onto itself. Spray with matte varnish , and once dry it holds fine.
To get the ropes through the deadeyes and blocks I used a needle threader picture 158A. The one with the red plastic grip is the best.
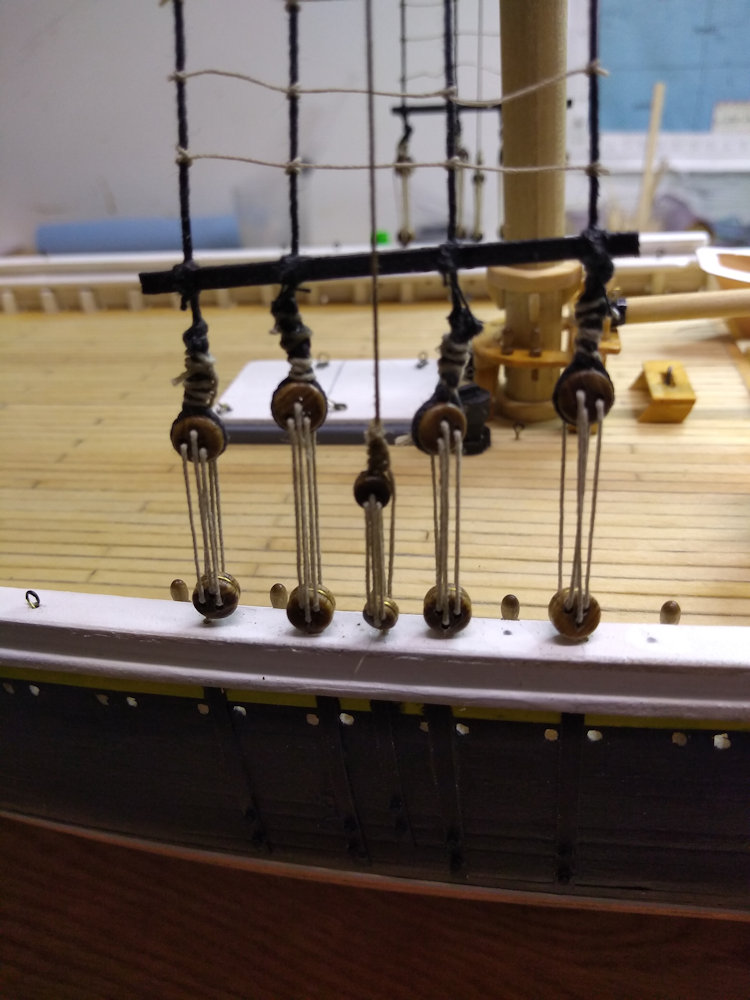
Sheer pools
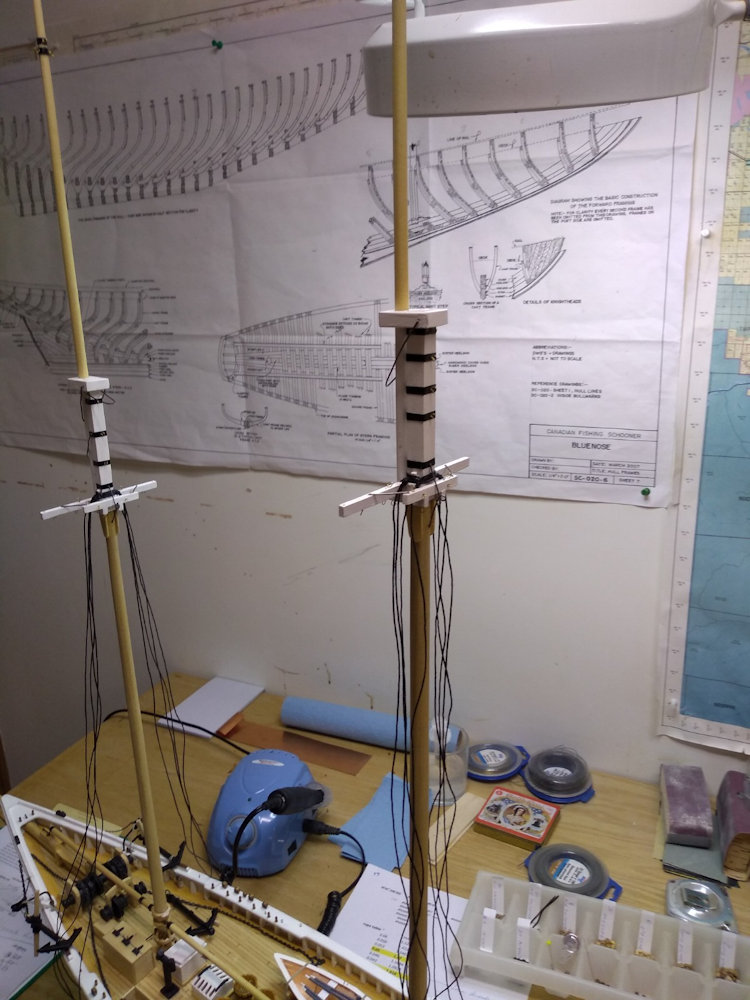
Topmast shrouds
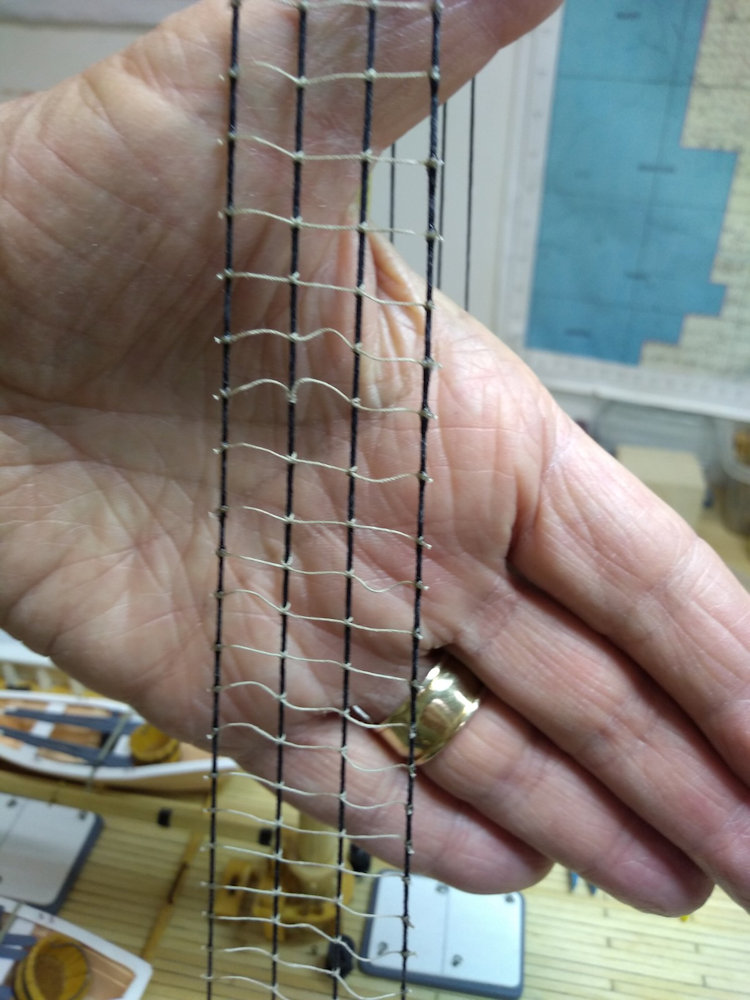
Ratlines
(Bodnar, page 111) Contains an error in the strand #80. In real life ratlines are about 1½" in circumference. Hence 1.5 / 3.14 / 48 = 0.01" in diameter, or #50 strand, or 0.25 mm.
Topmast stays
(Bodnar, page 112) Stated to use 0.05" rope. That would be the biggest rope used. The deadeyes are even smaller then those used for the lower shrouds. In my opinion the same thickness as the topmast shrouds of 0.023", or #30, or 0.5 mm, should be more appropriate.
Jib topsail Stay
Jib stay
Jumbo jib stay
Bob stays
Spring stays
Bowsprit shrouds instructions are missing.
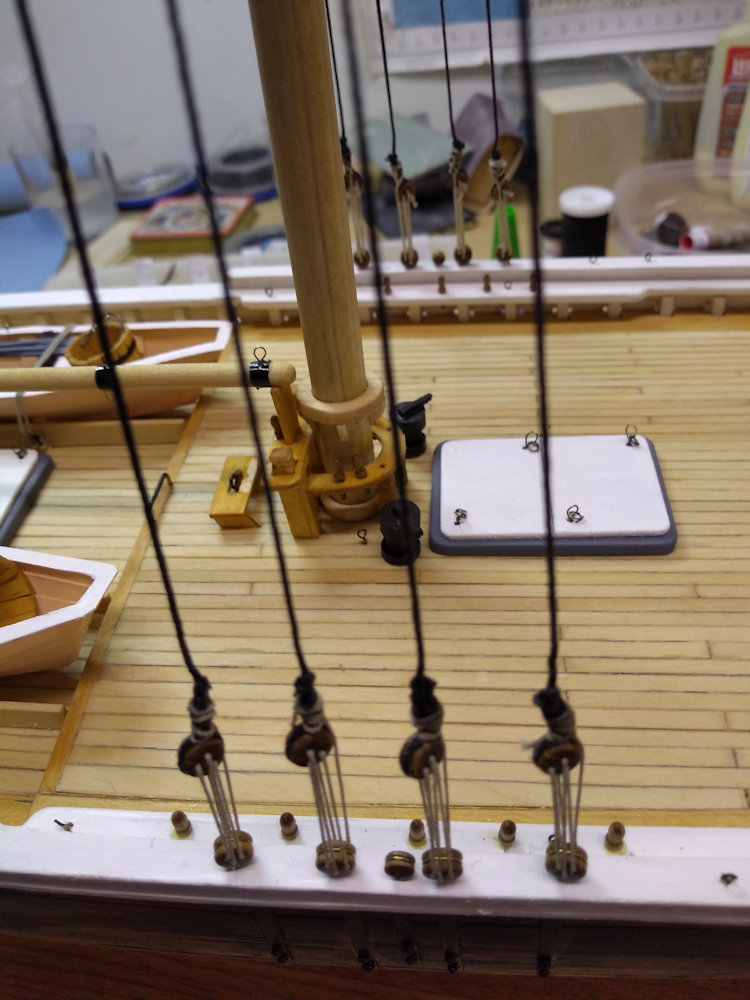
Running Rigging (Bodnar, page 106)
Here Gene Bodnar left us into the dark.
The blueprints are fine for following the ropes from the starting points, but the termination points naming is so confusing that I had to make guesses which belaying pin(s) I had to use. See pictures 169 to 172.
The sails are not done.
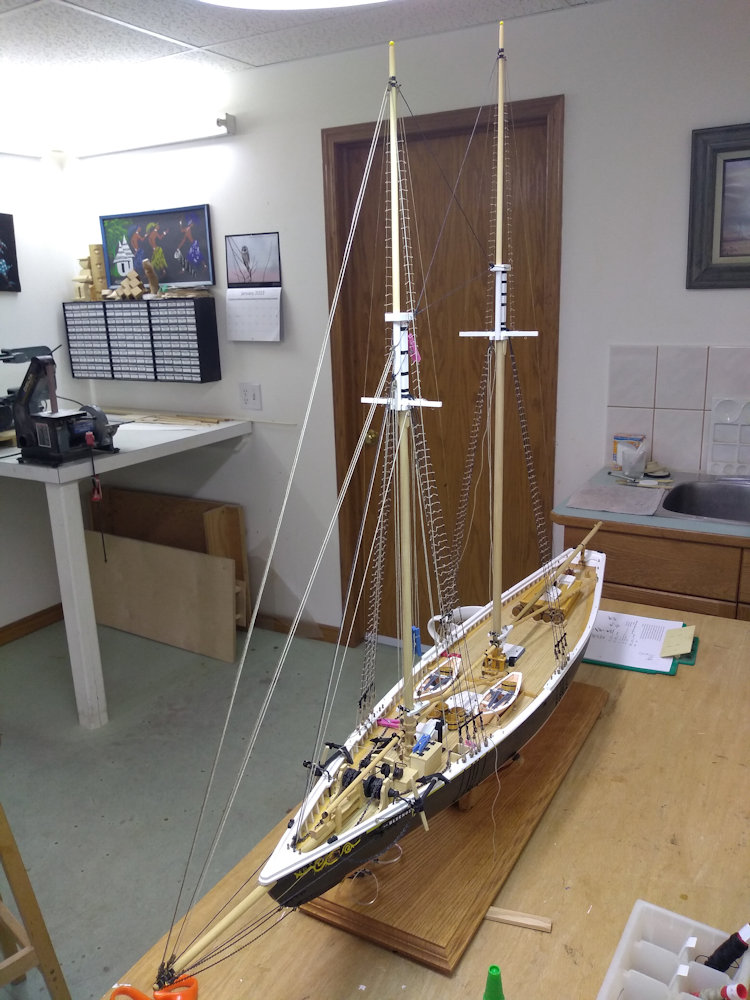
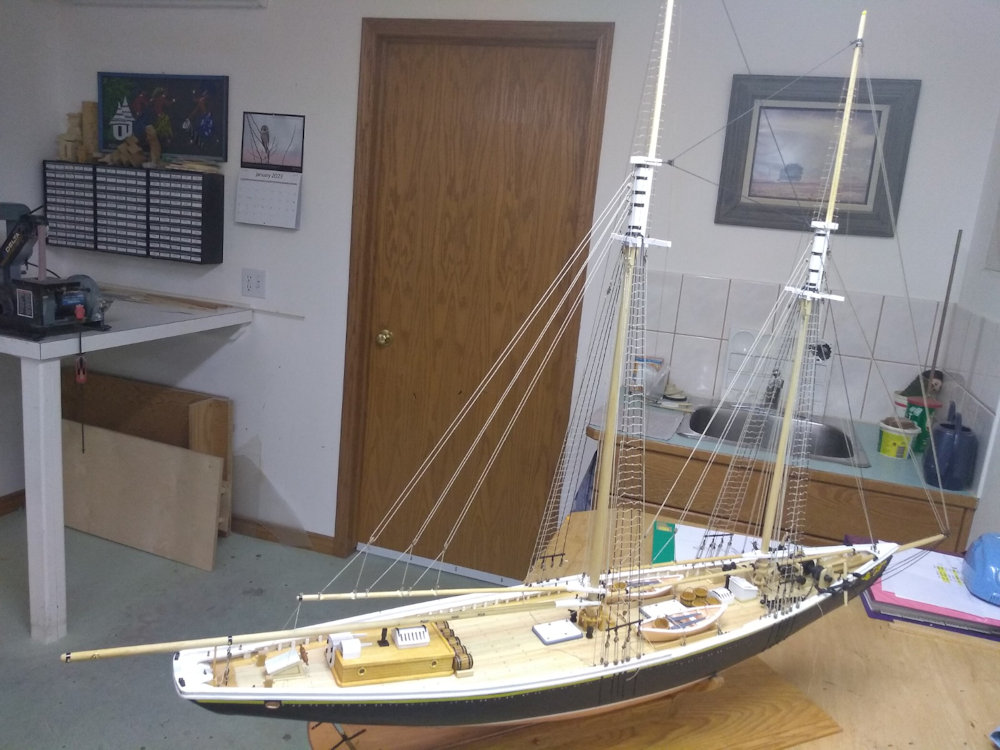
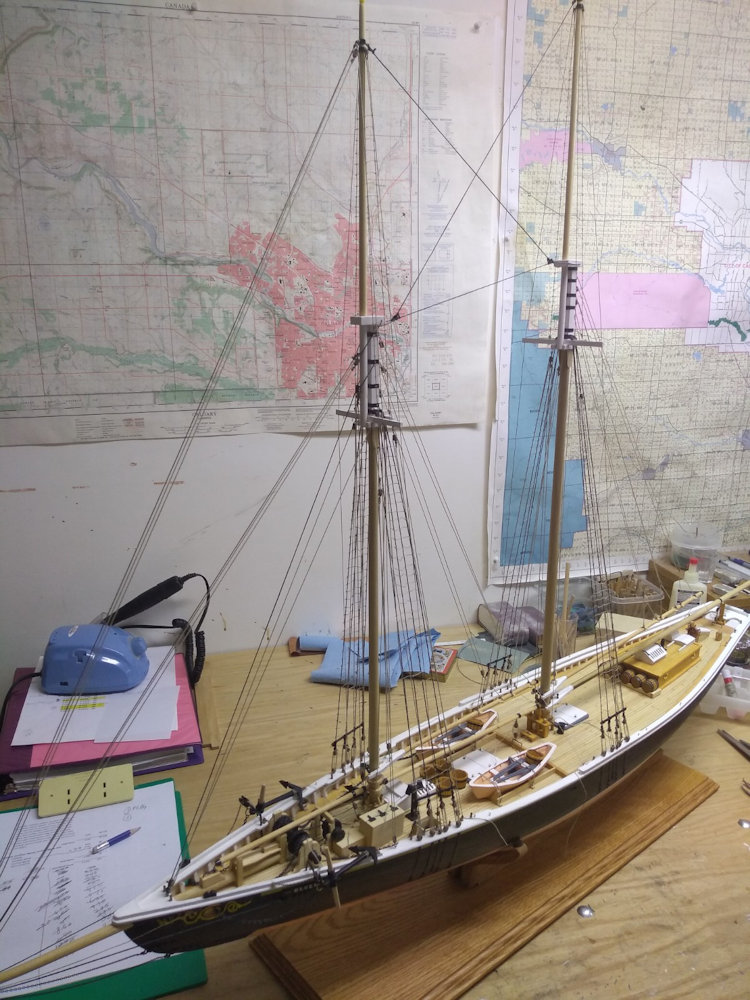
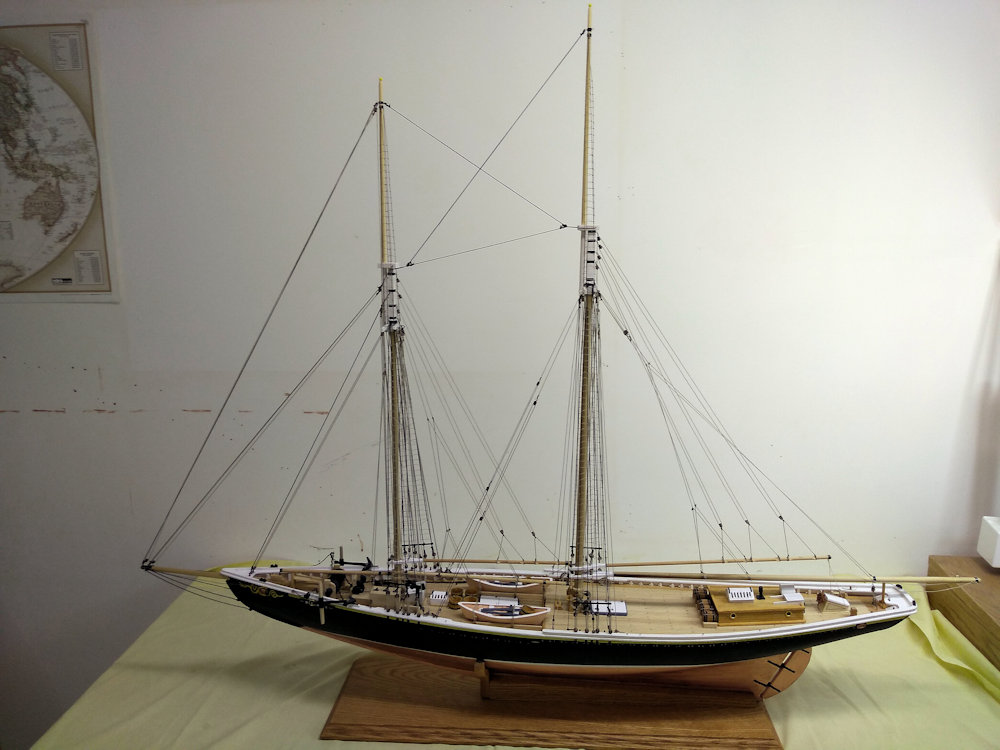
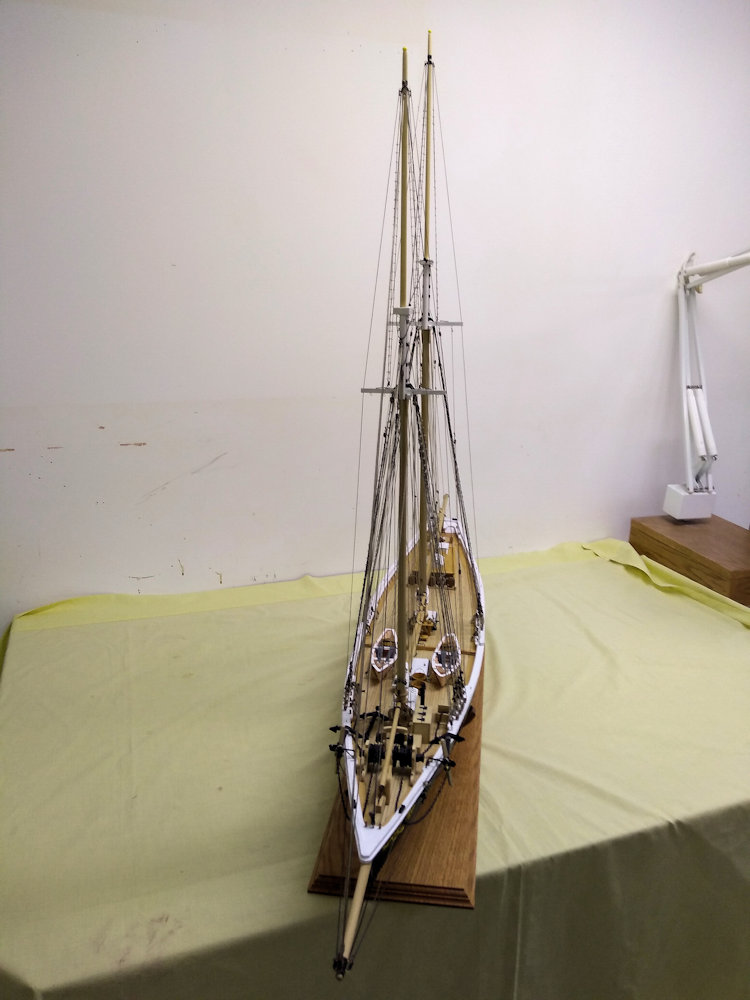
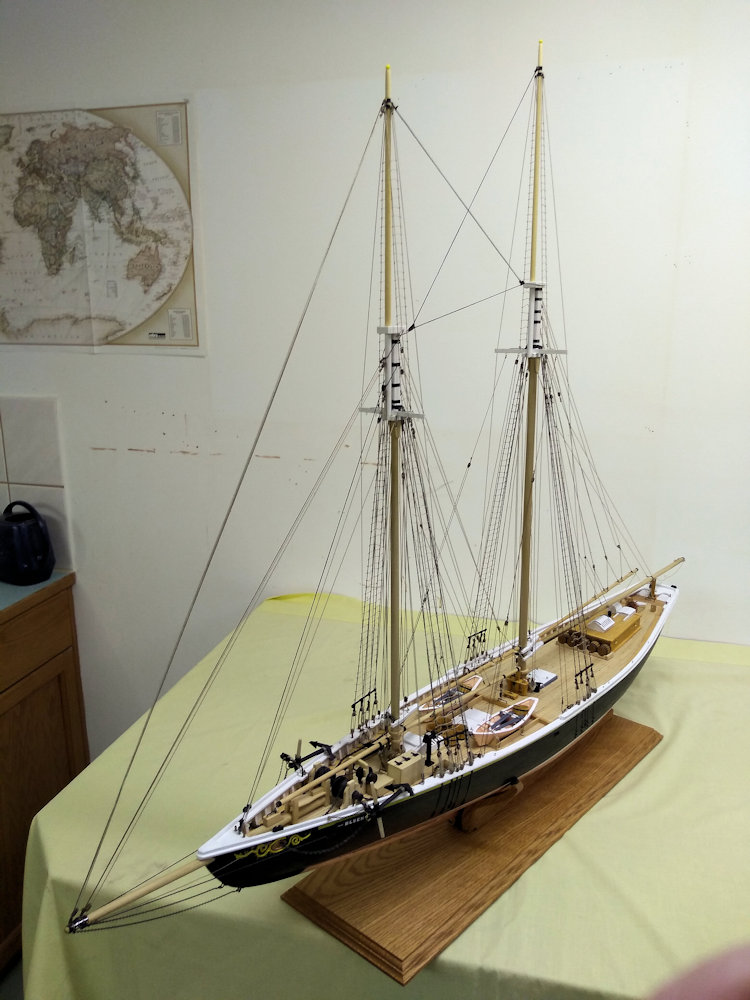
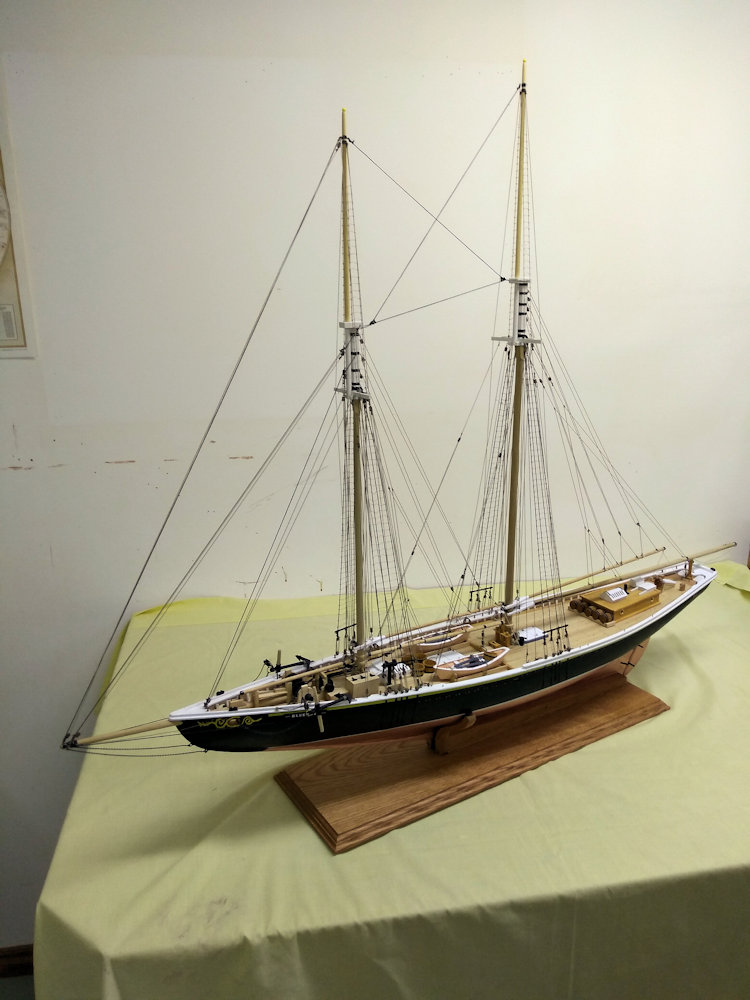
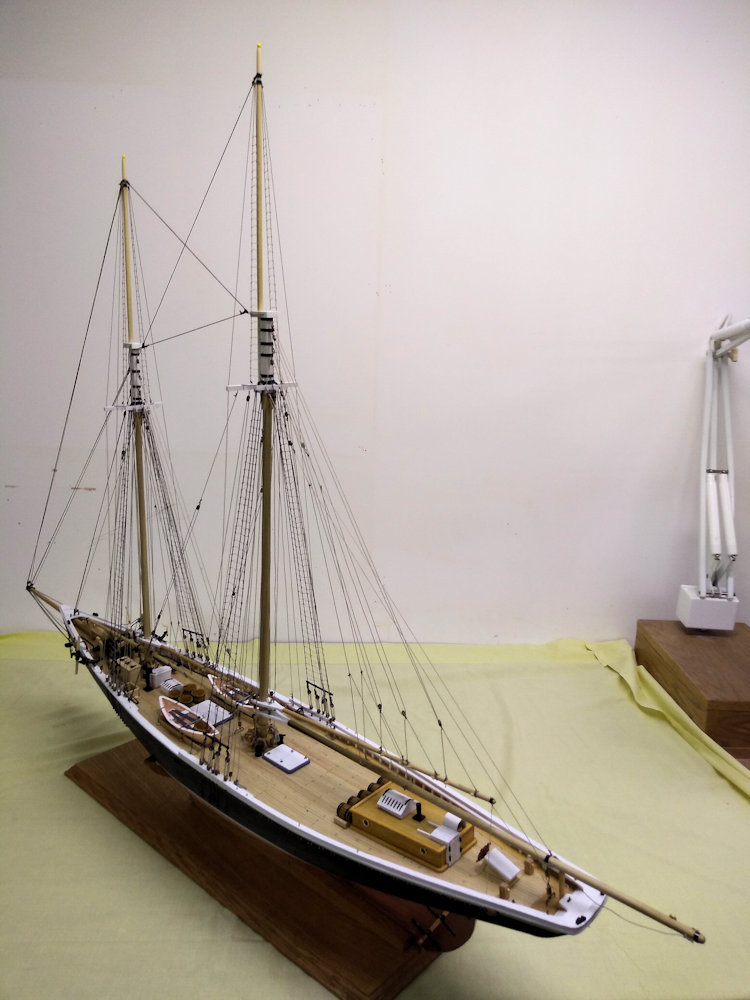
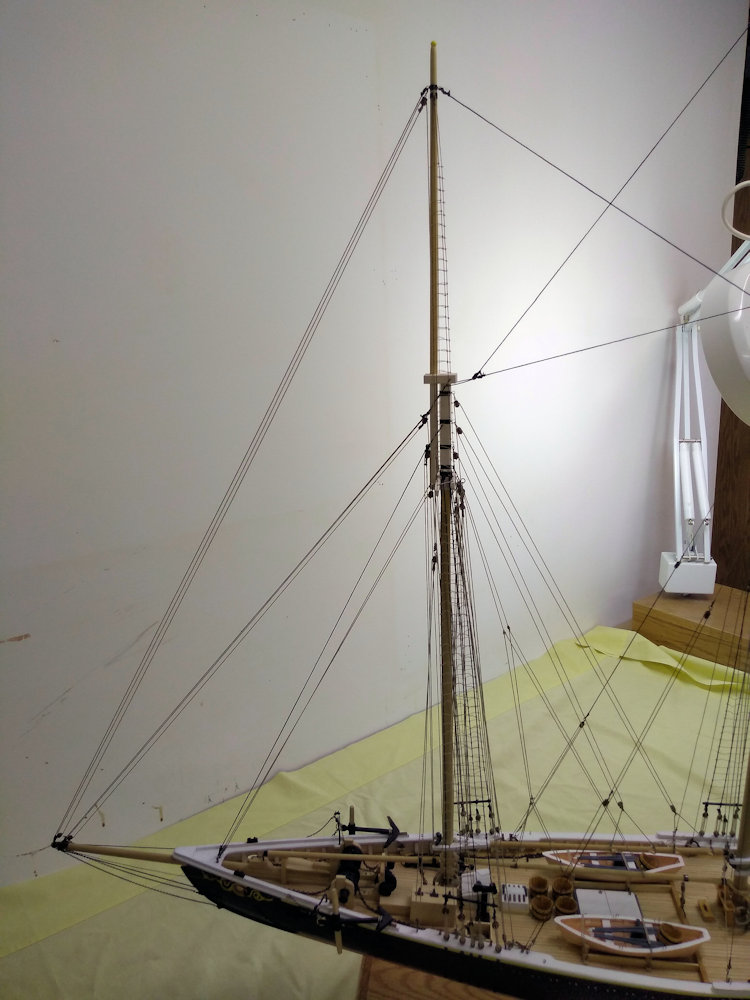
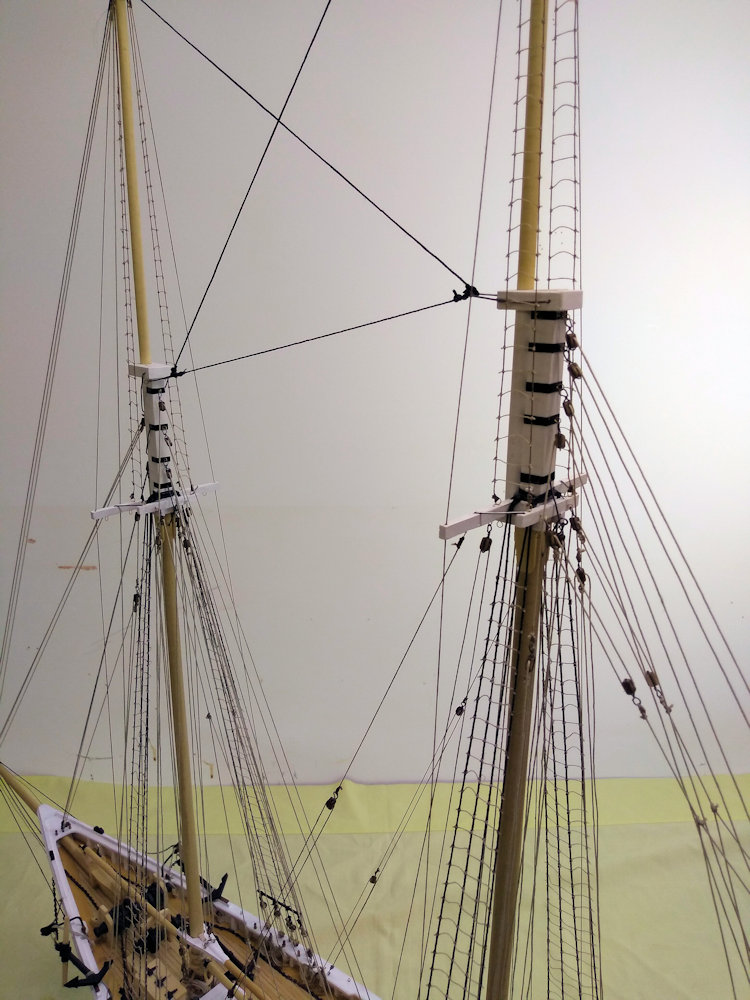
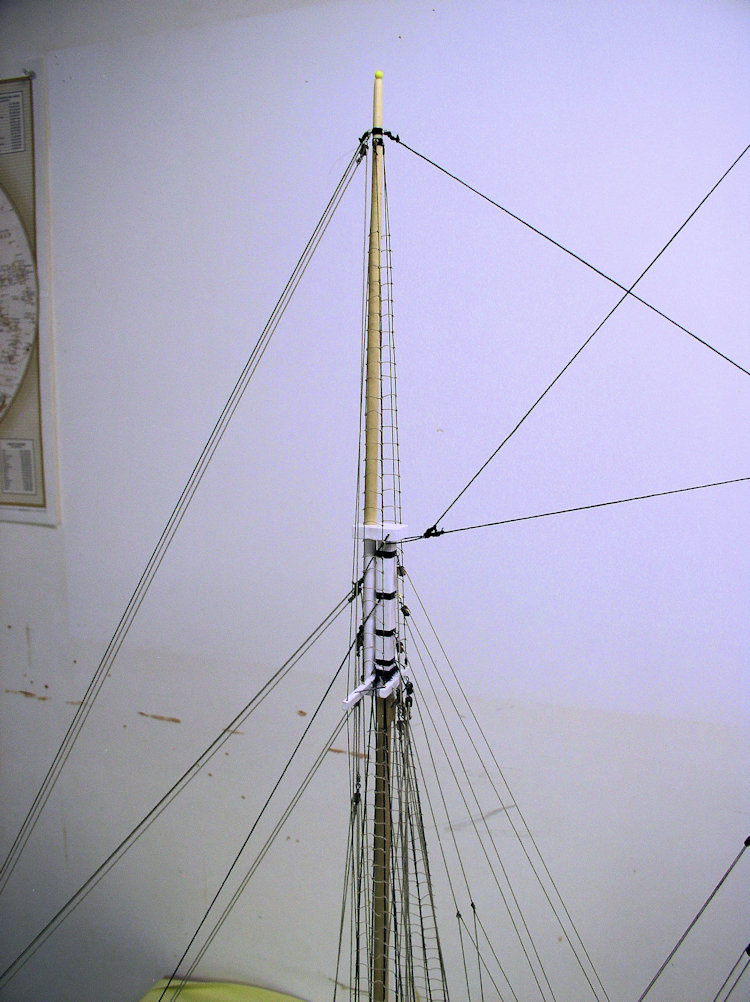
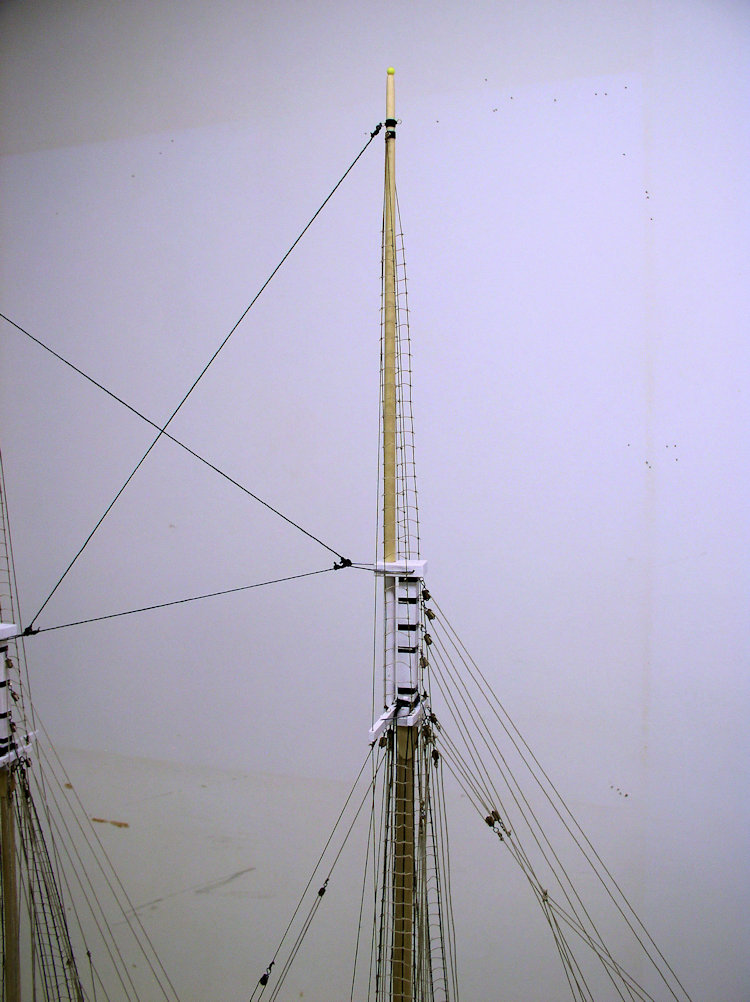
See pictures 173 to 207 of the completed Bluenose model. At this point only the Canadian Red Ensign flag is missing.
What went wrong
On the very first day I was cutting 1/4"x1/4" keels and my push stick got caught in the saw blade. Resulting in kick back and a piece of oak embedded in the hollow door behind me. My left hand thumb and pointing finger got some damage too. BTW, the hollow door has now three "arrow" marks. SOME PEOPLE NEVER LEARN.
When I tried to install the first frame (OX) on the keel things didn't look right. It took me more then an hour to figure out that I had made an error with the angle of the slip on the base board. The front of the slip was about 5 mm too high. After an hour of manual corrections with a chisel the frame fitted perfect.
When it was time to glue the 3/16" square deck shelf against the deck clamps, I realized that I had made an error while installing the deck clamps. I had taken the 1/16" thickness of the deck into account, but not the 1/8" tickness of the main deck beams at the edge of the hull. Lucky I had left the stantions longer. Decided to taper the main deck beams at the ends to 1/16".
I was about to glue the main railing to the hull when I discovered that I had missed the widening of the railing at the back. Fixed that. See picture 73.
After installing the Buffalo and Monkey railings and painting all the railings white, I discovered that there was a gap between the main railing and the stanchions on the left rear side. I was able to squeeze some wood glue in the gap and clamp it close.
While working on the "H" frame for the display stand I used the band saw. Went very well with the first few major cuts, and then the band saw snapped. That has never happened to me so I had to dig up the users manual. Everything needed to be cleaned, oiled, etc., and that was two hours down the drain.
Small pieces like deadeyes, belaying pins, blocks, ropes, etc. I was not able to make myself. I ordered those from Hobbylinc.com in Jan-2022. Every so often they sent me emails that they were waiting for supplies. After 6 months they cancelled my order, GRRRR. End of Sep-2022 I got desparate, and I just happen to stumble on company "Ages of Sail"; they are fantastic, had no supply issues, and shipped next day.
I had the dory jig made according to the Bodnar instructions. Put the cardboard strips over it and glued them on the under side of the jig. Then I realized that the centre section is 1 mm higher then the aft and fore section. I glued two small pieces of cardboard on de centre section cardboard to get just enough curve.
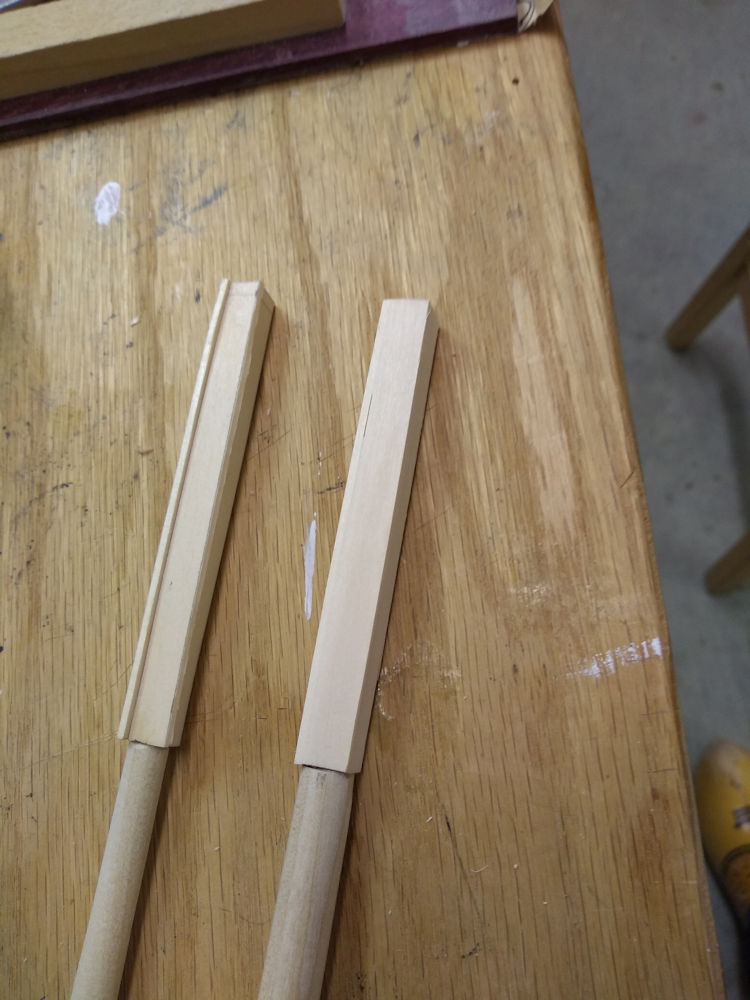
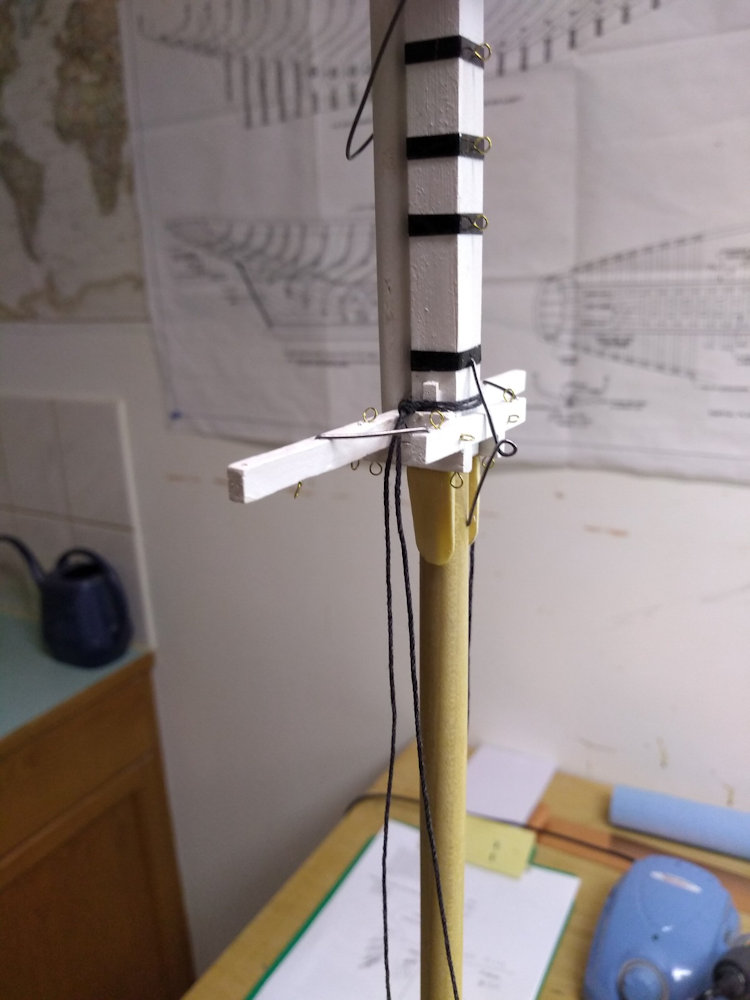
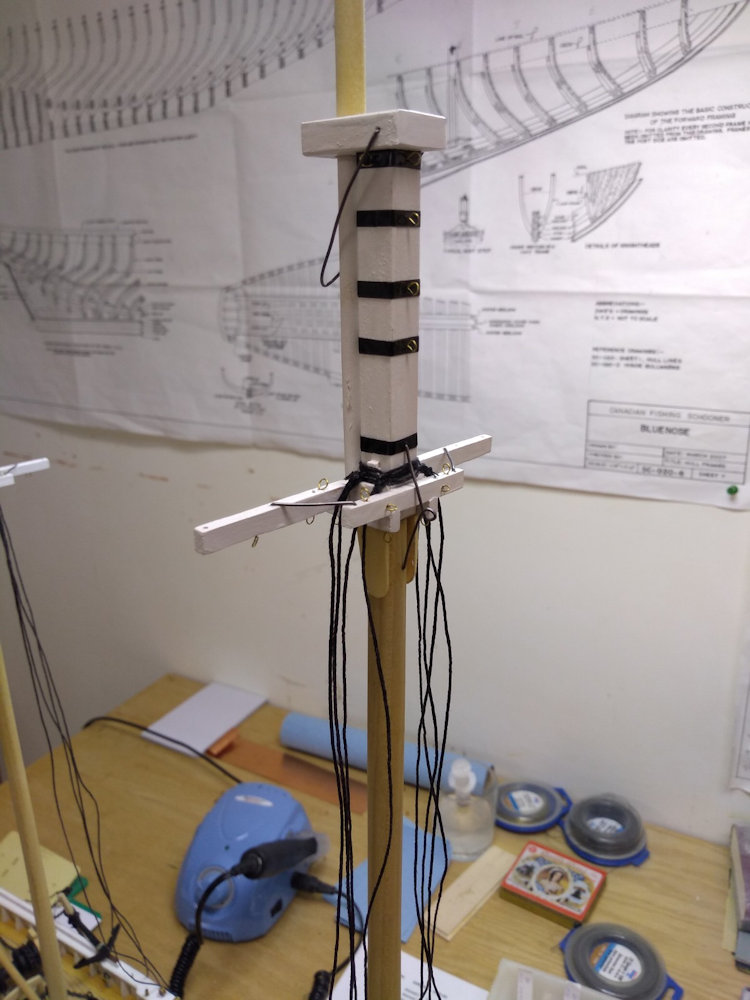
The heads of the lower main and fore masts is square. I used a vertical sanding disc with 90 degree platform, but the result was far from square. I fixed that by gluing 1/16" strips over the "non-square" heads. After that I used manual tools to create reasonable square heads. See picture 148.
Conclusion
It took quite a long elapse time to finish this project; from 1-Feb-2018 until 13-Jan-2023. Actual modelling time was appriximately 555 hours.
I must say that I enjoyed every minute of it. There were challenges and I made errors. Some errors were easy to fix, but some I discovered too late in the project and I had to live with it.
Model Ship Builder, Bodnar Bluenose Practicum -- Free download of the Bluenose Practicum by Gene Bodnar, PDF, 14 MB, 138 pages. The Bluenose Practicum was developed by modeler Gene Bodnar and outlines the process in detail of building a (museum quality) model of this famous schooner based on Philip Eisnors plans (picture 3).
Eugene E. Bodnar, Jr, passed away on November 23, 2021 at the age of 80.
Wooden Ship Modeling for Dummies -- Lots of practical information, tips, forums, glossary of terms, useful links, pictures, videos, etc. A one time membership fee entitles you to free Bluenose ship plans and complete construction details, AND lots of modeling tips and tricks with pictures and videos.
Ages of Sail -- Supplies for wooden ships such as accessories (blocks, deadeyes, belaying pins).
kapplerusa.com -- O-scale (1:48) basswood, both package and bulk in 12" and 24" lengths. Advantage is their perfect order list in real lumber sizes (feet).
Micro-Mark, The Small Tools Specialist -- Supplies for wooden ships such as accessories (blocks, deadeyes, belaying pins) and building supplies (wood, tools).


")
")


