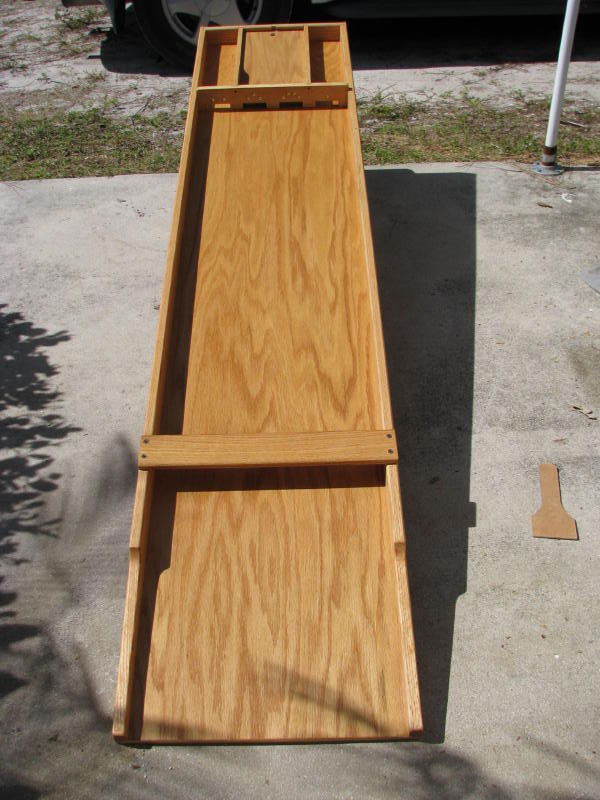
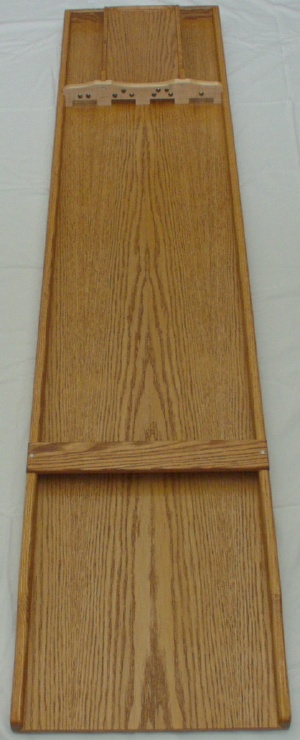
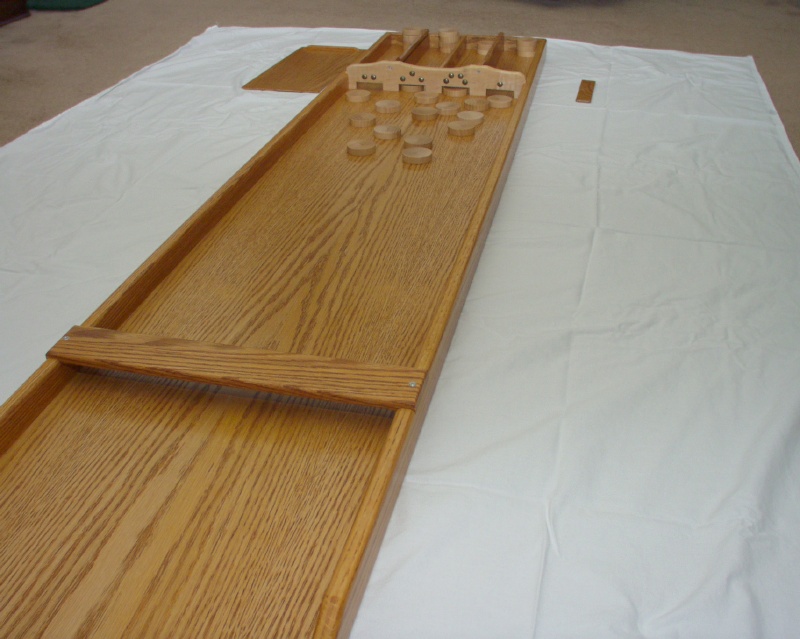
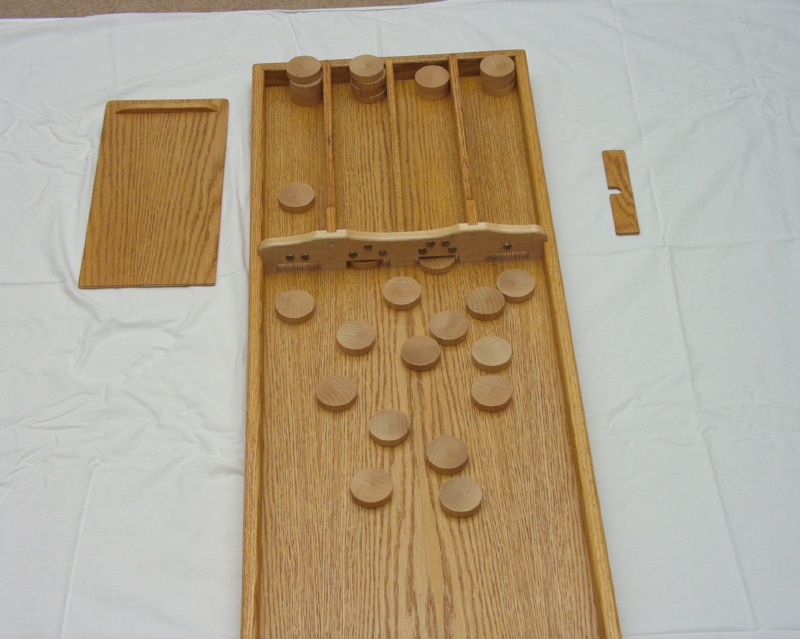
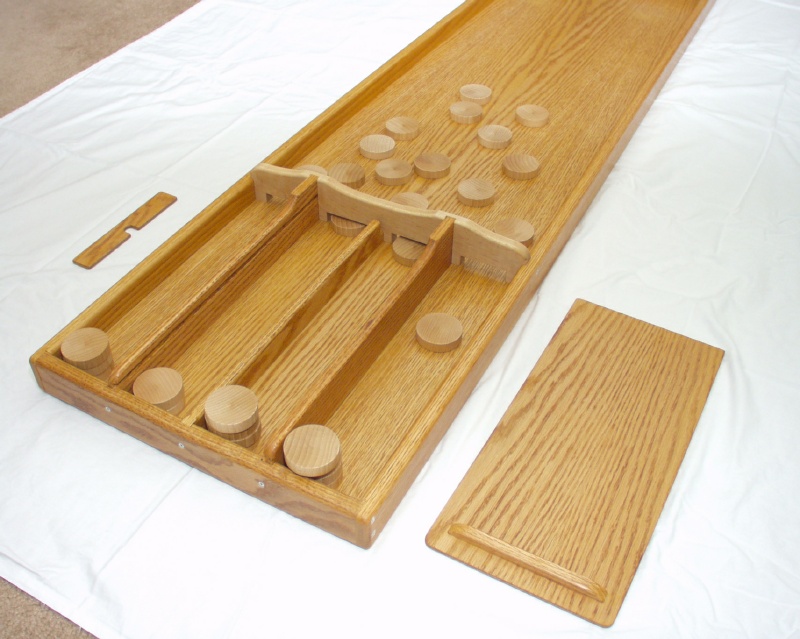
Sjoelen is a Dutch shuffle board game, at least a century old, and a true family winter game. The objective is to shuffle the 30 pucks in the four compartments at the opposite end in three subturns. A more even distribution gives a higher score. The base is made from 1/4" oak plywood, the score board is maple and the rest is solid red oak. The main challenge was to find the right finish for a super smooth surface.
Please note that these measurements, although perfectly suitable for building a sjoelbak for playing a family game at home, are not exactly according to the measurements of a modern competition sjoelbak used by the Dutch Sjoel League.
In the olden days the sjoelbak and pucks were measured in inches and fractions thereof. The official measurements are now in mm. See the English translation below for the mm measurements.
Visit Dutch Games US where you can order Dutch made shuffle boards (sjoelbakken) and pucks. NOTE: We get many requests, but we don't make nor sell the shuffle boards and/or pucks.
Pictures
Click on a picture to get a larger picture and then used the back button of the browser to return.
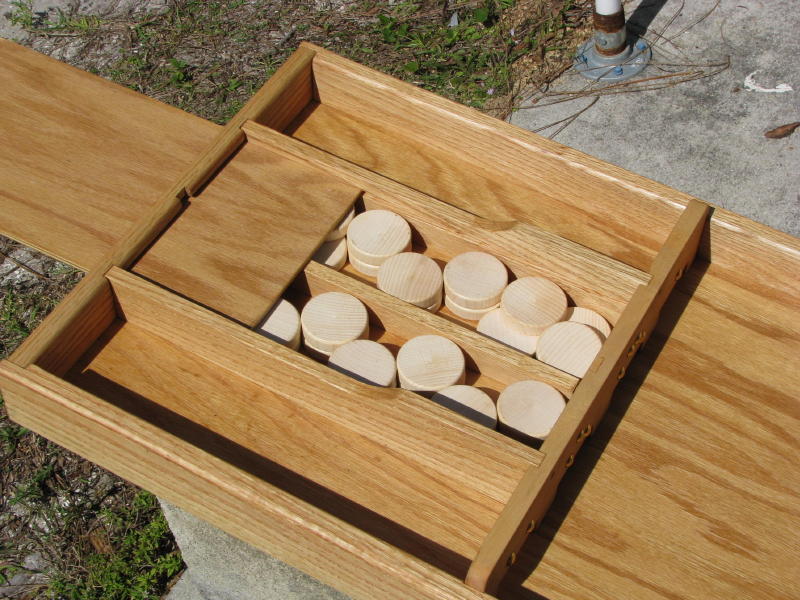
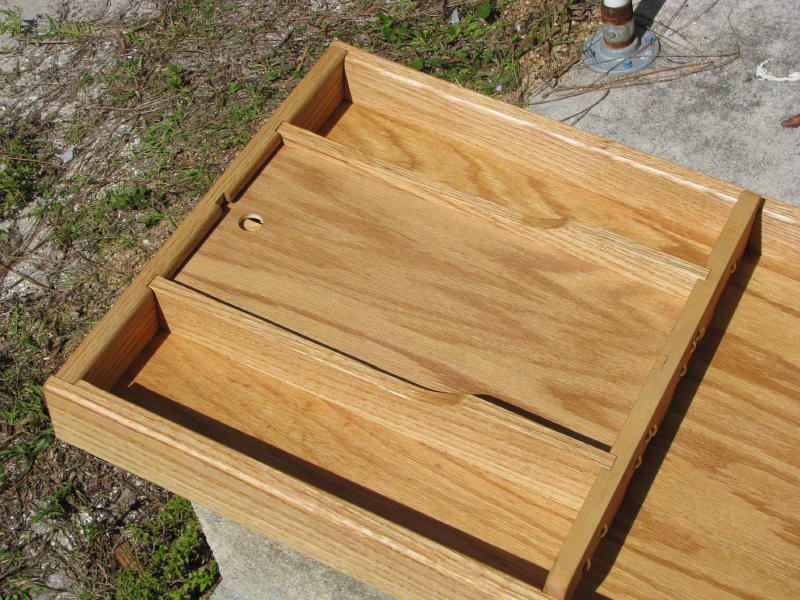
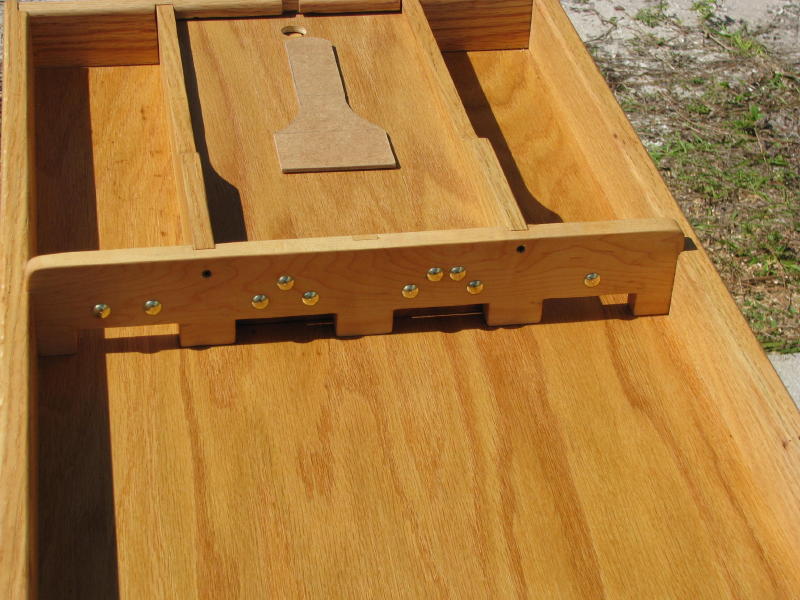
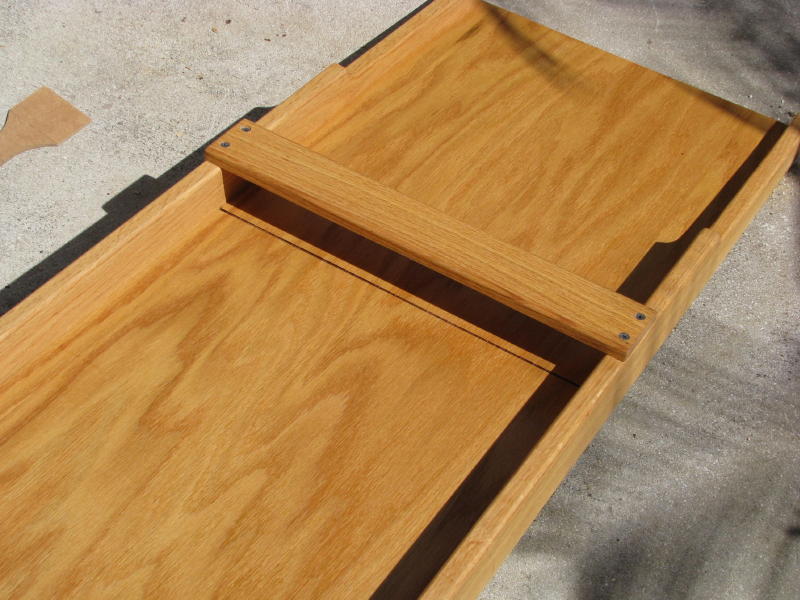
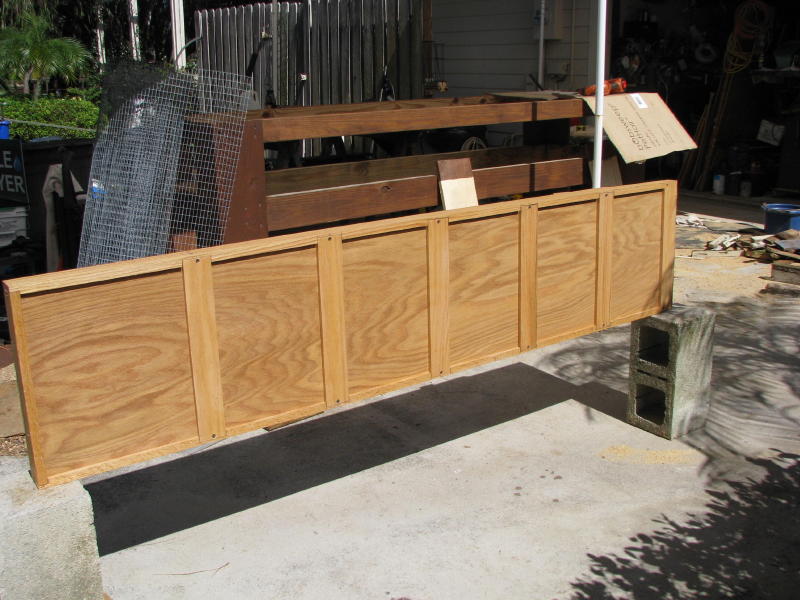
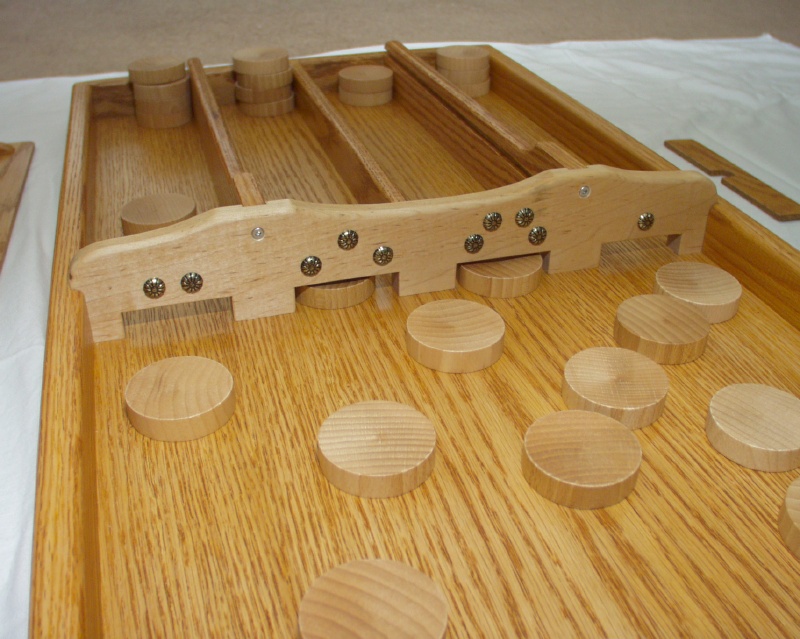
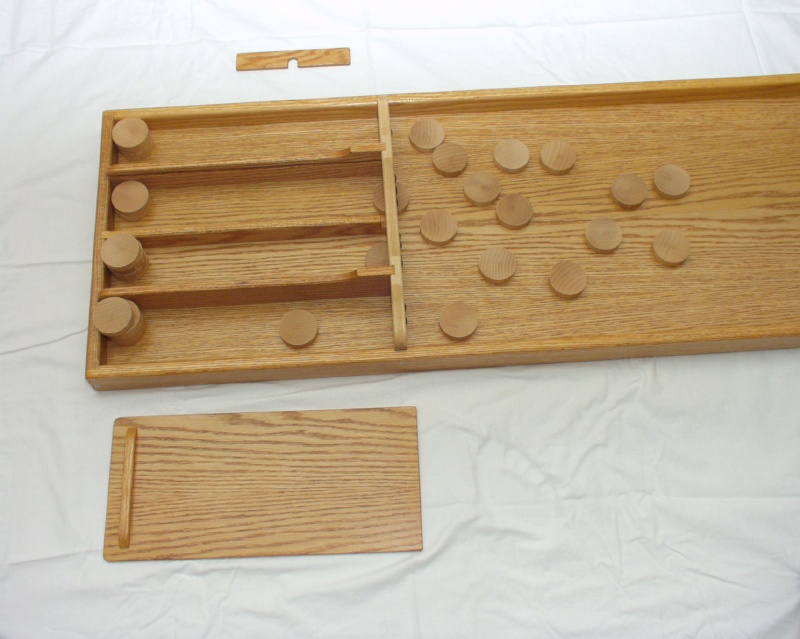
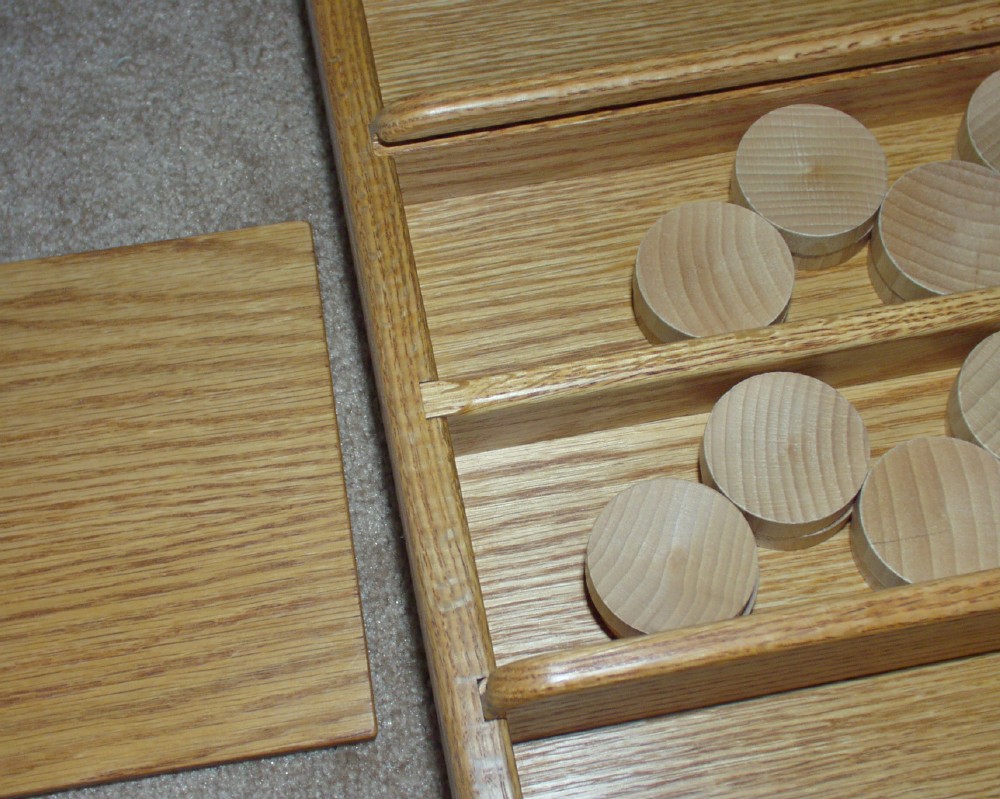
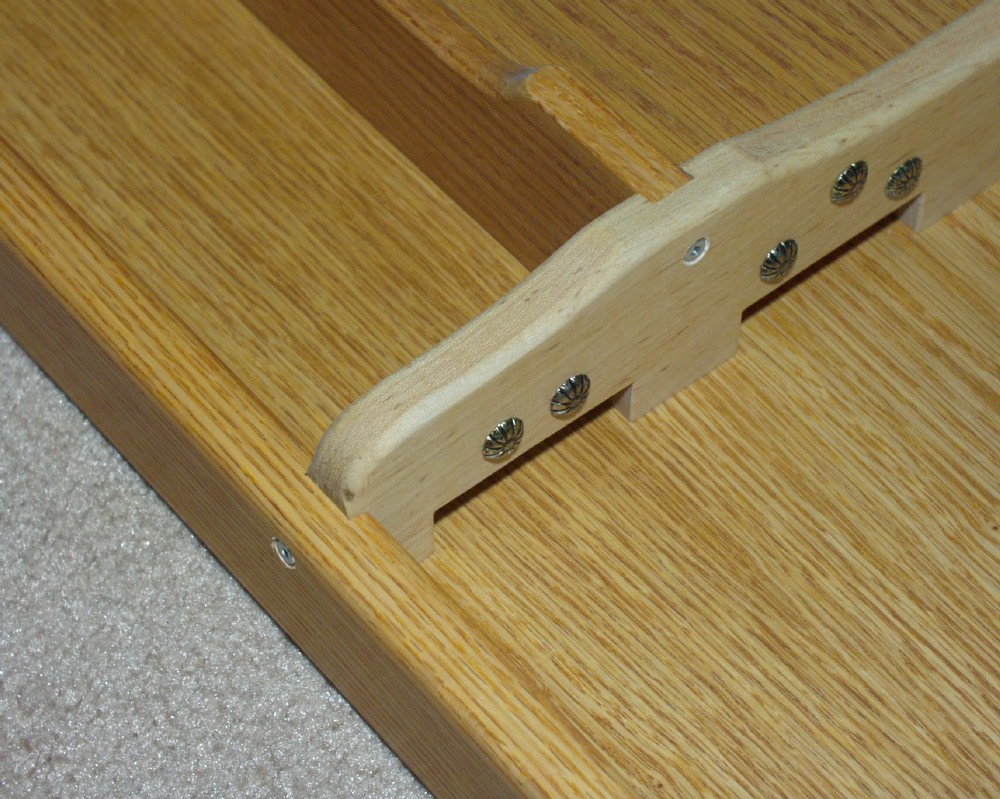
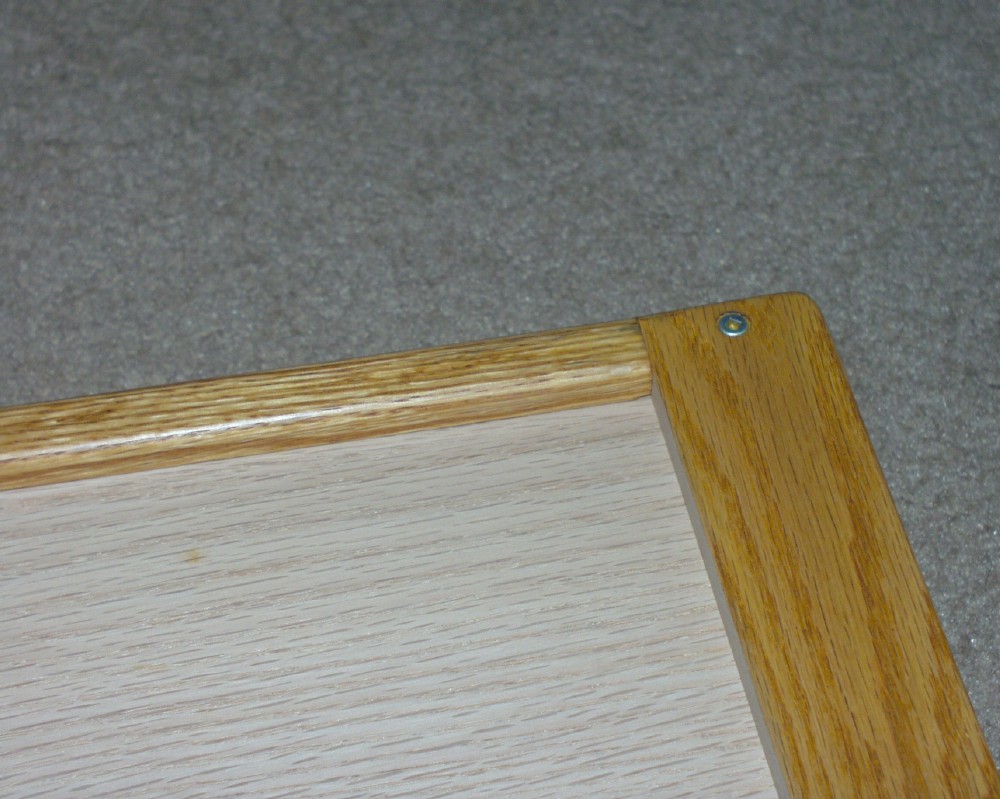
Full view of gameFull view of gameFull view of gameView of game and puck storage partsFront view compartments and scoreboardCompartments and puck storage partsCompartments and puck storage partsTwo middle compartmentsTwo left compartmentsTwo right compartments with puck storage closedTwo left compartments with puck storage closedBottom support at start of baseboardStartbarBottom support, middleBottom corner
Pictures taken by my son Peter van Vliet.
How others did it
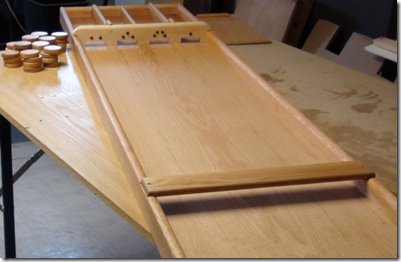
Bob Boutillier sent me an email with pictures of his version of the Sjoelbak. This is what he had to say.
Many years ago my father-in-law showed me a Sjoelbak board that he made and taught me the game. I think it was two years ago that I found your site, and built my own. Thank you for posting those plans. It was great fun to build and still gets a lot of play. I thought I would let you know about a couple of my additions.
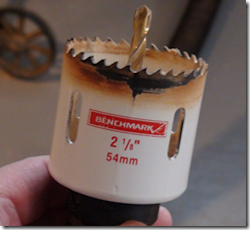
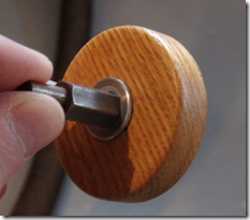
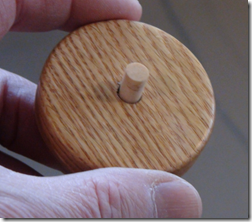
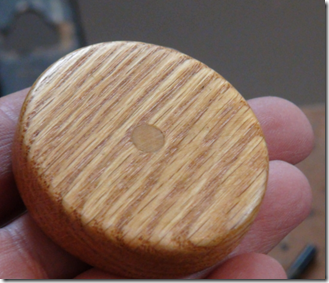
I made my own pucks. They were pretty simple. I used a 2" hole saw to cut out the disks. Then, filled the center hole with a dowel and sanded.
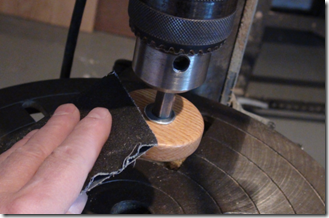
INSTRUCTIONS: (1) Cut the disk blanks with a 2 1/8" (54mm) hole saw. (2) Mount the blank onto the arbor of a drill grinder pad. (3) Mount the assembly onto a drill press and sand. (4) Fill the hole with a dowel. (5) Last, sand smooth and Varathane.
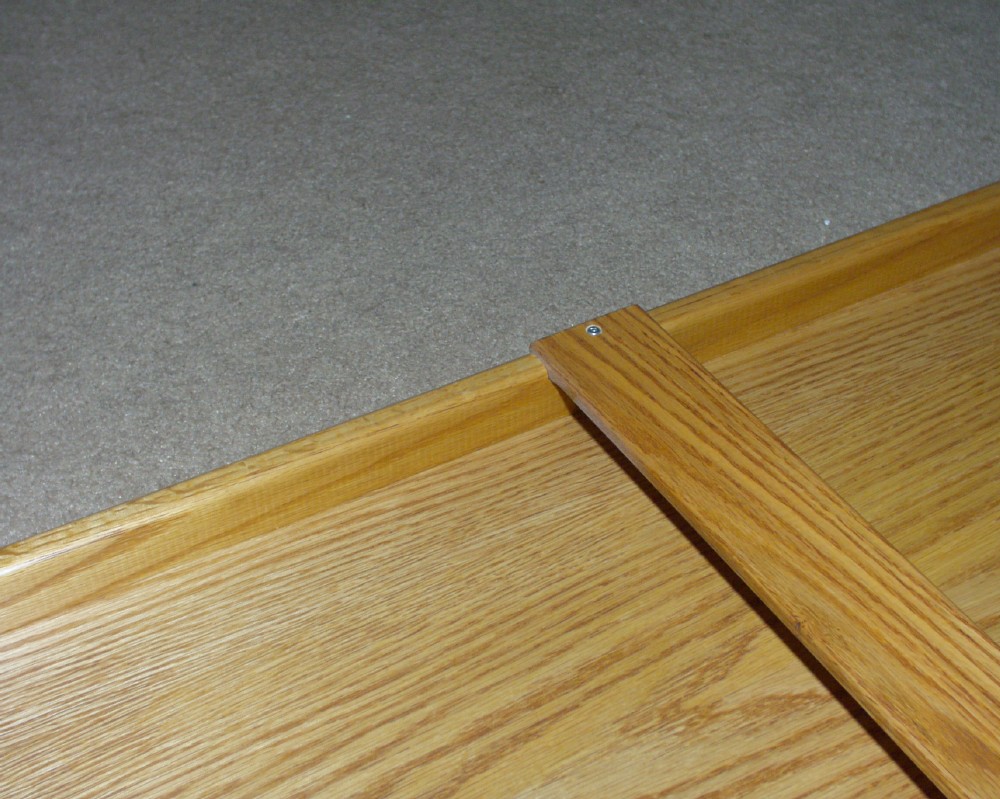
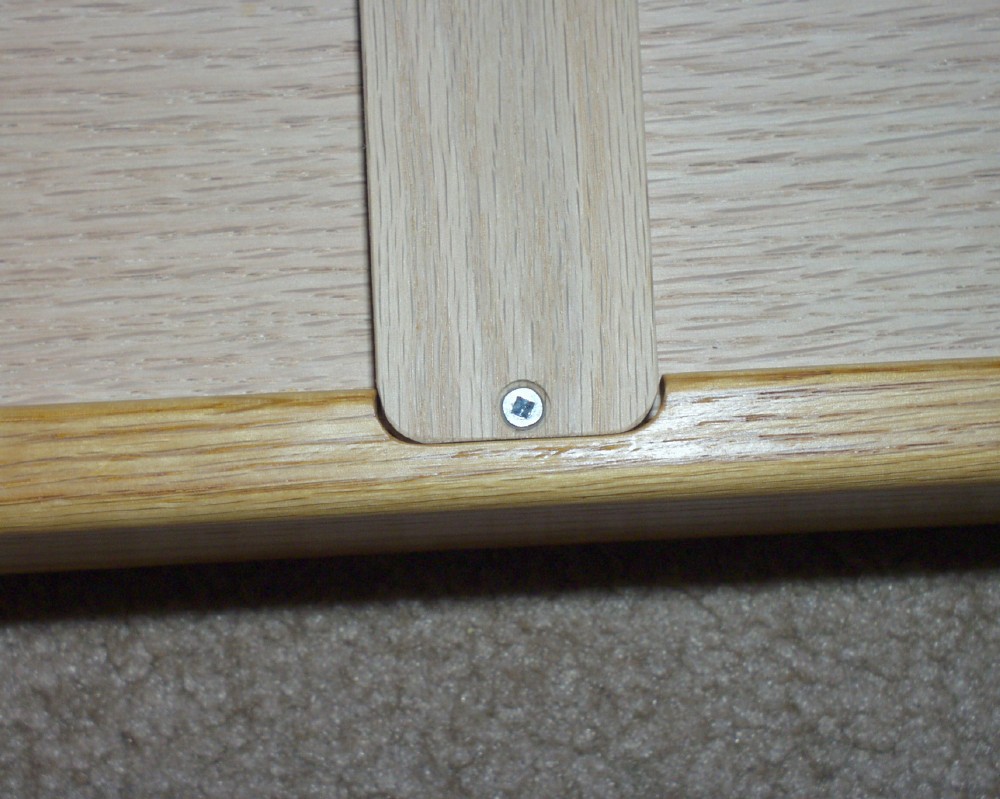
Just last weekend I pulled out the rules. They were a bit different than what my father-in-law taught me, but that is ok. What was interesting was that after each racking of the disks, they should be moved away from the backstop 5 mm to form a buffer. It took no time to fashion up a spacer stick. Tapered on the ends so it easily slides between the disks and the backstop. I thought it might be something you may like to add to your plans.
My comment: Thank you for sharing that with me. Your sjoelbak and disks look fantastic. In hindsight I am sure that his disks will not be accepted for official tournaments as the grain of the wood must run from top to bottom.
Bob is not done yet; this he added in Dec-2016:
I just brought out my board for its winter usage. We keep it in the basement rec room and generally only use when the cold weather comes in and we get the wood stove going. I find each year that it takes me a while to remember the values of the slots when counting up the score. This is because I am usually behind the board looking back at the last player. So, I have made another modification you may be interested in. Marking the back of the scoreboard. All I did was mark out the "dot" placement with a pencil. Then cut a length of wire clothes hanger, heated the tip with a blowtorch, and burn the little dots into the wood. Makes counting really quick.
Bob Parkman contacted me in November 2015 with several questions about the sjoelbak. Then in August 2016 he surprised me with his pictures and story:
"I finally was able to get mine built so that we could use it at the New Years Eve party last year.
I used the Official measurements (Algemene Nederlandse Sjoelbond, Spelreglement Version 2014.02), but I did deviate on the thickness of the sides using 3/4" rather than 12 mm, and the back board using 3/4" rather than 14 mm. The offical game measurements are for 12mm thick sides, 14 mm for the gate and back board.
I kept the over all dimensions as shown in the official Rules, 2000 mm overall length, 1570 mm from back to front of the start bar, and 390 mm from back to front of poortenbalk. The width inside from side to side is 396 mm. I used Oak for everything except the gate which is maple. The bottom and puck compartment cover is 1/4" Oak plywood.
The only problem I had was that the area between the gate and the back ended up a little short because of the thickness of the back board, but all the disks fit in there. I had to use a very thin keeper to cover the holes in the gate to keep the pucks from falling thru the gate holes when the pucks are stored. I also made a gauge board to space the pucks the proper distance from the back board during play. I ordered the official pucks made of beech for the game.
I thank you for your help and encouragement on this project. The game was a big hit at the New Years Eve party, and I even learned some Dutch in the process, as the rules were all in Dutch.
The pucks were ordered thru Dutch Games US. They are not cheap current price is US$47.00, but the shipping is free. These are Dutch made pucks out of beechwood with concave faces. In other words they are Official in size and weight. They come 30 in a pack."
It certainly is a great looking board and thanks to Bob I can now point other folks to a place where they can buy the pucks.
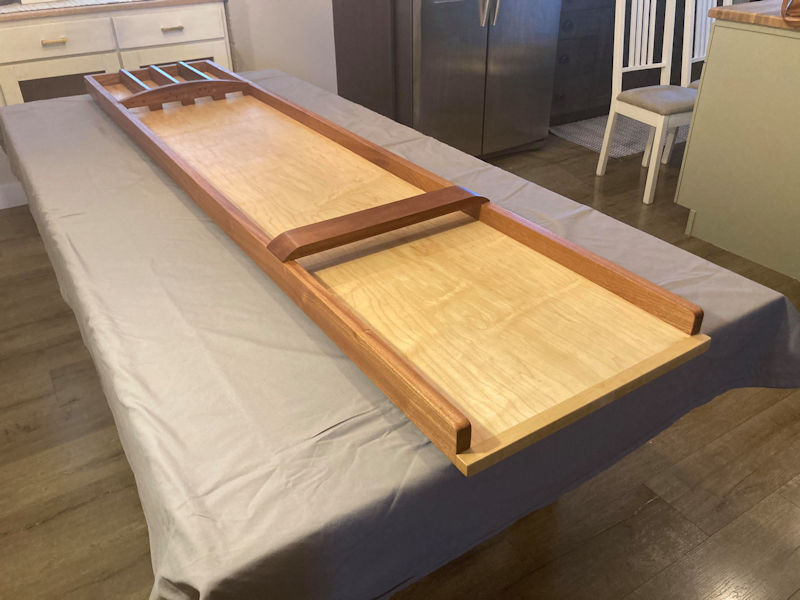
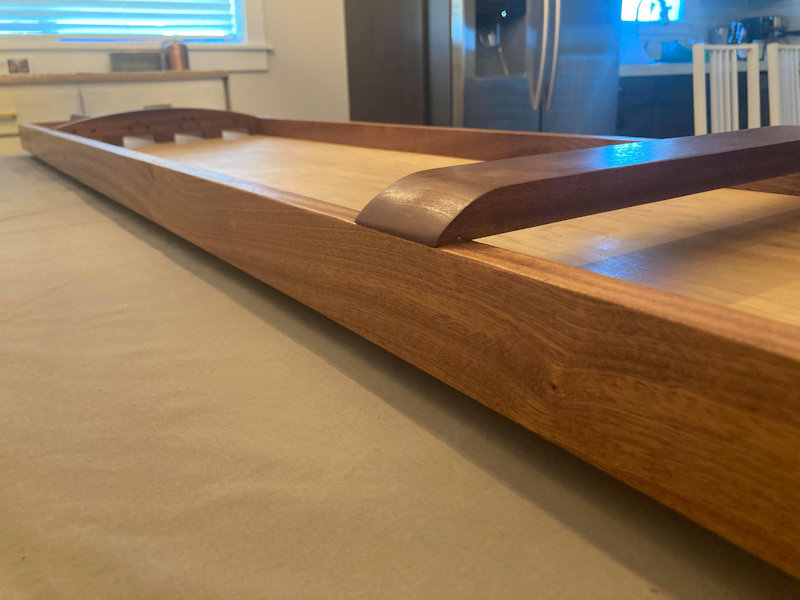
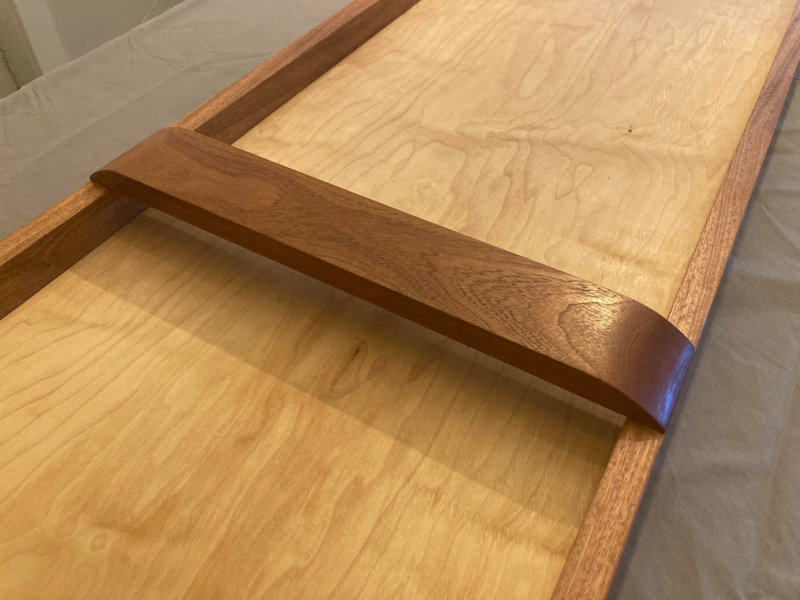
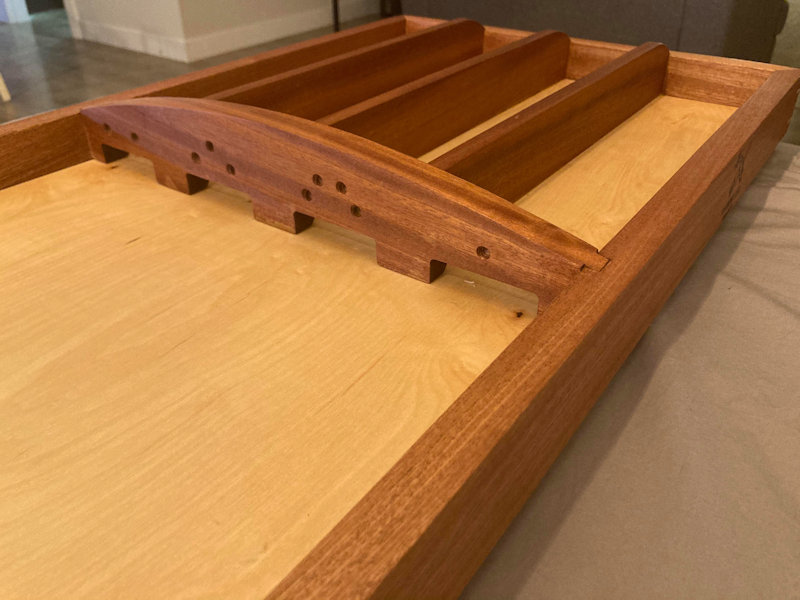
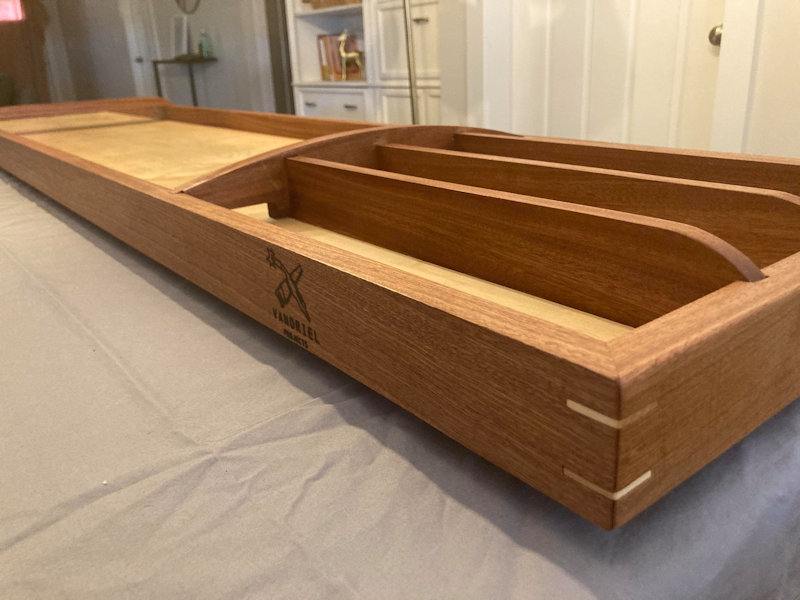
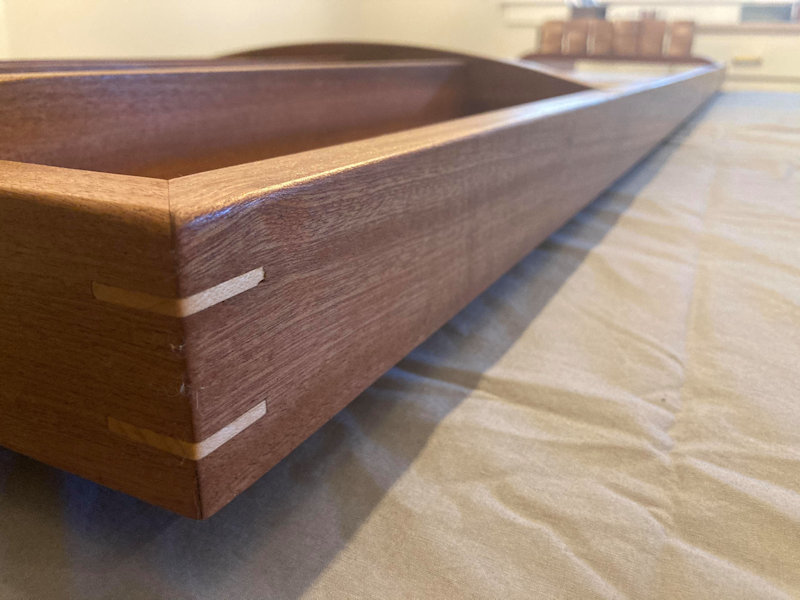
Aaron VanDriel contacted me mid May 2021, and had this to say (edited).
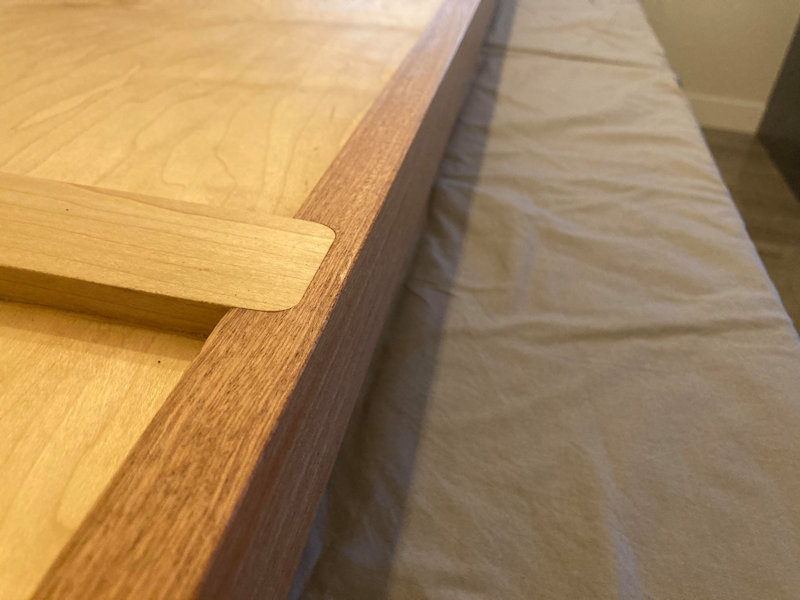
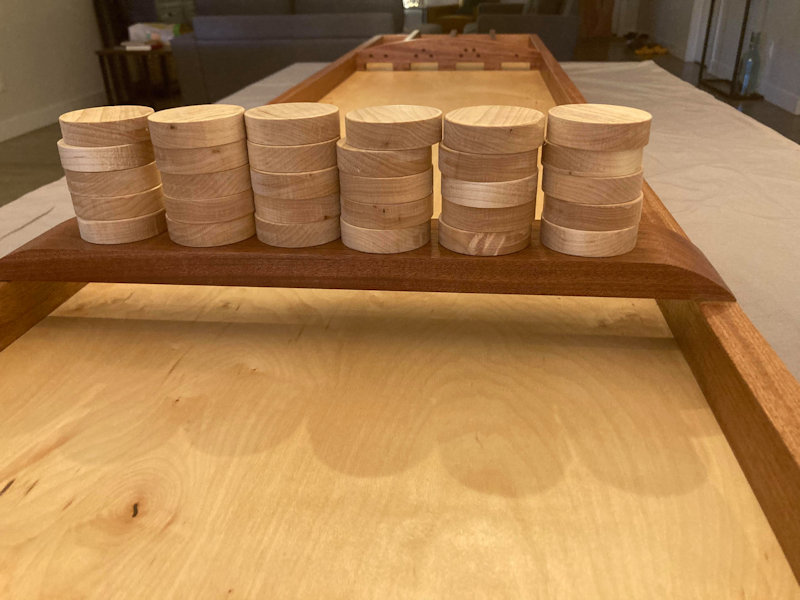
I just wanted to reach out and thank you for the detailed Sjoelbak instructions on your website. I have fond memories of playing Sjoelen on my grandparents' Sjoelbak at their house in British Columbia. I've gotten into fine woodworking as a hobby, and I just knew I had to tackle the Sjoelbak project! I am about half-way finished with the Sjoelbak at this point (building the scoreboard and puck separators, as well as finishing, remain). If you're interested I'd love to send you photos of the finished product to feature on your website. I am going with a bitonal look with maple and sapele (type of mahogany) -- it should turn out great with help from your detailed plans!
A week later Aaron surprised me with a YouTube video of his beautiful artful project where the use of CAM (Computer Aided Manufacturing) is also demeonstrated: https://www.youtube.com/watch?v=N6UF-9kNz0g
Here is a selection from the pictures he provided.
Anja Richards wrote that her husband had made several sjoelbakken. Her suggestion is to use through dowels of a contrasting colour so that the score value can be seen on both sides of the score board. I thought that it was a nice idea. Note that Bob Boutillier (above) had marked the score board already on the back by using burn marks.
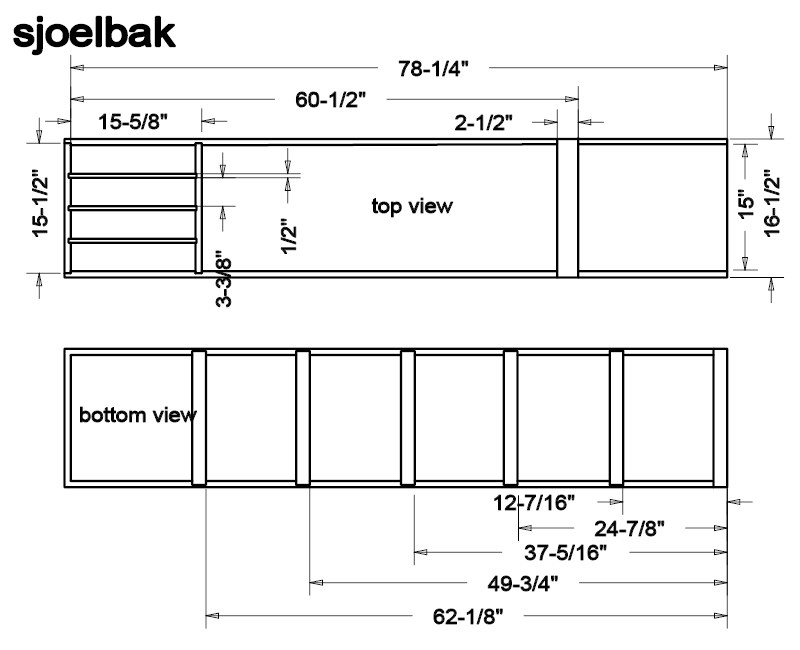
Plans, Drawings, Sketches (inches)
To view or print the full scale drawing just click on a drawing, and then use the print-preview of the browser to select portrait/landscape format and (re)size the drawing before doing the actual printing.
Materials List (inches)(30-Mar-2006)
no.
description
length
width
thickness
suggested basic material, comments
1
baseboard
78 1/2
15 7/16
3/16
1/4" red oak plywood G2S
1
lid over two centre compartments
15 1/2
7 3/4
3/16
1/4" red oak plywood G2S
1
hole cover for two centre compartments
7
1 1/4
3/16
1/4" red oak plywood G2S
2
left/right side
79
2
3/4
3/4 red oak, 2 1/2 wide (1x3)
1
back side
15 1/2
2
3/4
3/4 red oak, 2 1/2 wide (1x3)
2
left/right compartment separator
15 1/2
2 1/2
1/2
3/4 red oak, 2 1/2 wide (1x3)
1
start bar
16 1/2
2 1/2
1/2
3/4 red oak, 2 1/2 wide (1X3)
1
center compartment separator
15 1/2
1 3/8
1/2
3/4 red oak, 1 1/2 wide (1x2)
5
bottom support, middle
15 3/4
1 5/8
3/8
3/8 red oak, 3 1/2 wide (1/2x4) length will be adjusted during final assembly
1
bottom support, beginning
16 1/2
1 5/8
3/8
3/8 red oak, 3 1/2 wide (1/2x4)
1
scoreboard
15 1/2
2 1/2
5/8
3/4 maple, 2 1/2 wide (1x3)
30
round puck, slightly hollow in centre
2 round
1/2
beech
10
decorative furniture nail
1/2
1/2 head
copper, brass, etc. for scoreboard
25
screw
1
#6
stainless
Watco Danish Oil, golden oak
to seal the wood
Briwax, antique mahogany
to get smoothness and bring out the wood grain
LePage carpenter's glue
yellow, cabinet maker's quality
Buy high quality red oak, maple and plywood as any imperfection in the material can impact that heated championship competition!
Required Tools
Power tools -- table saw, miter saw, planer, router, hand drill, random orbit sander.
Hand tools -- screw driver, sanding block, tape measure, square, straight edge, clamps, drill bit with countersink.
Construction (30-Mar-2006)
All measurements are in inches (1 inches = 2.54 cm) because all wood measurements in the shop are in inches. The sjoelen game is at least a century old and in those days all measurements were in inches as well. So it all makes sense.
I recommend to cut, shape and sand all pieces and dryfit them together with clamps as soon as possible. I cut 5 temporary spacer pieces from scrap wood at exactly 15" long, the inside width of the board, and about 2" wide. These are handy when clamping everything together while keeping the side pieces at the correct distance from each other.
Cut and shape the stock
Ok, let us start. Cut and shape the stock according to the materials list. Cut a 1/4" grove in the sides and the backside to receive the baseboard at 1 3/8" from the top. Cut a 1/4" notch out of the end of the sides to receive the backside. Cut the dado slot for the scoreboard in the sides. Mark the place for the bottom support pieces on the sites and router out the material up to the grove. Notice that the support piece at the beginning of the sjoelbak goes the full width so you need to cut out a notch there. Mark the start bar position on the side pieces and cut out a notch. Finally shape the beginning of sides and round over the edges of all pieces.
Shape the scoreboard and cut the 4 openings. Router the groves in the backside and the scoreboard to receive the three compartment separators. Notice that the center separator has a slot at the top to receive the little hole cover. The slot prevents the hole cover from sliding away.
Cut a grove in the two side compartment separators so that you can slide in the lid to keep the pucks in the middle two compartments when storing the sjoelbak away. There is a little piece to cover the two holes. Glue a decorative handle on top of the lid.
Before final assembly treat all surfaces with two coats of Danish Oil. DO NOT treat the underside of the baseboard and the support pieces otherwise you cannot glue the support pieces under the baseboard. Once the oil is dry polish all surfaces and then apply Briwax (a hard furniture wax) and polish it so that it is smooth as ice!
Final assembly
Now the final assembly. Nail the decorative furniture nails above the openings in the scoreboard in the order 2, 3, 4 and 1. Only the support pieces under the baseboard are glued against the baseboard. All the other pieces are kept together with screws. As we are working with red oak we need to pre-drill and counter sink all holes. Dry fit everything together once again with clamps. Put the temporary spacer pieces inside the sjoelbak on top at the approximate place where the support pieces at the bottom are coming.
Ensure that the backside is square with the sides and fasten with 2 screws on each side. Turn the sjoelbak upside down. You may have to reposition the clamps. Install the support pieces starting with the one under the scoreboard and working towards the beginning of the sjoelbak. This is your last chance to ensure that the baseboard is against the backside and that the backside is square with the sides. Look along the sides to ensure that they are absolutely straight. Cut the support piece to the exact length and shape. Now apply glue to one side of the support piece, put in place and push down so that the baseboard is pushed against the top of the grove in the sides and secure the support piece with one screw on each side. Finally clamp the scoreboard and the support piece together to make sure there is a good bond between the baseboard and support piece. Let glue set for about half an hour.
Then do the next support pieces using the temporary spacer pieces on the top side for clamping. Each time check that sides remain straight. The last support piece at the beginning of the sjoelbak spans the full width of the sjoelbak. Once installed and the glue is dry you need to finish this piece with Danish Oil and Briwax.
Turn the sjoelbak right side up. Push the scoreboard down and secure with two screws on each side. Push the compartment pieces down and put in a screw on each end. Finally place the start bar and fix with a screw on each side.
Ongoing maintenance
Dust off with soft cloth before and during use. To restore smoothness spray very lightly with Johnson Pledge and wipe with soft cloth to desire luster. If this does not give the desired result anymore, then apply Briwax from Henry Flack LTD, Beckenham, England, and rub to desired smoothness. Do not use the sjoelbak for a few days to let the Briwax volatile components evaporate.
Scoreboard layout -- front (inches)
Give the top a nice decorative shape. The openings in the scoreboard are 5/8" high. The other measurements are:
description
width
start
end
recessed in left side
1/4
0
1/4
material
11/16
1/4
15/16
opening for 2 points score
2 3/8
15/16
3 5/16
material
1 3/8
3 5/16
4 11/16
opening for 3 points score
2 3/8
4 11/16
7 1/16
material
1 3/8
7 1/16
8 7/16
opening for 4 points score
2 3/8
8 7/16
10 13/16
material
1 3/8
10 13/16
12 3/16
opening for 1 point score
2 3/8
12 3/16
14 9/16
material
11/16
14 9/16
15 1/4
recessed in right side
1/4
15 1/4
15 1/2
Scoreboard layout -- back side (inches)
The dado slots are 1/4" deep and 1/2" wide:
description
width
start
end
over #2 opening
3 5/8
0
3 5/8
left dado slot
1/2
3 5/8
4 1/8
over # 3 opening
3 3/8
4 1/8
7 1/2
middle dado slot
1/2
7 1/2
8
over #4 opening
3 3/8
8
11 3/8
right dado slot
1/2
11 3/8
11 7/8
over #1 opening
3 5/8
11 7/8
15 1/2
Positioning of supports under baseboard (inches)
Spacing between the supports under the baseboard is 12 7/16" starting at the beginning of the sjoelbak, i.e. where you will sit.
start
centre
end
comments
0
13/16
1 5/8
beginning of baseboard
12 7/16
13 1/4
14 1/16
24 7/8
25 11/16
26 1/2
37 5/16
38 1/8
38 15/16
49 3/4
50 9/16
51 3/8
62 1/8
62 15/16
63 3/4
under scoreboard
Other critical measurements (inches)
what is measured
measurement
inside backside to front scoreboard
15 5/8
inside backside to front start bar
60 1/2
inside backside to edge of board
78 1/4
inside width
15
inside height
1 3/8
height of score openings
5/8
space between baseboard and start bar
1 1/8
References
Algemene Nederlandse Sjoelbond (in Dutch) -- We bought the pucks from one of the contacts listed on the official sjoelen web site as we don't have a lathe. They don't do mail order, which is for us no problem as we visit Holland from time to time.


 Bob Boutillier sent me an email with pictures of his version of the Sjoelbak. This is what he had to say.
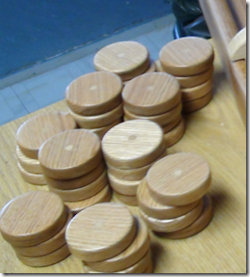
 I made my own pucks. They were pretty simple. I used a 2" hole saw to cut out the disks. Then, filled the center hole with a dowel and sanded.
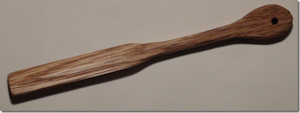
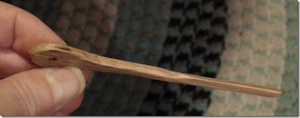
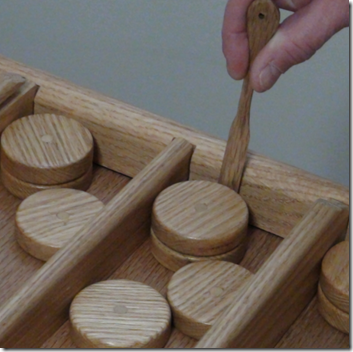 Just last weekend I pulled out the rules. They were a bit different than what my father-in-law taught me, but that is ok. What was interesting was that after each racking of the disks, they should be moved away from the backstop 5 mm to form a buffer. It took no time to fashion up a spacer stick. Tapered on the ends so it easily slides between the disks and the backstop. I thought it might be something you may like to add to your plans.
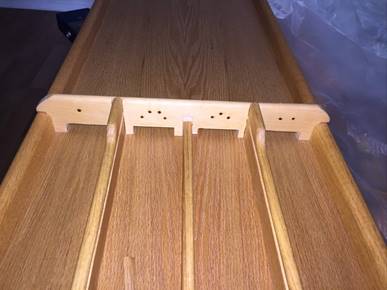 Bob is not done yet; this he added in Dec-2016: