Roll Top Desk -- 367 hours -- Can$ 2715.00 -- Advanced
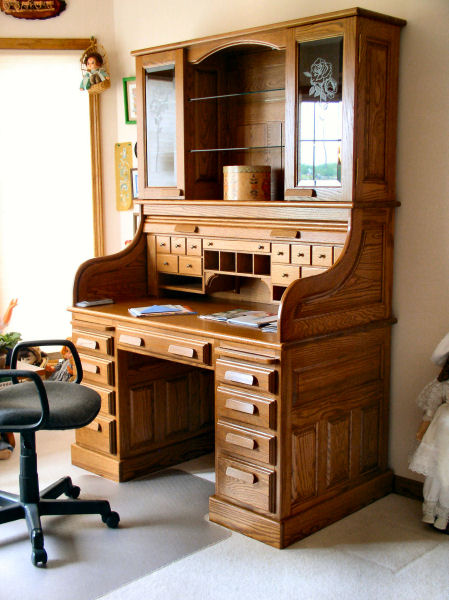
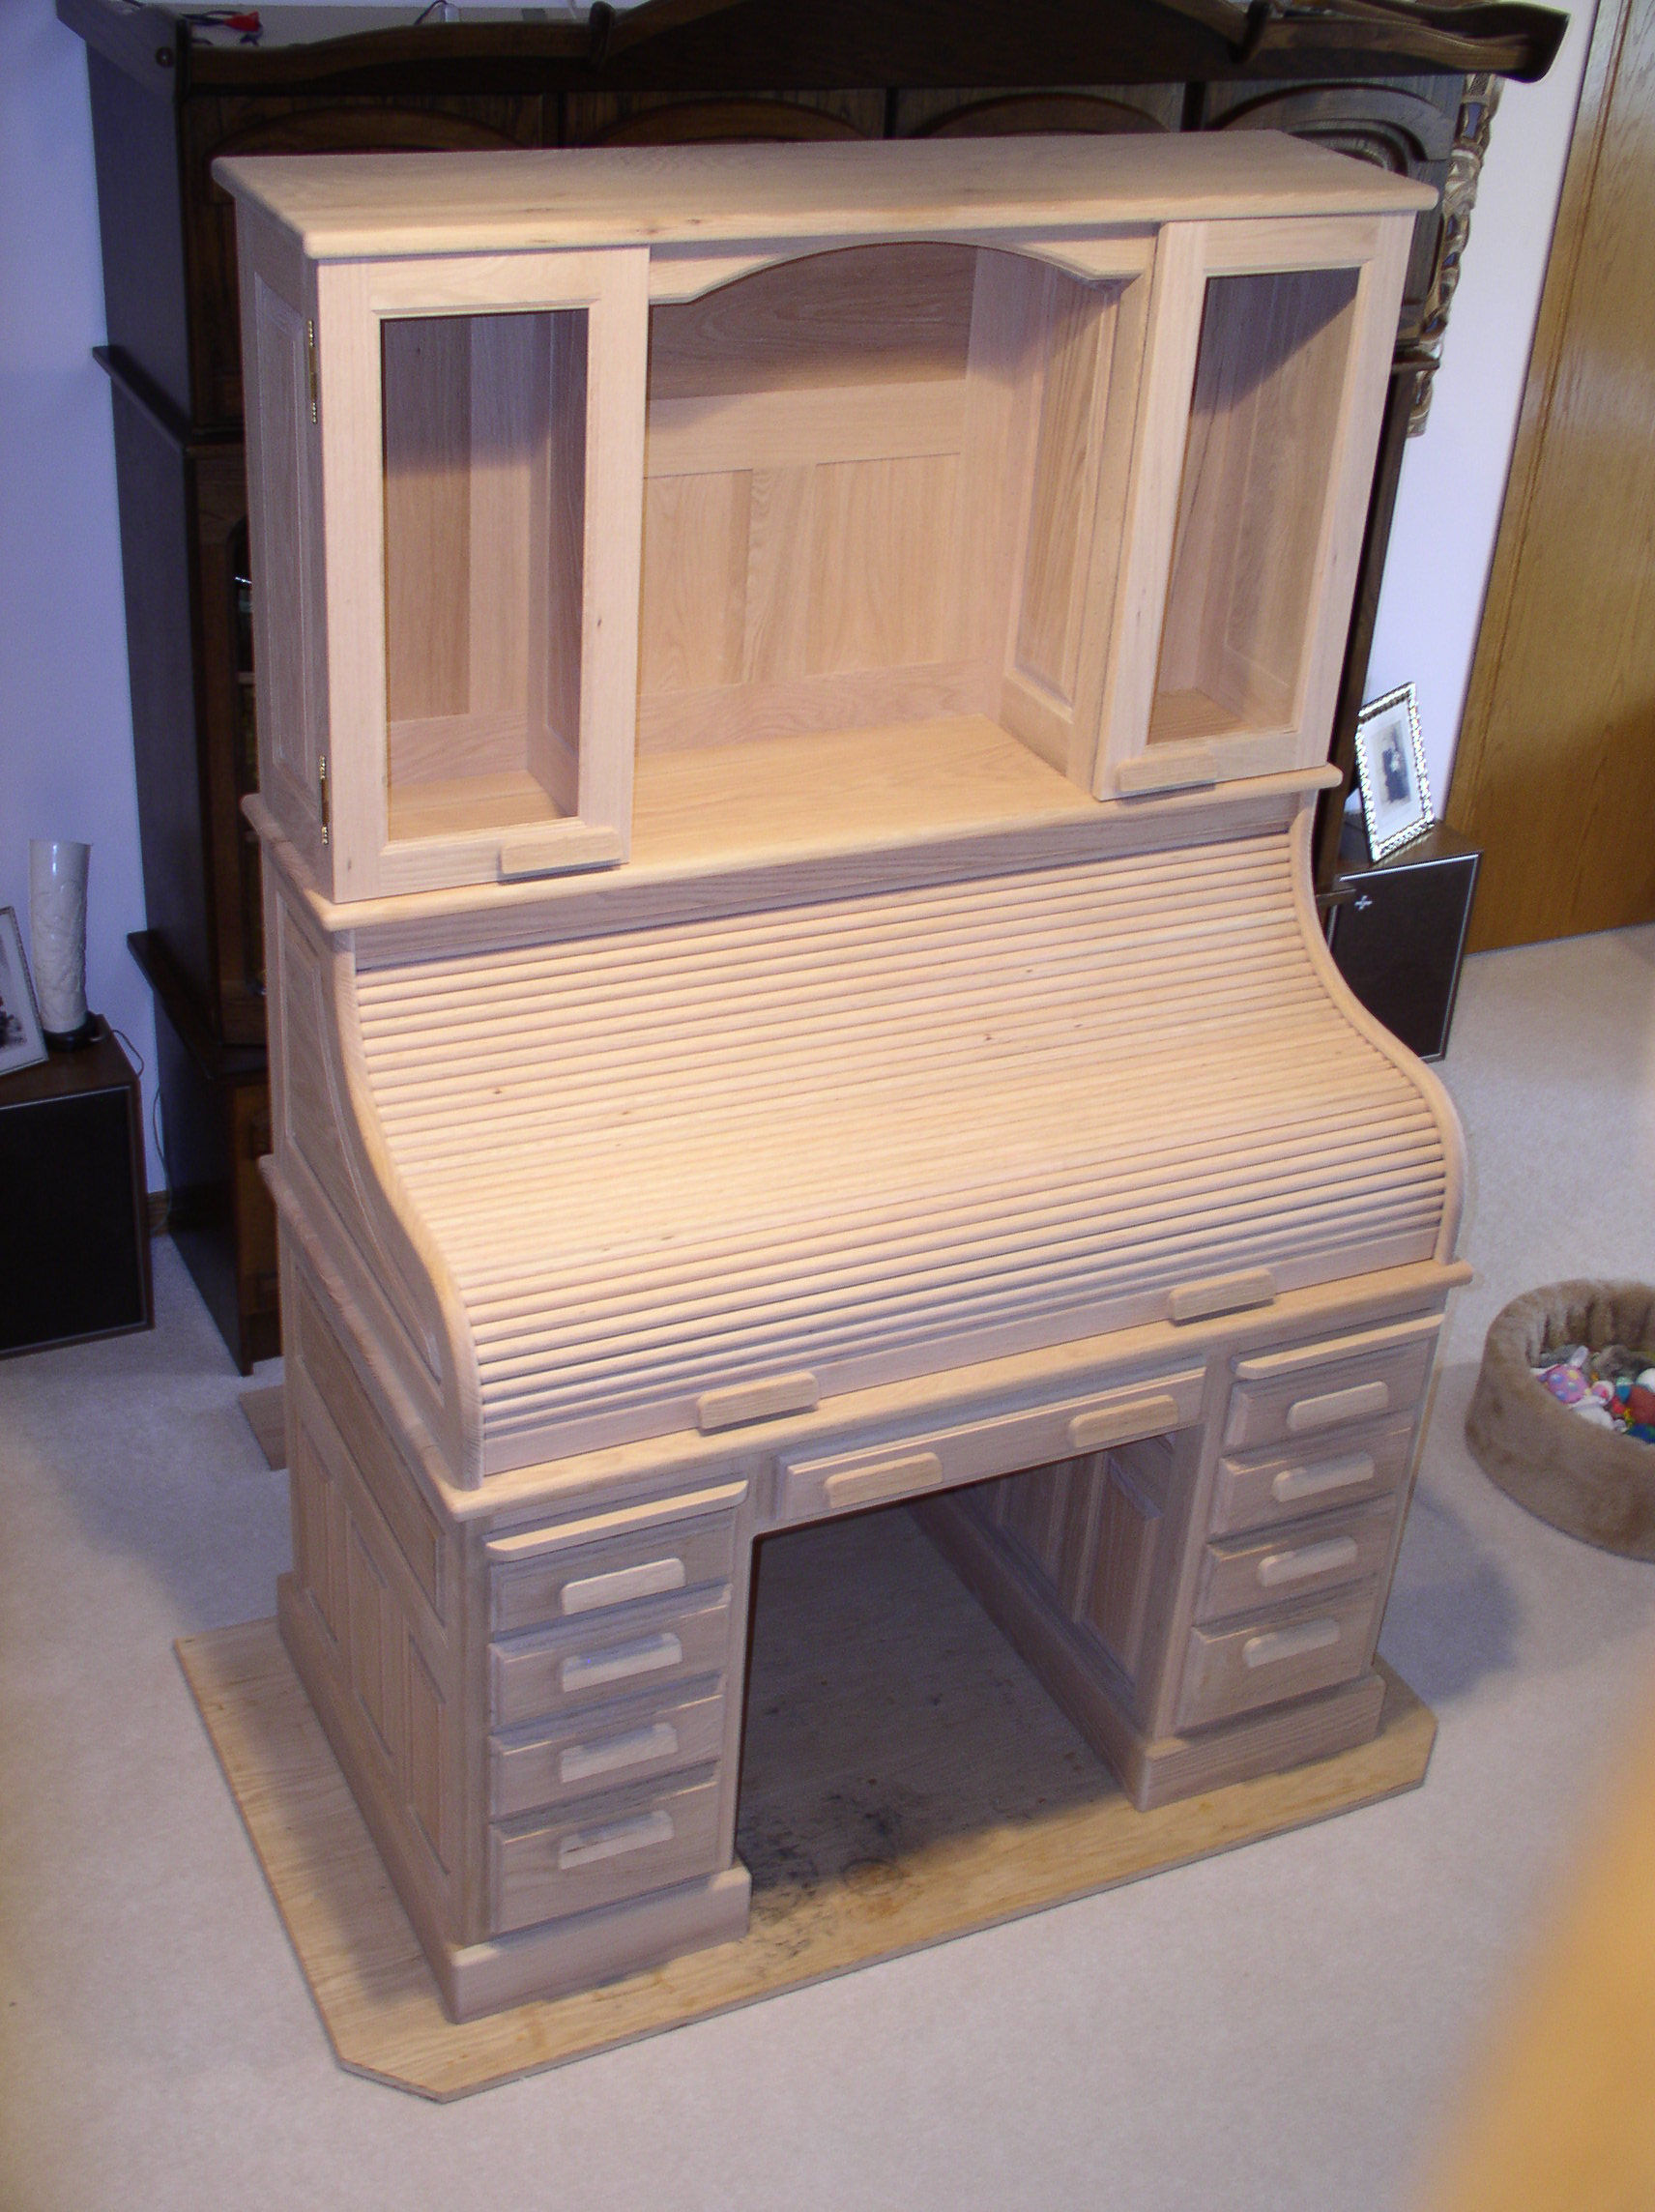
My wife, Jeannette, wanted to have a roll top desk for a long time. She likes the roll top, but above all lots of little drawers and cubby holes. And then of course some secret compartments. I really don't see the point as I would know where they are, but... when the boss speaks... I obey. As this desk will replace two other storage cabinets, another requirement is that there be some kind of "hutch" on top of it all. The whole desk will be made from red oak that is ready available in our area.
The total time includes approximately 25 hours of studying the plan and preparing the list of materials to buy. Some 20 hours can be contributed to learning how to use the Leigh mortise and tenon jig and the Leigh dovetailing jig, as well as time needed to correct mistakes. The first piece of wood was cut on 7-Feb-2005. The plan was to have this project completely finished by mid May or there about. On May 7th all the woodworking was done, and on May 31st the staining and varnishing was completed.
Compare this with the roll top desk project at the American Sycamore Woodworking School. Tuition and materials is US$ 1,800.00 for an intense 12 days of using professional tools under professional guidance with what looks like an excellent lunch as well. Hours are from 9:00 A.M. until 5:00 P.M., so roughly 96 hours at Can$ 2,200.00, and you take your own built roll top desk home.
(11-Feb-2016) The storage unit has "cubby" holes as per the drawing and instructions. I am reading the book Dragonfly in Amber, i.e. book 2 in the Outlander series, by Diana Gabaldon, and in that book they are called pigeonholes on page 28. So you know.
Conclusion
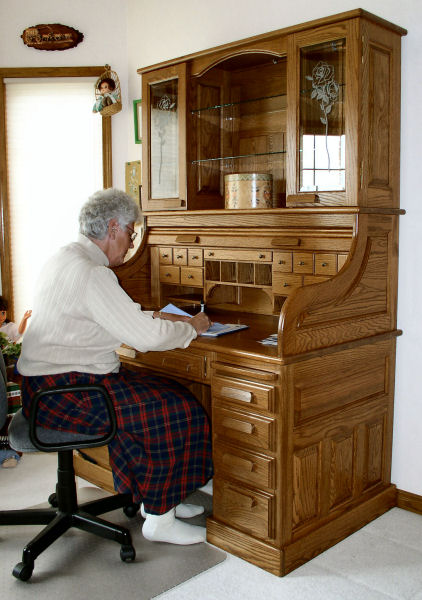
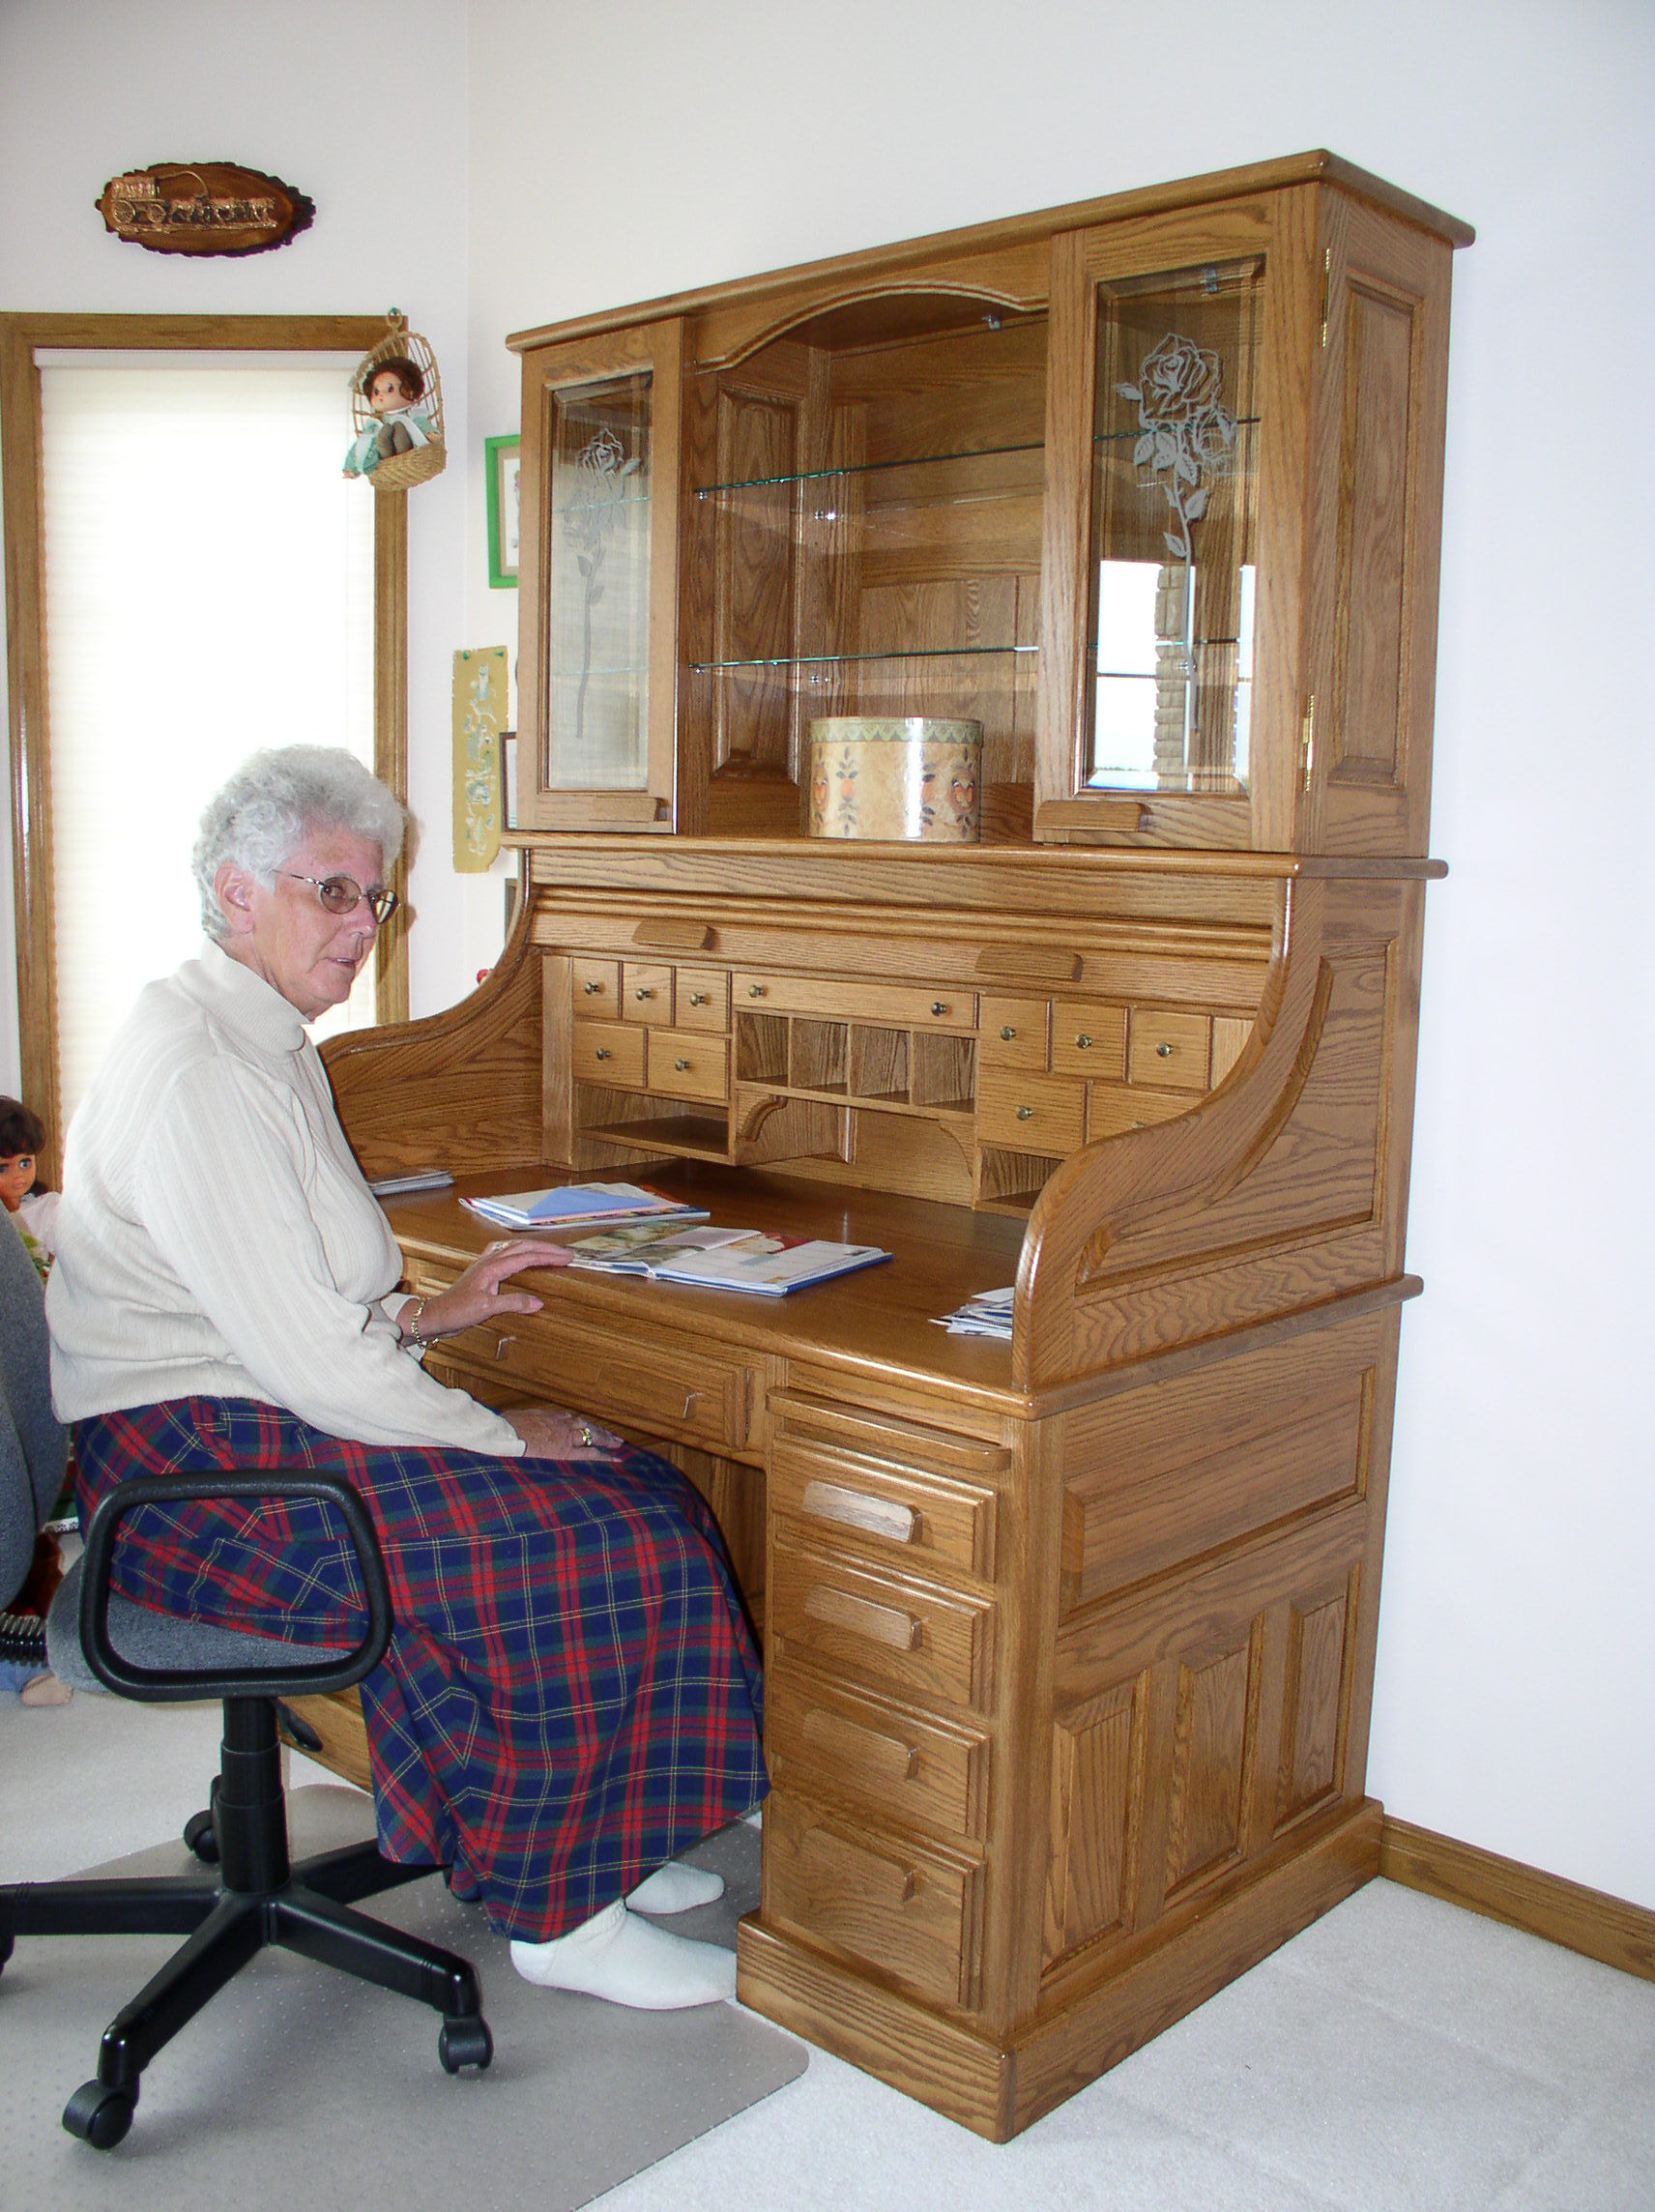
Looking at the finished roll top desk I must say that it looks great. It is definitely my best project ever. Although the project had its frustrating moments, it was a great project to do, while I learned a lot in the process. Looking back at the project there were certainly areas where things could have been done more efficient, but on the other hand the time of a retired guy is free. And last but not least, the wife is very happy with it, and that is in the end what counts.
Pictures
Click on a picture to get a larger picture and then used the back button of the browser to return.
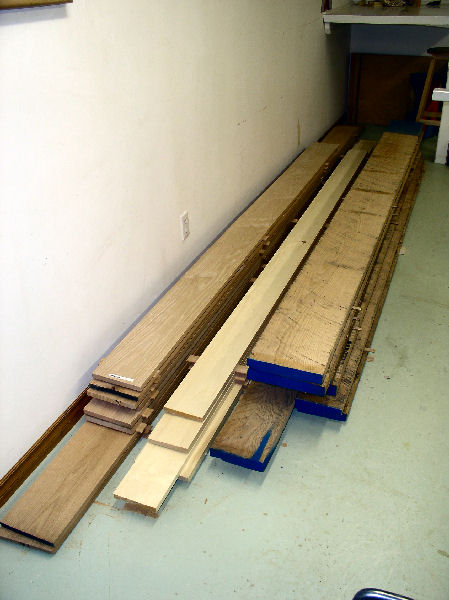
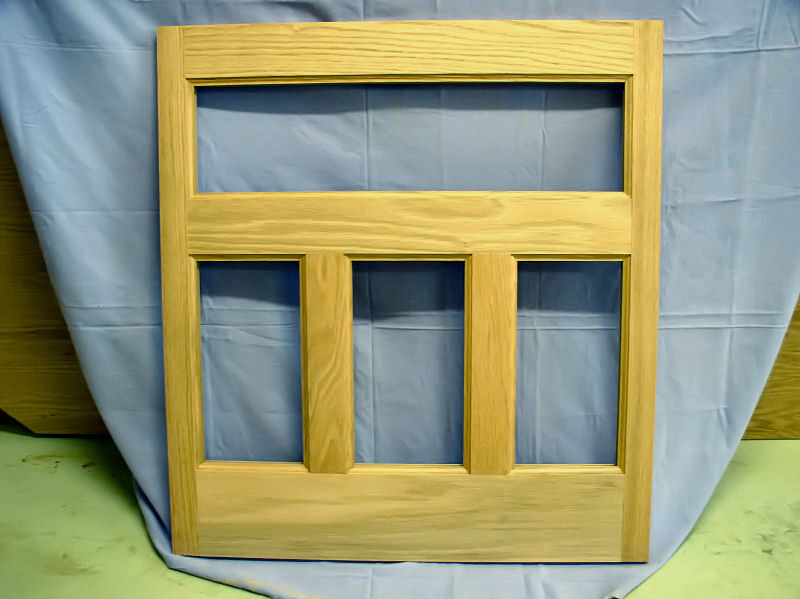
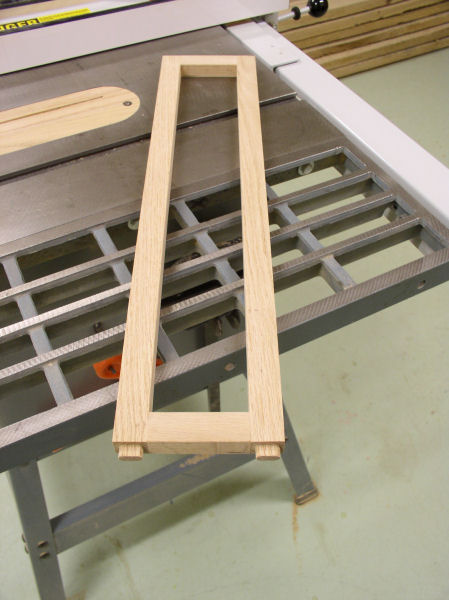
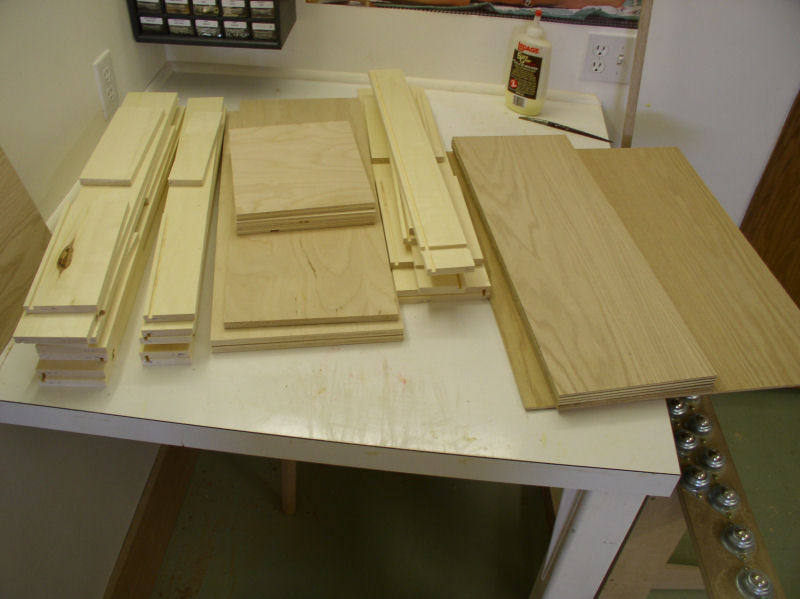
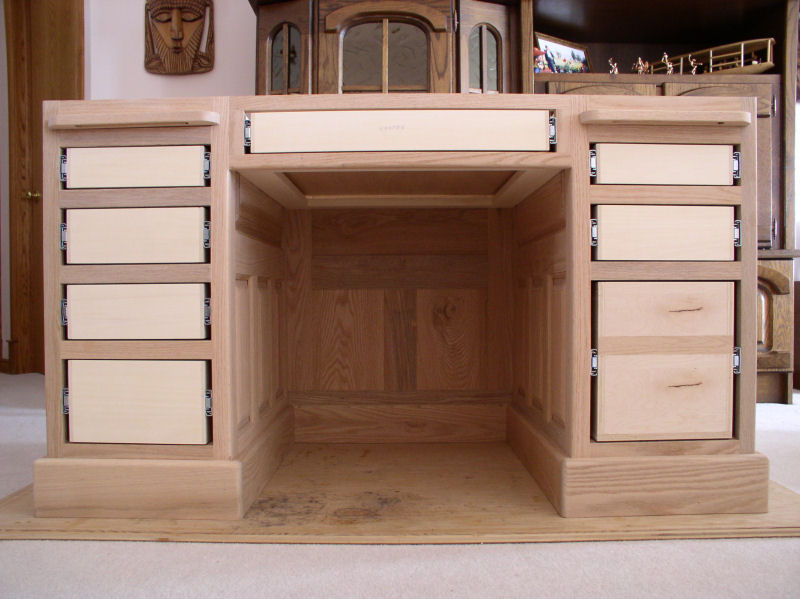
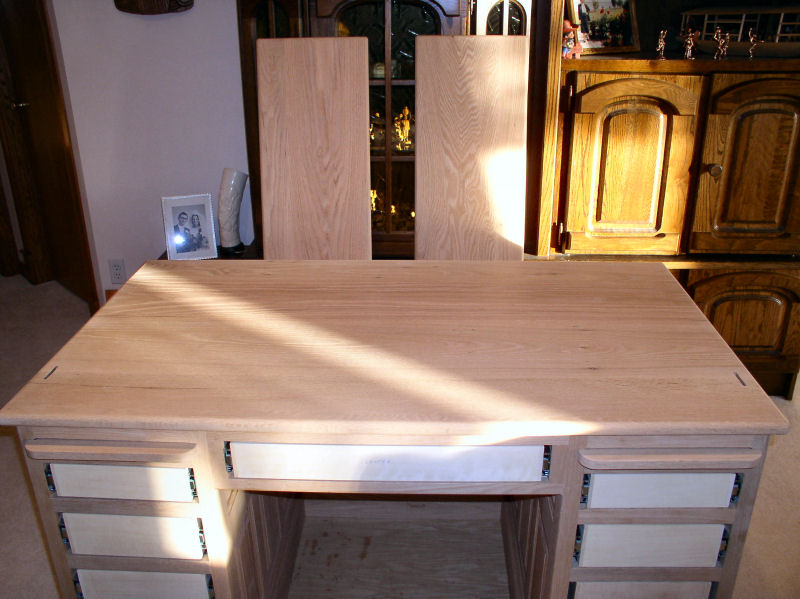
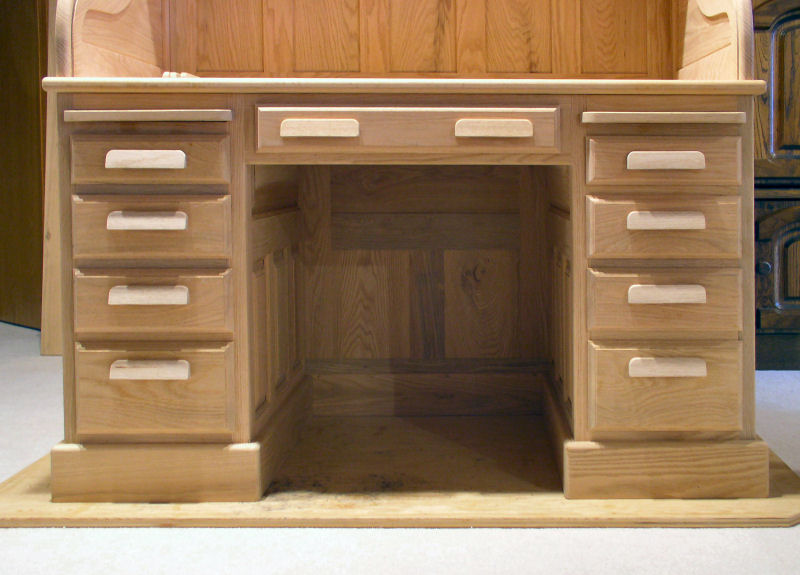
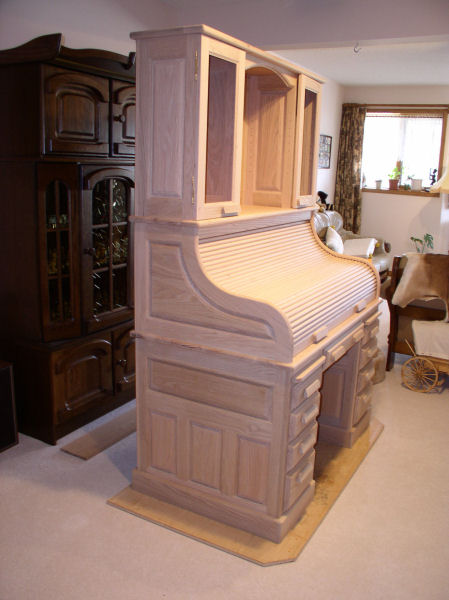
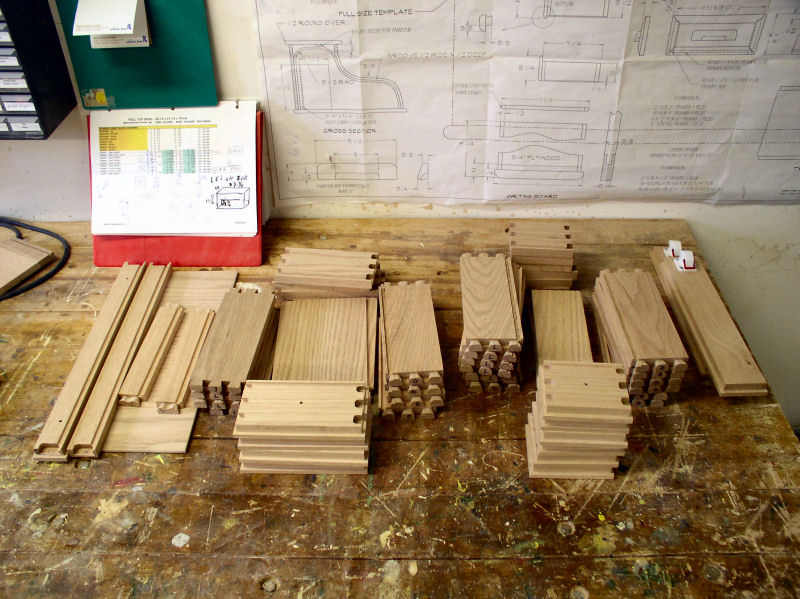
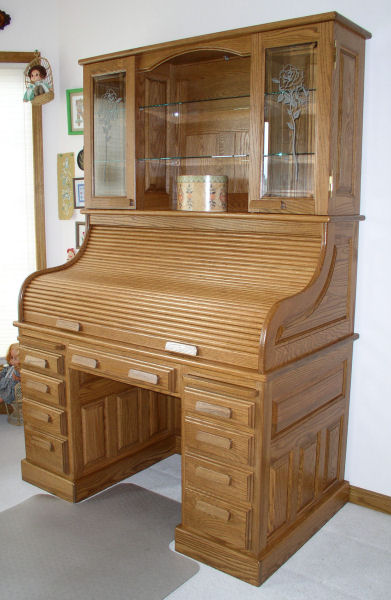
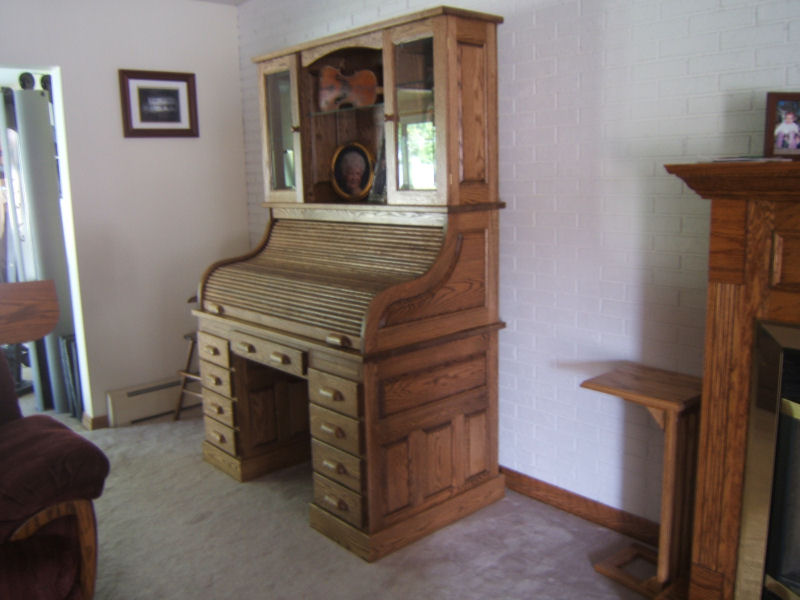
The ultimate goal, plus hutch on top.Half of the 3/4" red oak, all the aspen stock, and all the 6/4 rough-sawn red oak.Rails and stiles of lower desk side panel dry-fitted to verify measurements
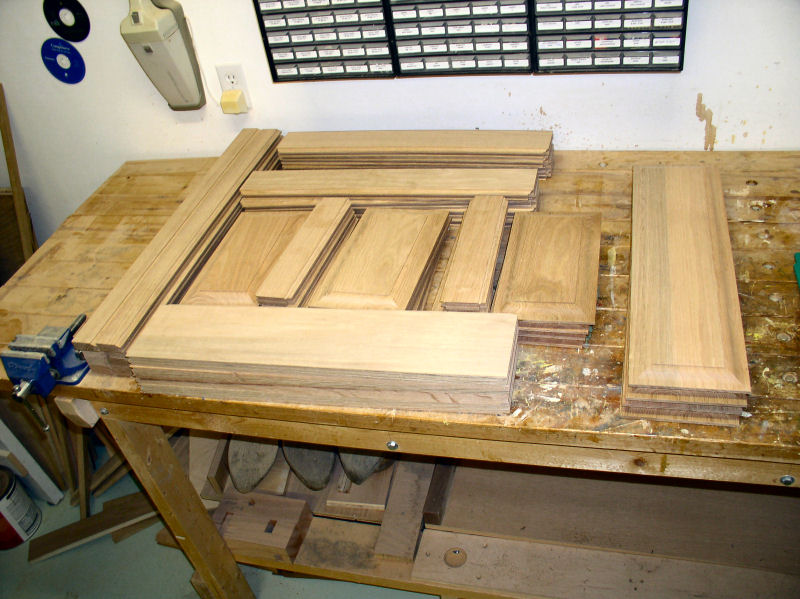
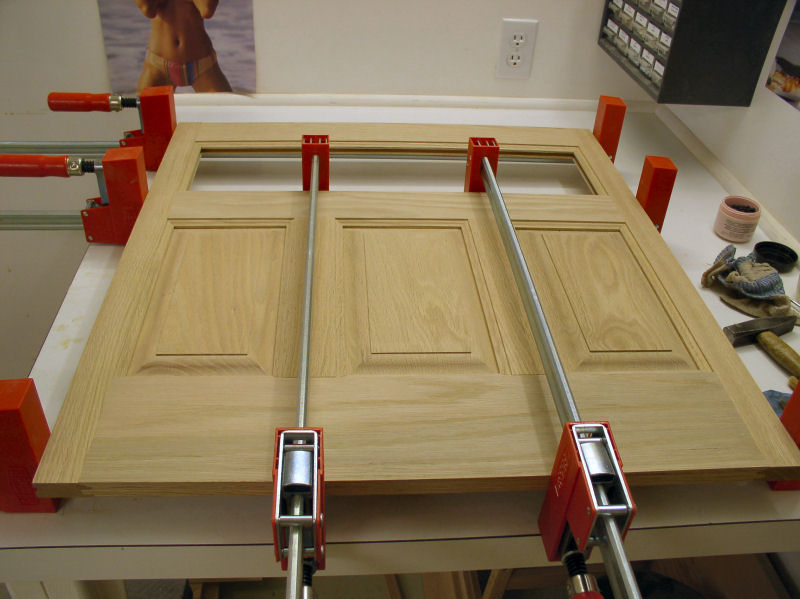
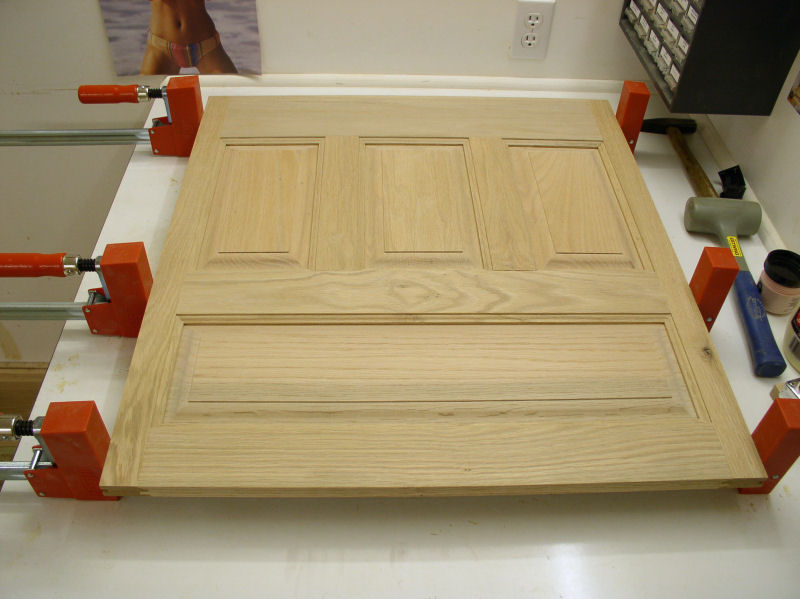
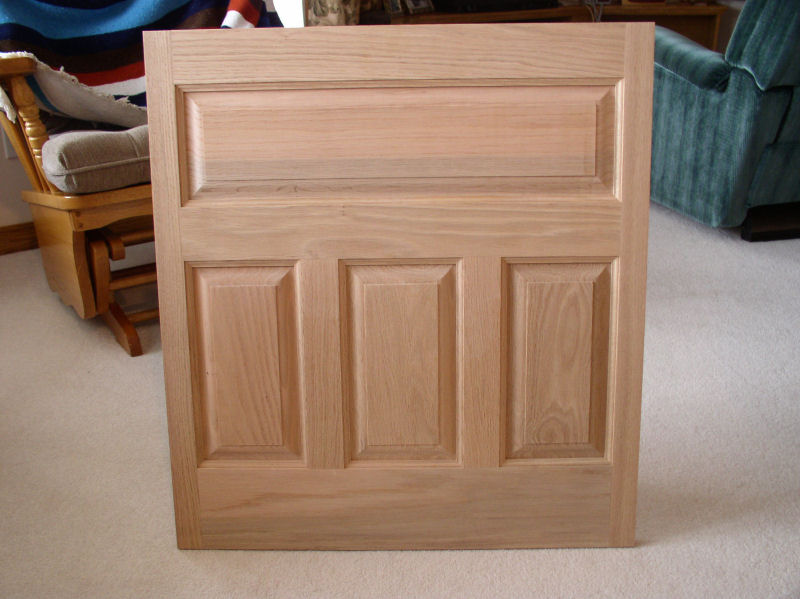
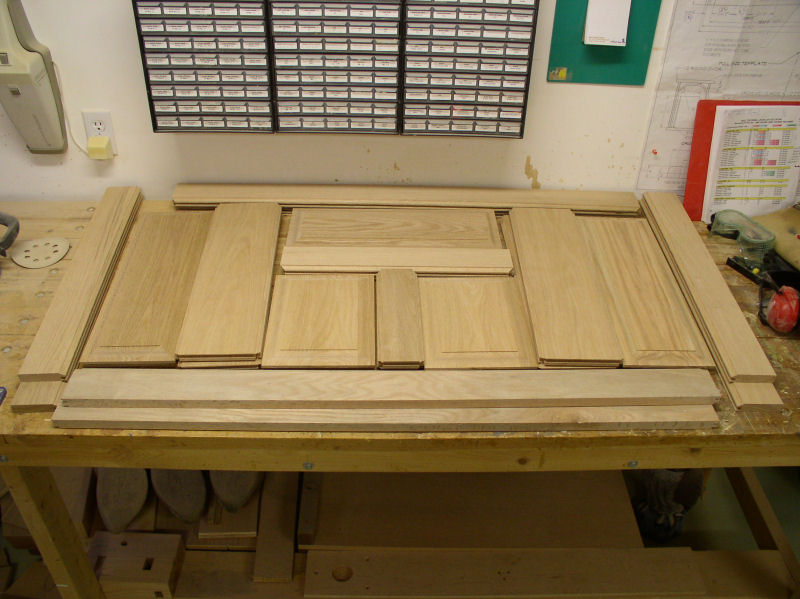
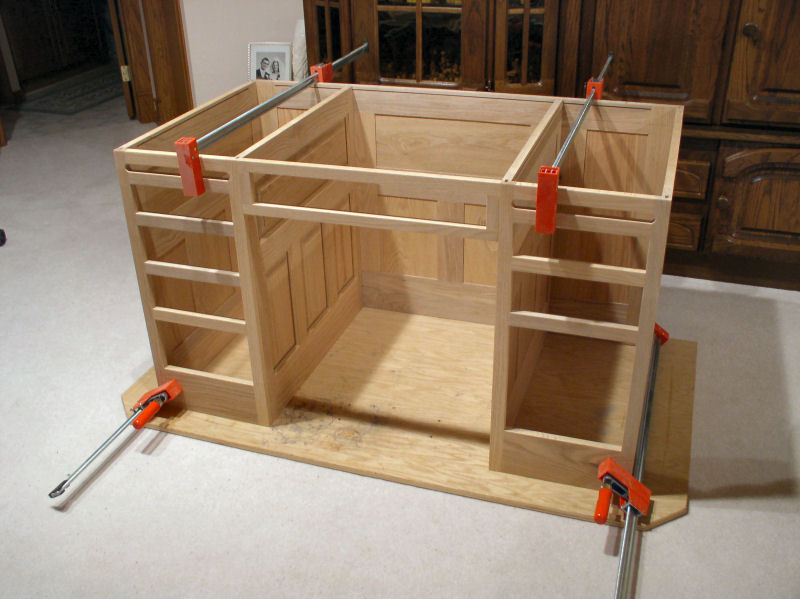
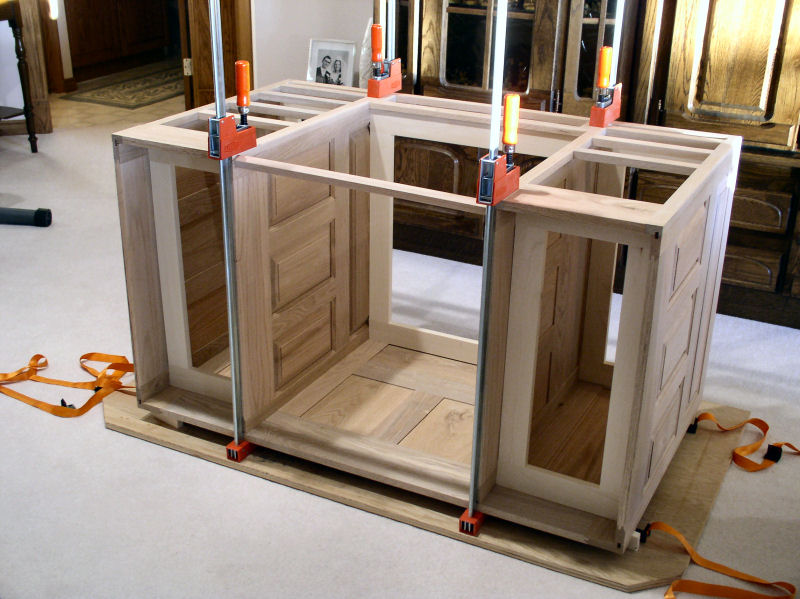
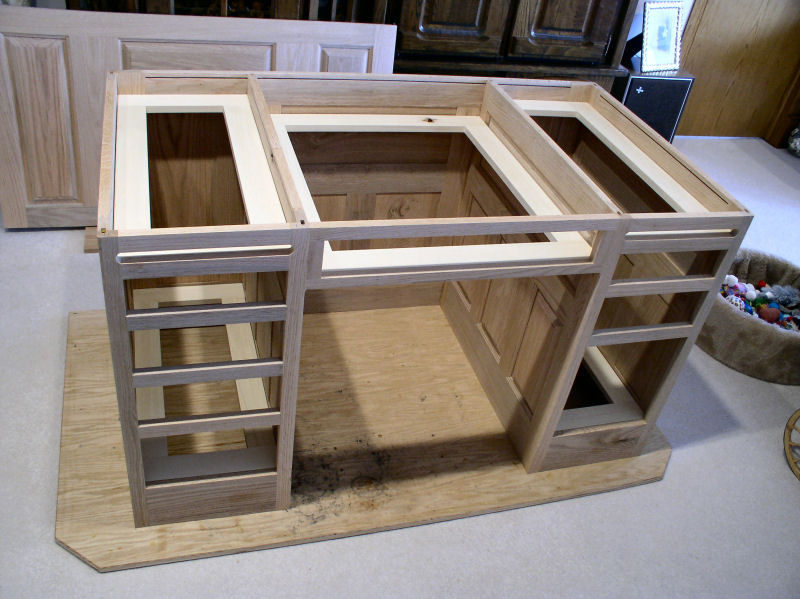
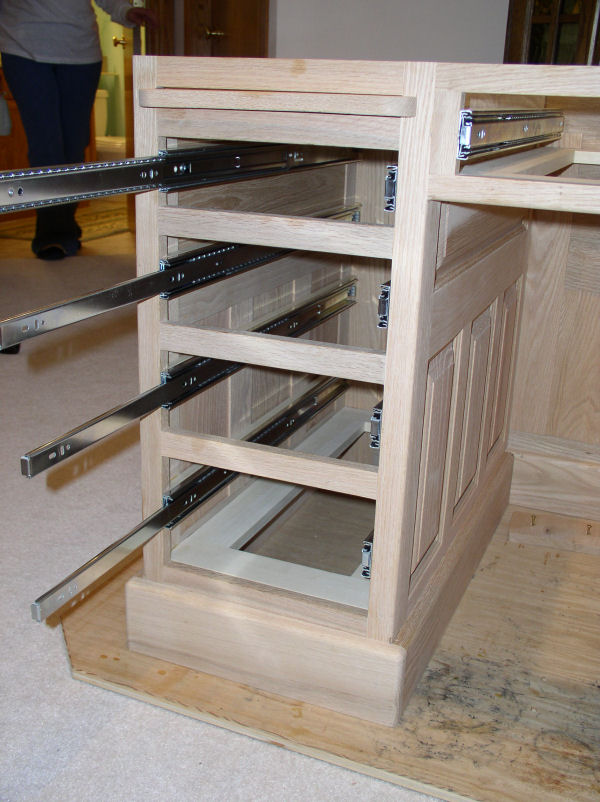
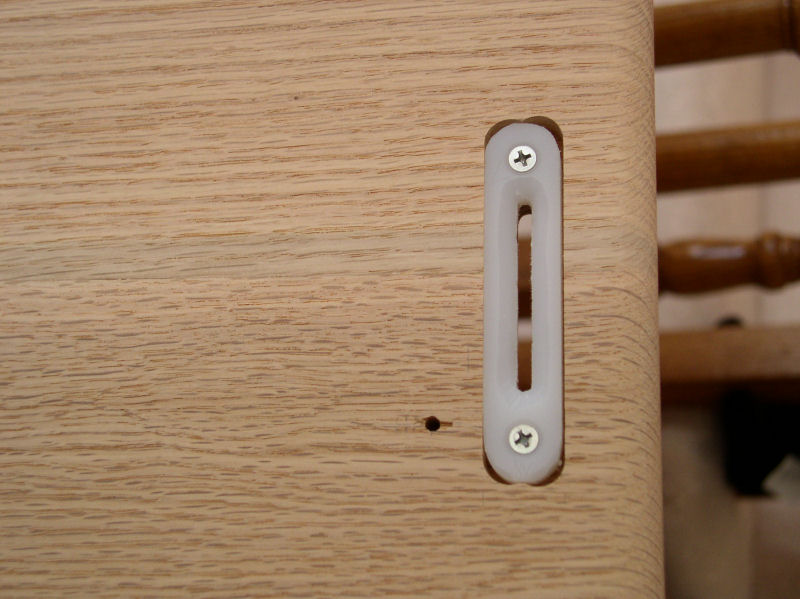
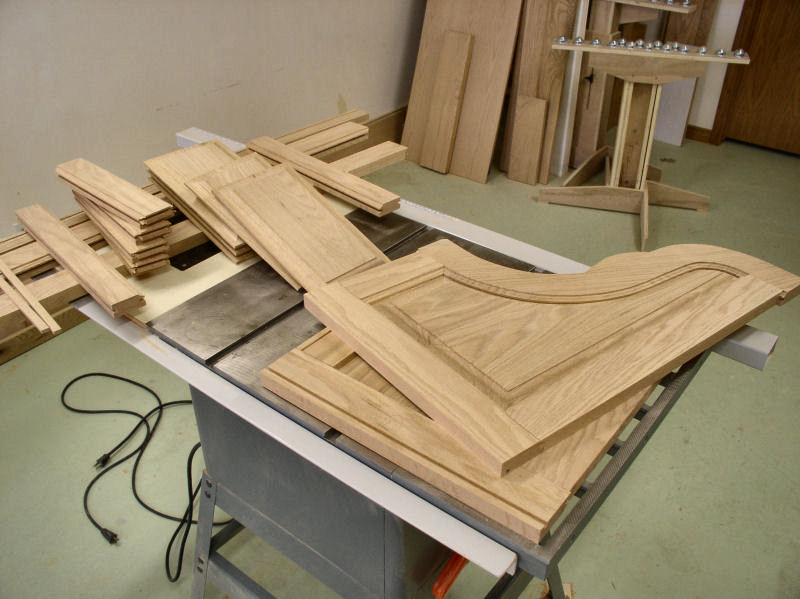
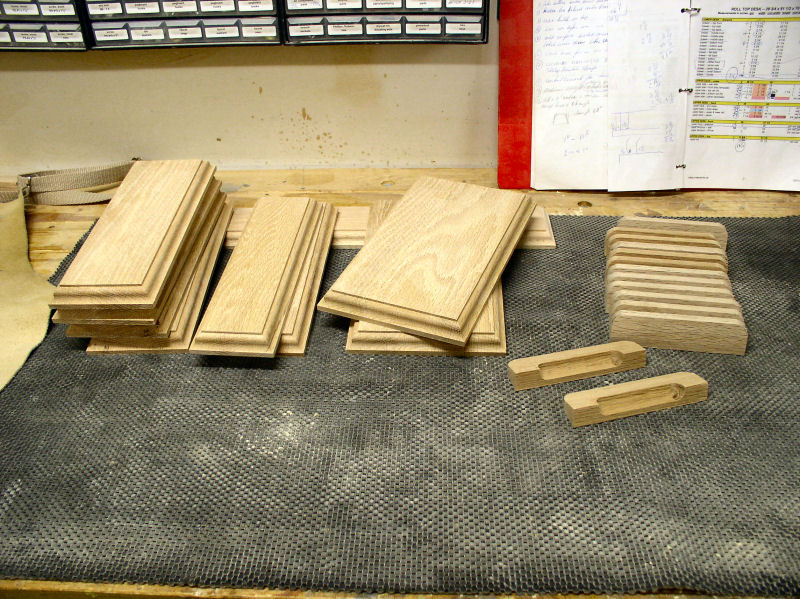
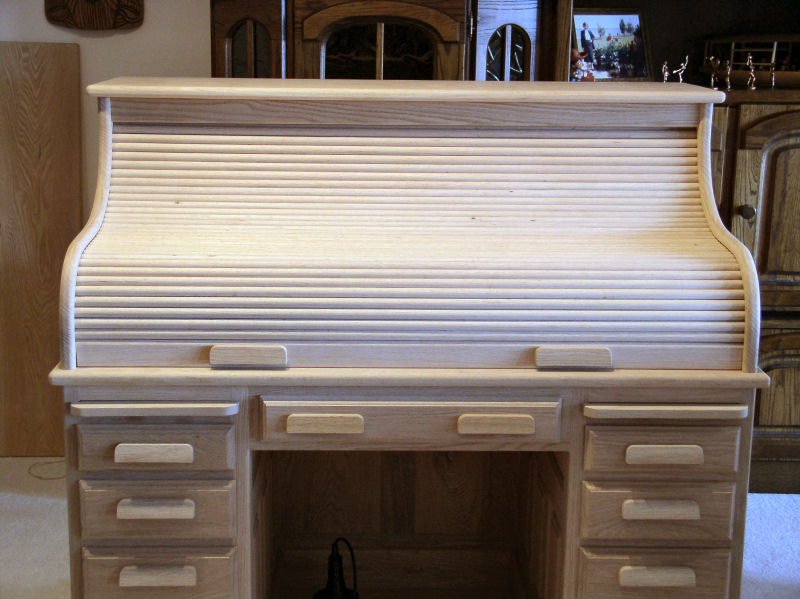
Stock for lower desk side panels sawn and shaped.Only the two inner stiles are glued. The rest is only dry-fitted.Glued, clamped and checked for squareness.Finished lower desk side panel; front view.Finished lower desk side panel; back view.Stock for back panels of lower desk and hutch sawn and shaped.Finished lower desk back panel.Assembled face frames of lower desk using mortise and tenon jointsAssembled centre face frame of lower desk.Lower desk dry fitted.Lower desk support frames sawn and shaped.Lower desk dry fitted, ready for gluing.Lower desk glued together.Writing boards.Slides for drawers mounted.Lower desk completed.Drawers sawn and shaped.Drawers assembled.Drawers installed.File drawer veneer detail. (see also what went wrong)Another look at the drawers.Lower desk top finished (tops for upper desk and hutch in the background). Notice the slots on the left and right for mounting the upper desk.Slot detail underneath the top of lower desk, using UHMW material.Upper desk sawn and shaped.Upper desk assembled.Drawer fronts and drawer pulls sawn and shaped.Drawers fronts/pulls mounted.Pencil tray insert in centre drawer.Slats and lift bar of tambour sawn and shaped.Tambour finished.Side panels and doors of hutch sawn and shaped.Hutch partialy glued.Hutch completed.Main desk complete high resolution (661 KB)Main desk completed. high resolution (599 KB)Main desk complete high resolution (584 KB)Main desk completed. high resolution (597 KB)Storage dry-fitted.Storage compartments finished.Drawer part sawn and shaped.Drawer dovetailing details.Some finished drawers.Drawers in place (some knobs still missing).A pile of cutoffs, discards, pieces, once-off jigs, and not shown the 15 to 20 garbage bags with saw dust and shavings.Stained and varnished components.Complete view. high resolution (556 KB)Inside view. high resolution (692 KB)Side view. high resolution (626 KB)Front view. high resolution (762 KB)The boss takes possession... high resolution (651 KB)...and I am forgotten already. high resolution (550 KB)
How others did it
Mark Janaes made this beautiful rolltop desk using the same American Furniture plans as I did. This is what he had to say, "Let me say thank you for documenting and publishing your experience building your roll top desk. I have been looking for roll top plans for a while, and your web site convinced me to select the American Furniture plans. Your information gives me the confidence to take on this project. In particular, it is great to read about the critical remarks you have pointed out in the plans, and to see your enhancements."
And here is Mark again when he finished his desk, "I can't thank you enough for posting your experiences building your desk. They were far more valuable than the instructions that came with the plans. I probably would not have attempted such a project without your website."
This is part of an e-mail from South Africa. I let Les Adlard of the East London Woodcrafters Guild tell the story:
"I belong to the East London Woodcrafters Guild which caters for both woodturners and woodworkers from beginners to advanced levels. We are a group of retired men and we meet on a monthly basis, exchanging ideas and experiences. A time for getting together, making the odd individual project and so the days roll on.
At a recent committee meeting, of which I am a member, I stuck my neck out and said it was about time we, as a guild, made something as a group project, and it so happened that our chairman and I both came up with the idea of making a roll top desk which, when finished, we could hopefully sell and at least recover our costs.
Lady luck was on our side as I approached the owner of a timber import company and to see if he would sponsor us in letting us have the imported timber at hopefully cost. What a surprise we got when he said he always wanted a roll top desk and that he would give us all the timber required, the only condition being that it had to be an article of furniture that he could use eventually as a family heirloom.
To cut a long story of seek and find short, I spent many hours on the internet, purchases the plan #151, of the desk from American Furniture Design Co. and started the task of studying it. Fortunately in December I came across your web site and your rolltop desk project. I must say what an eye opener. I used it extensively in selling the idea to the Timber Importer as well as to the members of our Guild. They were reluctant to make raised panels as none of them had ever made one. This was an ideal opportunity to learn a new skill, experimenting using cheap pine to make raised panel as well as to do rail and style preparation.
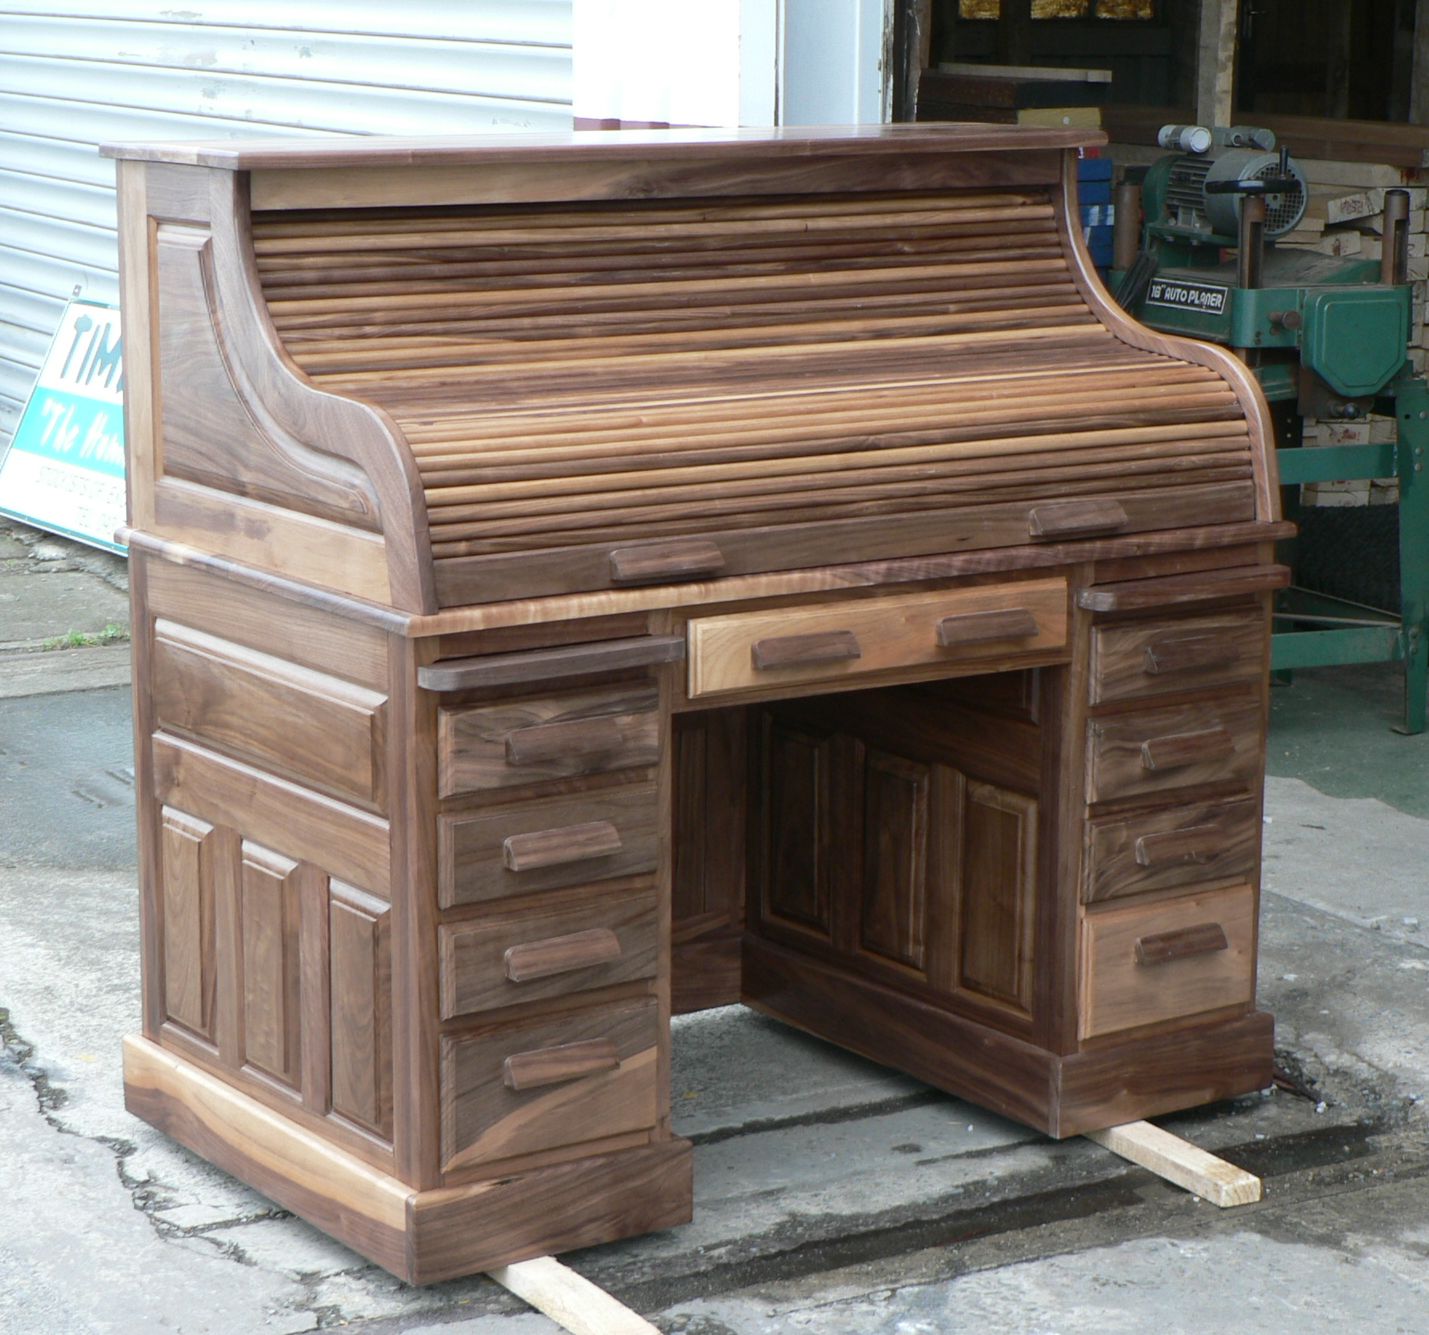
I prepared drawings of the various components and assigned the various members different task. There are 10 of us on the project divided in teams of 2 so it was easy to have the four sides and rear panel of the lower desk made as well as the upper desk. We are using walnut as this is what was requested. I have used your pictures as a guide as well as the advice in your notes and so far things are progressing OK. As Mark Janaes states and I quote, "Let me say thank you for documenting and publishing your experience building your roll top desk." I must whole heart fully endorse his statement, it has been an inspiration and a wealth of helpful advise."
The above was written in February 2010, but finally, after a long silence, I was pleasantly surprised by an email from Les Adlard with pictures of their finished product. And what a beauty it is. Click on a tumbnail to see the enlarged image and enjoy viewing the beautiful craftsmanship and gorgeous wood grain. Les (in picture) has every reason to smile and so do all the Guild members who worked together on this project. Here a few words from Les:
"We eventually finished the desk and it turned out A1. As you can see from the photos it is made in American Walnut. We decided not to stain the wood but leave it as natural as the various colour grains arrived. The finish was brought up using a sanding sealer, rubbed down, etc., and then finished with 3 coats of "Wood-Doc 10" which is an indoor velvet polywax sealer. We handed over the project to the proud owner on the 24 November which was the last Guild meeting for the year."
I wish I had known about the fact that they couldn't find "space balls" for the raised panels. They managed to overcome that by cutting their own from the 5mm thick base of preformed polystyrene platters!!!
Congratulations folks out there in East London, South Africa.
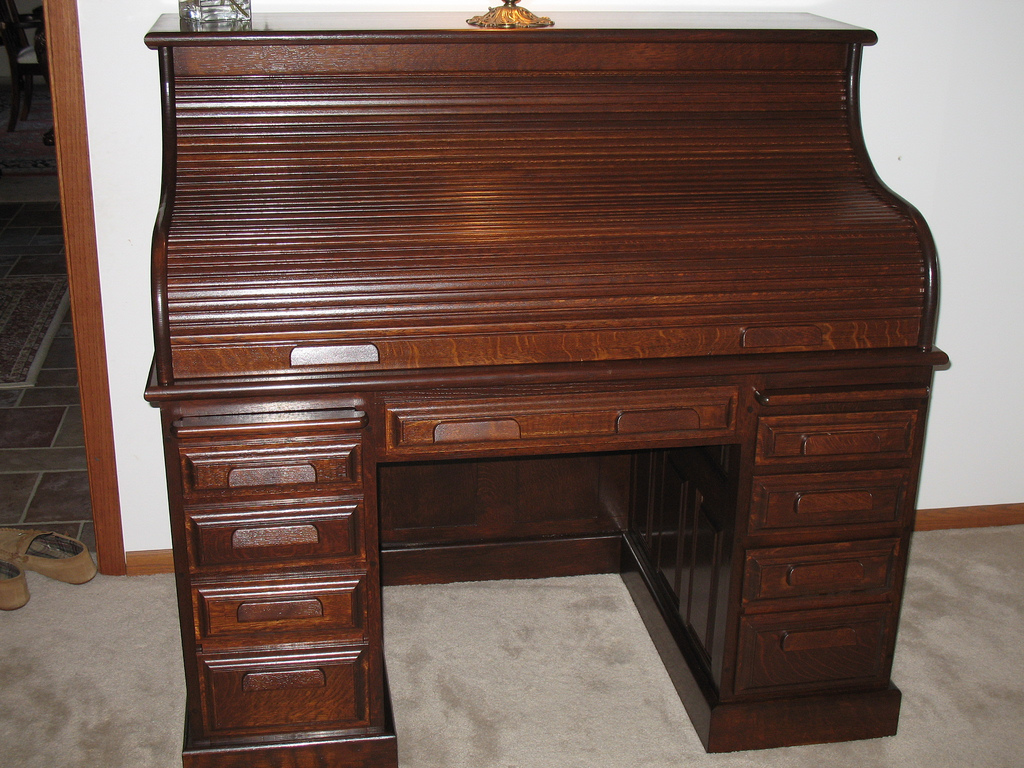
This rolltop desk with hutch is made by Cal Smith, and this is what he had to say.
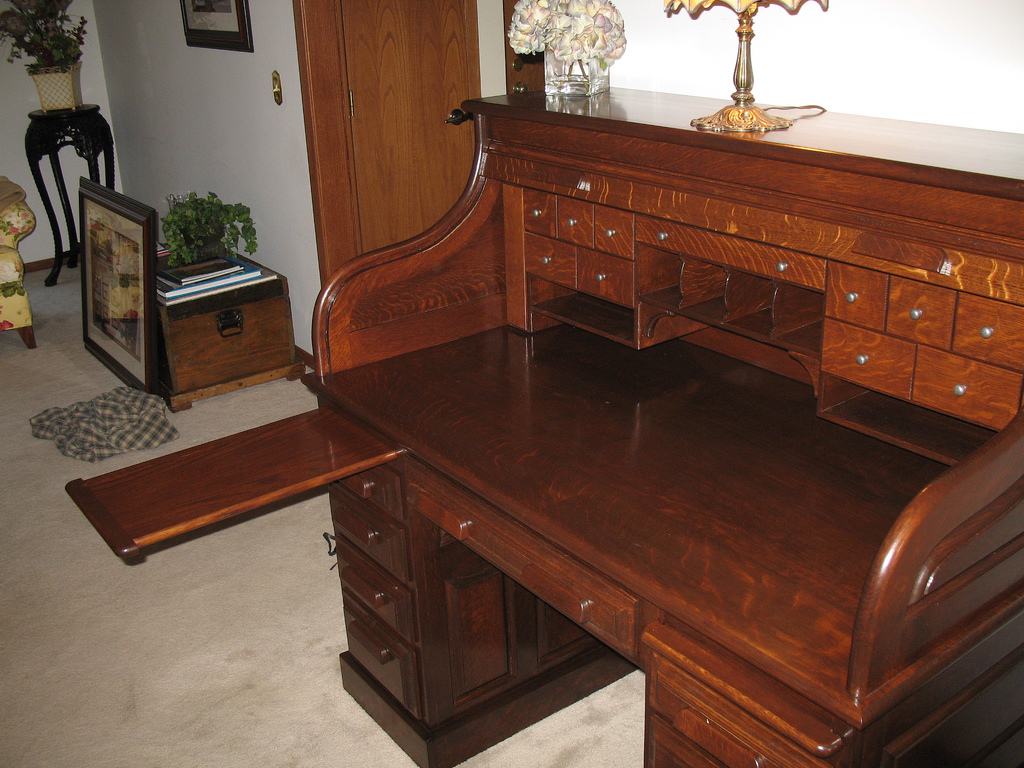
"Here are a few pictures of my version of the rolltop desk. I completed the rolltop desk and then, because of space constraints in my shop, I moved it into the house and started the hutch part. I disassembled the rolltop and the hutch is fastened using the high density plastic I ordered from Rockler. I also found some friction free tape that Rockler has in stock which I lined the tambour grooves with rather than using the wax. It seems to be working very well. I would be very excited to see my pictures on your web site!!! I'm not sure I would have been able to complete this without your very detailed instructions you put on the web site. We're very happy with the desk and thanks so very much for all of your help."
Cal later on added, "I forgot to mention to you about the writing boards. As pictured, they are flush with the rails and styles on the desk. I purchased some gadgets that are mini plungers. You just give the writing boards a slight push and they pop out."
A very nice addition and certainly a beautifully executed project. Well done Cal.
Michael W Rogillio started building his roll top desk in December 2012, but he has much more to tell. Read his story and view the other pictures taken during the project at Michael's story. Follow the link in the document and have also a look at his many other projects.
Thanks Michael for sharing your story. Great job!
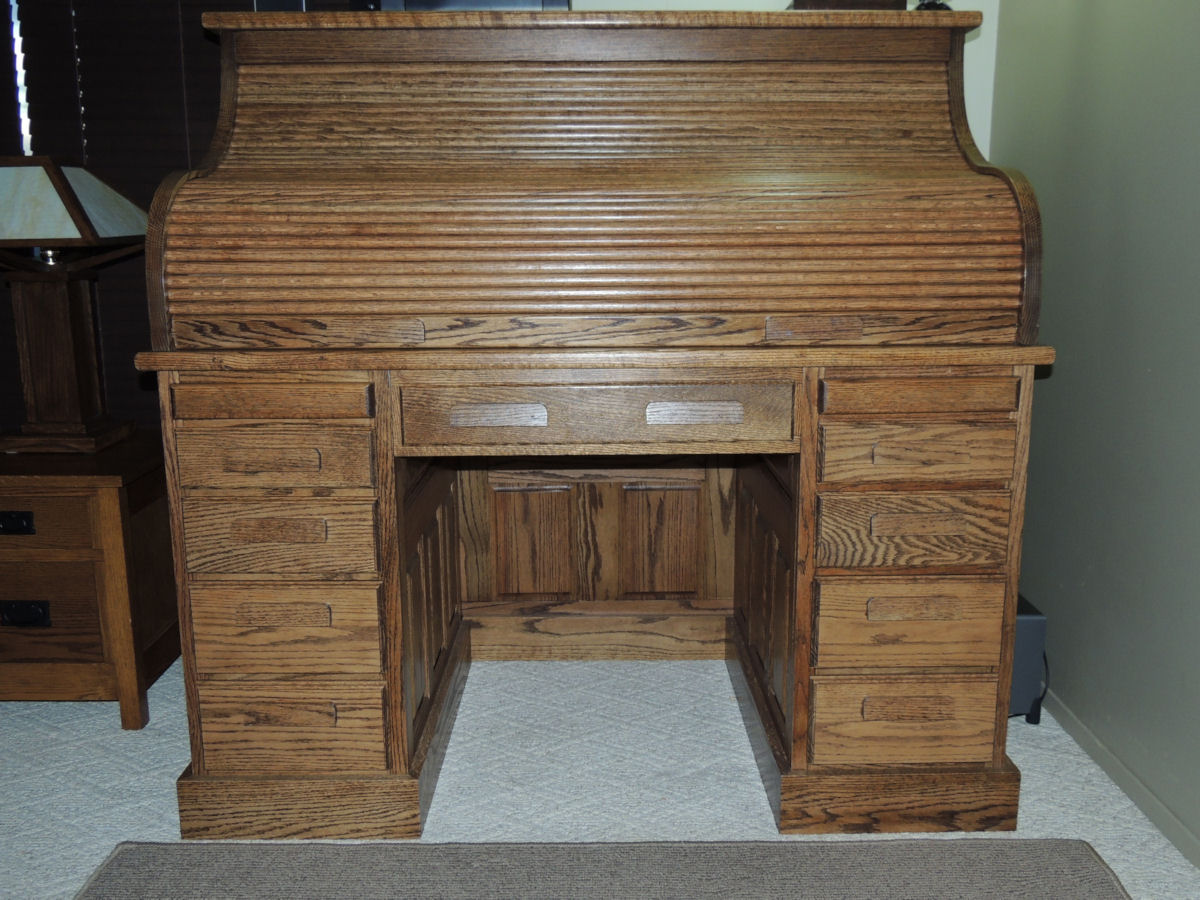
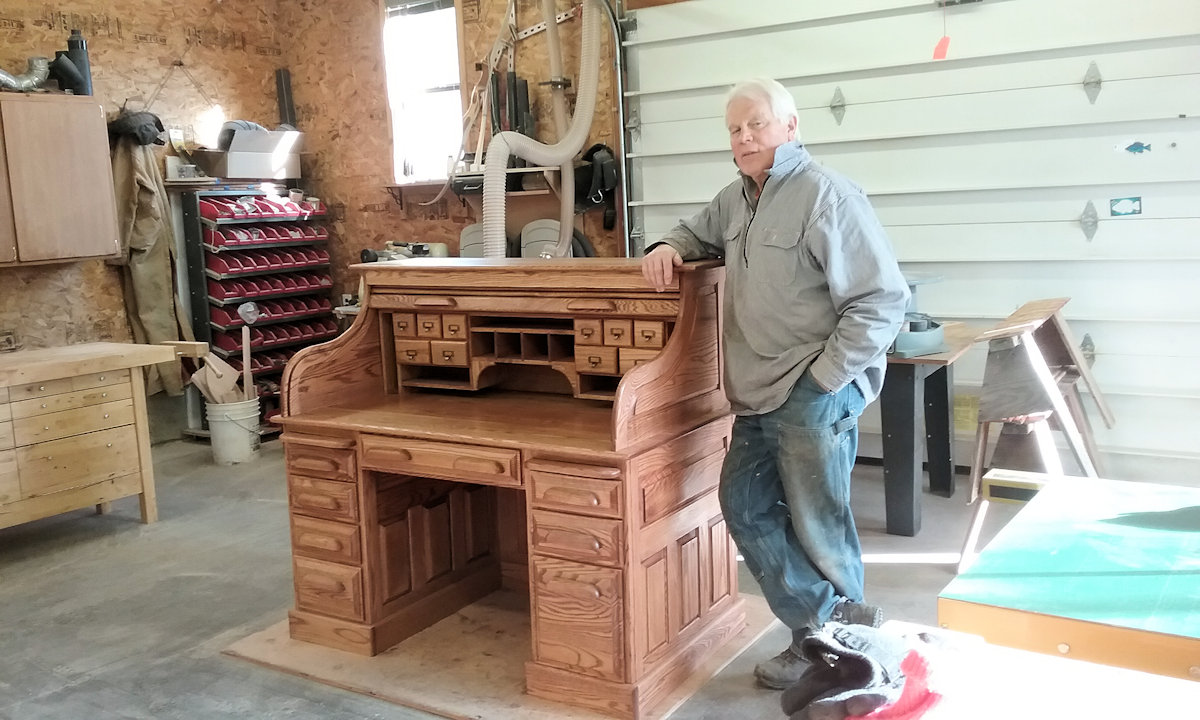
Steve Conley contacted me in October 2012 with a few questions about building the Roll-top desk. He was also very concerned about the 3/4" thickness of the top and the upper side panels and was hinting at going for 1" thickness. He was going to build the roll-top desk for his wife, Heather, like I did for my wife, Jeannette. Then it was awful quiet until July 2014!
Steve had completed the roll-top desk and he wrote, "I can't believe it is actually 2 years from buying the plans to finishing. But I think it was worth it." He spent 498½ real hours in the workshop at a total cost of Can$3,072.27. The desk contains 377 lbs (171 kg) of solid red oak.
As an explanation with the photos Steve wrote, "This desk plan was edited from the start to be a computer desk, so the desk top section is an additional 1¾" higher to accommodate the screen on my Dell Inspiration One 2330 all-in-one (23" screen). I have removed it for clarity but you can still see some cables and the modem. The back of this top section is ¼" plywood but you might notice there is a 1½" leather curtain at the bottom to run wires etc. The tambour in the middle is 6" high and allows me to reach behind to run cables to different apparatus and to access the power bar."
In another email he mentioned that he used 2 coats of Minwax Provincial stain and 2 coats of Diamond Satin Varathane. On the top and drawer front he use 3 coats of Varathane. What got me laughing was his final remark, "Both tops and the upper sides turned out to be 1 1/32" thick and I think that makes the desk feel very solid."
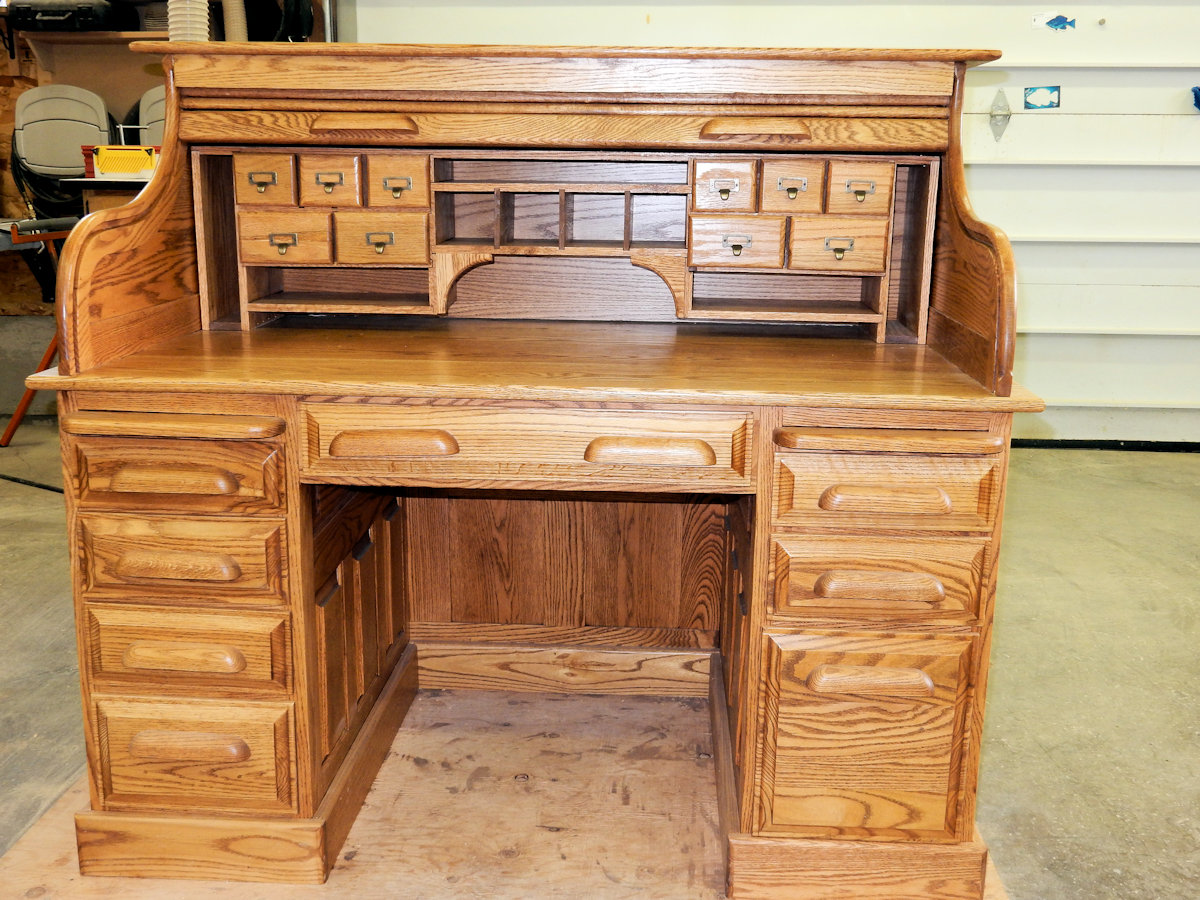
Steve, the desk looks great and it is certainly a roll-top desk you can be proud of. I trust that Heather is very happy too. The asymmetrical storage compartments, with vertical left and horizontal right, is very unique and a great idea. And the little tambour in the center with leather apron is a superb adaptation too. I don't belief I have seen any of these features before.
James Schrum surprised me with this email and pictures of his version of this beautifully executed and personalized roll-top desk in November 2014.
James wrote: "I found your website two years ago looking for roll top desk. I studied your photos, etc., for hours. Loved the looks of your desk, great job. After cutting some chestnut trees for my mother-in-law's neighbor and letting it dry for 5 years, I decided to give it a try. I thought about getting the plans, but decided to use your photos as a pattern and give this ageing brain a challenge. Worked off and on it for about two years. I decided to change sizes and add extra doors on the hutch.... I hate dusting high up and the wife liked the idea too. The raised panels had to stay, even though it is to heavy to move the desk to see the back. A mentor of mine give us a scroll saw picture of Jesus which I copied by etching into the glass and carved into the storage compartment. Some LED lighting and receptacle completed the job. Thanks for the great web site. Keep up the great work you do."
Doing a project like this without starting drawings showed that James must have prior woodworking experience, and certainly when he started out with the chestnut trees from his mother-in-law's neighbour. And sure enough, I learned that his dad was a master carpenter and he got to watch a lot. He also studied a good bit on the internet.
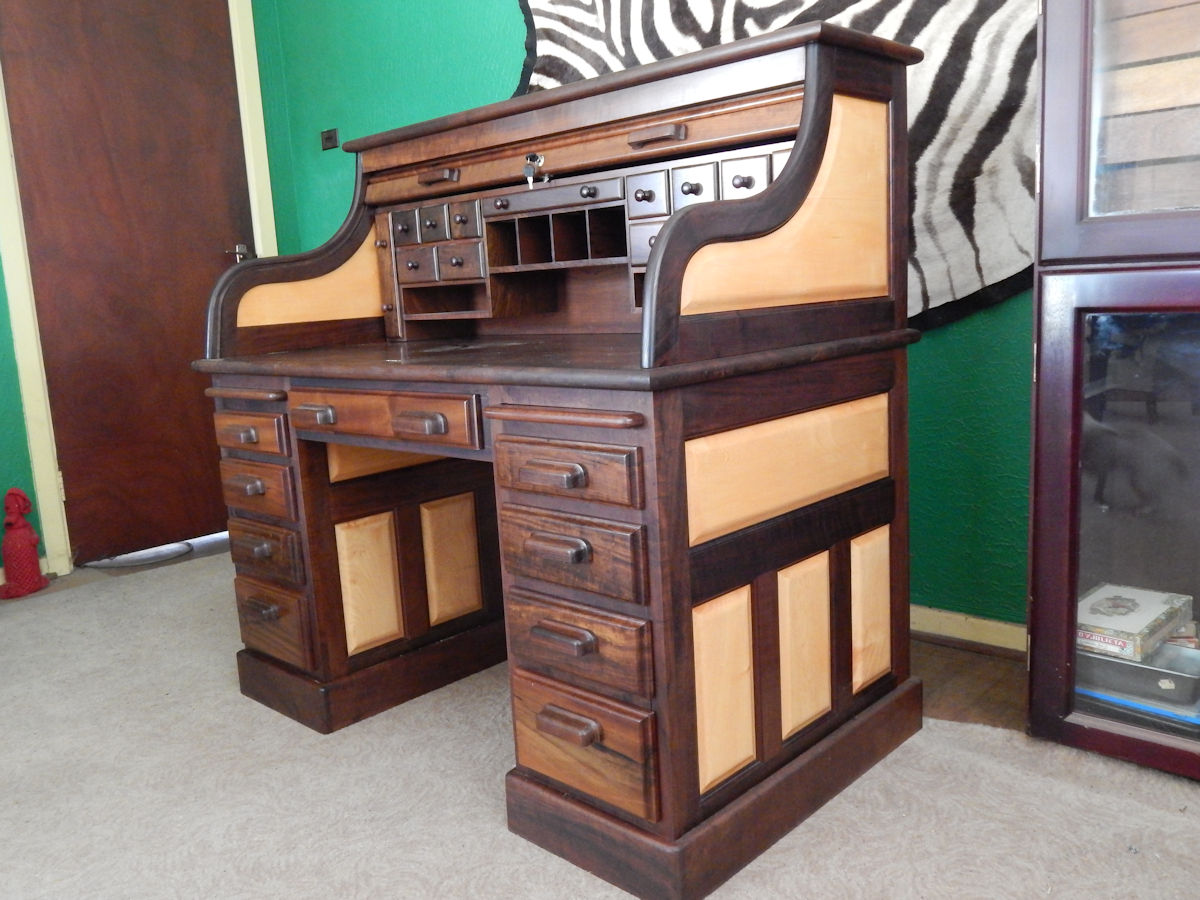
Neville Murrell from Port Elisabeth, South Africe, contacted me in October 2015 with several emails and questions about the roll-top desk. I am always happy to answer those question in the hope that I eventually get to see their finished product. And sure enough, on December 31st, 2016, Neville surprised me with an email and picture of his finished roll-top desk. And what a masterpiece it is!
Neville wrote: "Finally my roll-top desk is completely finished. I still have a few extras planned such as extra secret hidey-holes, a pencil tray in the middle drawer, and an engraved plate with my name and the desk details. Fastening the table-top clips was a major problem, but with gritted teeth and long arms, I managed to do it. I love just sitting before it admiring it's beautiful wood, and fine lines.
And it's all thanks to you and your fabulous website. I know many people have also expressed their gratitude for publishing your pictures. I have printed it out and will permanently keep a copy in the desk for any future owners. My good hunting buddy, Peter, will get my desk when I'm gone. I hope it will last for generations - and very much all thanks to you. You were also kind enough to answer my questions, and for your help and kindness I thank you sincerely."
Neville, thank you very much for you complements (you made me blush), but in the end you did all the work and made a master piece!
Neville provided also the following details: "Here are a few details of my roll-top. All of the dark wood frame, drawer fronts, storage section carcase, tambour slats, etc. are of Brazilian imbuia wood (latin - ocotea porosa). The drawer bottoms and writing boards were of specially ordered imbuia veneered Superwood - (like masonite), as it is totally stable. These were the only man-made woods.
It was quite a process to machine the 1/2" boards for the storage compartments. I wanted to make them of solid wood. I managed to split raw 1" boards, which are a bit thicker, to make two thin boards and save a lot of money and wood. Imbuia doubled in price in the last 5 years, is now a CITES registered wood, and is becoming very scarce.
The raised panels, drawer sides, storage drawer sides, and the 3 support frames are of jacaranda (jacaranda mimosifolia) which was originally from South America, but since has been planted in many countries. Pretoria, our administrative capital, is known as the 'Jacaranda City' as from October the jacarandas that line the streets blossom with blue flowers. Unfortunately, jacaranda has now been declared an invasive alien in South Africa, may no longer be planted, and is slowly being cut down. This is good for woodworkers, but sad for tree lovers. Pretoria residents screamed blue murder when they wanted to remove the city's trees, so they will stay for now.
I wanted an old-fashioned 'oiled-finish' look, so I used Woodoc 5 varnish. It took up to 6 coats with a flat down between each coat, then the final rub down with fine steel wool and Woodoc Deep Penetrating Wax Polish. It looks great. That is what took so long - about 5 years in all - but a 3 year break when I fell and smashed my shoulder. I never counted the time - it was a labour of love, and I just wanted to do my absolute best job. The desk weighs over 150kg. Not a thing to move around much! I bought a dovetail jig for joints on drawers, then added false fronts, and mortice and tennon for other joints."
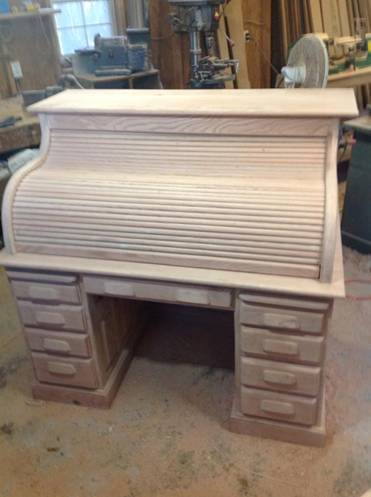
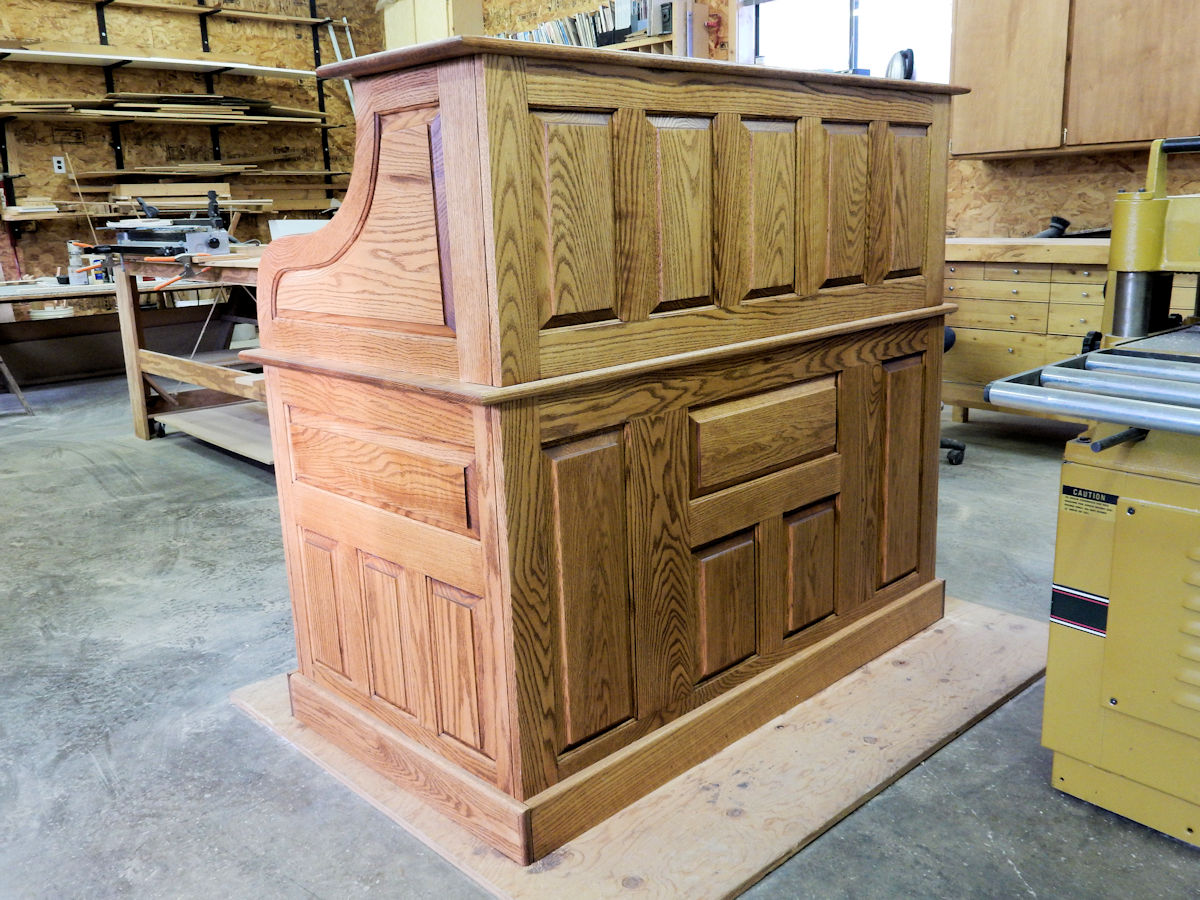
Willison J. Parker contacted me for the first time on March 3rd, 2016, with a question. Next contact was two years later when Will Parker had finished the bottom of the desk and needed some advice on the sides of the top of the desk. Next contact was on January 29, 2020, where Will was ready to apply the clear top coats, and needed some advice on putting everything together. And on February 28th, 2020, Will emailed me several pictures and his story:
"Thank you for your generous help and suggestions. I finally finished the desk. All red oak and all built from scratch. Phew, sure feels good to have it done. This was a challenging project for a carpenter with rather meager and limited skills. Building the curved sides was the biggest obstacle. I don't have a band saw, so I had to cut the curved sections with a jig saw. Free hand shaping the curved raised panels was a bugger, too. I ruined a few pieces, but I never lost my patience. Those curved sides have to be mirror images of each other and I struggled with that. I used Old Masters (old American) wipe on stain and a brush-on lacquer top coat. The finish isn't as smooth and beautiful as sprayed on lacquer, but I don't have a booth or HVLP to use, but I'm satisfied with the brush on results.
I may build the hutch when we move to a bigger home. I forgot to tell you that I used medium weight artist's canvas instead of denim for the backing on the tambour. Along with that tambour glue, it worked really well and was easy to work with."
My complements, your did a magnificent job. Nice colour and I love the rich grain.
Plans, Drawings, Sketches (inches)
The plan is from the American Furniture Design Co., plan #151, Roll Top Desk. You can order the plan directly from them. It comes with a clear large drawing and 13-page instruction manual.
Critical remarks about the plan
The importance of studying drawings, plans, instructions, parts list, etc., can not be emphasized enough. Working up to a project like this one, study it for several hours over the course of one or two months. These are the critical notes we want to shared before you embark on this project.
Throughout the instruction manual references are made to "(See Source of Supply)". With the exception of a reference on the last page that Daly's finishing supplies can be ordered from American Furniture Design Co., there is no Source of Supply list. Suggest that you visit their web site for more information on available hardware, etc..
Looking at the drawing and adding up the sizes of a set of stiles and panels it indeed adds up to the overall size. As it is a "raised panel" construction, the rail and stile routers will create a 3/8" deep groove into which the panels will slide. So far, so good. This means that the stile or rail has to be 3/8" wider to accommodate for this. However, the bill of materials listed on pages 11 to 13 of the instruction manual does NOT TAKE THIS INTO ACCOUNT!!! Therefore, add 3/8" to the width of each stile and rail that has a panel on one side, and add 3/4" to the width of each stile and rail that has a panel on both sides.
According to the drawing the sides of the upper desk go all the way to the back, i.e. its back is in between the sides. That means that the end stiles should be 1-7/8" (plus that 3/8") wide. Yet the bill of materials indicate a width of 2-7/8".
On the bill of materials the two inner stiles for the back of the lower desk are missing. Their width should be 5-3/4" (plus that 3/4") and length 21-1/4". On the drawing the width is indicated as 5-11/16".
On the bill of materials the top rail for the back of the lower desk is missing. The width should be 2-3/4" (plus that 3/8") and length 44-1/4". That length of 44-1/4 applies to the bottom rail too! (updated 15-Oct-2014)
In order to prevent the panels from sticking out above the rails and styles of the lower desk, they need to be planed down from 3/4" to 5/8". This is assuming that the inside ridge on the rails and stiles is about 1/8". The plan does not mention this.
In other words we were not particularly impressed with the instruction manual we got.
---=== NOTICE ===--- As of August 2010 American Furniture Design Co. has new Assembly Instructions that comes with their Roll Top Desk plan. Not only did I have the privilege to review their new document, but I was also delighted that they featured several of my construction pictures. ---=== NOTICE ===---
Changes made to plan
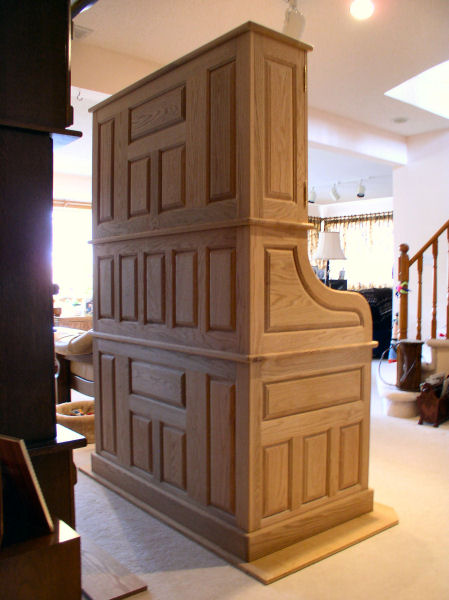
In our construction we made several changes to the back of the lower desk. We wanted the vertical lines to match more with those of the back of the upper desk.
Width of outer stiles changed from 2-1/4" to 2-7/8".
Width of side panels changed from 7-1/2" to 7-1/4".
Width of inner stiles changed from 5-3/4" (5-11/16" on drawing) to 5-3/8".
For the face frames we use mortise and tenon joints instead of dowels to connect the rails to the stiles. For the 1/2" tenons we added 1" to the length of those rails.
We used 1/4" space balls to provide for expansion and contraction of the panels, while at the same time preventing rattling of the panels. The panels have to be 5/32" smaller on all sides, or 5/16" smaller in width and height.
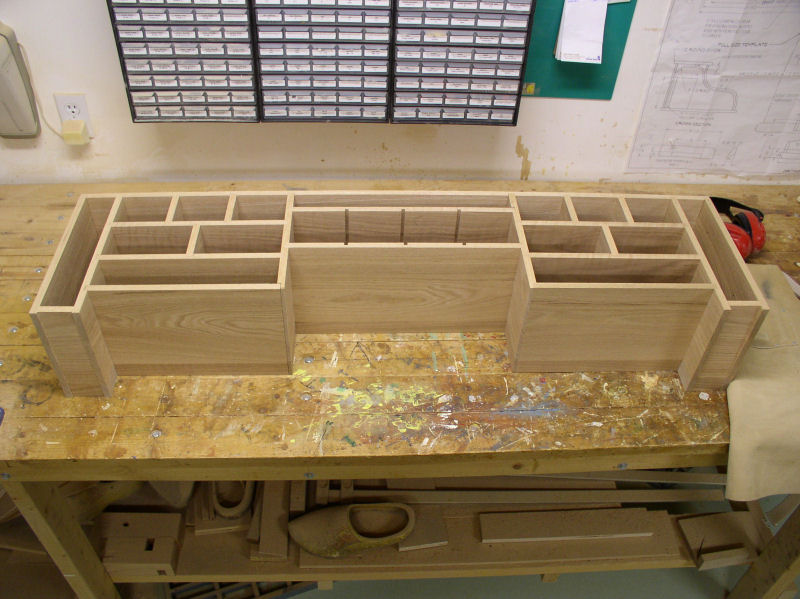
According to the plan the storage compartments with small drawers and cubby holes is 12-1/2" high and 7-1/2" deep. We changed that to 8-1/2" deep plus 1/4" plywood backing. Although it fits perfect, we recommend that you choose a depth between 8" and 8-1/4" plus plywood backing for a slightly better look and to provide enough space for the knobs that protrude from the centre drawer of the storage compartment. For the drawers we used rabbited drawer fronts and half blind dovetails.
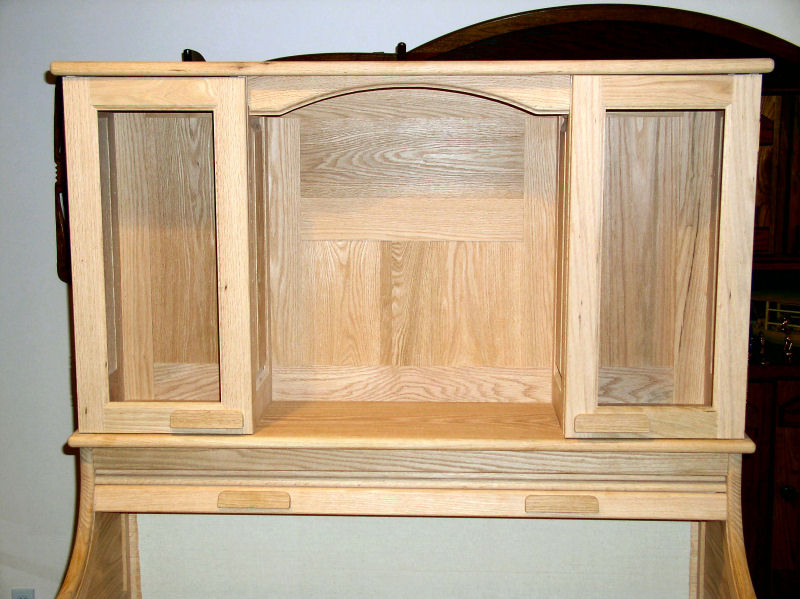
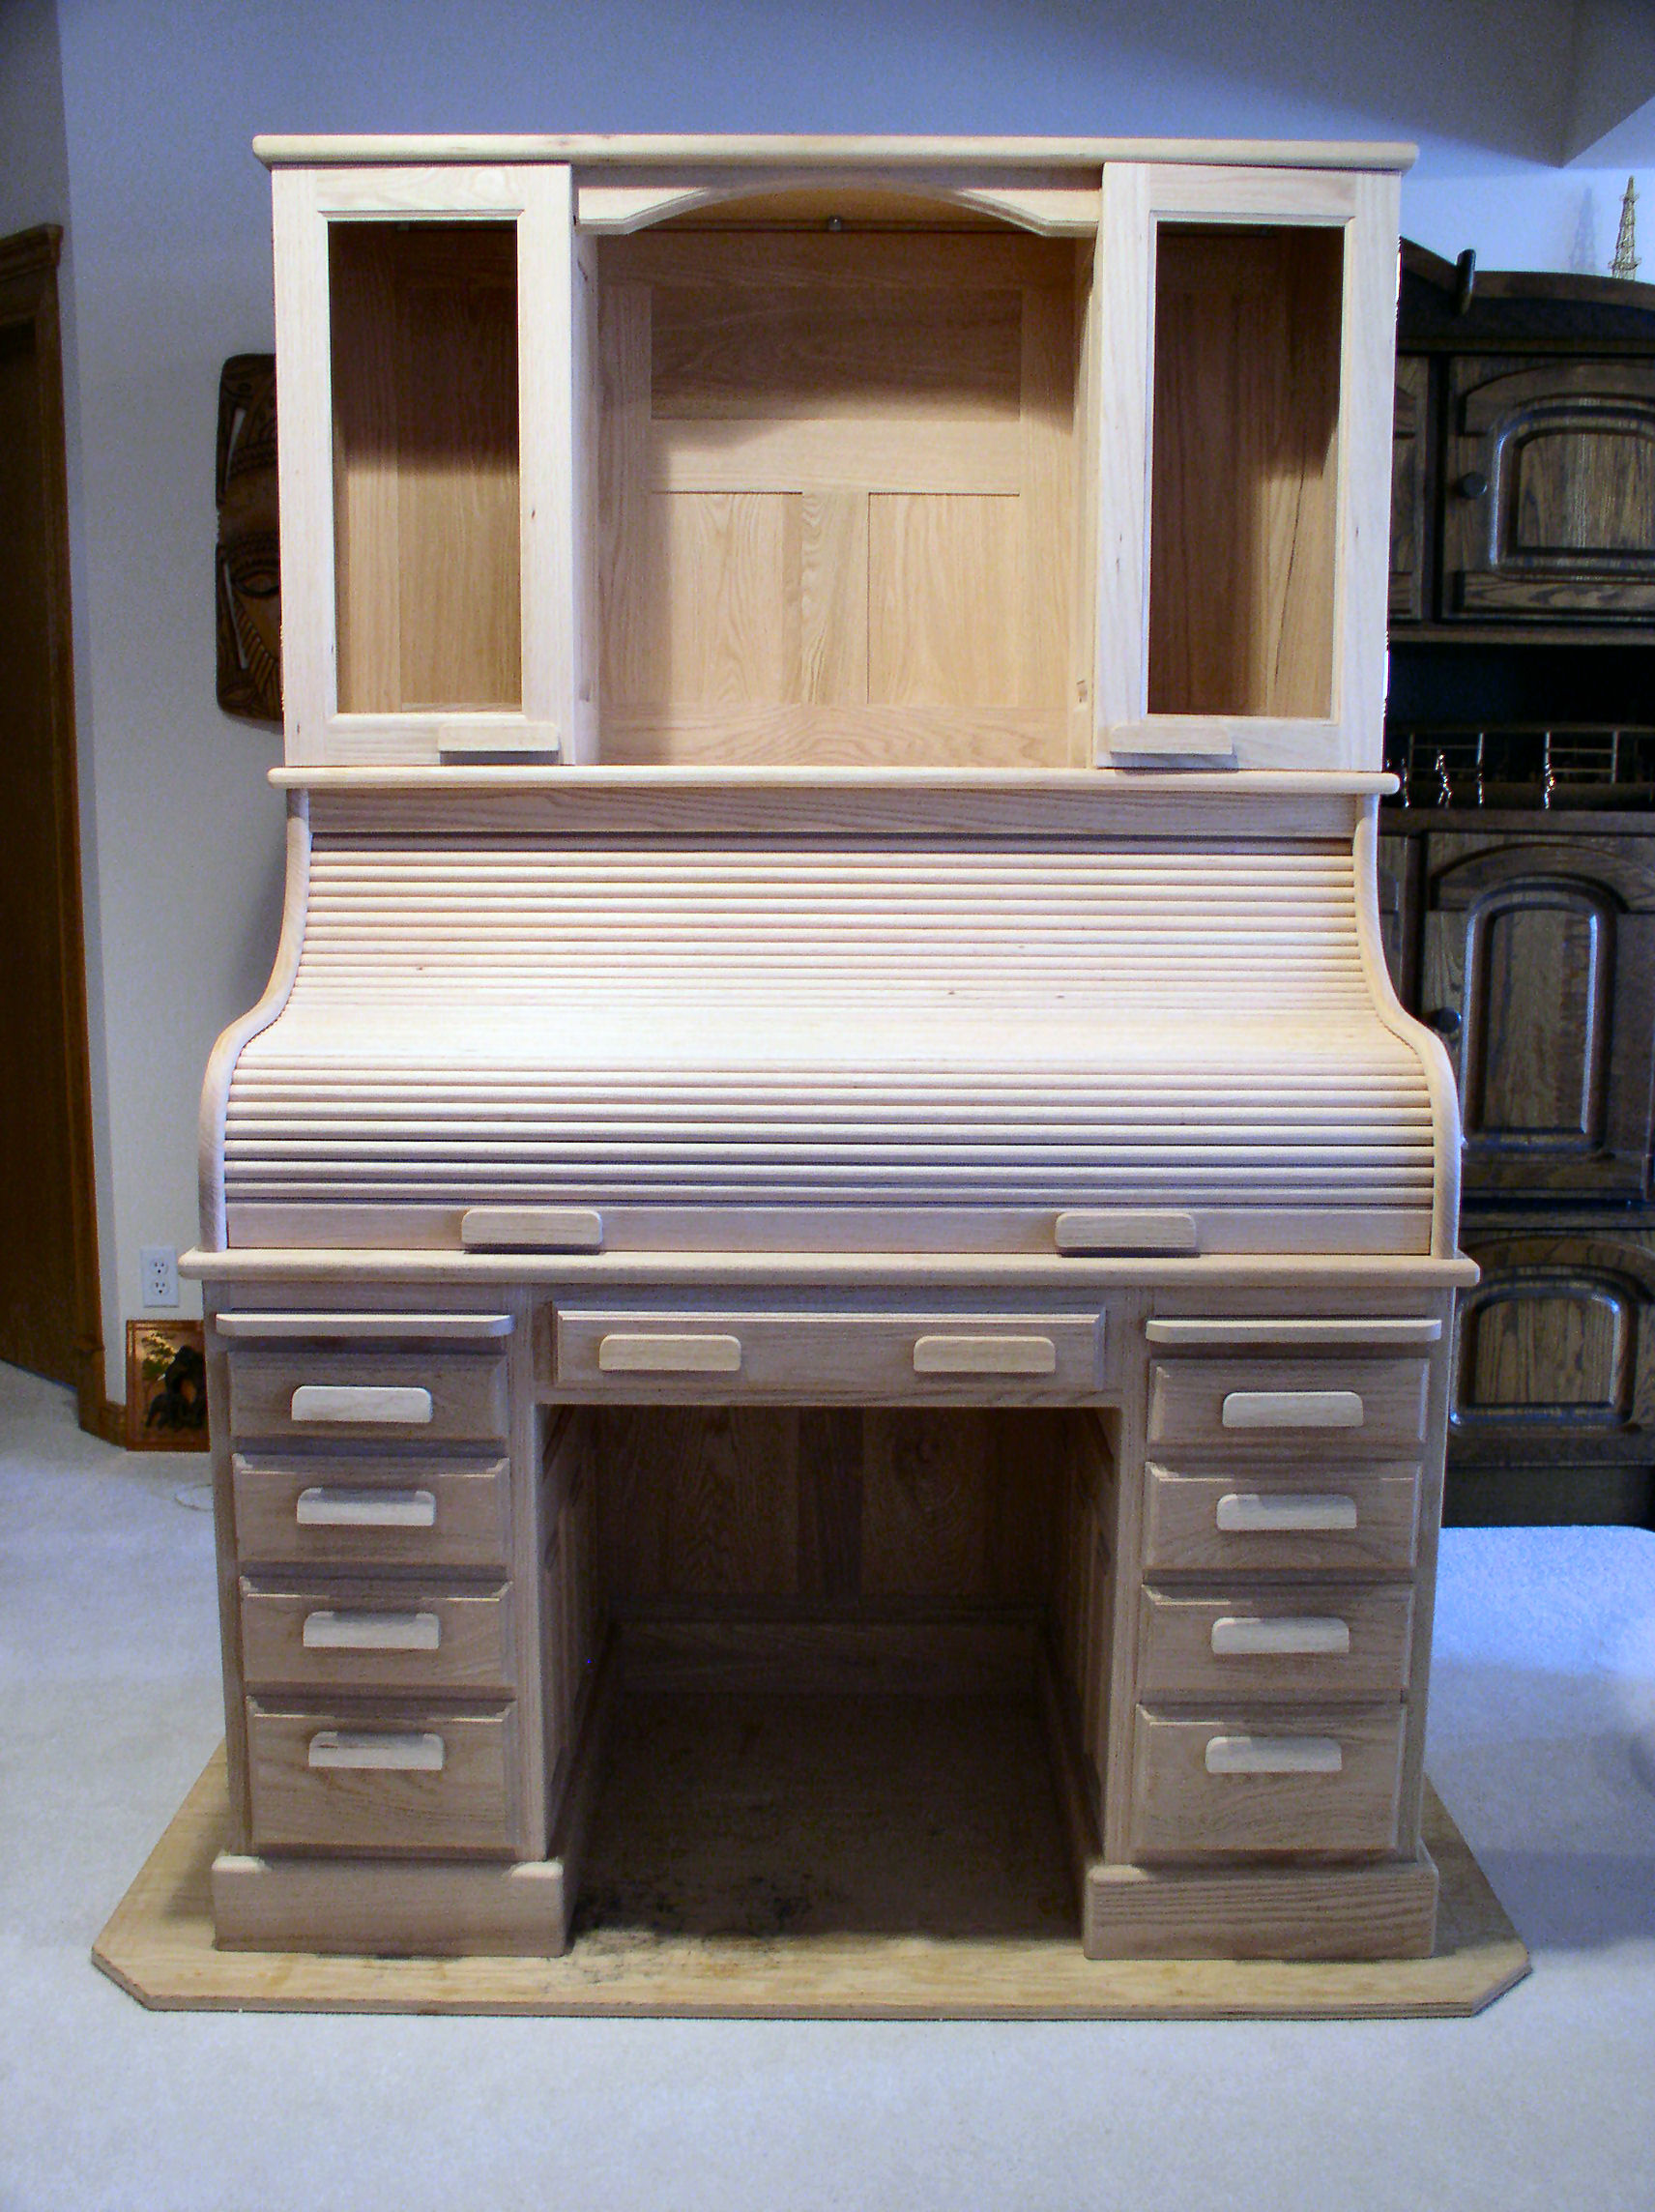
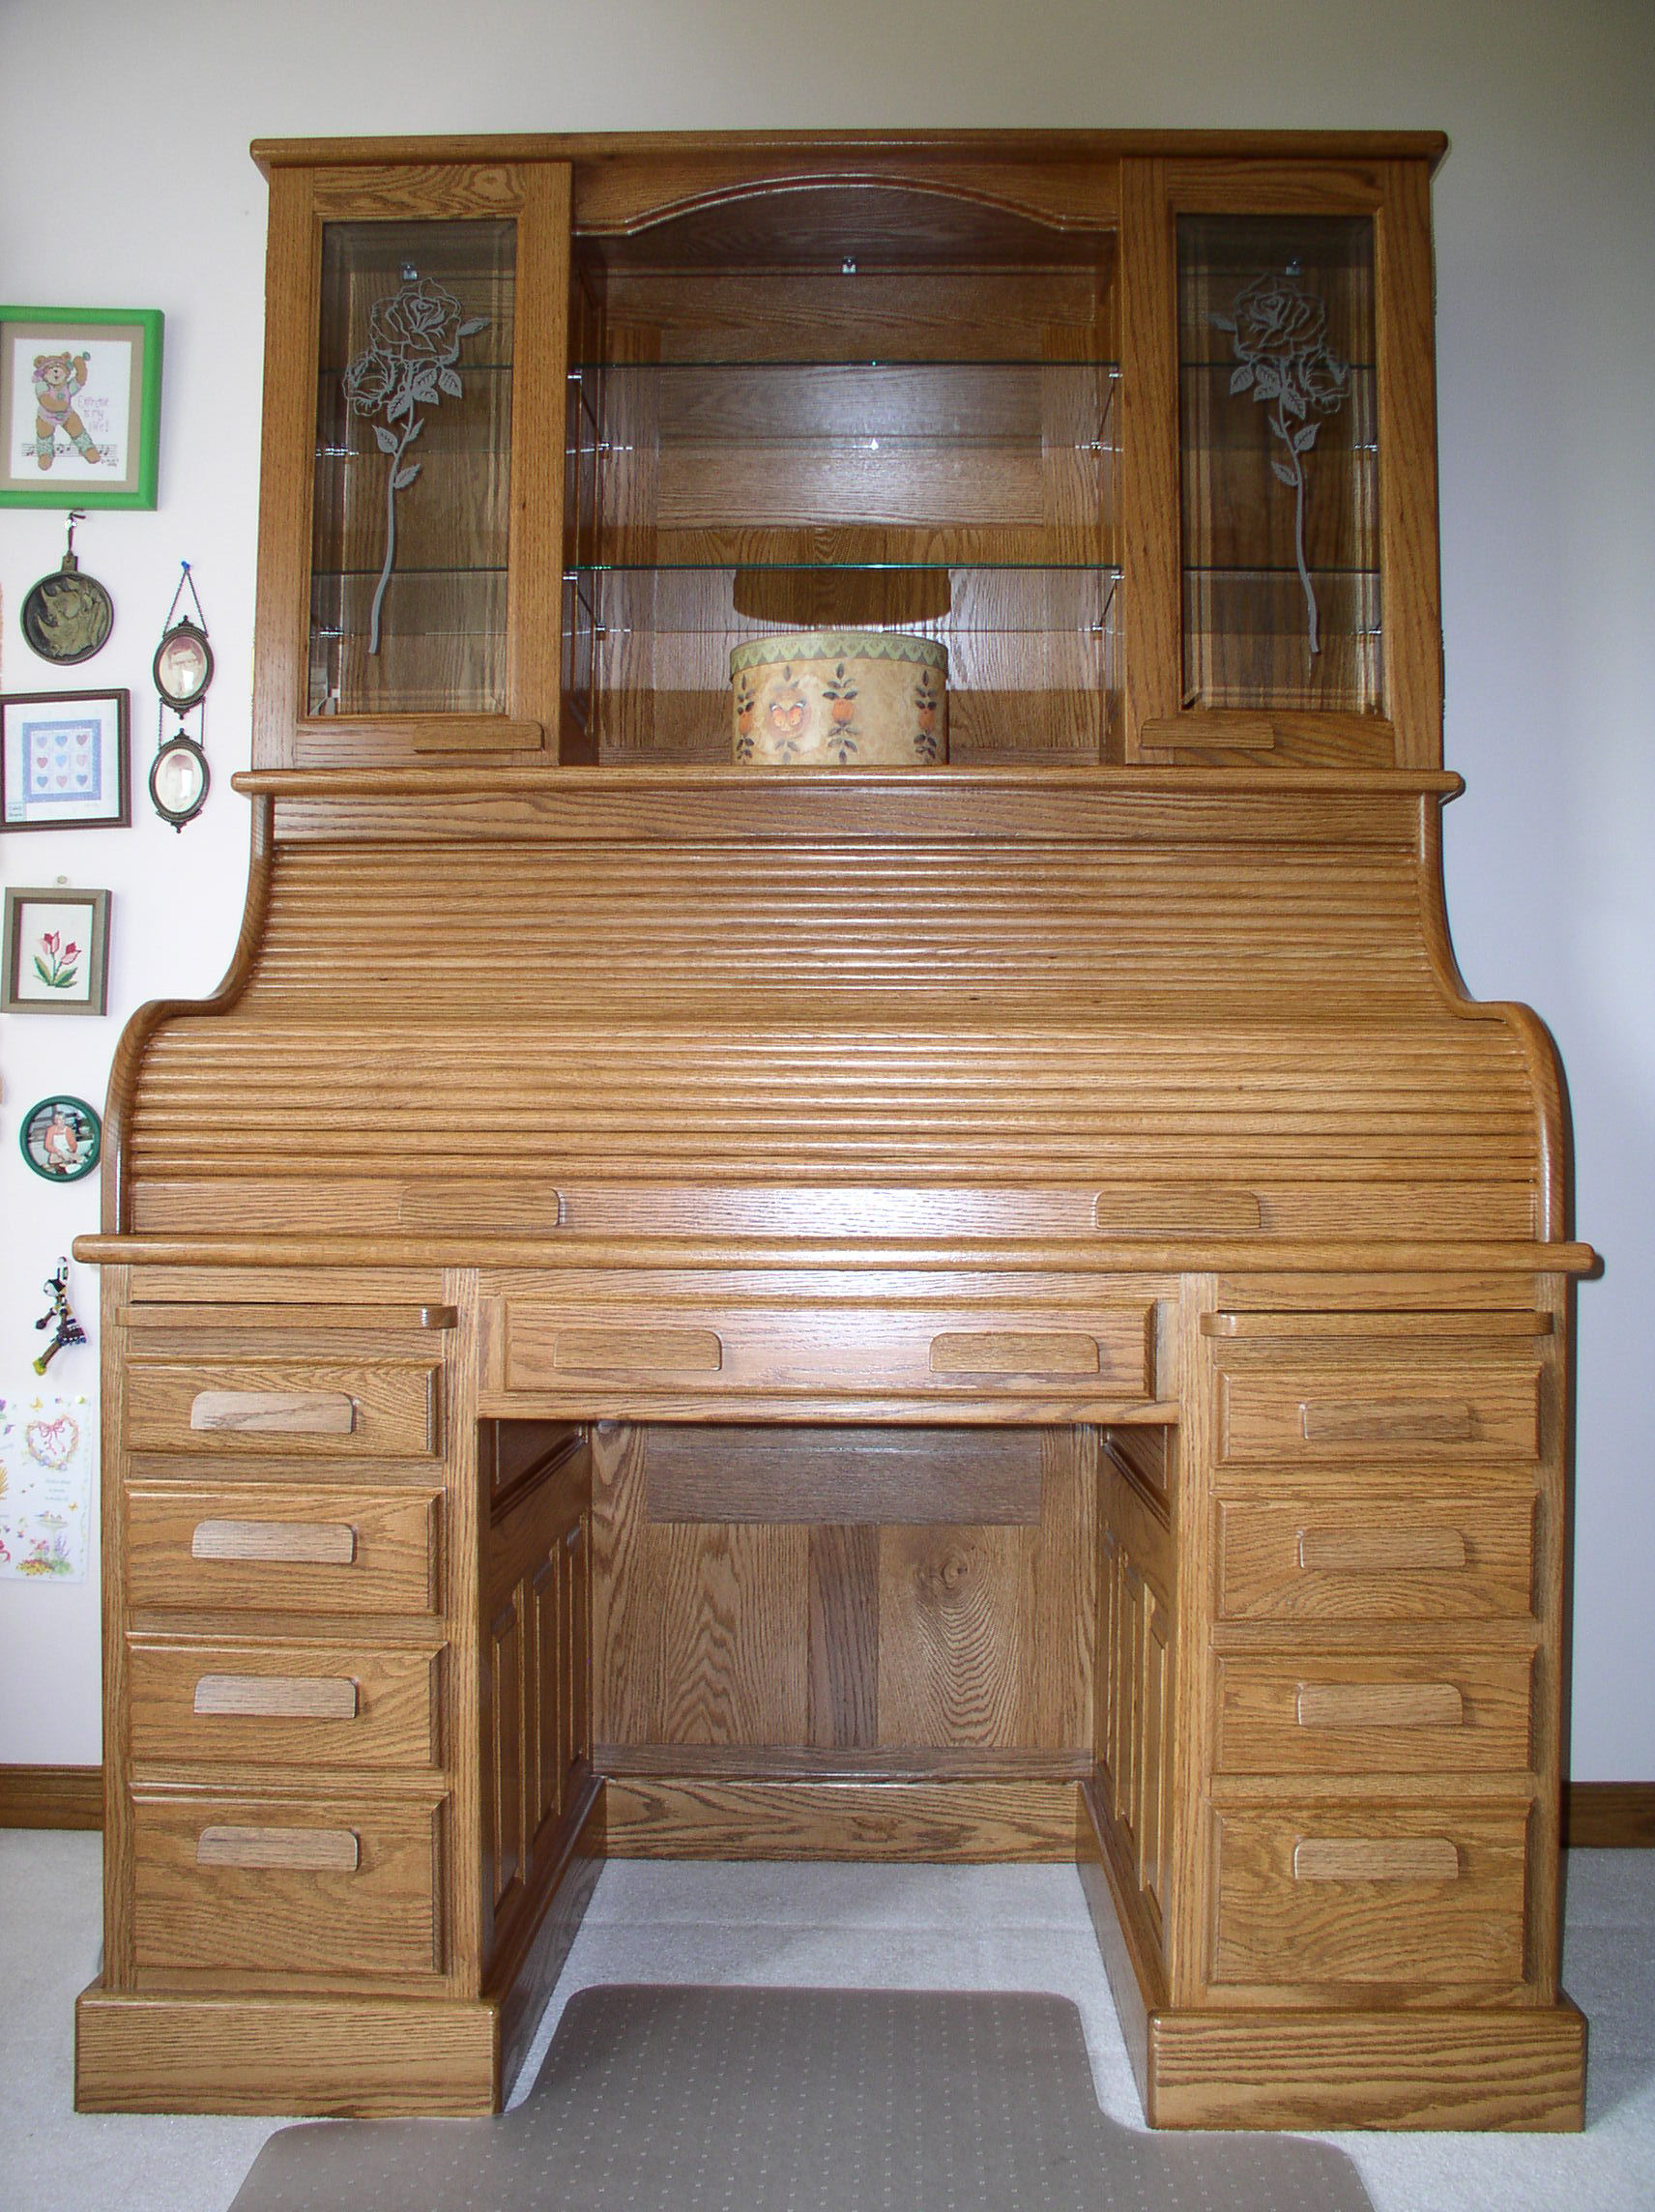
Adding a hutch
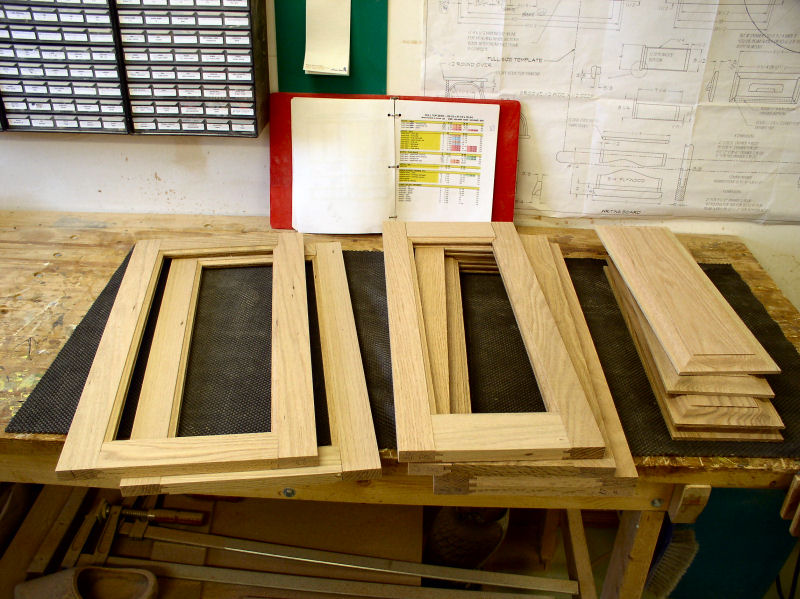
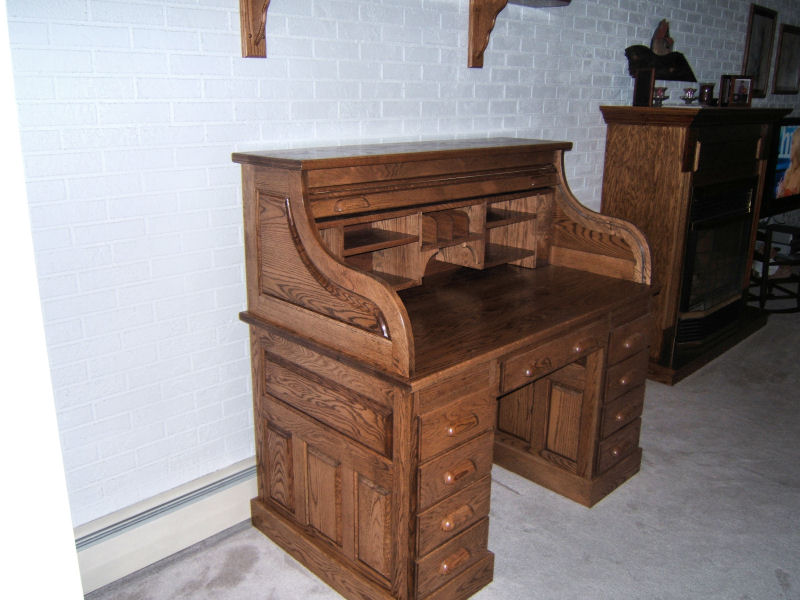
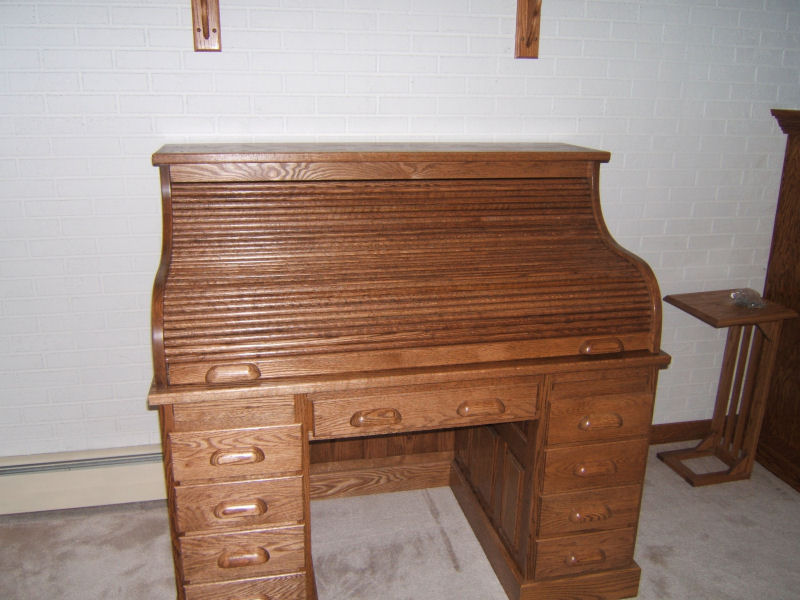
The hutch sits on top of the upper desk, and measures 50" wide, 11-3/4" deep and 26-3/4" high. The left and right section is 13-1/4" wide, with two adjustable glass shelves, and covered with a beveled glass door. The glass in each door features a decorative sandblasted rose, which was very much appreciated by my wife. The centre has an arched top and two adjustable glass shelves. The top is the same as the top of the upper desk: 13-1/4" by 51-1/2". The back panel has the same lay-out as the back panel of the lower desk. The total height of the desk is 76-3/4".
Materials List (inches)
No detailed material list, as that can be found on the drawing and in the construction manual. The desk will be made from red oak. The plan calls for poplar for the drawers and internal frame work. However, poplar is not available in our area, so we will use aspen instead -- I can even say this with a straight face --. Interestingly enough both poplar and aspen have the botanical name "populus". Got that?
The hardware we will get from Lee Valley. This is our shopping list:
1" x 8" (3/4" x 7-1/4") red oak
158 linear feet
1" x 8" (3/4" x 7-1/4") red oak (to be planed down to 1/2" thickness)
43 linear feet
6/4" rough sawn red oak (to be planed down to 1" thickness)
80 board feet
1" x 8" (3/4" x 7-1/4") aspen
22 linear feet
1" x 6" (3/4" x 5-1/2") aspen
45 linear feet
3/4" red oak plywood for writing boards
2 x 4 feet
1/2" birch plywood for filing drawer
2 x 4 feet
1/4" red oak plywood for drawer bottoms
4 x 8 feet
medium weight denim, large enough to end up with a pre-shrunk size of 47" x 28"
1 piece
1/4" aluminium rod for file drawer
2 feet
small knobs for storage drawers
12 pieces
full extension 26" zinc slides
8 pairs
space balls (about 8 per panel)
about 300
table top mounting fasteners, 3/4" #10 screws
14 + 8 + 10
22-1/2" x 9-3/16" bevelled glass for hutch doors; decorated with a sand-blasted rose
2 panes
23-3/8" x 10-1/8" glass shelves for hutch centre
2 panes
11-11/16" x 10-1/8" glass shelves for hutch sides
4 panes
brass magnetic catch for hutch doors
2 pieces
lift off hinges with finial for hutch doors
2 pairs
tambour glue from van Dyke's Restorers
less than 500ml
Acrylic Urethane Varnish, satin finish
1 gallon
You are welcome to have a look at my own detailed materials list (lower desk drawer material list corrected 28-Apr-2009), an MS Excel2000 spreadsheet. Although I have done my utmost to keep the spreadsheet up-to-date, it is possible that it may contain minor errors.
Required Tools
Power tools -- table saw, miter saw, planer, jointer, router, frame mortise and tenon jig, hand drill.
Hand tools -- hand saw, chisels, tape measure, clamps, straps.
Router bits -- Ogee Raised Panel Bit (16J64.60), Vertical Ogee Panel Raising Bit (16J63.51), Reversible Ogee Frame Bit (16J67.51). All from Lee Valley.
Construction
Followed the drawing and the instruction manual. These are notes on how I did some of the construction.
Built two rectangular aspen support frames in each pedestal of the lower desk. One just under the lowest drawer and one just under the writing board. This gives the whole desk much more rigidity. Built another support frame just underneath the central drawer.
Sand the panels with #220 grid before mounting.
Sand the rails and stiles with #220 grid before mounting.
Ease over all edges of panels, rails and stiles, except those edges that will be mounted against another piece of wood. Ease over means two passes with #220 grid sand paper under a 45° angle. It takes the sharpness away while still leaving a nice crisp edge.
Don't try to glue up a whole side in one go unless you are superman. For example, for the lower side panels I glued the two inner stiles between the bottom rail and inner rail with the bottom row of panels in place with the space balls. The other pieces are just dry-fitted and then everything is clamped. See above pictures. Put a pencil mark on the bottom rail and inner rail where the two inner styles should come. If you don't you will have a hell of a time positioning them with the glue applied and the slight pressure from the space balls.
Clamp at least twice as long as recommended by the glue manufacturer. I use LePage Sure Grip® yellow carpenter's glue (cabinet maker's quality; 2 tons of strength or 4,000 psi). Recommended clamping time is 25 minutes, but I clamp at least one hour.
Instead of routing mortises in the drawer fronts for the drawer sides and bottom, I made complete drawers from aspen with the red oak drawer fronts attached later. As I had 1/4" red oak plywood left over from other projects, I used that as the bottom. The colour difference gave the drawers a nice special effect.
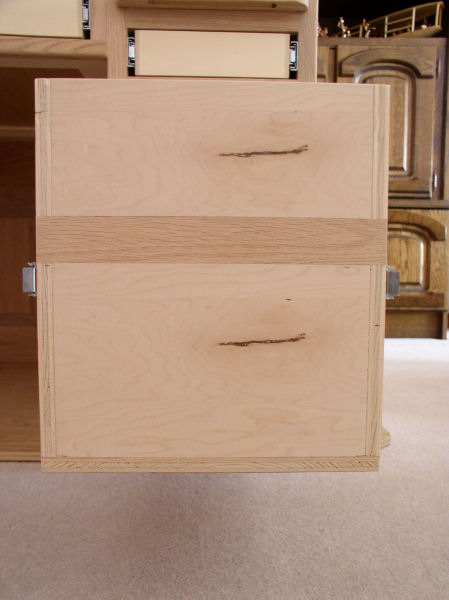
The right bottom filing drawer will get two drawer fronts to match the two drawers on the left. The plan calls for a 1/2" centre support strip. However, this will stick out inside the drawer and looks ugly. A much nicer way is to route a shallow groove where the gap between the two drawer fronts will be, glue a strip of red oak veneer in the groove and sand it flush. Groove should be about 1-1/4" wide and slightly less deep then the red oak veneer. See above picture for details.
To mount the upper desk on the top of the lower desk the plan calls for three screws in the back and dowels on the front side. I use screws at the front too. The top of the lower desk has a 2" slot on each side. On the underside is a piece of UHMW, ultra-high molecular weight plastic with very low friction, that allows the screw to slide easy when the lower desk top expands and contracts. See above picture for details.
A high point is when you successfully complete the tambour and slide it into the upper desk. Next moment is a huge disappointment as the tambour does not slide at all or only with enormous effort. First of all make sure that the 1/2" mortises in the sides of the upper desk are absolute smooth. Also ensure that the tambour fits loosely in the mortises. That is all you can do for now. If after finishing the desk (staining and several coats of Acrylic Urethane Varnish) the tambour still gives problems then treat the mortises and edges of the tambour with paraffin. I used a leftover piece from a paraffin candle, and the tambour runs very smooth.
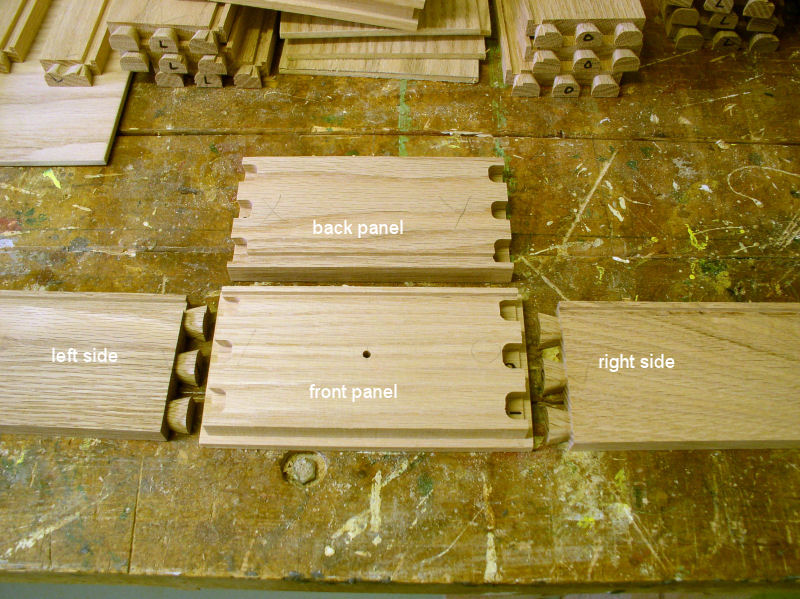
For the drawers of the storage compartments it was decided to use use rabbited drawer fronts and half blind dovetails. After the pieces were cut to size, it became apparent that the front and back pieces of the six small drawers cannot be clamped in the Leigh dovetailing jig. With some creative thinking this solution was found. Cut two pieces of wood of equal thickness and about 3" wide, and 5" and 8" long. Glue them together at the edge, forming a fat "L-piece". The small drawer front/back is placed under the finger assembly against the left stop of the jig and the stop board clamped in the front of the jig. Slide the L-piece under the top clamp such that is pushes against the drawer front/back piece towards the left and the front and then lock the top clamp down on the L-piece. Lower and lock the finger assembly. Take small bites with the router. It is not ideal, but the results were good enough.
The desk has four secret/hidden compartments. No details or pictures for obvious reasons.
For the finishing the whole desk was taken apart into 57 separate wooden pieces. Visible red oak was stained with a medium oak colour and then given two coats of Acrylic Urethane Varnish. The three tops where stained and varnished on both sides to help prevent warping and cupping. The topside of the tops got four coats of varnish. The plywood and aspen of the drawers got one coat of varnish. See Woodworking Tips for finishing tips.
Building the tambour
One challenge was making the raised panels for the first time, and the other challenge was making the tambour from scratch.
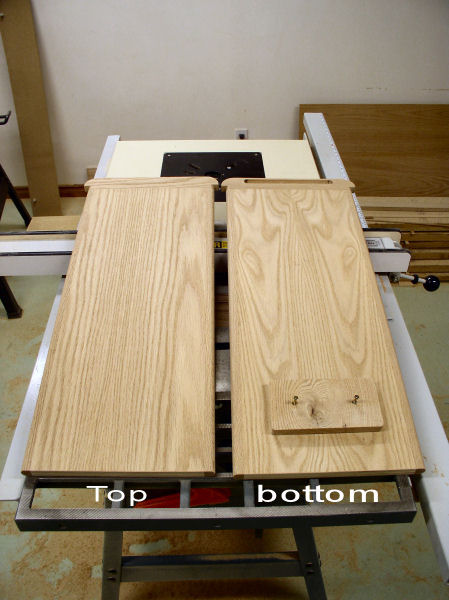
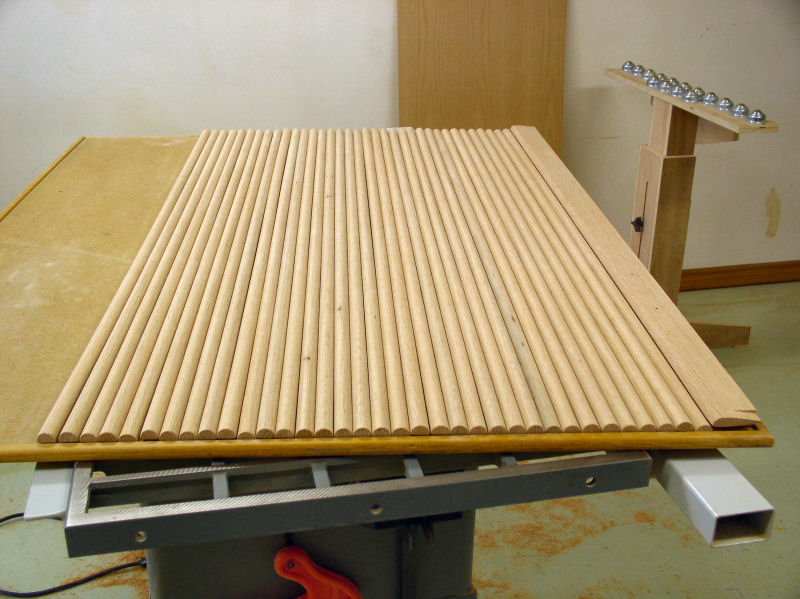
Making the slats is easy. Take a 3/4" board, sand it on both sides, and make sure that the edges are parallel and run through the jointer. Then round over one edge with a 3/8" round over bit on both sides. On the table saw rip the half round edge at a thickness of 1/2". Run the half round slat, using a little jig, one pass over the jointer to smooth the back and to ensure that it can run free in the grooves of the upper desk side panels. The little jig is just a 3/4" by 2" board, with a stop block at the end and with the same length as the slats. Next run the sawn edge of the remaining board over the jointer, and start rounding over again. I used five boards at the time to speed up the process. Created 38 slats and kept 35. The plan calls for 34 slats, but I wanted to build the tambour with 35 -- just in case --. I can later cut off one slat if it is indeed too much. Sand the slats, ease over the edges, and make them free of dust.
For fabric I used a medium weight denim, washed it so it is pre-shrunk, and ironed it. I found very little helpful information how to glue the slats on the denim. In the end I followed the instructions that came with the tambour glue (a PVC-E glue) I bought from Van Dyke's Restorers in the USA. Apparently they have a quick way of applying glue to all slats, but I did it one slat at a time.
Cut the denim to a width of at least 2" less than the slat length. Spread the denim on a flat surface and clam the bottom 3/4" to 1" of denim under a straight edge. This excess material will be used later to attach the lift bar. Secure the top edge of the denim with duct tape just so that the denim flat but not overly stretched. For the left edge of the slats clamp another piece of straight wood perpendicular to the bottom straight edge and about 1" to the left of the edge of the denim. Lay out the slats in the order you want to place them, back side up.
Apply glue to the back of the first slat leaving 1" inch on each end without glue. Let the glue set for a few minutes while doing the next step. Apply about the same amount of glue as you would do for a normal wood joint.
Apply glue to the back of the next slat leaving 1" inch on each end without glue. Let the glue set for a few minutes while placing the other slat on the denim. Push the slat against the left edge and the bottom edge or slat and press down while gradually lowering the right end of the slat. Apply pressure on the slat with a roller or rubbing hard with a towel. Repeat this step for the next slat, and so on.
Let everything dry for at least one hour after the last slat is glued before handling the tambour. Attach the lift bar with glue to the excess denim at the bottom. Trim any excess denim at the top and the bottom. The tambour needs 24 hours to cure before you should place it in the upper desk and operate it.
My concern was that gluing with fabric would be messy, but the method from Van Dyke's Restorers makes it an easy and clean job.
My other concern was about the flexibility of the tambour. I could see that it would bend easily towards the fabric side, but I had a problem imagining it bending the other way as is needed in the S-curve of the upper desk. After the tambour was glued up I found that there is just enough flexibility when using the above construction method.
I hope that this helps future tambour builders.
Building sequence
Preparation and study plan (25.0 hours)
Lower desk 4 side panels (26.5 hours)
Lower desk back panel and hutch back panel as their measurements are almost the same (20.8 hours)
Lower desk face frames (17.3 hours)
Lower desk inside support frames, assemble lower desk (15.5 hours)
Baseboards (4.3 hours)
Drawers, writing boards (39.5 hours)
Tops for lower desk, upper desk, hutch (25.8 hours)
Back and side panels upper desk (37.7 hours)
Drawer fronts, drawer pulls (16.0 hours)
Tambour (22.9 hours)
Side panels and doors hutch (30.5 hours)
Inside drawers and compartments (49.6 hours)
Finishing and final assembly (35.3 hours)
In case you like to know
This desk is a heavy beast as the next figures will show. These figures include all hardware.
hutch -- door and shelf glass
hutch -- body and top hutch -- complete
10 kg (22 lbs)
28-1/4 kg (62-3/4 lbs) 38-1/2 kg (84-3/4 lbs)
upper desk -- storage compartments and drawers
upper desk -- tambour
upper desk -- body and top upper desk -- complete
21 kg (46-1/4 lbs)
6-1/2 kg (14-1/4 lbs)
23-1/4 kg (51-1/4 lbs) 50-3/4 kg (111-3/4 lbs)
lower desk -- top
lower desk -- drawers, slides and writing boards
lower desk -- body lower desk -- complete
18-1/4 kg (40-1/4 lbs)
42-1/4 kg (93 lbs)
54 kg (119 lbs) 114-1/2 kg (252-1/4 lbs)
TOTAL WEIGHT DESK
203-3/4 kg (448-3/4 lbs)
For the staining and varnishing the desk was taken apart into 57 separate wooden pieces (bodies, tambour, drawers, drawer fronts, drawer handles, tops and storage unit) in order to do a proper job.
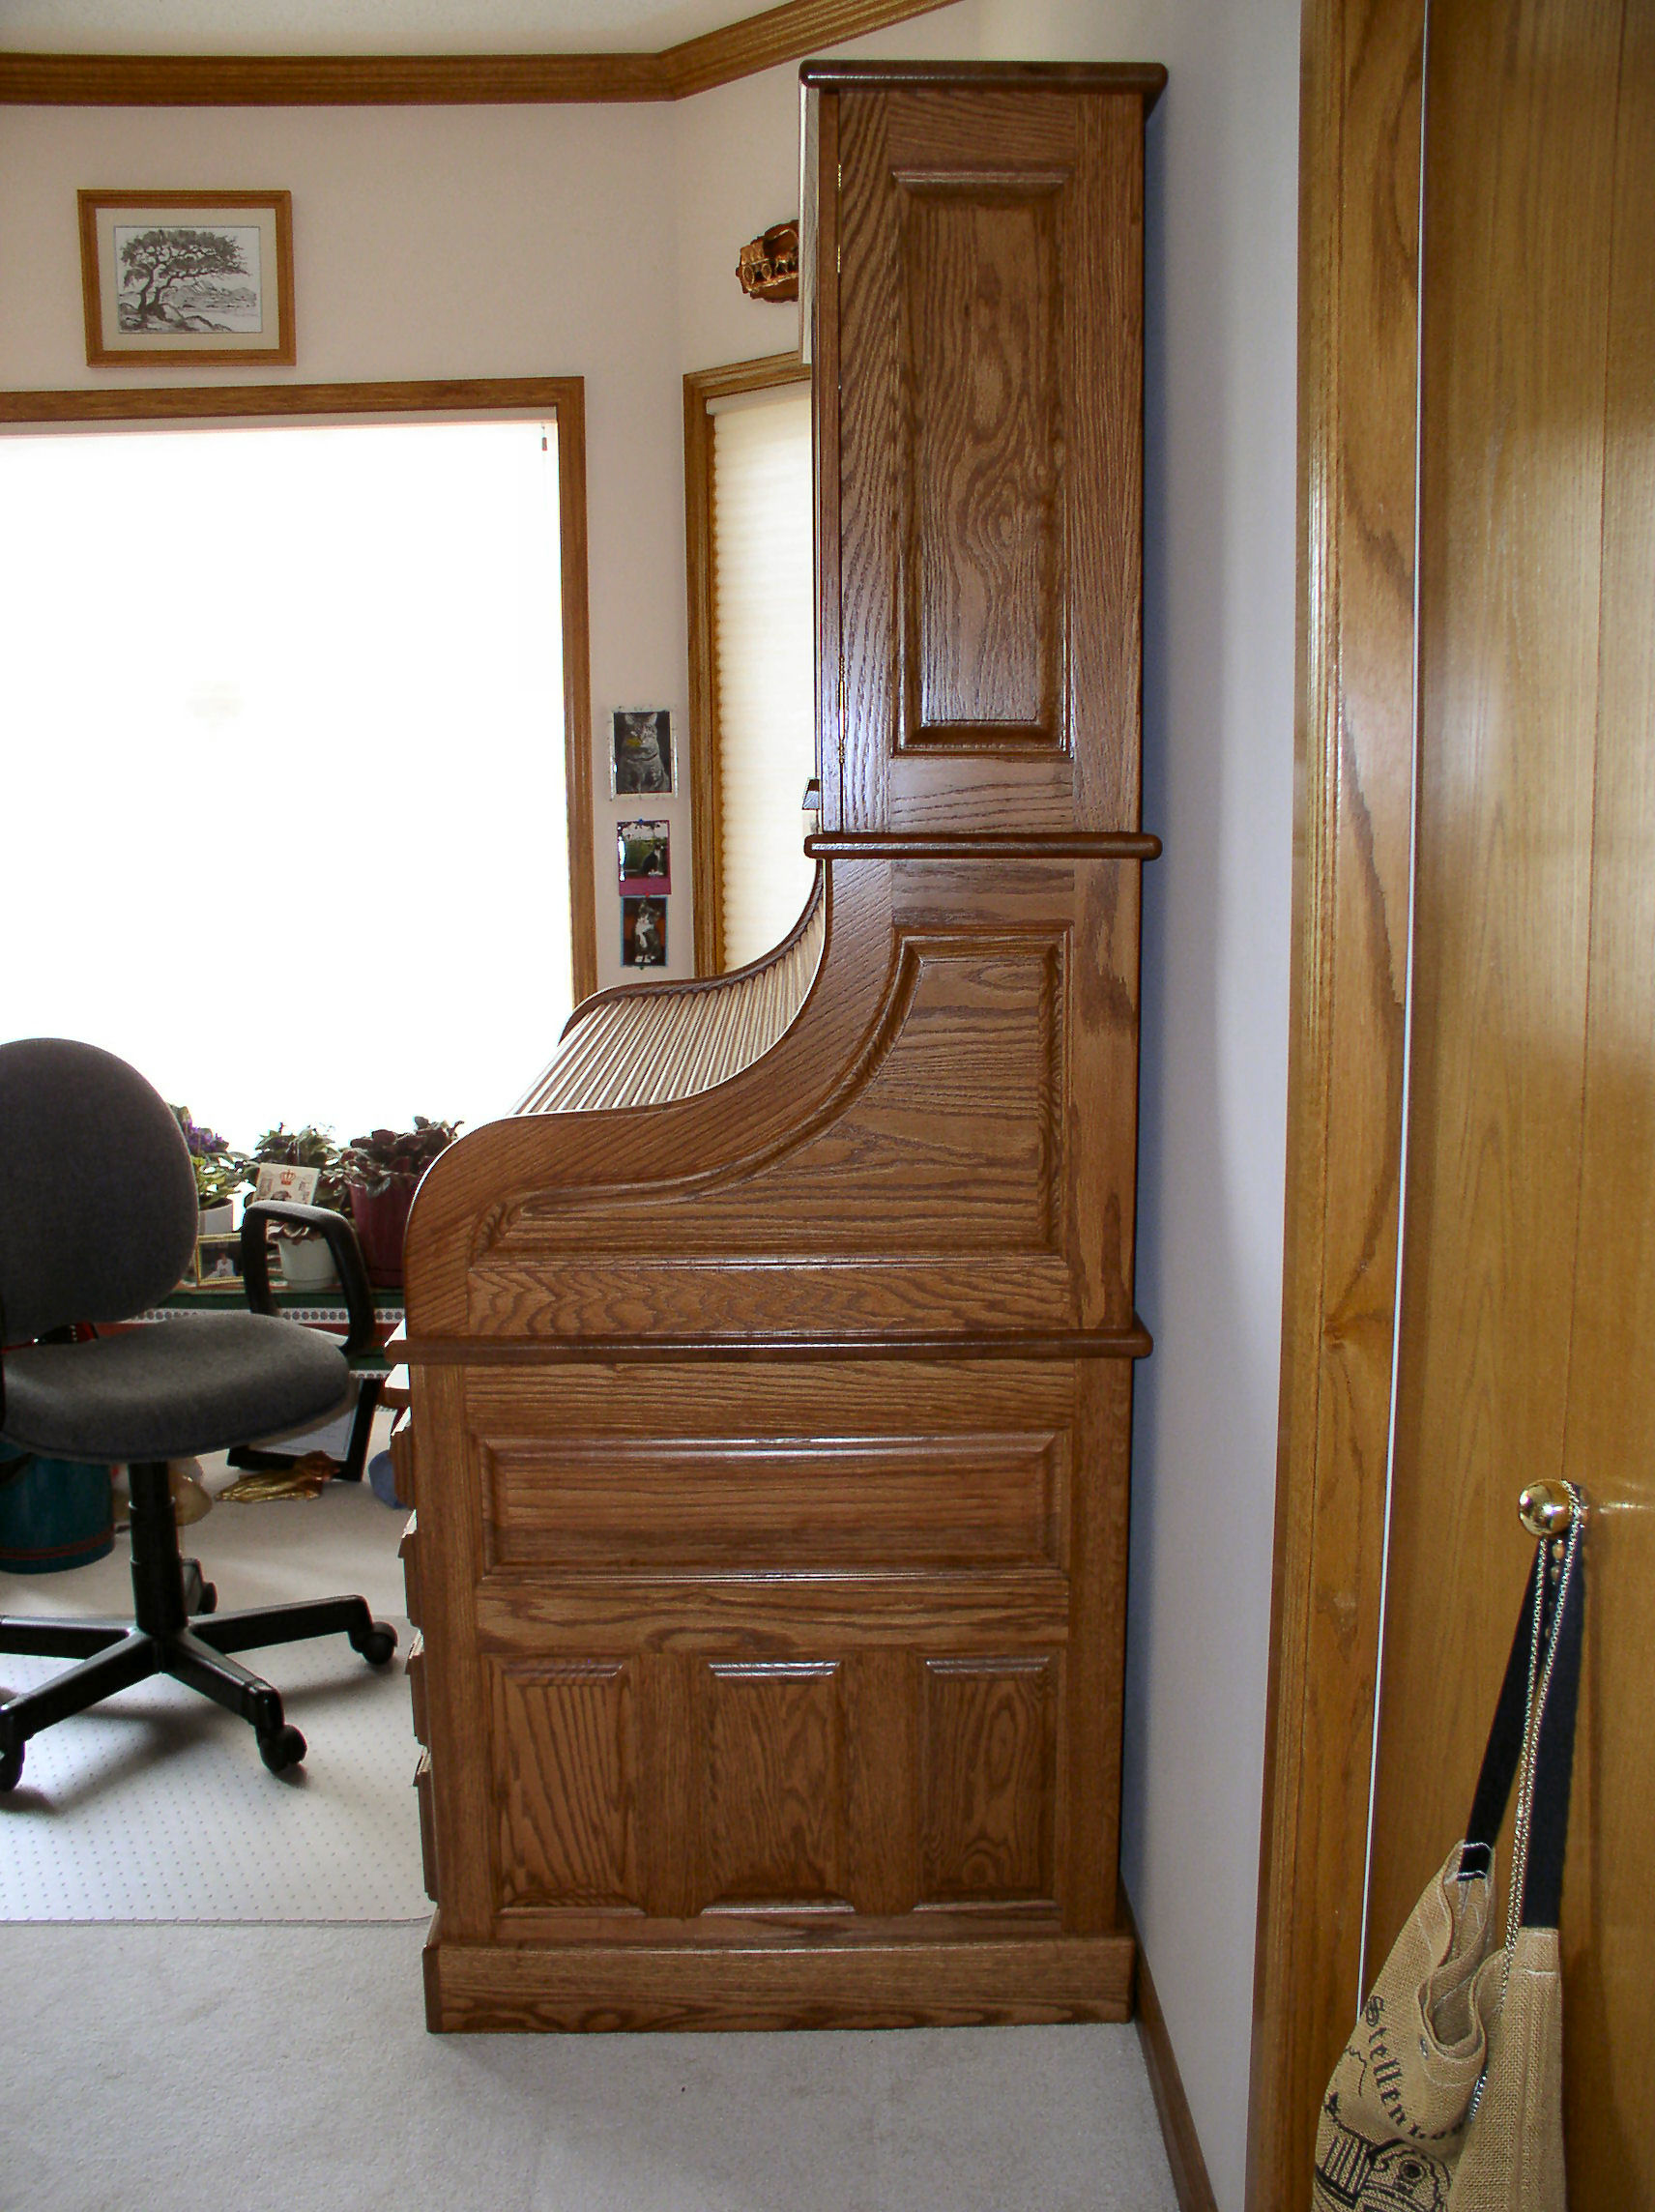
Moving the roll top desk
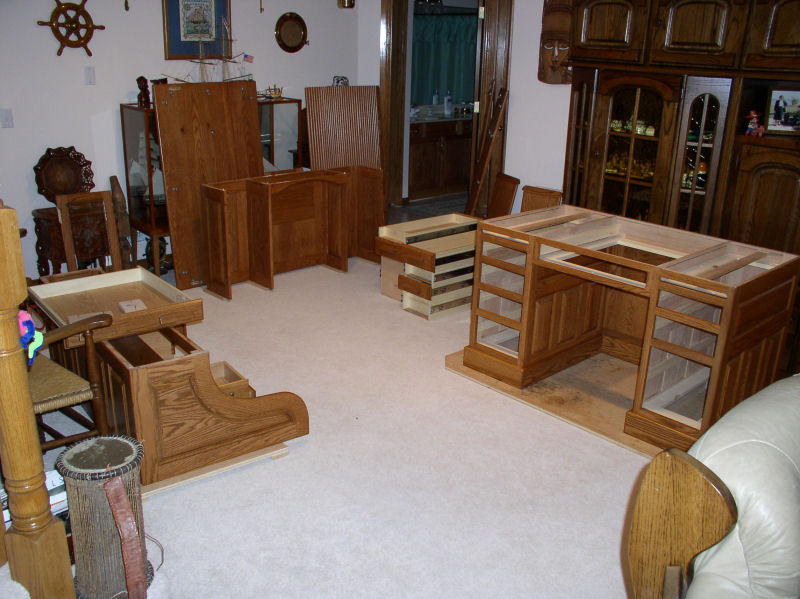
Disassembly of the rolltop desk and moving it out of my wife's office has two major challenges. The total weight is 204 kg or 449 lbs. Secondly, the depth of the lower desk is 29½ inch while the door opening with the door removed is 29¼ inch. However, the height of the lower desk is "only" 29 inch. Therefore to move the rolltop desk out of the room it has to be disassembled into its smaller components. Here are the instructions how to assemble it, and thus followed the reverse order to disassemble it:
There are three sub-assemblies: HUTCH (hutch, top, doors, glass shelves), UPPER DESK (upper desk, top, tambour, storage compartments), LOWER DESK (lower desk, top, drawers).
Secure the top of the upper desk to the underside of the hutch with screws.
Secure the assembly to the upperdesk using 8 table top mounting fasteners.
Place the top of the lower desk off-center on the lower desk and place the assembly on the top, but such that the slot for the tambour hangs over the edge.
Slide the tambour inside the groove in the upper desk. Two man job as tambour can get away from you!!!
Carefully slide the assembly in position on the lower desk top and secure with screws.
Position the assembly on the lower desk and secure with 14 table top mounting fasteners.
Move/slide the desk in the finally position.
Hang the hutch doors, place the hutch top and secure with 10 table top mounting fasteners.
Place the storage compartments, and make sure it does not interfere with the operation of the tambour. Then secure the storage compartments to the top of the lower desk with a few screws in the two outside compartments. There is a Rev-A-Lock magnet in one of the compartment drawers that will unlock the two outside compartments. There are also two more "secret" compartments for you to find.
Finally put the glass shelves in the hutch and the drawers in the lower desk.
What went wrong
There is always something that goes wrong during a project. Sometimes you can find a quick fix and sometimes you throw the piece away and start all over again. Here are some of the mishaps during this project:
Had to cut two pieces from a board that was just long enough. I marked where to cut the first piece, but got sidetracked and turned the board around. The result was that I cut on the wrong side of the line. Arrggghhhh.
Was routing the ends of rails and stiles so they would fit into the sides of other rails and stiles. Did not pay attention and accidentally routed the ends of two end stiles that did not need routing. Arrggghhhh.
Finished gluing the two side panels of the upper desk. All that needed to be done was to route the 1/2" mortise in them for the tambour. I carefully positioned the 3/4" plywood template, clamped everything, and started routing. The first pass went fine, but about 3/4 of the way through the final pass I noticed that the template had shifted. The result was an up to 1/4" wider mortise over a length of about 4". Decided to fix it by selecting a small piece of matching oak, and custom fitting and gluing it in the slot. Once the glue was dry carefully re-routed that section of the mortise. Arrggghhhh.
Drawer pulls are mounted to the drawer front with two screws. The drawer pulls are in the middle of the 3-1/2" high drawers -- about 1-1/8" from the top. The pulls for the other drawers are supposed be the same amount from the top. I had a "seniors moment" and marked all the screw holes in the centre of all drawers. After drilling the 4-1/2" drawers I realized my mistake. Luckily, repositioning the pull to the correct place still covered the wrong holes. Arrggghhhh.
In picture 24 I showed how smart I was in covering the potential gap between the two drawer fronts with red oak veneer on the filing drawer. Well, after mounting the two drawer fronts it became apparent that nothing covers the gaps between drawer and sides and thus showing a nice 1/2" by 3/4" gap. Solution: re-route the groove, but now 1/8" deep and let the filler piece stick out 1/2" to each side of the drawer. Arrggghhhh.
I had arranged the numbered slats on top of the denim. Disaster struck after gluing slat 20 to the denim. Slat 21 had glue on it. Instead of applying glue to slat 22 I applied glue to slat 35. When I discovered that, I had a seniors moment, and tipped over the jar with glue. The glue spilled on the denim and on the back side of a few slats that I still had to glue. In the recovery process I used a putty knife to scoop the glue from the denim causing more glue to drip from the putty knife onto yet more slats. Then I discovered that I had put glued slat 35, glue side down, diagonally over the other slats. Everything came right again, but not after a few choice words were said which I will not repeat here. Arrggghhhh.
We were celebrating our 41st wedding anniversary, and that day and the next day I was working on the storage compartments. I got distracted too much with visits and phone calls, resulting in three cock-ups. The storage compartments were glued together and looked fantastic. Next was the 1/4" plywood backing. First error: I forgot to sand it before I glued it against the back. After the glue was dry I trimmed the oversized plywood with a flush trimming bit. That went fine, except that I also cut away the open area at the bottom of the storage compartments. The plywood was not supposed to be taken away there as it had to hide the view of the back of the tambour: second error. Fixed it with a "patch" of plywood and quarter round trim. While marking off the patch I used a ballpoint pen instead of my carpenters pencil: error three. That was when I called it quits for the day. Arrggghhhh.
O.K. this is the last one. While making the cutting plan for the drawers of the storage compartment I needed 9/16" thick boards for the front and back because of the half-blind dovetails. For some reason -- another seniors moment I guess -- I sized the sides 1/2" thick. It was not until everything was cut and shaped, and I dry-fitted the smallest drawer, did I realized that the thickness of the sides did not look right for the small drawer. And indeed, the plan called for 1/4" thick sides. This time I had enough of it, and decided that we would have to learn to live with it. Arrggghhhh.


