This towel hanger is only a few pieces of wood and a 1/2" steel ball. Sounds easy enough and it is, except that creating the groove for the steel ball could be tricky to downright dangerous if not done properly. So, read the instructions very thoroughly and decide for yourself if you have the required expertise.
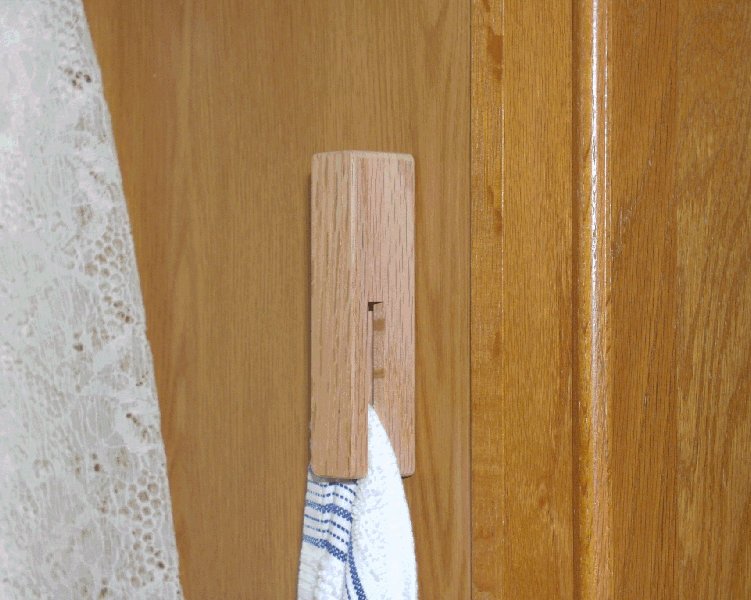
The towel hanger is mounted with double sided tape onto a smooth surface. To hang a towel just slide it up from below and when you let go the steel ball will slide down and hold it. To remove the towel slide it sideways. They are ideal little gifts like stocking stuffers for Christmas.
The required time and cost per towelhanger is based on making 60 towelhangers at the same time.
Pictures
Click on a picture to get a larger picture and then used the back button of the browser to return.
Base, top and filler milled to height and widthAnother look at the milled stockDado setup
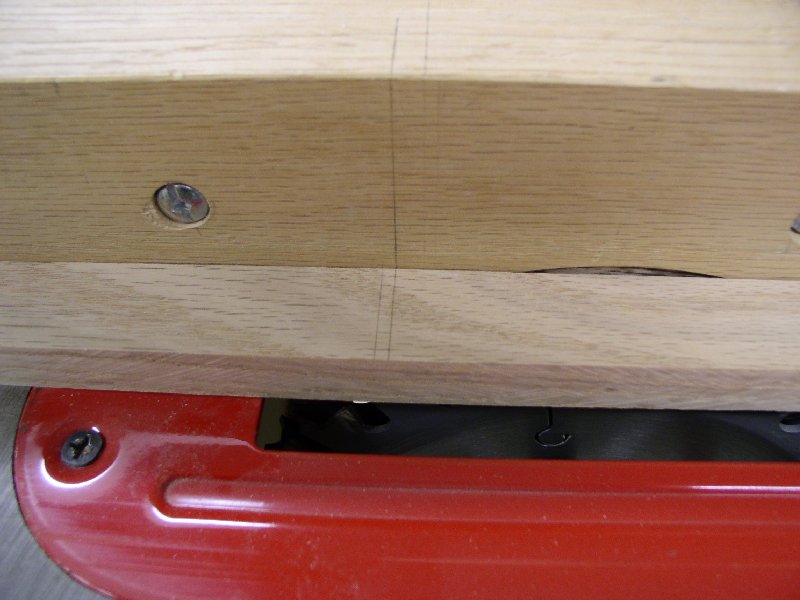
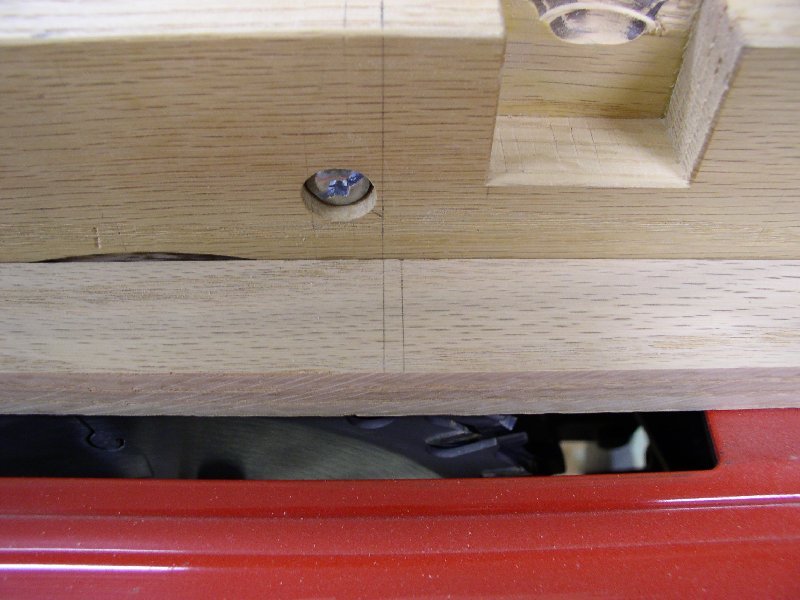
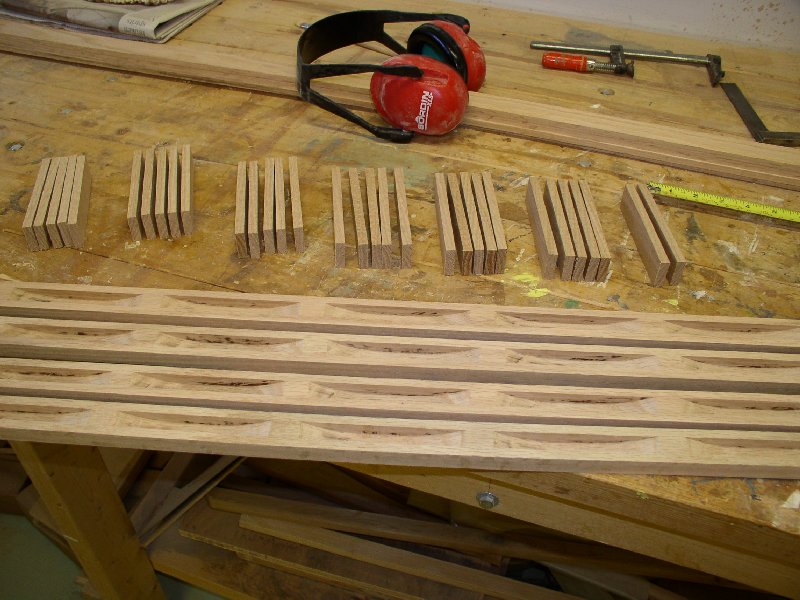
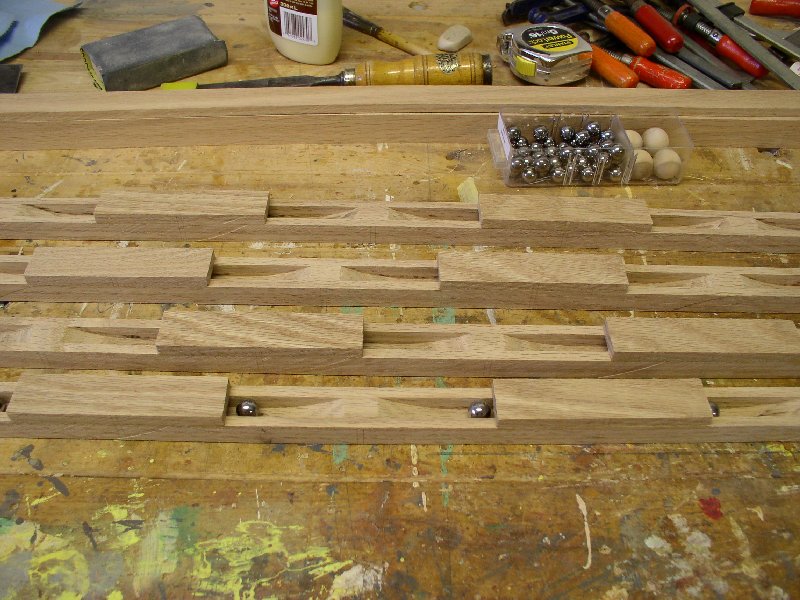
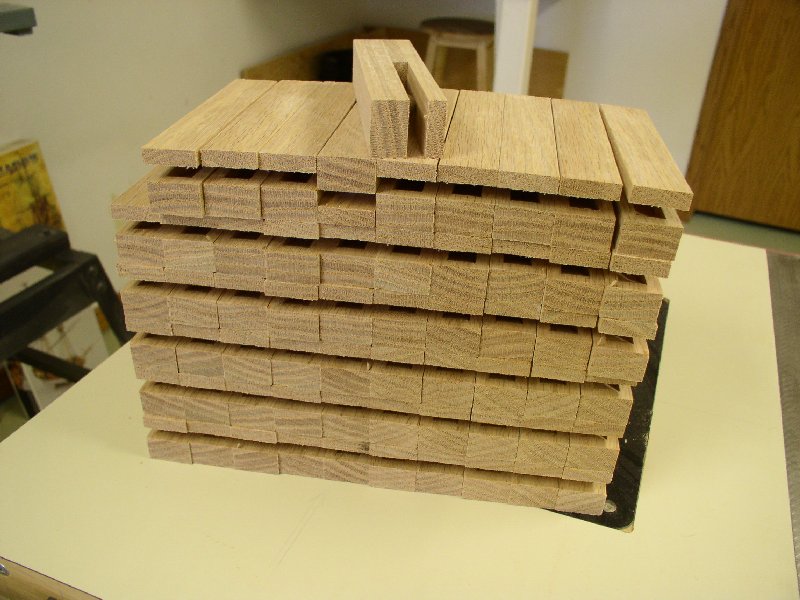
Line-up start markers and then lower the base onto the dadoLine-up end markers before lifting the base away from the dadoFiller pieces cut and the grooves cut in the base Filler pieces glued onto based and balls "loaded"Top glued onto filler pieces60 towelhangersFinal productFinished product
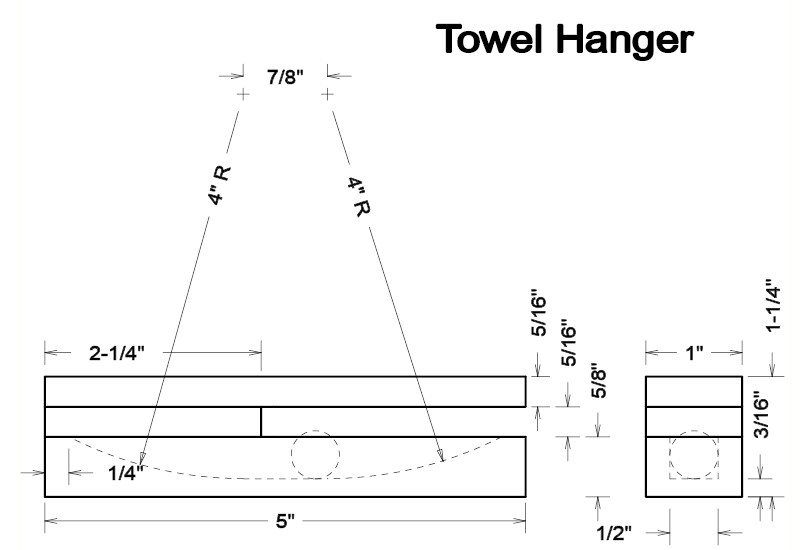
Plans, Drawings, Sketches (inches) (13-Feb-2006)
To view or print the full scale drawing just click on a drawing, and then use the print-preview of the browser to select portrait/landscape format and (re)size the drawing before doing the actual printing.
Materials List (inches)
no.
description
length
width
thickness
suggested basic material, comments
1
base
5
1
5/8
see instructions first
1
top
5
1
5/16
see instructions first
1
filler
2 3/8
1
5/16
see instructions first
1
stainless steel ball
1/2
sold in ball bearing shops
1
double-sided tape
5
1
1/16
Material is your choice, but I recommend a hardwood like red oak.
Required Tools
Power tools -- table saw, miter saw, planer, dado set.
Hand tools -- sanding block, tape measure, clamps, chisel.
Construction
All measurements are in inches (1 inches = 2.54 cm) because all wood measurements in the shop are in inches. I recommend to cut, shape and sand all pieces and dry fit them together with clamps.
Cut and shape the stock
There are basically two methods based on how many towel hangers one likes to make and which tool is used for creating the groove for the steel ball.
One or two -- chisel method (Beginning). Shape and sand the stock according to the material list. Clamp the base in a woodworking vise and carefully chisel out the groove. Glue the filler piece onto the base, insert the steel ball, glue the top piece onto the filler piece, clamp and let dry. Once dry sand the outside and ease over all edges and the four corners. Stain in the desired colour and finish with two coats of acrylic urethane varnish. Put a strip of double sided tape on the back and you are done.
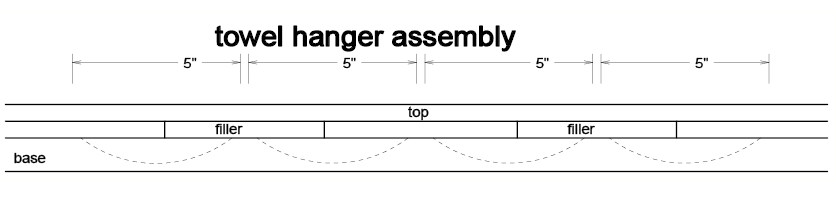
Dozens -- dado method (Advanced). This is the method I use. Let us assumed that we start with 8ft stock, i.e. 96". We can safely make 16 towel hangers of 5" long. To separate them on the miter saw we need at least 1/8" (the tickness of the blade) between the pieces. For safety reasons we give ourselves at least 10" on the in-feeder side and at least 4" on the out-feeder side. This adds up to 96".
Use the planer to mill an 8ft base stock to a 5/8" thickness and a width of 1 1/8". I know the material list says 1", but trust me, we will take care of that later. Plane an 8ft top stock to 5/16" tickness and a width of 1 1/8". For the filler pieces we need at least 40" so let us plane a 4ft filler stock to 5/16" tickness and a width of 1 1/8". Next cut the filler stock into 4 5/8" segments, i.e. two filler pieces with 1/8" for the separating miter saw blade later. Mark the centre of each double filler piece on the side as that mark is needed later to align it with the base pieces.
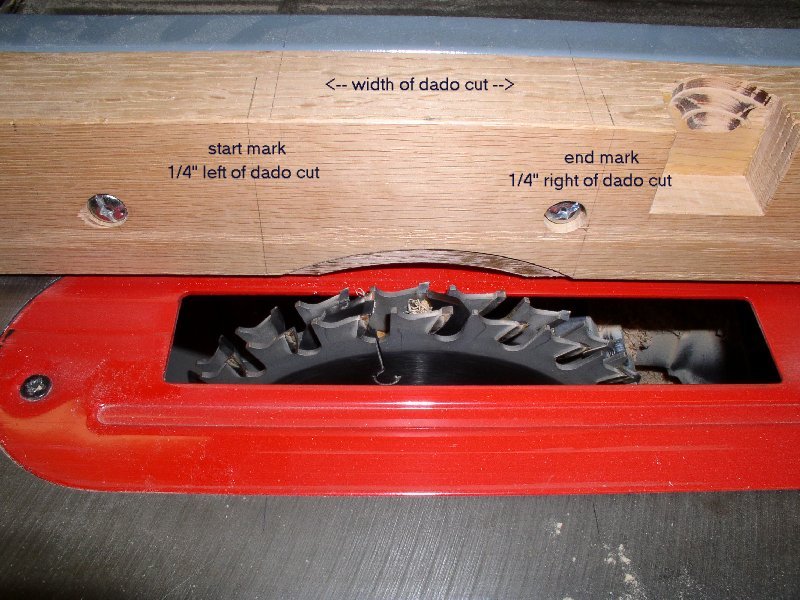
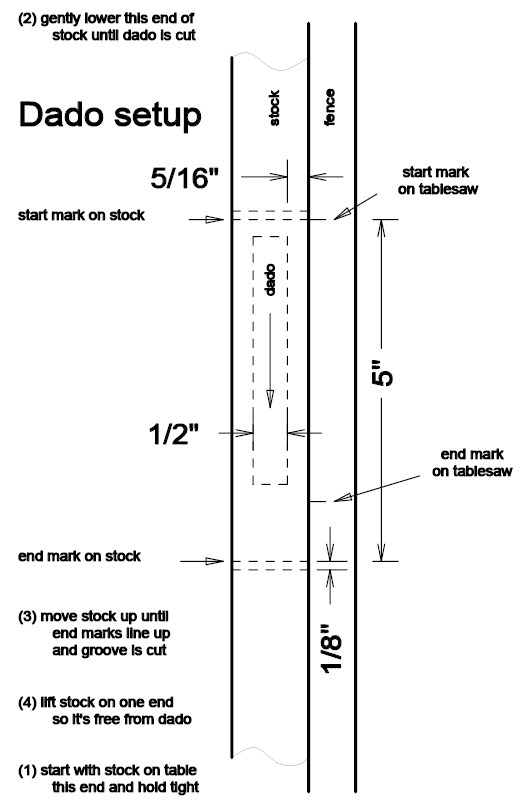
On the back side of the base stock mark off the 5" pieces separated by a 1/8" gap. Stack the dado to a 1/2" width and mount in the table saw. Adjust the fence to a gap of 5/16" between dado and fence. Now comes the tricky part, i.e. cutting the grooves following the four steps indicated on the drawing.
You may be wondering if a 1/2" dado groove is not too tight for the 1/2" ball. Well, this depends a bit on your brand of dado. My dado is a hair wider than 1/2" when stacked to 1/2" to begin with. Secondly, that wee bit of "extra" cutting that happens when you lower and lift the base stock gives just enough extra width. There are very thin fillers on the market to put between dado blades. Personally, if I needed one, I would cut a round piece of paper with a hole in the middle and put that between the dado blades (but don't tell anybody).
Final assembly
The rest is easy again. Lay the base stock down with the grooves up. Glue the double filler pieces at alternating "joints" as per the drawing. Put a steel ball in each groove. Glue the top stock on top of the filler pieces. Clamp everything trying to line the pieces up as well as possible. Clean up any glue with warm water. After the glue is dry scrape off any major unevenness on the sides. Run each side through the planer taking off about 1/16" of each side thus arriving at the finished width of 1". With the miter saw separate each towel hanger. Sand the outside and ease over all edges and the four corners. Stain in the desired colour and finish with two coats of acrylic urethane varnish. Put a strip of double sided tape on the back and you are done.