We are ready to replace our master bedroom furniture. Knowing my wife's taste that would be expensive. I figure that given the time, I can make something unique that we both like, that is perhaps cheaper, and rock solid. After the successful King-size Bed construction, my wife was pushing me very hard to make the matching nightstands and dresser with mirror before the winter season was over, and I would disappear outside for the summer yard work. It took me a while to design the nightstands and dresser, but I think that I found the design that complements the king-size bed design.
The nightstands are 31" wide, 22" deep and 23-1/2" high, and have two large drawers. The legs have the same thickness as those of the the king-size bed. The starkness of the nightstands are broken by a curved front. It is common in furniture design that height of drawers, width versus height, etc., relate to each other with a ratio of 1.618. As the overall attempt is to create a sort of rugged feeling, this ratio -- also called phi, or golden ratio -- is not applied during this design.
The dresser is really a chest of drawers. The left and right side of the dresser is basically the same as the nightstands, but with one more drawer. The centre section is straight having two large drawers at the bottom and two smaller drawers at the top. The overall size of the dresser is 87" wide, 22" deep and 31-1/4" high. On top of the dresser will be a wood framed oval mirror, overall size of 49-3/4" high by 27-3/4" wide, supported by the same decorative back as in the headboard and footboard of the king-size bed.
The clearance under the nightstands and dresser is 5", the same as under the king-size bed. The material will again be red oak with Baltic birch plywood and poplar. The reason for doing the construction of the nightstands and the dresser at the same time is that several pieces have the same size and can all be machined at the same time, thus reducing construction time.
The time reflects construction and finishing time. Design and drawing time is not included.
Construction Considerations
I read somewhere not to think about construction while designing, as that will stifle new ideas. Well, I followed that advice and it did get me into trouble. The most challenging parts to make are the curved drawer fronts. Resawing the drawer fronts in thin 7-3/4" x 26" strips and then gluing them together while clamping them in a form would be most likely the ideal solution. Problem is that my bandsaw has only a 6" capacity, and is not suitable for a proper resaw blade. Buying another bandsaw was out of the question, as I have no future projects lined up where I would need such a bandsaw.
So I came up with this crazy idea of building the curved drawer fronts by gluing three 7-3/4" x 13" pieces together, and cut and sand away any excess material to shape the drawer front. I had to buy a 3" x 21" belt sander to accomplish that, just on a hunch that it might work. Oh, I had a backup plan. If the drawer fronts looked really bad then I would glue a red oak veneer layer over it. So you better read over the construction details of the drawers first before even thinking about this project.
Pictures
Click on a picture to get a larger picture and then used the back button of the browser to return.
1: Rough sawn lumber. Notice the amount of space needed2: Template decorative board; reused from king-size bed3: Templates drawer and mirror frame4: Dry-fit mirror frame segments5: Detail mirror frame finger joint6: Gluing mirror frame7: Mirror frame quadrants8: Mirror fitted in frame9: Mirror back view10: Decorative board mortise11: Mirror backboard construction12: Backboard dry fitted without slats13: Backboard close-up14: Backboard glued up15: Slats shaped; note rounded over tenon to fit tenon in mortise16: Mirror backboard stained and varnished, and placed temporarily on the old dresser17: Legs and side stretchers cut to manageable size18: Legs and side stretchers cut and milled to final size19: Drawer slide supports milled to size20: Template for front edges21: Back & front stretchers cut to manageable sizes22: Back & front stretchers milled and shaped23: Bad mortise due to dull router bit24: Glued up boards for side panels25: Side panels cut to size26: Finished raised side panels27: Raised side panel profile28: Leigh FMT jig setup with custom made bracket to support cutting tricky mortises29: Tenons on side and centre stretchers, mortises in legs30: Legs and side/centre stretchers dry fitted31: Tenons on drawer slide supports32: Back legs with all the mortises cut33: Nightstands dry-fitted to see where mortises for front stretchers need to be cut34: Front stretcher mortise detail35: Right nightstands dry-fitted36: Dresser dry-fitted37: Detail centre bottom front joint of dresser38: Detail centre top front joint of dresser39: Detail centre back leg joints of dresser40: Detail left back bottom corner of nightstand41: Tabletop mounting clamp42: Line up tenons of dresser centre assembly43: Nightstand glue up side assembly44: Finished sides of nightstand45: Glue front & back stretchers to left side of nightstand46: Gluing centre assemblies of dresser47: Top panel dresser glued48: Dresser complete with top panel49: Nightstand complete with top panel50: Drawer front pieces cut to size51: Dovetail detail of drawer52: Dovetail detail of drawer>53: Drawer front jig54: Drawer front glued55: All drawer fronts56: Drawer backs and sides57: Grooves in drawer sides58: Jig to shape drawer front59: Jig in use to shape drawer front60: First cut on curved drawer front61: Second cut on curved drawer front62: All cuts made on curved drawer front63: The curve is showing64: curved drawer front sanding setup65: Centre drawers of dresser installed66: Jointer setup for trimming drawer front sides67: Construction dresser completed68: Construction nightstands completed69: Left over lumber; compare with picture 170: Cut-offs and test pieces. Not shown are 30 bags of saw dust and shavings71: Staining completed72: Completed nightstands. I don't like the dark grain in the left top drawer. high resolution picture73: Completed dresser. Mirror backboard is slightly lighter than the dresser. high resolution picture74: Completed dresser in actual use. high resolution picture75: Completed left nightstand in actual use. high resolution picture76: Completed right nightstand in actual use. high resolution picture
Drawing 01 -- Left nightstand. Right nightstand will be a mirror image. The drawing shows a flat side panel, but the final product will have a more elegant raised panel.
Drawing 02 -- Left nightstand. Construction overview without drawers, and without the right side panel to show internal details.
Drawing 03 -- Left nightstand. Exploded construction overview without drawers. Select multi-page PDF (577 KB) for a large four-page drawing.
Drawing 04 -- Left nightstand. Left side details.
Drawing 11 -- Dresser with mirror board. This is my preferred design, because the decorative board brings the whole bedroom suite together.
Drawing 11a -- Dresser with mirror. Another option for the mirror, but it does not really integrate with the king-size bed.
Drawing 12 -- Dresser. Construction overview without drawers, and without the right side panel to show internal details.
Drawing 13 -- Dresser. Exploded construction overview without drawers. Select multi-page PDF (540 KB) for a four-page drawing.
Drawing 14 -- Dresser. Left side details.
Drawing 15 -- Front view of mirror board.
Drawing 15a -- Front view of bottom right mirror frame quadrant.
Drawing 21 -- Top view of drawer front. This serves as the template for the curved drawer fronts, the front supports, and the tops.
Drawing 22 -- Top/front/side view of drawer. Measurements of a drawer of the left nightstand and left side of the dresser. Those for the right nightstand and right nightstand are mirror images.
Drawing 23 -- Cutting plan for the 5 x 5 ft Baltic birch plywood.
Materials List (inches)
Here is the detail materials list. Compare the nightstand and dresser list, and you will notice that many pieces have the same thickness and width. Some piece have even the same length. Milling those pieces at the same time will provide considerable time savings.
no.
description
length
width
thickness
suggested basic material, comments
TWO NIGHTSTANDS
8
leg
22-1/2
2
2
red oak
4
side stretcher, long
19
2
2
red oak; 17" with 1" long 1/2" x 1-1/2" tenon on centre on both ends
4
side stretcher, short
17
2
2
red oak; 15" with 1" long 1/2" x 1-1/2" tenon on centre on both ends
2
top panel
31
22
1
red oak; front edge shaped
4
front stretcher
28
6
1
red oak; front edge shaped 26" with 1" long 1/2" x 5" tenon on centre on one end and 1" long 1/2" x 3-1/2" tenon on centre on other end
4
back stretcher
28
3
1
red oak; 26" with 1" long 1/2" x 2-1/2" tenon on centre on both ends
12
high drawer front, left/middle/right pieces
13
7-3/4
1
red oak; see construction for shaping
2
side panel, wide
13-15/16
17-7/16
3/4
red oak; raised panel finish
2
side panel, narrow
13-15/16
15-7/16
3/4
red oak; raised panel finish
4
drawer slide support, long
19
2
1
poplar; 17" with 1" long 1/2" x 1-1/2" tenon on centre on both ends
4
drawer slide support, short
17
2
1
poplar; 17" with 1" long 1/2" x 1-1/2" tenon on centre on both ends
4
high drawer side, long
18-1/2
7
1/2
poplar
4
high drawer side, short
16-1/2
7
1/2
poplar
4
high drawer back
24-1/2
6-1/2
1/2
poplar
2
back panel
26-3/4
12-1/4
1/4
Baltic birch plywood G2S
2
bottom panel
26-3/4
14-3/4
1/4
Baltic birch plywood G2S
4
drawer bottom
24-1/2
18-1/4
1/4
Baltic birch plywood G2S; shape according to front
DRESSER
8
leg
30-1/4
2
2
red oak
4
side stretcher, long
19
2
2
red oak; 17" with 1" long 1/2" x 1-1/2" tenon on centre on both ends
4
centre stretcher, short
17
2
2
red oak; 15" with 1" long 1/2" x 1-1/2" tenon on centre on both ends
1
top panel
87
22
1
red oak; front edge shaped
2
front stretcher
84
6
1
red oak; front edge shaped 82" with 1" long 1/2" x 5" tenon on centre on both ends
2
back stretcher
84
3
1
red oak; 82" with 1" long 1/2" x 2-1/2" tenon on centre on both ends
18
high drawer front, left/middle/right pieces
13
7-3/4
1
red oak; see construction for shaping
2
high drawer front, centre
26
7-3/4
1
red oak; see construction for shaping
2
low drawer front, centre
26
3-7/8
1
red oak; see construction for shaping
2
side panel, wide
21-11/16
17-7/16
3/4
red oak; raised panel finish
6
drawer slide support, long
19
2
1
poplar; 17" with 1" long 1/2" x 1-1/2" tenon on centre on both ends
14
drawer slide support, short
17
2
1
poplar; 17" with 1" long 1/2" x 1-1/2" tenon on centre on both ends
6
high drawer side, long
18-1/2
7
1/2
poplar
10
high drawer side, short
16-1/2
7
1/2
poplar
8
high drawer back
24-1/2
6-1/2
1/2
poplar
4
low drawer side, short
16-1/2
3-1/8
1/2
poplar
2
low drawer back
24-1/2
2-5/8
1/2
poplar
3
back panel
26-3/4
20
1/4
Baltic birch plywood G2S
3
bottom panel
26-3/4
14-3/4
1/4
Baltic birch plywood G2S
6
drawer bottom
24-1/2
18-1/4
1/4
Baltic birch plywood G2S; shape according to front
4
drawer bottom
24-1/2
16-1/4
1/4
Baltic birch plywood G2S
MIRROR FRAME
4
mirror frame segment, left/right
19-27/32
4-1/2
1-1/4
red oak; see construction for shaping
4
mirror frame segment, top/bottom
13-25/32
4-1/2
1-1/4
red oak; see construction for shaping
1
mirror backing
44-3/4
22-3/4
1/4
Baltic birch plywood G2S
12
cleats
2
1
1/4
Baltic birch plywood G2S
MIRROR SUPPORT BOARD (optional)
2
decorative board
35
8
1-1/4
red oak; see construction for shaping. Drawing says 34 long, but cut yourself some slack!
2
vertical support
10-3/8
3
1-1/4
red oak; 7-3/8" with 1-1/2" long 1/2"x 2-1/2" tenon on centre on both ends
8
slats
total about 7-1/2 ft
red oak; various lengths with a 3/4" long 5/16" x 3/4" tenon on centre, and shaped according to contour of decorative boards and mirror frame. Slats that meet the decorative board or mirror frame have 1" extra in overall length for shaping.
2
15-1/4
1
1
red oak; 13-1/2" long with a 3/4" long 5/16" x 3/4" tenon on centre on one end. Shaped on other end.
2
10-3/4
1
1
red oak; 9" long with a 3/4" long 5/16" x 3/4" tenon on centre on one end. Shaped on other end.
2
8-7/8
1
1
red oak; 7-1/8" long with a 3/4" long 5/16" x 3/4" tenon on centre on one end. Shaped on other end.
2
5-1/8
1
1
red oak; 3-3/8" long with a 3/4" long 5/16" x 3/4" tenon on centre on one end. Shaped on other end.
1
mirror back support
74-1/2
3-1/2
5/8
poplar
HARDWARE, etc.
9
100 lbs full extension slide
16
Lee Valley 02K30.16, in sets of two (75 lbs would be fine too), comes with 5/8" screws
5
100 lbs full extension slide
18
Lee Valley 02K30.18, in sets of two (75 lbs would be fine too), comes with 5/8" screws
84
wood screws, pan head
1/2
#8
for mounting drawer slide rails to drawer sides
28
antique brass drawer handles
4-1/2
Lee Valley 02W27.13, comes with 5/8" bolds
56
handle bolds
3/4
Lee Valley 01Z01.06; 5/8" bolds that comes with handles are too short
1
oval mirror
44-3/4
22-3/4
3/16
1
floating tenon
12
2
3/8
Lee Valley 50K42.05
12
wood screws, flat head
5/8
#6
for cleats to hold mirror and mirror backboard
20
wood screws, flat head
1-1/2
#8
for decorative mirror board, and nightstand & dresser top
3
wood screws, flat head
1-1/4
#8
To attached mirror back support to mirror and dresser
17
tabletop mounting clamps
Lee Valley 13K01.01; to secure tops to nightstands and dresser
17
wood screws, round head
3/4
#10
for tabletop mounting clamps
48
space balls
1/4
rubber spacers; two for each edge of the side panels
26
biscuits #20
for joining top panels
LePage carpenter's glue
yellow, cabinet maker's quality or equivalent
Woodwise red oak wood patch CP308
Found this filler at Windsor Plywood
wood stain
Acrylic Urethane Varnish, satin finish
The next step is to summarize the above material into approximate standard sizes. For the plywood that is done by making a cutting plan using the standard 5 x 5 feet Baltic birch sheets. In order to keep cost under control, I ordered rough sawn stock. Obviously, you can only do that when you have the woodworking machines to mill the stock, i.e. table saw, planer and jointer. Mind you, you normally don't have very much control over lengths and width, and you can expect some waste/surplus. On the other hand it gives you the chance to select the best part from the rough stock while you have full control of the final sizing of each piece of wood. The amount of boardfeet is the bare minimum. I typically order 50% more, and what is left over I can always use for the next project.
no.
description
length
width
thickness
calc.bdft
ordered material
4
legs
54
4-1/4
2
29
10/4 rough sawn red oak
2
side stretchers
63
4-1/4
2
1
decorative boards
69
8
1-1/4
135
6/4 rough sawn red oak
2
oval frame, vertical supports
88
4-1/2
1-1/4
3
top nightstands
63
8
1
3
top dresser
88
8
1
6
drawer fronts
78
8
1
5
front/back stretchers
85
7
1
6
side panels
89
6
3/4
13
4/4 rough sawn red oak
3
drawer slide supports
90
4-1/4
1
12
6/4 rough sawn poplar
13
mirror support, drawer sides/backs
96
6
1/2
60
4/4 rough sawn poplar
drawer bottoms, mirror backing, back and bottom panels
1/4
1/4" Baltic birch plywood G2S -- 4 sheets of 5x5 ft
Required Tools
Power tools -- table saw, miter saw, band saw, planer, jointer, router, drill press, random orbit sander
Jigs -- Leigh Frame Mortise and Tenon (FMT) jig, 1/2" spiral upcut router bit (Leigh 180CL), 5/16" spiral upcut router bit (Leigh 170-500C), matching joint guides; Leigh Dovetail (D4) jig, 12° dovetail bit (Leigh 112-8)
Router bits -- 1/2" template bit (Lee Valley 16J10.08), vertical ogee panel raising bit (Lee Valley 16J63.51), 1/2" straight cutter bit, 45° chamfer bit (Lee Valley 16J30.08), finger joint bit (Lee Valley 16J75.01)
Miscellaneous -- 1-1/2" sanding drum, 1/2" lipped brad-point drill bit
Construction
All measurements are in inches (1 inches = 2.54 cm) because all wood measurements in the shop are in inches. I recommend to cut, shape and sand all pieces and dry-fit them together with clamps.
I my opinion the clock starts ticking from the moment I pick up the lumber, because from that moment on everything is under my control. Stack the rough sawn red oak and poplar in the workshop with thin slats between each board to let them adjust to the temperature and humidity of the workshop for at least a week, but preferably 2 to 4 weeks. Check the lumber for staples and remove them so that you don't ruin any sharp blades! Measure the lumber and make a list for later use. Identify spots that cannot be used, or that you don't like to use, for example extreme discolouration.
Before doing any machining it is important to make a cutting plan. Take the list of measured lumber and decide on the most economical way to cut each piece up into the various parts needed for the project. Give yourself 3 to 4 inches on each end of lumber, or 6 to 8 inches extra, because when you run material through the planer it often have some indentation in the first few inches; also called snipe.
It is assumed that you are familiar with all your machines and Leigh jigs. For tips and tricks see the description of the king-size bed construction.
This is roughly the order in which I did the work.
mirror backboard part(s)
hours
make templates mirror frame, drawer front, decorative board
Before we begin it is important that we all speak the same language, so that when I use a term you know what I am talking about.
Templates
While I was waiting for the order of rough sawn red oak to come in, I felt this was a good time to make the templates I would need. Templates can be make from posterboard, but I like to use 1/16" thick matting left over from doing picture framing.
Template for the mirror frame -- Use drawings 14 and 14a. Although the oval shape can be drawn using the two focal points, a piece of string and a pencil, I decided to create a template for the bottom right quadrant of the mirror frame.
Template for the decorative board -- Use drawing 14. I did not make a new template; I simply reused the template for the decorative board of the king-size bed project (king-size bed project, drawing 4).
Template for the drawer front -- Use drawing 21. This template can be used for the inside and outside of the drawer fronts, as well as the top panels, and front stretchers of the nightstands and dresser.
Mirror Frame
The mirror frame needs to be made first so that a perfect fit can be made with the decorative boards, vertical supports and slats. There are two ways to connect and glue the eight segments of the mirror frame together. One is to cut the segments to the exact size as in drawing 4, and then strengthen each joint with two #20 biscuits above each other and glue them together. However, for this project I used finger joints which are very strong joints as they provide 2-1/2 times more glue surface. To make finger joints it is absolutely essential to use a router table. The following description assumes that finger joints are used.
First we need to calculate how much extra length we need for the 8 mirror frame segments because the fingers of one piece mesh with the complementary fingers of the adjacent piece. Secondly, finger joint router bits you buy may well be different from the one I bought at Lee Valley. After setting up the finger joint router bit in the router on the router table, take a 1-1/4" thick piece of red oak and adjust the high of router bit to the approximate position. Run a finger joint on the cross grain end of the red oak piece. Measure the depth of the groove; I my case that is 6 mm (millimetre).
For the four top and bottom pieces we need to add 1.150 * (6/25.4) * 32, which is 8.7, or 9/32". Hence an outside length of 13-13/16.
For the four middle pieces we need to add 1.047 * (6/25.4) * 32, which is 7.9, or 8/32". Hence an outside length of 19-27/32.
Note: the first number is a factor that I calculated already for you, 6/25.4 converts millimeters into inches, and 32 converts the answer into fractions of 32nd.
Cut the approximate sizes for the eight mirror frame segments, the two decorative boards, and the two vertical support pieces from 6/4" rough sawn red oak, as those all need a finished thickness of 1-1/4" and are supposed to be flush with each other. Take into account any possible snipe of your planer which adds about 3" to the length on each end.
Milling process is pretty standard. Smooth and flatten one face of each board on the jointer. Next mill the other face of the boards through the planer until the required thickness of 1-1/4". Straighten one edge of each board on the jointer and make it perpendicular to one of the faces. Rip the boards on the table saw to the desired width plus 1/16" with the jointed edge against the fence. Finally run the sawn edge twice over the jointer taking off 1/32" in each pass.
Cut the eight mirror frame pieces as per drawing 4, and with the outside lengths as calculated above, which might be different when you use a different finger joint router bit. Next arrange the eight segments on a flat surface. Select the best face of each segment to face up, as that will eventually be the front side of the mirror frame. Tighten the segments together using a strap (see picture 4). Try to squeeze all the joints together leaving only gaps in the middle two joints. Carefully trim one of the middle segments to make that a tight joint as well, and do the same with a middle segment on the other side. Next mark the two outside corners of each segment with a "U" (for up) and "D" (for down) as indicated in drawing 4. Number the segments 1 to 8, for example starting at the top and going clockwise.
Use two cut off pieces, trim them say at a 10° angle. Put the piece together like for example the two top pieces of the mirror frame and mark the left one "D" and the right one "U". Adjust the position of the finger joint router bit using these two test pieces. Run the piece marked "U" along the router bit from right to left with the "U" facing up. Run the piece marked "D" along the router bit from right to left with the "D" facing down. Notice that the routing action is "with the grain". Fit the two pieces together with the "U" and "D" facing up. If they are not flush then measure the offset, and raise the router bit half the offset if the "U" test piece is higher, otherwise lower the router bit half the offset. Trim the finger joints from the test pieces and cut the test joint again until perfectly flush.
Now make the finger joints on the segments as you did with the test pieces. Put the segments together in the correct order making sure that the finger joints are clean. Use a file or sandpaper to file off the sharp corners that stick out. Tighten the segments using a strap and check the fit of the joints. Next glue the two pieces of one quadrant together by applying glue to all finger joint surfaces of one segment only. Put all the segments together again and tighten the strap so that there is no gap in the glued joint. Watch for proper line-up of the segments and that the top surface is absolutely flat. Repeat for the other three quadrants.
With the four quadrants still strapped together, trace the outside and inside of the mirror frame template on each of the four quarants. Distribute the frame evenly left-right and top-bottom, using the quadrant joint lines and the outside height and width of the frame. Cut out the frame of each quadrant using the bandsaw. Sand the edges using a 1-1/2" sanding drum, but leave a bit a of material where the four quadrants need to be glued together. Finish the sanding with 220 grid sandpaper on a sanding block. Clean out the finger joints and do a dry-fit. Glue the two left quadrants together, again tigthening the strap with all the pieces in place. Repeat for the right side. Finally glue the top and bottom joints together at the same time and strap together as done before. Once dry, sand the outside and inside joint edges flush and smooth.
Lay the oval frame backside up. Route a rabbit slot on the inside of the frame to hold the mirror and the mirror backing. The rabbit slot should be 1/2" wide and 3/8" deep, assuming that the mirror is 1/8" thick. Next we need to predrill 12 holes evenly distributed outside the rabbit slot and at 1/2" out from the rabbit edge. The holes are needed to screw the cleats to the oval frame. The cleats will hold the mirror and the mirror backing in the oval frame. The easiest way is to measure approximately 4-1/2" to the left and right of the top, bottom, left and right finger joints following the inside rim of the rabbit slots, and than extend that mark 1/2" onto the oval frame. Mark the four remaining points in between, and predrill all 12 holes at 3/8" deep for a #6 woodscrew. See also picture 9.
Next put the oval frame face side up and clamp it on top of a piece 1/4" Baltic birch plywood. Trace the maximum width of the rabbit onto the plywood. Cut out the traced oval shape with the bandsaw and sand the edge so that the plywood fits loosely inside the routed rabbit. Don't forget to mark the inside (front side) of the mirror backing. Cut the 12 cleats from the left over 1/4" Baltic birch plywood. Roundover the corners of the 1" by 2" cleats, sand the edges and roundover the edges. Drill a countersink hole in each cleat on centre at 3/4" from a short edge to receive the 5/8" #6 flathead wood screw.
If you have to custom order the mirror you may have to give them your frame or a template so they can fit the mirror to the size the rabbit slot. I reused the mirror of the old dresser. I created a template using the just created mirror backing, but in such a way that the cut mirror would have about 1/8" free play all the way around and also taking into account the offset off my wheel glass cutter. Cut out the template with the bandsaw and sand the edge smooth. Place the old mirror on a flat surface, and fix the template to the mirror side of the old mirror with double sided tape. Trace the template onto the old mirror using a new glass cutter. Slide the mirror to the edge of the support surface and tab from the bottom along the cut until it brakes free. Take your time. Dry fit the mirror in the oval frame.
Decorative Mirror Board
Decide which side of the milled boards should be the front side and mark those as such. Trace the decorative board template on the boards and cut them out using the bandsaw. Sand the edges using a 1-1/2" sanding drum, and 3/4" sanding drum for the tight corners. Do not sand the straight edges with the drum sander where the decorative board will attach to the dresser and where the decorative board will attach to the vertical support. Instead use the disk sander to get those spots flat and perpendicular to the face. Leave a bit of material for later final fitting. Finish sanding the rest of the edges with 220 grid on a sanding block.
Next trim the 2 vertical support pieces to a length of 10-3/8". Select which face will be the front and mark that face. With the face against the Leigh FMT jig, cut on both ends a 1-1/2" long tenon of 1/2" by 2-1/2" on centre with a 1/2" spiral upcut bit. Machine the 1" by 1" slats and cut them to the indicated length or longer. Route a 3/4" long tenon of 5/16" by 3/4" on centre on one end of each slat using the Leigh FMT jig with 5/16" spiral upcut bit. Again with the same 5/16" spiral upcut bit and Leigh FMT jig setup route two mortises on each side of the vertical supports with the vertical support face against the Leigh FMT jig. The centre of the bottom mortises are 1-1/2" from the bottom shoulder, and the top ones are 4-11/16" from the bottom shoulder. Note that the slats should be flush with the front face of the vertical support. Trim the bottom tenon of the vertical supports to a length of 7/8".
To ensure that the whole mirror backboard is absolutely flat, I use a sheet of melamine on top of my work bench. Attach a strip against the bottom edge to act as an straight edge -- basically representing the dresser top --, and put stops on either end that are 87" apart, i.e. the total width of the dresser.
Mark the place on the bottom of each decorative board where the mortise has to come for the tenon of the vertical support. Using a jig, lots of clamps, and a 1/2" lipped brad-point drill bit in a bench drill, drill five holes next to each other for a total width of 2-1/2". See picture 10, and also the write up of the king-size bed. Chisel out the mortise and fit the vertical support such that the faces of the decorative board and the vertical support are flush with each other. With the vertical supports dry fitted with the decorative boards place the assemblies on the melamine sheet against the left and right stops. The next step is a careful trimming of the decorative board with the disk sander where it touches the vertical support and where it touches the straight edge, while ensuring that the vertical support is indeed perpendicular to the straight edge. Take the time to do it right, or it will haunt you later. Glue the vertical supports to the decorative boards.
With the decorative board assemblies in their proper place trace both sides of the decorative boards with a pencil onto the melamine starting from the vertical support towards the centre where the mirror frame will come. Remove the decorative board assemblies. Marked a centre line on the melamine that is perpendicular to the straight edge to be able to position the mirror frame perpendicular to the bottom en in the centre. Place the mirror frame -- without cleats, mirror and mirror backing --, face up, on the centre line. The true centre of the mirror frame is the middle of the top and bottom fingerjoints, however I use the visible joints on the face of the mirror frame instead. Create a flat bottom on the mirror frame over a width of about 3" using the disk sander. When the mirror frame rests on the dresser it looks better this way, rather then like a balancing egg. Position the mirror frame on the centre line and clamp to the melamine. Trace the outside of the mirror frame with a pencil onto the melamine where the decorative boards will join. Copy the position of the top and bottom edges of the decorative boards onto the side of the mirror frame. Remove the mirror frame and place the decorative board assemblies in the correct place. Copy the position of the mirror frame onto the side of the decorative boards all the way to the top. Place the mirror frame on top of the decorative boards, line up the markings, and trace the outside of the mirror frame onto the decorative boards with a pencil.
Cut off the excess material from the decorative boards with the bandsaw. Carefully smooth the edge using a 1-1/2" sanding drum, each time fitting the decorative board to the mirror frame until a perfect fit is obtained. Mark the centre of where the decorative boards join the mirror frame, the centre where the decorative boards will eventually rest on the dresser and the centre on the bottom of the mirror frame where it will rest eventually on the dresser. Using the Leigh FMT jig and a 3/8" spiral upcut bit, route 1" deep 3/8" by 2" mortises on centre on the places just marked. Make sure that the face of each piece is against the Leigh FMT jig. From the floating tenon material cut five pieces of 1-7/8" long and ease over the edges with 220 grit sandpaper. Dry-fit the decorative boards and the mirror frame with the floating tenons in place. Make adjustments if necessary. Glue all pieces together using clamps to keep everything flat on the melamine and together. See picture 14. Sand the back side of the decorative boards/mirror frame assembly.
We are almost done. Place the whole assembly face up. Mark where the bottom slats meet the decorative boards, vertical supports and mirror frame at 1" from the bottom. Mark where the top slats meet the decorative boards, vertical supports and mirror frame at 4-3/16" from the bottom. Put the slat shoulder against the vertical support as appropriate and trace the shape of the decorative board or mirror frame onto the side of the slat. Trim the slat a wee bit longer than the desire length. Remove excess material using a chisel and/or draw knife. Note that there will be no tenon on the shaped end of the slat. Finally use the drum sander to gradually remove the last material. Check the fit frequently. In order to slide the tenon into the vertical support from below, it might be necessary to sand off a bit from the top side of the end of the tenon. Don't sand off anything from the base of the tenon, i.e. the part closest to the shoulder. See picture 15. Sand all sides of the slats, except the front side.
Route a 3/32" chamfer on the back edges of the slats. Route a 3/32" chamfer on the back of the decorative boards/mirror frame assembly, again avoiding the areas where the assembly will meet the dresser. Due to the various wood grain directions it is recommended to do one pass climb routing (with the rotation of the router bit) and finish it with one pass in the normal direction. Put the assembly face up. Glue the 4 top slats in place, making sure that they are flush with the face of the assembly. When the glue is dry, pre-drill and countersink one hole in each slat where it meets the decorative board or mirror frame, and secure the slat with a 1-1/2" flat head #8 screw. Then do the same for the 4 bottom slats.
Sand the whole face of the assembly flush with a randow orbit sander, and put a 3/32" chamfer of all face edges. Again, due to the various wood grain directions it is recommended to do one pass climb routing and finish it with one pass in the normal direction. Fill up any imperfections or gaps using a good red oak wood filler and sand flush when dry. The Woodwise wood filler I am using is applied to the bare wood, and stains and varnishes perfectly. Finally give all the chamfered edges a very light sanding with 220 grid sandpaper.
Mill the 74-1/2" long, 3-1/2" wide and 5/8" thick poplar for the mirror back support. This will be used on the back of the mirror and the dresser to connect the two together. See final assembly later on.
I stained and varnished the mirror back board immediately rather than waiting 6 or 7 months for the rest to be finished.
Legs, Side Stretchers
We first work on the legs and side stretchers that all have a finished 2" x 2" size. Working with 10/4 stock is heavy and clumpsy work, especially when you work alone like me. It so happens that we need 8 long legs, 8 short legs, 8 long side stretchers and 8 short side stretchers. Combining a 30-1/4" leg with a 17" stretcher plus an extra 6" for router snipe and bad wood ends gives a rough length of about 54". Do the same for the other leg and stretcher which gives a length of about 48". On the table saw rip 8 lengths of each of about 2-1/2" square.
On the jointer make two adjacent surfaces flat and perpendicular to each other. I typically mark the perpendicular corner with an "L" on the end. On the table saw rip the other two surfaces such that you end with stock that is about 2-1/8" square. Recheck the two jointed surfaces that they are still flat. If not then make them flat again. Finally smooth the two sawn surfaces with the planer so that you end up with 2" x 2" finished size.
Next cut the milled stock to the exact lengths of legs and stretchers, discarding the end cut offs. An important step is to look at each piece of wood and decided where it should come and in which orientation. The best side should face outward, especially on the front and the sides. I had a few pieces were the knots broke out during milling, but nobody will see it because the bad spots face inside. Mark the end grain of each board to indicate which part it is, e.g. DLF stands for Dresser Left Front, NRT stands for Nightstand Right Top.
Drawer Slide Supports
These will be machined from the 6/4 poplar. Okay, I have to be honest. I could not get the rough sawn 6/4 poplar quick enough, and have used knotty pine instead. Love the smell. Same method, cut the rough stock into manageable sizes by combining the 17" and 19" drawers slide supports. Using the jointer mill one wide surface flat . With the planer mill the other wide surface flat and to a thickness of 1". Make one edge flat and perpendicular to a surface. With the straight edge against the fence rip a piece 2-1/16" wide, and finish the piece with two passes of the sawn edge over the jointer, taking off 1/32" in each pass. Finally, cut to the proper lengths.
Back & Front Stretchers
The next step is to mill the back and front stretchers. First we need to make a template so that we can route out the curve in the front stretchers using a template router bit. I used a strip of 1/2" plywood about 5 feet long, making sure that the template is exactly 6" wide and both edges are parallel. Trace the curve from drawing 21 on one end, and cut away the material on the narrow side with the table saw such that it is exactly 4" wide. Saw out the curved part with the bendsaw, and sand that part with a 1-1/2" drum sander. As this template is used for the front stretchers and the top panels, it is worth while to do as good a job as possible. This will save you a lot of sanding of the 1" thick red oak later.
For the back and front stretchers we use 6/4 rough sawn red oak. It is getting boring, but again the same method, i.e. cut the rough stock into manageable sizes. Using the jointer mill one surface flat. With the planer mill the opposite surface flat and to a thickness of 1". With the jointer make one edge flat and perpendicular to a surface. Rip the other edge on the table saw such that the board is 1/16" wider than the finished size, and pass the sawn edge twice over the jointer, taking off 1/32" in each pass. Finally, cut to the proper lengths.
Using the just made 1/2" plywood template trace it onto the front stretchers. Cut away the excess material with the bandsaw staying away from the traced line between 1/16" to 1/8". Next clamp the plywood template on top of a front stretcher and clamp both onto a workbench, making sure that the template is properly lined up. Using a 1/2" wide and 1" long template bit route the edge using the template as the guide. Sand the front edge smooth with 220 grid sandpaper.
Side Panels
For the side panels we use 1" rough sawn red oak. Due to the width of the panels we have to glue multiple boards together. Select the rough material and layout how those will be glued together. Cut everything into manageable sizes. Using the jointer mill one surface flat. With the planer mill the opposite surface flat and to a thickness of 3/4". With the jointer make one edge flat and perpendicular to a surface. Rip the other edge on the table saw such that the board is of maximum width, and pass the sawn edge twice over the jointer, taking off 1/32" in each pass.
Do the final matching of the boards that need to be glued together. Try to match the wood grain at the joint as good as possible. Apply glue to the joining edges and clamp them together using good quality clamps, such as Bessey K-clamps. Press the boards against the clamp bar to keep everything flat, and use clamps on both sides of the boards. Ensure that the boards line up. Clean up squeezed out glue as soon as possible with warm water. I recommend that you cover the metal of the clamp bar were the glue joint is going to be, with for example masking tape. The glue, water and acidic red oak can cause the metal of the clamp bar to leave nasty black stains on the red oak. Clamp for at least 12 hours or overnight.
With a wood scraper make the joints flat. This is also a good time to sand both sufaces of the glued up boards with a random orbit sander and 220 grid paper. Rip the boards to the exact width plus 1/16", and pass the sawn edge twice over the jointer, taking off 1/32" in each pass. Using a cross-cutting board cut off the required pieces a little longer. On the table saw cut the length exactly.
Set up the router table with a vertical ogee raised panel bit. Mount a vertical fence (about 6 to 7" high) perpendicular to the table. I screw a piece of 3/4" MFD to my table saw fence. Set the distance between the fence and the router bit such that you don't get that extra ridge that is typical for raised panels. Router the curved edge in about 5 passes, raising the bit for each pass. You should end up with about a 1/2" flat edge.
Next mount a 1/2" straight cutting bit in the router table. Set the fence with a piece of scrap material such that the router bit sticks out from the fence at least 3/8". With the back of the side panels flat on the table cut a rabbet in about two passes on all sides, and such that the remaining edge material is a hair thinner than 1/4". The reason for doing this is that these side panels have to fit loosely in the 1/4" grooves in the legs and side stretchers with 1/4" rubber space balls in the grooves.
Finally sand the side panels by hand with 220 grid sandpaper. Ease over the sharp edges, that is only 2 of 3 passes with sandpaper is enough. Look at picture 27 for a profile of the edge of a side panel.
Mortises and Tenons
Setup the Leigh Frame Mortise & Tenon (FMT) jig with a 1/2" by 1-1/2" joint guide, and use a plunge router with 1/2" spiral upcut bit. Mark the outside face off each side stretcher as the reference surface that will be placed against the Leigh FMT clamp plate. For the centre stretchers of the dresser mark the side facing the middle section of the dresser. Then cut 1/2" by 1-1/2" tenons on centre that are 1" long on both ends of the stretchers. After cutting the tenons don't change the setting of the Leigh FMT.
Now we are going to work on the legs. First mark the outside face off each leg as the reference surface that will be placed against the Leigh FMT clamp plate. Next mark the vertical centre of the mortise for the side/centre stretchers on the inside of the legs. You can use the following table for that, where each measurement is from the bottom of the leg. See also drawings 04 and 14.
Nightstand mortise distance from bottom of leg
top of leg
1
22-1/2
top side stretcher
3-7/8
21-1/2
drawer slide support
7-3/4
17-5/8
drawer slide support
3-7/8
9-7/8
bottom side stretcher
6
6
bottom of leg
0
0
Dresser left/right section mortise distance from bottom of leg
top of leg
1
30-1/4
top side stretcher
3-7/8
29-1/4
drawer slide support
7-3/4
25-3/8
drawer slide support
7-3/4
17-5/8
drawer slide support
3-7/8
9-7/8
bottom side stretcher
6
6
bottom of leg
0
0
Dresser centre section mortise distance from bottom of leg
top of leg
1
30-1/4
top side stretcher
1-15/16
29-1/4
drawer slide support
3-7/8
27-5/16
drawer slide support
5-13/16
23-7/16
drawer slide support
7-3/4
17-5/8
drawer slide support
3-7/8
9-7/8
bottom side stretcher
6
6
bottom of leg
0
0
I recommend that you only mark the mortise centres for the stretchers at this time so that you don't get confused with the mortise centres for the slide supports. With the same setup as for the tenons, but with the 1/2" router bit set 1/32" deeper, cut the mortises. The top mortises is tricky as you may not have enough clamping support, so consider using a jig described in the FMT user guide (picture 28). Sand the sharp edges of the tenons and the sharp edges of the mortises. Dry fit the legs and the stretchers and adjust where necessary. At this point every piece should be properly labeled so that it is obvious which tenon goes into which mortise and in what orientation.
We continue with cutting the tenons on both ends of the drawer slide supports. These tenons are 1/2" by 1-1/2" and 1" long on centre. Set the router depth back to 1". After the tenons are done on one slide support check its fit between the legs. Ideally the finished slide support length should be a "hair" shorter than the side/centre stretchers. Adjust the tenon length accordingly. After cutting all the tenons leave the FMT as is. Ease over the sharp edges of the tenons. Mark the vertical positions of the mortises for the drawer slide support on the inside of the legs. Note that the drawer slide supports should end up flush with the sides of the legs, so those sides of the legs should be against the FMT clamp plate! With the same setup as for the tenons, but with the 1/2" router bit set 1/32" deeper, cut the mortises. Ease over the edges of the mortises.
The back stretchers of the nightstands are pretty standard. Use a 1/2" by 2-1/2" joint guide in the FMT. Set the 1/2" router depth back to 1" and cut the tenons on centre. The tenons of the back stretchers for the dresser we do later. Ease over the edges of the tenons. Mark the vertical position of the mortises for the back stretchers on the outside back legs of the nightstands and dresser. The back stretchers will be flush with the back side of the legs, so that surface will be against the FMT clamp plate! Make the mortises, ease over the edges of the mortises, and dry fit the back stretchers.
Now comes the more difficult tenons of the front stretchers of the nightstands. Again the tenons of the front stretchers of the dresser we do later. Continue using the 1/2" by 2-1/2" joint guide in the FMT. Set the router depth back to 1". Setup the FMT jig to cut a 3-1/2" wide tenons on the 4" wide end of the front stretchers. This is described in detail in the FMT user guide. Cut the tenons in two steps as per the user guide. Next setup the FMT jig for the maximum width tenon for the 6" wide end of the front stretcher. Although the user guide says that 4-1/2" is the maximum, I found that 5" wide tenons can just be done. Cut the tenons on the wide end in three steps (left side, right side, and centre). Make sure that the finished length of the front stretchers is the same as that of the back stretchers, or in other words exactly 26"!!!
Dry-fit the legs, side stretchers and back stretchers of the nightstands all together (picture 33). This allow you to visually verify where you have to cut the matching mortises on the side stretchers and front legs. We cut the front stretcher mortises of the dresser at the same time. First the mortises for the 6" wide end of the front stretchers. The top front stretcher will be flush with the front of the front leg and the top of the top side stretcher. The bottom front stretcher will be flush with the front of the front leg and the bottom of the bottom side stretcher. With the the front leg and the side stretcher together the centre of the mortise is exactly 3" from the front of the front leg, or 1" on the side stretcher. Cut the partial mortises in the side stretchers using the same setup as for the last tenons, except that the 1/2" router bit should be 1/32" deeper. Notice that the mortise continues for about 1/4" into the tenon as shown in picture 34.
Setup the FMT jig for the 1/2" by 3-1/2" tenon/mortise again as you did for the tenons on the 4" wide end of the front stretchers. The centre of the mortises is in this case 2" from the front of the front leg, or in other words at the joint between the leg and the side stretcher. Otherwise the cut of the mortises in the side stretchers is the same as for the 6" wide ends. Cut the partial mortises in the side stretchers.
The part of the tenons on the front stretchers that goes in the front legs need to be shorten to 1/2" long. This can be done with a fine crosscutting handsaw. For the mortise extension on the legs we also have to use a "manual" method. Draw the centre lines of the mortise extensions on the front legs. On the 6" wide front stretcher side the mortise extends 1-1/2", and on the 4" wide front stretcher side it extends 1-3/4". With 1/2" lipped brad-point drill bit in the drill press drill hole along the mortise centre lines 1/2" deep. Clean out the mortise extensions such that it has the same width as the mortise on the side stretcher. Next fit the front stretcher tenons into the combined front leg and side stretcher mortises. At this point you can dry-fit the nightstands including the slide supports, and also label the slide supports. Everything should slide together easily, after clamping everything should be square.
Finally we cut the tenons of the back and front stretchers of the dresser. With the FMT jig we would need a 7 feet high workbench; not very practical. So we cut 1" long 1/2" by 5" tenons on centre using a 3/4" wide dado setup in the table saw. Not very easy due to the length of the back and front stretchers. The alternative is doing it with a hand saw. Whatever the method, make sure that the finished length is exactly 82", and the shoulders are perpendicular to the edges. Recommend to cut the tenon a wee bit thicker than 1/2" and then custom fit them to their specific mortises.
The last part to work on are the centre legs of the dresser. The two centre back legs of the dresser need on the back side two notches cut out; one at the top of 3" long and 1" deep to received the top back stretcher, and a same notch 5" from the bottom of the leg to receive the bottom back stretcher. The two centre front legs also need two notches on the inside. An 1" by 1" notch at the top and the other one 5" from the bottom. Marked all those notches very precise, and then cut then out with a 3/4" dado setup on the table saw. Set the dado to exactly 1" high. Attach an extra board to the miter gage that extends well past the dado this will prevent tear out. Clamp the leg to be cut to the the miter gage so that the leg cannot move during cutting.
After the notches are cut verify that the tenons of the centre stretchers don't stick out. If they do then trim the tenons a wee bit shorter.
On the back stretchers all that needs to be done is mark on the inside the exact location of the 2" wide legs. You should have three section of 26". On the front stretchers we need cut out two notches on the front exactly 2" wide (width of the legs) and 1" deep. Again you should have three section of 26". Make the notches the old fashioned way with a cross-cutting saw and chisel. Finally make a complete dry-fit of the dresser including all the slide supports. Note that the top slide support of the centre section, i.e. the slide supports for the top low drawer, will not fit due to the top centre stretcher. Take some material off from the top of these two slide supports with the jointer until there is no conflict anymore with the top centre stretchers. Everything should slide together easily, after clamping everything should be square. Don't forget to label the slide supports also.
Putting everything together
Well not yet. First we have to cut grooves for the side panels, back panels, bottom panels, and for the tabletop mounting clamps. For that we put together only the legs and their side/centre stretchers, and let us called those the side/centre assemblies. Trust me, this is the only way to keep your sanity while cutting the grooves and chamfering edges.
Setup a 1/4" dado in the table saw, and set it exactly 3/8" high.
Grooves for the side panels. Set the fence at 1/2" (away from the dado). Take each side assembly in turn and cut that 1/4" groove 1/2" from the outside face of the stretchers and legs on the edge where the side panel is coming. On the legs stop the grooves 5" from the bottom! With the side panels made as described before, the raised side panels will fit nicely with about 1/16" space between the panels and the slide supports.
Grooves for the back and bottom panels. Change the distance between the fence and dado to 3/8". For each side and centre assembly cut a 1/4" groove at 3/8" from the back of the back legs and from the bottom of the bottom stretchers on the edge where the back panel or bottom panel is coming. On the legs stop the grooves 5" from the bottom! Cut a groove also on the bottom of the top back stretchers and the top of the bottom back stretchers. Also cut a groove on the inside face of the bottom back stretcher at 3/8" from the bottom. Finally on the back edge of the bottom front stretcher cut a groove at 3/8" from bottom of that front stretcher.
Grooves for fastening the top panels. These grooves are not shown on the drawings. Replace the dado with a regular saw blade, set the height to 3/8", and 3/8" between saw blade and fence. These grooves comes on the inside of the top side and centre stretchers and the side of the top back stretchers at 3/8" from the top. Cut the 1/8" wide grooves.
Note that we did not cut a groove in the back edge of the top front stretcher. Instead we will use 1-1/2" wood screws to fasten the top panels to the front stretchers. For that we will drill two holes in the top front stretcher of each nightstand. Both are about 1-1/2" in from the front, and 2" from the left shoulder and 2" from the right shoulder. Do the same on the top front stretcher of the dresser.
Put a 45° chamfering bit in the hand held router. Put a side assembly on the bench with the outside facing up. Clamp the legs against the stretchers with two clamps. Router a 3/32" chamfer on all exposed edges except on the top edge of the assembly. NOTE: use a climb cut, i.e. cut with the rotation of the bit. This avoids any tear out. If some fuzzies form then go over it once more in the normal direction, i.e. against the direction of the router bit. Of the centre assemblies chamfer only the inside bottom 5 inches of the legs. We do the outside (back side) later. Chamfer also the four edges at the bottom of each leg. Finally, chamfer the top and bottom front edges of the bottom front stretchers, and the bottom front edge of the top front stretchers. We will do more chamfering after the final assembly.
Next is some manual labour. Sand all the surfaces of the legs, stretchers and drawer slide supports. Use 220 sandpaper with a sanding block. Ease over any sharp edges, where it does not meet another piece of wood. So don't ease the edges of the shoulders of a tenon!!! Make sure that all pieces of the side and centre assemblies fit together without any force. For example, put a front leg down with the mortises facing up. Slide in the stretchers and drawer slide support, and everything should line up without any force. This is your last chance to make any corrections before gluing up. IMPORTANT: After the sanding mark the centre line on the inside of the drawer supports using a wheel marking gauge. This is the centre line for the drawer slides.
First a partial glue up of the side assemblies; we do the two centre assemblies later. Glue the bottom stretcher and drawer slide support to the front leg. Apply glue to the mortises and then put each piece in place after applying glue. Do not apply glue to the shoulder of the tenons; it is cross grain and does not provide any strength, plus it causes unnecessary glue squeeze out. Next put the top stretcher and back leg in place (without glue!!!) and clamp everything with two clamps. Check for squareness by making sure that the two diagonals (top of one leg to bottom of other leg) are equal in length. My glue bottle recommendation is to clamp for 25 minutes, but I let it sit at least 2 hours.
Once the partial glue up of the side assemblies is dry we glue the rest. Take the back leg and top stretcher off. Put eight space balls in the 1/4" grooves for the raised side panel; two on each side, about 1/5 of the length from each corner. slide the side panel into the partial glued side assembly. Now apply glue to the remaining mortises and tenons and put everything together, and again clamp with two clamps for 2 hours.
In the same way glue the centre stretchers and the drawer slide supports to the BACK leg of the centre assembly. Put the front leg in place without glue, clamp, and check for squareness.
Cut the back and bottom panels from 1/4" plywood. These panels should be cut 1/16" smaller than the indicated size. For example, the bottom panels of 26-3/4" by 14-3/4" should have a final size of 26-11/16" by 14-11/16".
Some more sanding. Using the random orbit sander (#220 paper), sand both sides of the back and bottom panels, and ease over the edges. Of the side assemblies sand the joints of the legs and stretchers until they are smooth. Finally sand all surfaces of the back and front stretchers.
For the nightstands first glue the front and back stretchers to the widest side assembly. Place the narrower side assembly in place and clamp with four clamps. Checking for squareness is difficult due to the curved front, so use a square and check as many 90° angles as possible. Once this has dried for some 2 hours, take the narrower side assembly off. Slide in the back and bottom panels and now glue the narrower panel in place, and clamp.
Now it is time to put the dresser together. I am always working alone, so putting something as large as a dresser together needs a little bit of planning. Select the flattest area in your shop -- my floor is like hill country. Lay down the bottom back stretcher. Put the left centre assembly without the front leg in the approximate place. Place the back panel in the grooves of these two pieces. Place the right centre assembly without the front leg. Put the left and right back panel in place. Put the top back stretcher on place. Place the left and right side assembly in place. Put the bottom and top front stretchers in place, and finally put the two centre front legs in place.
Clamp the top and bottom together using straps (16ft Web Clamps with nylon corners, Lee Valley 17F10.13). Ideally the ratchets should be located about halfway of the sides, and the webbing one inch from the top and 6 inches from the bottom. Put the dresser straight up. Place shims under the legs until the entire top is flat. Use regular clamps to keep the centre assemblies together. Use smaller clamps to clamp the webbing of the straps against the dresser, such that you can release the ratchet on one side while the webbing stays in place on the other side. So, take a deep breath and release the ratchets on one side. Carefully remove the side assembly, apply glue to the mortises and the tenons, and put the side assembly back in place, and tighten the straps again. Use a large square and check everything for squareness. Clean up any glue squeeze out. Let the glue dry for some 4 hours. Do the same for the other side assembly.
Take the straps and clamps off, and re-check that the dresser is still standing level. Next we are going to attach the top back stretcher to the back legs of the centre assemblies with two 1-1/2" #8 wood screws. Make sure that the back legs are evenly distributed over the back. I use a slat that is exactly 26" long to verify that. Clamp everything in place so that the centre assemblies cannot move while you are drilling and screwing. Pre-drill the holes as you are screwing in oak! Attach the bottom back stretcher in the same way. Make sure that the top front stretcher is in place and flush with the front legs. Attach the top front stretcher to the top centre stretchers with one 1-1/2" #8 screw each.
Take the left centre front leg off, apply glue to mortises and tenons, put the leg back in place, and clamp. Make sure the front stretchers are flush with the front leg. Repeat for the right centre front leg. Let the glue dry for 4 hours. Finally, put the dresser on its back, and attach the bottom front stretcher to the bottom centre stretchers with one 1-1/2" #8 screw each.
Sand the front legs and front stretchers flush with each other for both the nightstands and dresser. Put a 3/32" champer on the inside of the front legs, and the bottom 5 inches of the back legs. Check that everything on the outside is flush and smooth. Make the nightstands and dresser completely dust free, and store in a dust free place.
Top panels
I don't like to mill boards to far in advance before using them. In this case I combined the milling of the boards for top panels and drawer fronts. I selected the best 11 rough sawn red oak boards from my stock. They are 1-1/2" thick, between 8-1/2" to 10" wide, and at least 8 feet long. They have been in my workshop for 8 months so I expect very little warping after machining them. I have only a 6" jointer, so to create a flat surface on one side of the boards is a challenge. The result might not be perfect, but when the surface is straight so that you can run it through the planer as the reference surface that is all that is required. Take off about about 1/4" with the planer on the rough side in multiple passes. Then flip over the boards and reduce the tichness to 1-1/32". Then flip the boards over one more time and take off the last 1/32".
Select the three best surfaces for the dresser top. Try to match colour and grain as much as possible. Next select three more boards. Those will provide three boards for each of the nightstand top panels, and enough material for drawer fronts for the centre section of the dresser. Cut them to rough length. The remaining 5 boards are for the construction of curved drawer fronts. Cut those boards in half, one half per curved drawer.
Mark the boards for the top panel of the dresser. Put a square edge on each board. On the table saw rip the boards to width with the square edge against the fence, and then square the sawn edge on the jointer. The front board should be about 7" to 7-1/2" wide. The back board should be wide enough to make the total top panel width 22". Do the same for the top panels of the nightstands.
Position and clamp the plywood template to the front board of the dresser top panel and trace the curve. Flip the template and do the same for the other side. Cut away the excess material with the bandsaw staying away from the traced line between 1/32" to 1/16". Next clamp the plywood template on top of a front board and clamp both onto a workbench, making sure that the template is properly lined up. Using a 1/2" wide and 1" long template bit route the edge using the template as the guide. Follow the same procedure for the front boards of the nightstand top panels.
Place the three boards together, top surface facing up. We will be gluing the board together and also using #20 biscuits to line up the boards. Establish the centre line on all three boards. For the dresser top put a mark at 13" intervals from the centre line on each joint; thus 7 marks including the centre line. For the nightstand tops establish a centre line too and place a mark at the joints 12" from the centre, thus 3 marks including the centre line. Finally mark the outside edges on the front boards.
Cut the slots for the biscuits with a biscuit cutter, approximately in the centre of the edge, using the top surface as the reference. Make sure that the edges and the slots are clean, then apply glue to each edge to be joined, put glue in each slot and place biscuits in one edge. Put the boards together lining up the centre lines, and clamp with the clamp bars on both side so that they keep the boards flat. Clean up any squeezed out glue immediately. As it is a lot of gluing, I typically glue the back and middle boards together first, and after two hours glue the front board to those two. Trim the edges of the top panels perpendicular to the back or front edge using a straight edge. I use a circle saw for that. Use a cabinet scraper on the joints to make sure that the surface is flat.
Now we need to make the slots for the mirror backboard. Put the top panel of the dresser flat with the top facing up. Place the mirror board in its approximate position on the top panel, and centre it left/right. Mark the location of the tenons of the mirror backboard in terms of width on the top panel. Assuming that the tenons in the mirror board are in the centre, then the centre of all the mortises should be 1-1/8" from the back edge of the top. The two outside tenons and the centre tenon are 3/8" thick and 2" wide, and the other two tenons are 1/2" thick and 2-1/2" wide. The mortises should be 1/16" wider than their matching tenons. I used a hand held router with a fence attachment and spiral upcut router bits to make the slots. To make it easier to place the mirror backboard later, I chamfer the edge of the mortises too. Finally take out a 1/2" deep and 3-1/2" wide notch from the back edge in the centre. The long 3-1/2" wide mirror back support will run from the top of the mirror, via this slot, to the bottom of the bottom back stretcher of the dresser.
Use a sanding block with 220 grid sandpaper to sand the edges of the top panels perfectly smooth. Use a wood rasp to champfer the four corners of each top panel. With a router and 45° chamfer bit put a 3/32" chamfer on the top and bottom edges. Use the random orbit sander with 220 grid paper to sand both surfaces of each top panel. Make the panels dust free.
The final step is to mount the top panels on the nightstands and dresser. Place a top panel flat on a a protective surface (like carpet) with the bottom facing up. Place the nightstand/dresser upside down on the top panel and centre it on the top panel. Using the pre-drilled holes of the front stretchers transfer their location to the top panel and pre-drill the holes in the top panel. Screw the nightstand/dresser to the top panel with 1-1/2" #8 flat head wood screws. Each nightstand uses 4 tabletop mounting clamps to secure the top panel while still giving the wood a chance to expend and contract. Place tabletop mounting clamps about halfway on each side and one close to each corner in the back. The dresser uses 9 tabletop mounting clamps, in the left and right compartment one about halfway on the side and one in each corner. In the centre compartment one halfway on each centre stretcher, and one in the centre of the back. The screw holes should be pre-drilled at 5/8" from the stretchers. Use 3/4" #10 round head wood screws.
Drawers
Drawer Fronts. From the previous steps you should have 13 boards of 1" thick red oak, three for the centre drawers and 10 for the curved drawers. Lay out the boards as they would as drawer fronts, try to match them as much as possible in terms of colour and wood grain. Mark the boards on the ends. Using a jointer put a straight edge on each board perpendicular to the surface of the board. Take one board for the centre drawers, and with the smooth edge against the fence of the saw table rip it at 3-15/16", pass the sawn edge twice over the jointer, taking off 1/32" in each pass, for a finished width of 3-7/8". Repeat this with the remaining piece, for the second small drawer front. Next rip all the remaining boards at a width of 7-13/16", pass the sawn edge twice over the jointer, taking off 1/32" in each pass, for a finished width of 7-3/4".
Next we cut the boards to length. My mitre saw does not have enough capacity to cross-cut 7-3/4", so a cross cutting board on the table saw would be a solution. As I recently bought a precision miter gauge from JessEm, I used that to get perfect square sides. Cut the boards for the four centre drawers to exactly 26" length. Each of the 10 remaining boards are to be cut into three adjacent pieces of 13" long. Mark each set of three pieces from left to right on the top edge, for example: DR2L, DR2M and DR2R, meaning dresser right compartment, drawer 2, left/middle/right piece.
Setup the dado in the table saw, and stacked such that it sticks out exactly 1/2" from a sacrificial fence on the table saw. Raise the dado to 5/8". Cut the rabbet on the backside of the very left side of the drawer fronts and on the backside of the very right side of the drawer fronts. The 1/2" provides the space for the drawer slides, while the 5/8" gives space for the rabbeted dovetail joints.
Drawers Sides and Backs. Select the poplar boards, cut to manageable sizes. Mill one surface flat -- not easy when you have only a 6" wide jointer --. Next mill the other side on the planer until about half the material is removed. Flip the boards over and remove the remaining material until a finished thickness of 1/2". Using a jointer put a straight edge on each board perpendicular to the surface of the board. Rip all the high side boards at a width of 7-1/16", pass the sawn edge twice over the jointer, taking off 1/32" in each pass, for a finished width of 7". Do the same for the four low sides for a finished width of 3-1/8". Same process for the high back sides of the drawers for a finished width of 6-1/2", and a finished width of 2-5/8" for the low drawers.
Using my precision miter gauge cut the 24-1/2" long drawer backs, and the 18-1/2" and 16-1/2" drawer sides.
Dovetails. Setup the Leigh Dovetail jig using a 12° dovetail bit in the router for 1/2" long dovetails. I created a lay-out of five even spaced dovetails on the high drawer sides and three even spaced dovetails on the low drawer sides. Make sure when you cut the dovetails that the drawer sides are exact 3/8" in from the top/bottom edge of the drawer fronts. If everything is milled to the exact dimensions and you followed the instruction of the Leigh Dovetail jig then the drawer sides should be centered on the drawer fronts. For clarity see picture 51.
Curved Drawer Fronts. For gluing the drawer front pieces together make a 3" x 26" rectangular jig on a flat surface; see picture 53. Place the three pieces of a drawer inside the jig with the top sides facing up. You may give them a light hand sanding with 220 grid if needed. Mark the centre on the top edge of the middle piece. Make sure that the pieces are stacked in the proper order; I always make sure that the front is facing me. Apply glue to middle piece only and such that there is minimal or not glue squeeze out on the front and the back. Apply clamps on one edge, carefully take the drawer front out of the jig and clamp the other edge and let the glue dry for at least 2 hours. Repeat for the other drawers. Trace the drawer curve with the template on both edges of the drawer fronts.
Make the jig that will enclose a drawer front to help you cut away the excess material from the curved drawer fronts. See drawing 21, and pictures 58 and 59. Cut the pieces accurately with little or no free play in height, and no more that than 1/16" free play left to right, and back to front. Glue the pieces together and strengthen the glue joints with wood screws. Once completed trace the drawer curve with the template on the left outside of the jig.
Setup the dado at its maximum width in the table saw. Mine goes to 13/16". Place the just made jig over the dado on the saw table, and gently squeeze the right side of the jig between the dado and the fence. Mark that setting on the fence scale. Next move the jig to the far right with the left inside side of the jig touching the dado, and the fence against to right side of the jig. Mark that setting also on the fence scale. Set marks in between the two extreme settings just slightly less than the width of the dado apart. In my case I can cut away the excess material in 10 steps per drawer side.
Place the whole jig to the right of, and against the dado. Use the fence to hold the jig against the dado. Raise the dado blade and move back and forth until the highest suitable cut. Stay away from the traced drawer curve by 1/16", and the place where the cut end should be 1/8" to 1/4" away from the drawer cut to take tear out into account. Clamp a stop on the table saw fence and against the far side of the jig. This determines how far this first cut will go. Score the dado on the outside edge of the jig by rotating the dado.
Put a drawer front -- back side down -- in the jig, place the jig and drawer front over the dado and move the jig and to the left most starting position. Move the jig back and forth until it touches the dado in both extreme positions, and put the jig about halfway those positions. This is your "free" position. Put a marker on the jig and the fence so that you can line them up again later.
Press the jig down and against the fence, start the dado, slowly cut until the jig touches the stop, and pull straight back into the "free" position. Do not switch off the dado. Hold the jig still and move the fence to the next position, and then move the jig to the right against the fence, and repeat doing the next cut. After pulling back from the last cut, switch off the power.
Examine the results. You will most likely have some tear out, which is okay, but you can minimize that with sharp dado blades. Flip the drawer front, and repeat the procedure as described above. Do this for the other curved drawer fronts. The results should be close to what you see in picture 60.
Lower the dado and decide on the best second cut, for the rest following the above procedure. Notice that the tear outs from the first cut are gone now. You may have to do about five of those cuts depending on the dado size you use.
Create a setup on your work bench that will hold up to two drawer fronts in place so that you can sand away the remaining excess material with a belt sander. Start with a 40 grid belt and sand the front and back surfaces smooth just shy of the curves marked on the edges of the drawer fronts. Do this one drawer front at a time. Switch to a 80 grid belt and sand two adjacent drawer fronts at the same time. Try to get everything as smooth, and straight from top to bottom. Finally sand each drawer front by hand with a sanding block and 220 grid sandpaper until the surfaces as perfect as possible.
Finish Drawer Sides and Backs. Setup a 1/2" dado in the table saw, and raise it 1/2". Using the precision miter gauge and saw fence, cut the a 1/2" wide and 1/2" deep groove on the inside of the drawer sides at 3/4" from the end. This groove will receive the drawer backs.
Change the dado to a width of 1/4", and 1/4" height. Using the saw fence cut a 1/4" wide and 1/4" deep groove on the inside of the drawer sides at 1/4" from the bottom. You may want the give a mark where the cuts have to be, because it can get very confusing. This groove is for the drawer bottom.
While at it also cut a 1/4" wide and 1/2" deep groove at the backside of the four straight drawer fronts at 5/8" from the bottom. You can dry-fit a drawer side to ensure that 5/8" is the correct value. The grooves in the backsides of the curver drawer fronts we do later.
Some light sanding using a sanding block and 220 sandpaper. Sand the surfaces and top edge of the drawer backs, and ease over top edges. Sand the surfaces of the drawer sides, and top, back and bottom edges, and ease over the edges.
Use a wheel marking gauge to draw a centre line on the outside of the drawer sides where the drawer slides will come.
Drawer Bottoms. Cut the drawer bottoms from 1/4" birch plywood according to the cutting plan. Although the material list state a length of 24-1/2", you may want to checked the first bottom on a dry-fitted drawer. Give yourself about 1/16" free play. On the front edge of the 10 drawer bottoms that are 18-1/4" deep, trace the curve using the template. Cut away the excess material staying as close to the traced line as possible. Sand all drawer bottoms on both sides with a random orbit sander with 220 grid paper. Ease over the edges.
Fitting the Drawers. We are ready for fitting each individual drawer into the nightstands and dresser. The drawers will end up being recessed about 1/8" from the front of the legs, just past the chamfer. The drawer edges will only be eased over.
First we mount the wide rails of the drawer slides in the cabinets. To begin with we do that with two screws (5/8" panhead, which come with the slides) in the centre of front and back horizontal slots of the rail. The front of the rail should be exactly 9/16" from the front of the leg. Measure the distances from the front of the leg to the centre of the horizontal slots. For the specified 18" drawer slides that is 2-1/2" and 14-3/4", and for the 16" drawer slides that is 2-1/2" and 15-3/16". Remember that you marked the centre line on the drawer supports? Mark those spots on that centre line of the drawer supports, and pre-drill the holes for the screws. Secure the fixed part of the drawer slides to the slide supports, and ensure that the drawer slide should be 7/16" from the front of the leg.
The drawer fronts are still 7-3/4" and 3-7/8" high respectively. This project was done in the winter and it is as dry as it will ever get. Our summers are more humid, but still relatively dry. The worst expension of the drawer fronts will be its height. Reducing the height by 1/8" should be enough for our climate. By reducing the drawer fronts by 1/16" on all sides makes everything looks nice. This means that there will be a 1/16" gap between drawer edges and the cabinet framework, and 1/8" between drawers. I made a few spacers from red oak that are exact 1/16" thick. Spacers are much easier to use than measuring the gaps while fitting the drawers in the cabinets.
Before we do the actual fitting we have to route a 1/4" groove at the bottom on the inside of the curved drawer fronts to receive the drawer bottom. Ideally the groove should be 1/4" deep, but I just happen to have only a 3/16" slot bit, so I used that in my hand-held router. In the ideal world the groove should start at 9/16" from the bottom of the curved drawer front, but verify that by dry-fitting a few drawer sides to the drawer front.
From now on we use the jointer set at a 1/64" cut. First we reduce the height of the four straight drawer fronts for the dresser centre section. But before we do any machining where we will loose the marking on the top edge, we have to mark which drawer front it is in an inconspicuous place. I use the dovetail area for that. Make 4 passes of the bottom edge (total 1/16") and 4 passes of the top edge over the jointer (total 1/16") for a final height of 7-5/8" and 3-3/4" respectively. Use a cabinetmarker's rule to check not only the height, but the verify that the top and bottom edge are parallel. If one end of the drawer front is lower than the other end then this can be fixed as follows. Start the jointer, carefully place the beginning of the lower end on the outfeed table of the jointer and then continue jointing normally. In this way you take off nothing at the lower end and 1/64" at the higher end, and thus fixing the problem.
We start fitting the centre drawers, and begin with the lowest drawer. Place the drawer front in its rightful place on the bottom front support. Theoretically we should have to take off 1/16" of each end. See jointer setup how to do this in picture 66. The "push" block is essential to avoid tear on the drawer front. Do one pass for each end on the jointer, and place the drawer front again. Use the spacers to see if there is a 1/16" gap on both ends with the cabinet framework. Also check that the ends are paralell to the legs, and if not the use the trick above to correct that. Once the spacing is fine dry-fit the drawer together with the sides, the back and the bottom. Next mount the narrow rail of the drawer slides on the outside of the drawer sides. Centre the rail on the earlier marked centre line and secure the rail with screws (1/2" panhead, bought separately) in the centre of the front and back vertical slot. The rail should have a gap of 1/16" from the back of the drawer front; our 1/16" spacer is very useful here.
Now place the drawer in the cabinet. You should be able to push it all the way in. If that does not work then you may have to shorten the drawer back piece by 1/64" or more on the jointer so that the drawer is less wide. Take your time and each time figure out how to get a better fit. Once the drawer is all the way in check that the sides and bottom have exactly a 1/16" gap. To raise or lower the drawer adjust the narrow rails on the drawer. To get the drawer deeper or less deep adjust the wide rails in the cabinet.
Now do the same for the next drawer up. You fit the drawer front on top of the bottom drawer. The final fit should have a 1/8" gap between the two drawers. Continue until all drawers in the centre section are fitted. The top drawer should have a gap of 1/16" with the top front support. Check that all drawer fronts are flush with each. Once you have a perfect fit secure the narrow rails on the drawers with an extra screw in the middle, secure the wide rails in the cabinet with two screws in the middle -- one screw would be enough, but I had spare screws anyway --.
Again starting with the bottom drawer, take it apart. Permanently mark the back of the drawer back panel as to which drawer it is. Mark the places on the drawer front where the holes should come for the handles. My handles need two bolds exactly 3" apart. The holes are 2-3/4" and 5-3/4" in from the left and right edge, and 3" from the top. For the low drawers that is 1-1/2" from the top. Drill the holes with the drill press. Sand the drawer front surfaces (it may have some marks from handling), the edges and the rabbets at the back. Ease over all edges, except of course the dove tails.
Glue the drawer sides to the drawer front. Slide in the drawer bottom, and glue the drawer back between the sides. Clamp the side and back pieces together and use 2 or 3 brad nails, 1" long, to secure the sides to the back. Place the drawer back in the cabinet, making sure it fits properly, and let the glue dry. Once the glue is dry secure the bottom to the back with three brad nails.
Repeat this for the other drawers of the centre section of the dresser. Do the same for the right and left section of the dresser, and the nightstands.
Staining, Varnishing, Placement
Up to this point everything is "vacuum cleaner" dust free. If you stain and varnish in your workshop then makes sure your workshop is dust free as well. Before starting the staining wipe all surfaces very lightly with a tack cloth to get the final dust off.
I apply a wipe-on stain, and let it dry for several hours, and then wipe all surfaces with a clean cotton rag. Let it dry 48 hours, and give all surfaces a final wipe with a clean cotton rag. Apply at least three coats of varnish. Let each coat dry for at least 24 hours, and do very light sanding with 320 grid between each coat. Don't forget to get the sanding dust off!!!
For the mirror back board stain all the red oak, and varnish with three layers.
For the dresser and nightstands stain the sides and front, the top and bottom of the front supports, the back of the (side) back legs, and the insides of the front legs. The 5" of the legs that protrude under the cabinets should be stained on all sides. All these should get three coats of varnish.
Stain the tops and the drawer fronts on all sides. All their surfaces should should get three coats of varnish. Staining and varnishing top/bottom and front/back helps to prevent the wood from warping. The top and edges of the tops, and the front and edges of the drawer fronts should get two more coats; so in total five coats. Five coats from those surfaces because those are the surfaces that get the most wear. The poplar and plywood of the drawers should be given one coat of varnish, and then lightly sanded. A sanding sealer can be used also. This will help avoid that wood fibres will catch onto fabric, etc..
Let the varnish harden out for a few weeks. Move the pieces to their final place and put the nightstands and dresser back together. Place the mirror backboard in the slots on the dresser top, and secure everything with the mirror back support with three flathead 1-1/4" screws, one in the bottom back stretcher, one in the top back stretcher and one at the top of the mirror frame. Slide in the drawers. Don't forget to date and sign each cabinet.
Conclusion
Not a bad project, but I am not overly happy with the drawer fronts. The joints in the curved fronts are too pronounced. Not enough glue and the stain makes the joint darker than the surrounding material. Enough glue and the very thin wood on top of the glue will not absorb enough stain making the joint too light. If I had to do it again I would use one solid piece of red oak for the drawer fronts and shape the drawer fronts from that. Perhaps using another glue that stains better could be a solution too.
In case you like to know
This is how heavy one nightstand is: 38 kg (84 lbs)
This is how heavy the mirror backboard is: 15 kg (33 lbs)
This is how heavy the dresser is: 133.5 kg (294 lbs)
What went wrong
There is always something that goes wrong during a project. Sometimes you can find a quick fix and sometimes you throw the piece away and start all over again. Here are some of the mishaps during this project:
I just finished routing a tenon on one of the vertical support pieces and switched off the router. I wanted to check if the tenon looked okay and that it was routed to the required length (depth). My view was blocked by wood shavings and I reached over with my left hand to clear away the shavings when my index finger got caught by the still rotating router bit. My fast reaction and the fact that the router bit had almost stopped prevented me from having a more serious injury, yet it should not have happened in the first place. The last time I had an accident like that was 28 or 29 years ago during a renovation project of our house. At that time I reached over a still running saw blade (no guard installed) and got also a flesh wound on one of my fingers.
After ensuring that my Leigh Frame Mortise & Tenon jig was properly set I made a test tenon and test mortise. The tenon went fine, but plunging the router bit to rough out the mortise needed lots of pressure. Eventually that was done and I was moving the router bit from left to right and back to clean up the mortise when the router bit caught. The result was a badly lob sided mortise (picture 23). Luckily only my ego was hurt this time, but it could have easily been worse, like a damaged router or jig. Important lesson learned here is to work only with sharp tools, and that includes router bits.
I was trimming the curved front edges of the top panels using a template bit in the handheld router. I normally place the router on the template surface and with the router bit shy of the material I switch the router on. Everything was going very well so I got overconfident and switched on the router before I had it placed properly. The rotating router bit caught the front edge unexpectedly causing knicks in both the front and the template. The template I had to patch to recreate a straight edge, while I had to re-cut an extra 1/16" from the front. Nobody will notice this difference, but it simply should not have happened.
I was cutting the 1/2" wide grooves for the drawer backs on the inside of the drawer sides, but instead of cutting the drawer sides I cut the groove in the low drawer backs. Decided to fill the grooves with another piece of wood and sand it flat. Being at the back of the drawer I figure that nobody will see it, but I will always know it.
It was late and I was tired, but I wanted to finish the drawers. I was marking and drilling the holes for the drawer handles, when I realized that one hole did not look to be in the right place. Measurements confirm my error. I re-checked the other drawers and I found one more hole that was wrong. Later on I was confused between a pencil mark and a look-alike wood grain, and drilled a third hole wrong. I was able to fix everything by gluing dowels in the wrong holes, filling them with red oak wood filler, and drilling the holes in the correct place. In this case the drawer handles covered my mistakes. Lesson learned is that you should stop when you get tired.
References
Ellipse calculations/construction
This information applies to the outside edge of the mirror frame.
Distance between foci: c = 2ea = 2*0.83* 24.875 = 41.29" (or 104.9 cm)
The oval or ellipse can be constructed using non-stretching string, two small nails and a pencil. Draw a straight line, and mark the two focal points at 41-19/64" apart. Mark the centre between the focal points, draw a line perpendicular to the line at the centre, and mark a point a 13-7/8" being the minor axis point. Put a nail in each focal point. Tie the string in a tight loop such that it goes around the two focal points and the pencil tip at the minor axis point. When the pencil is moved while keeping the string taut, it will scribes the oval or ellipse.


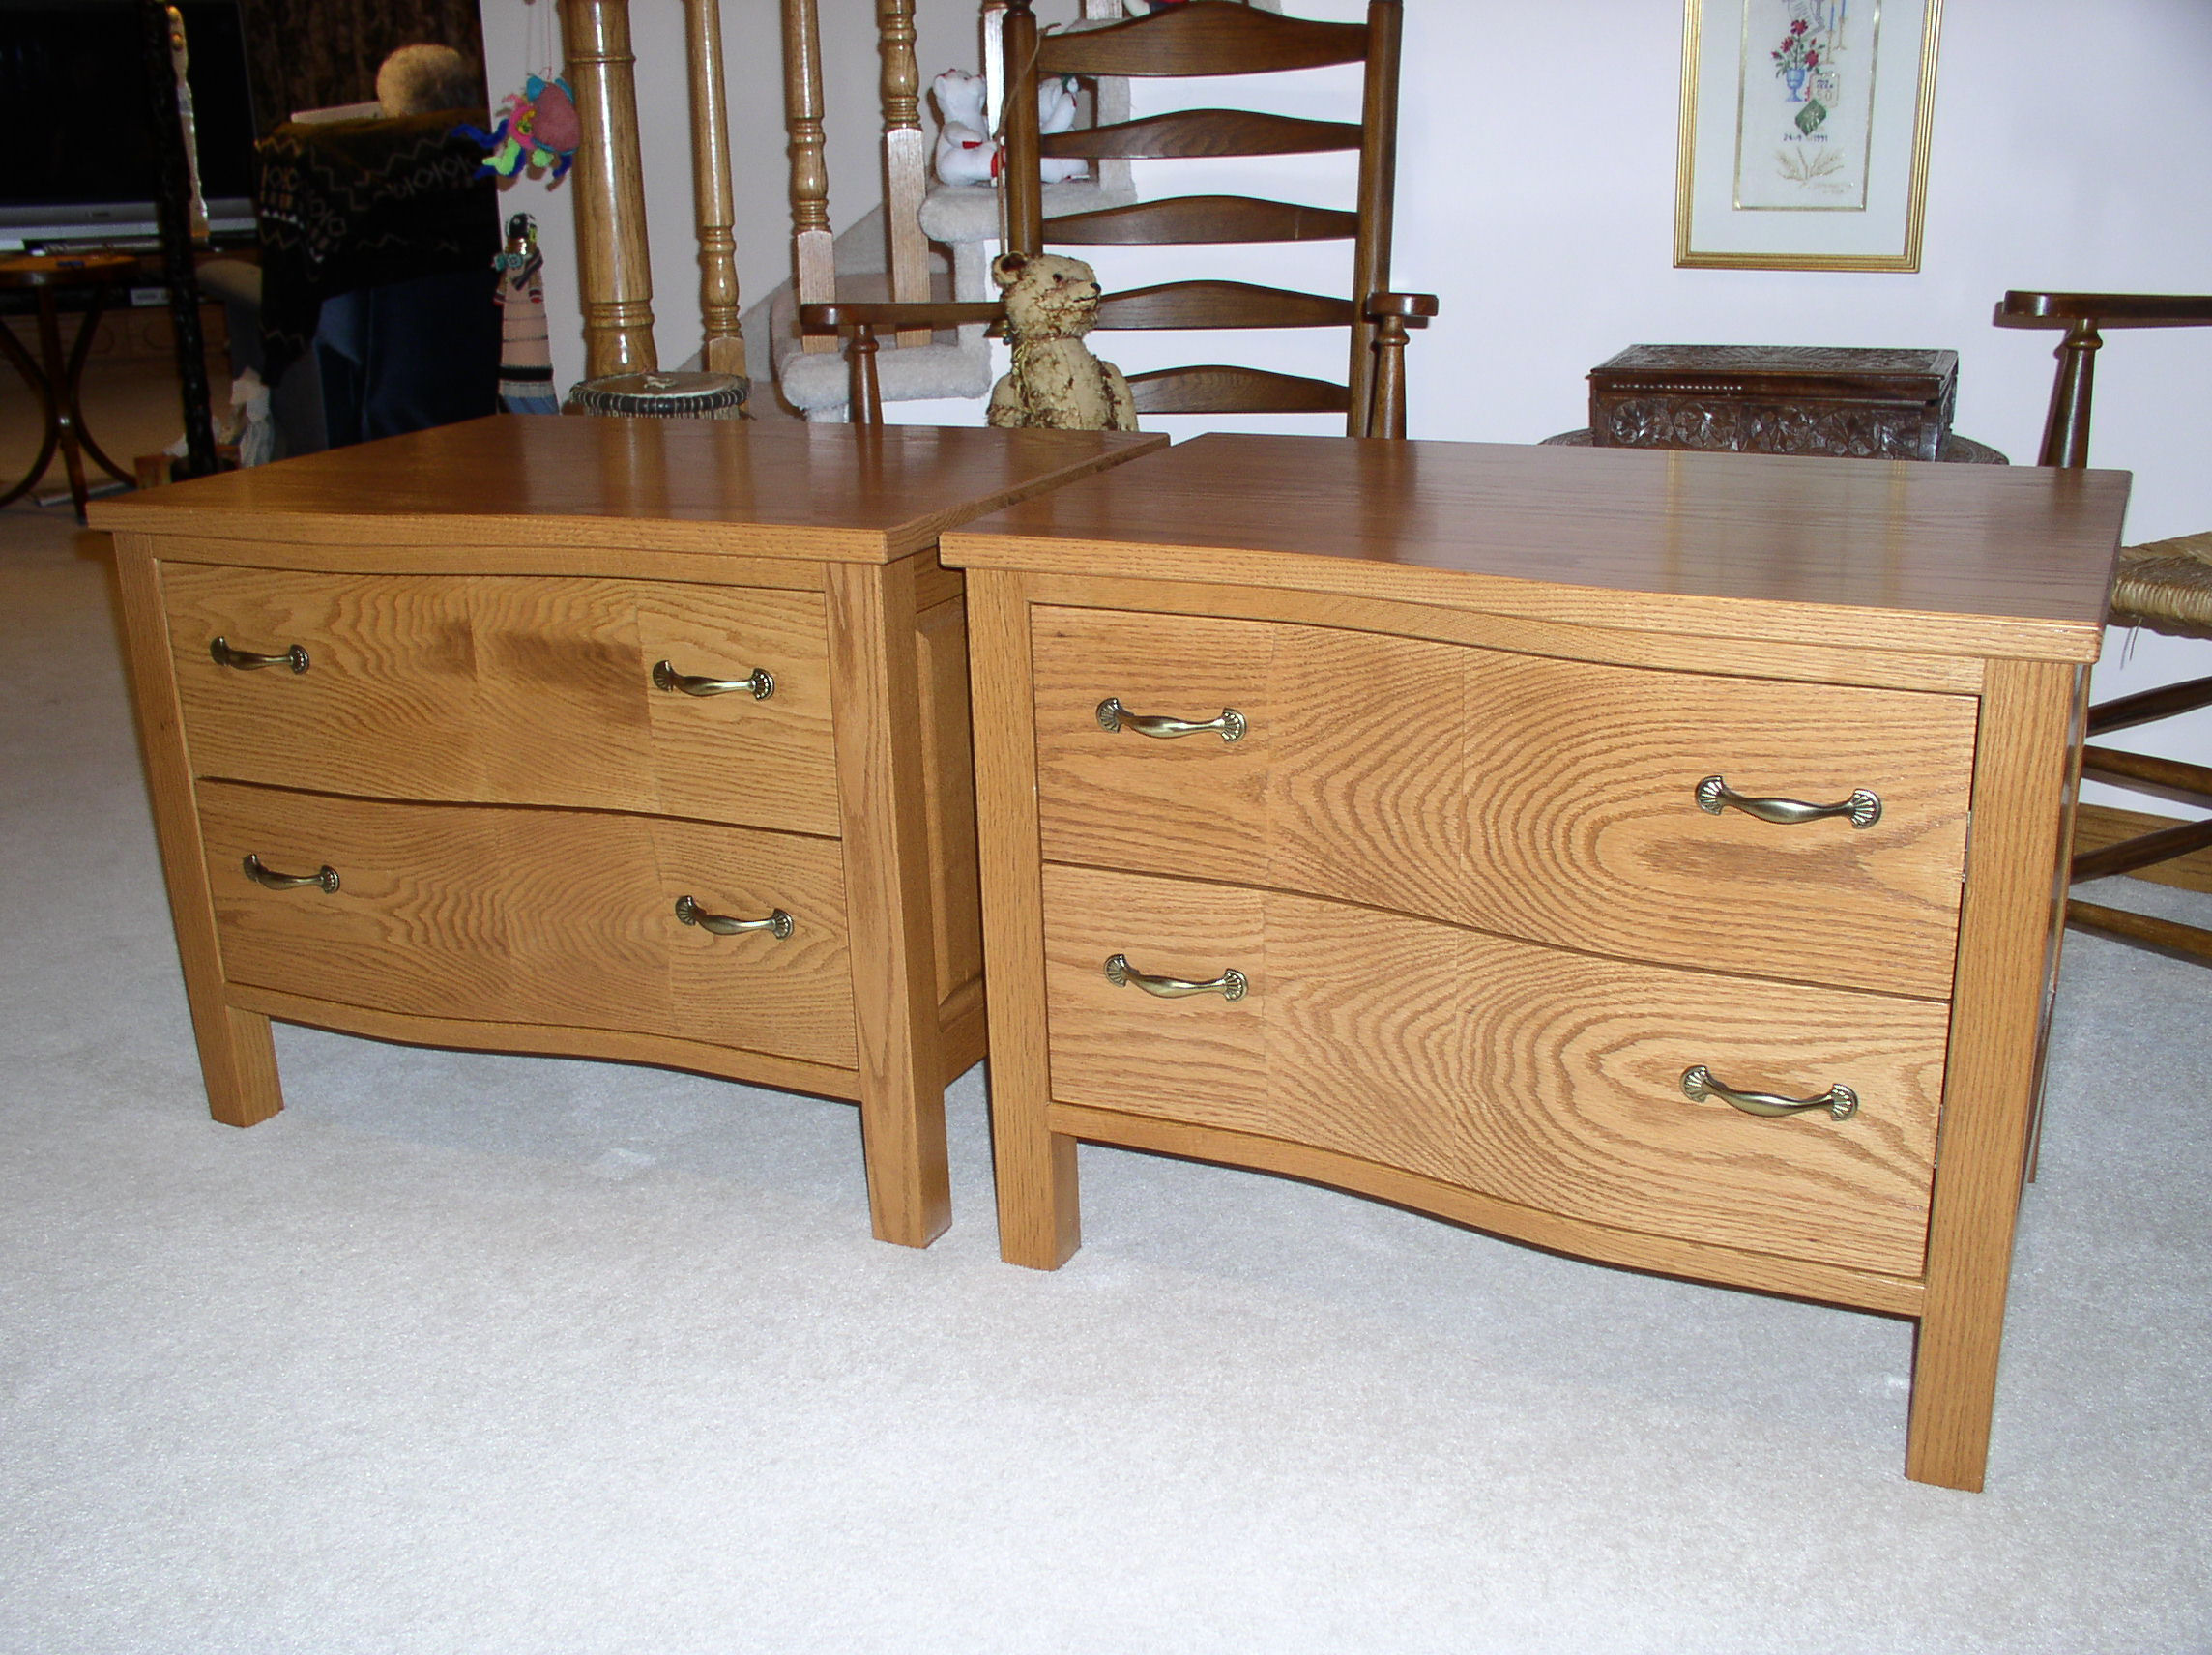
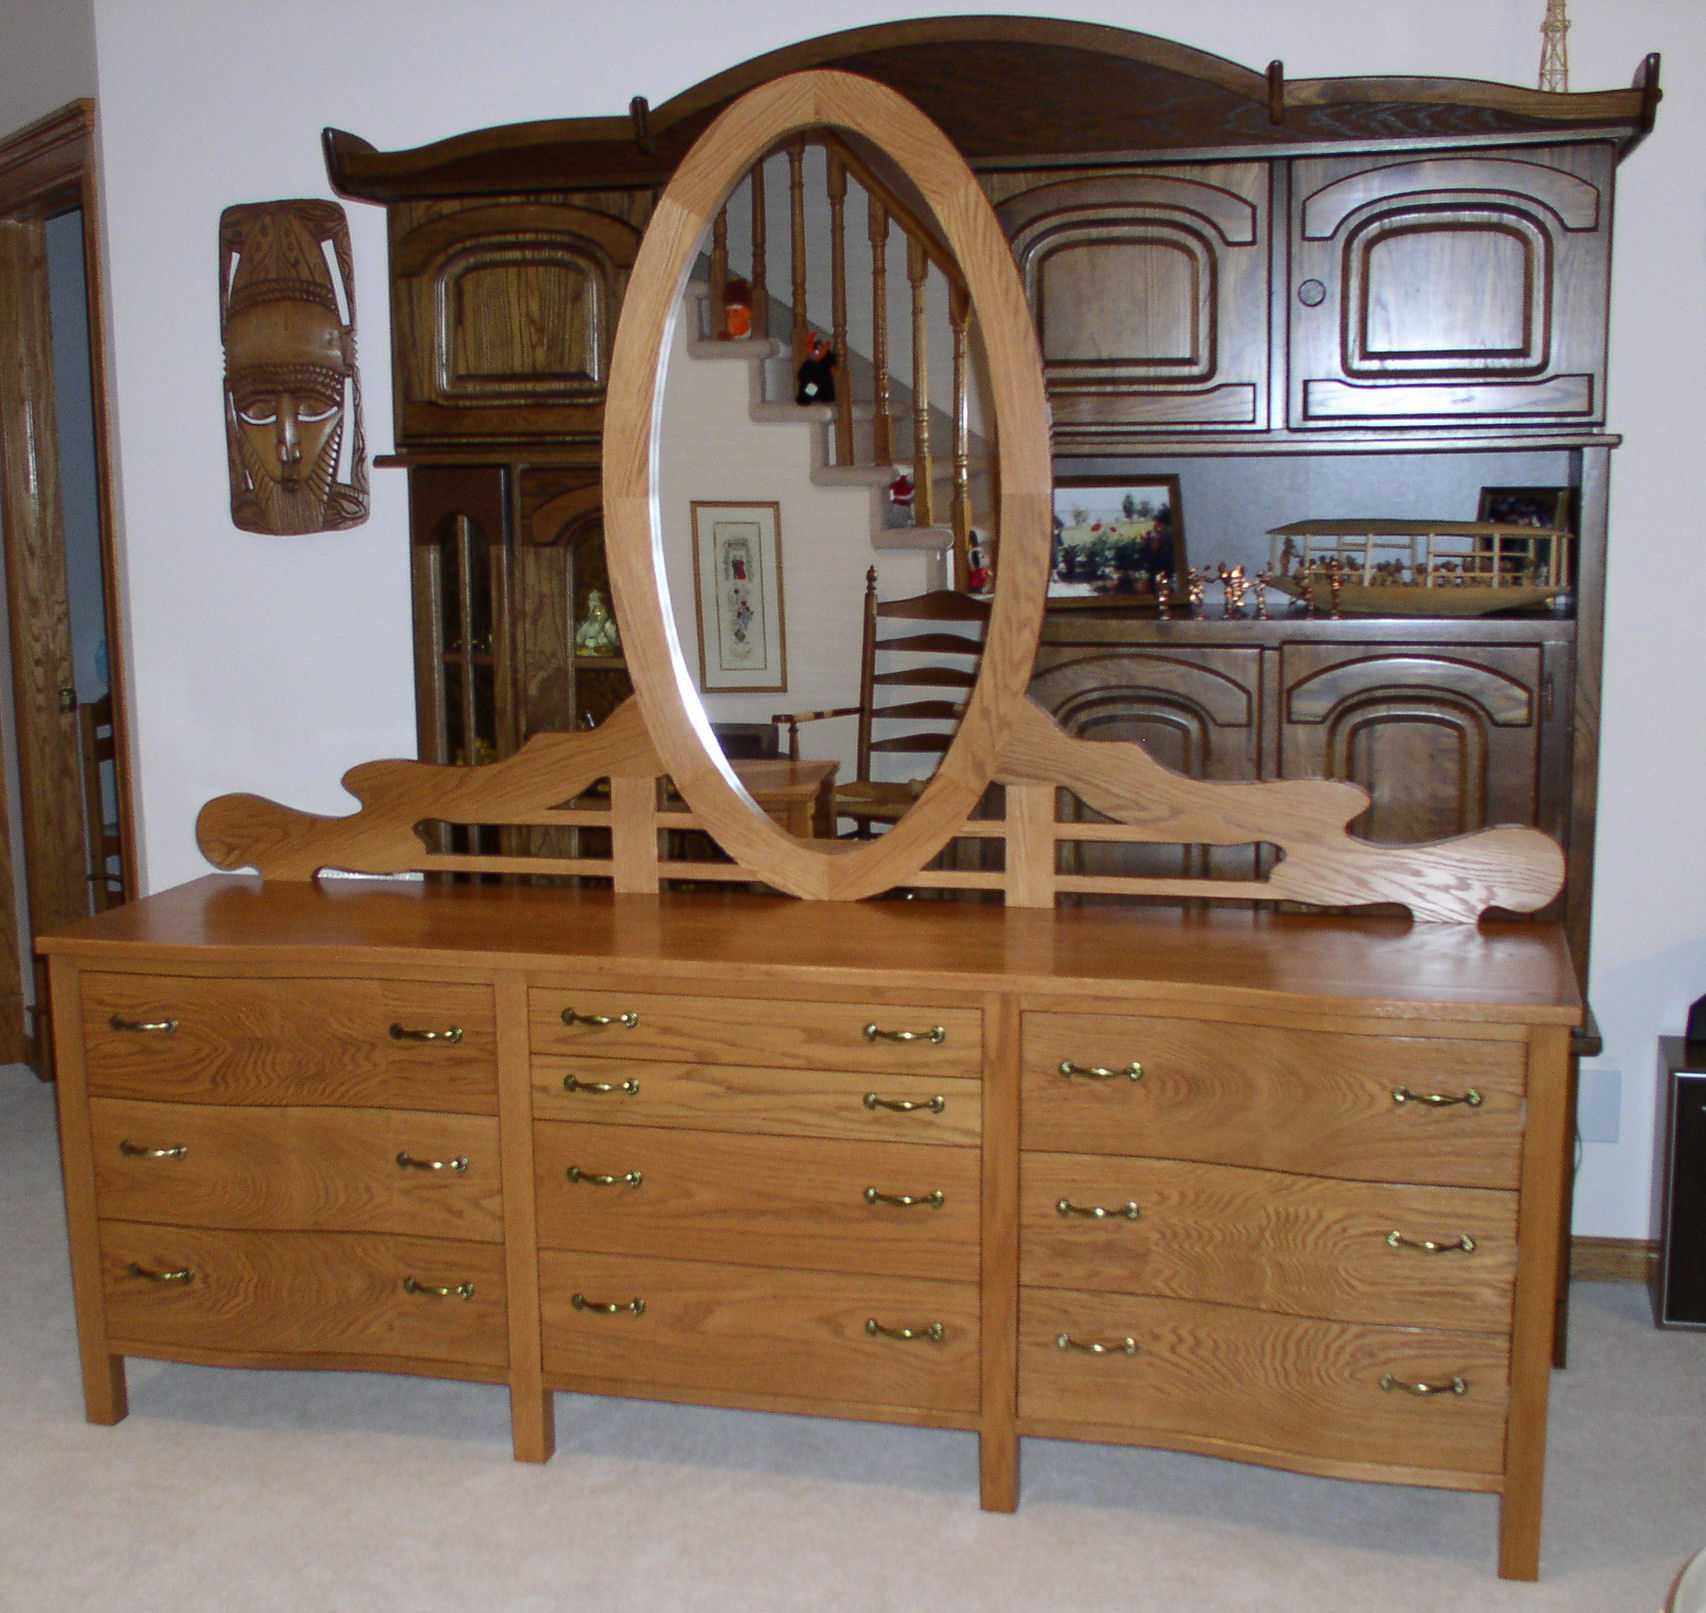
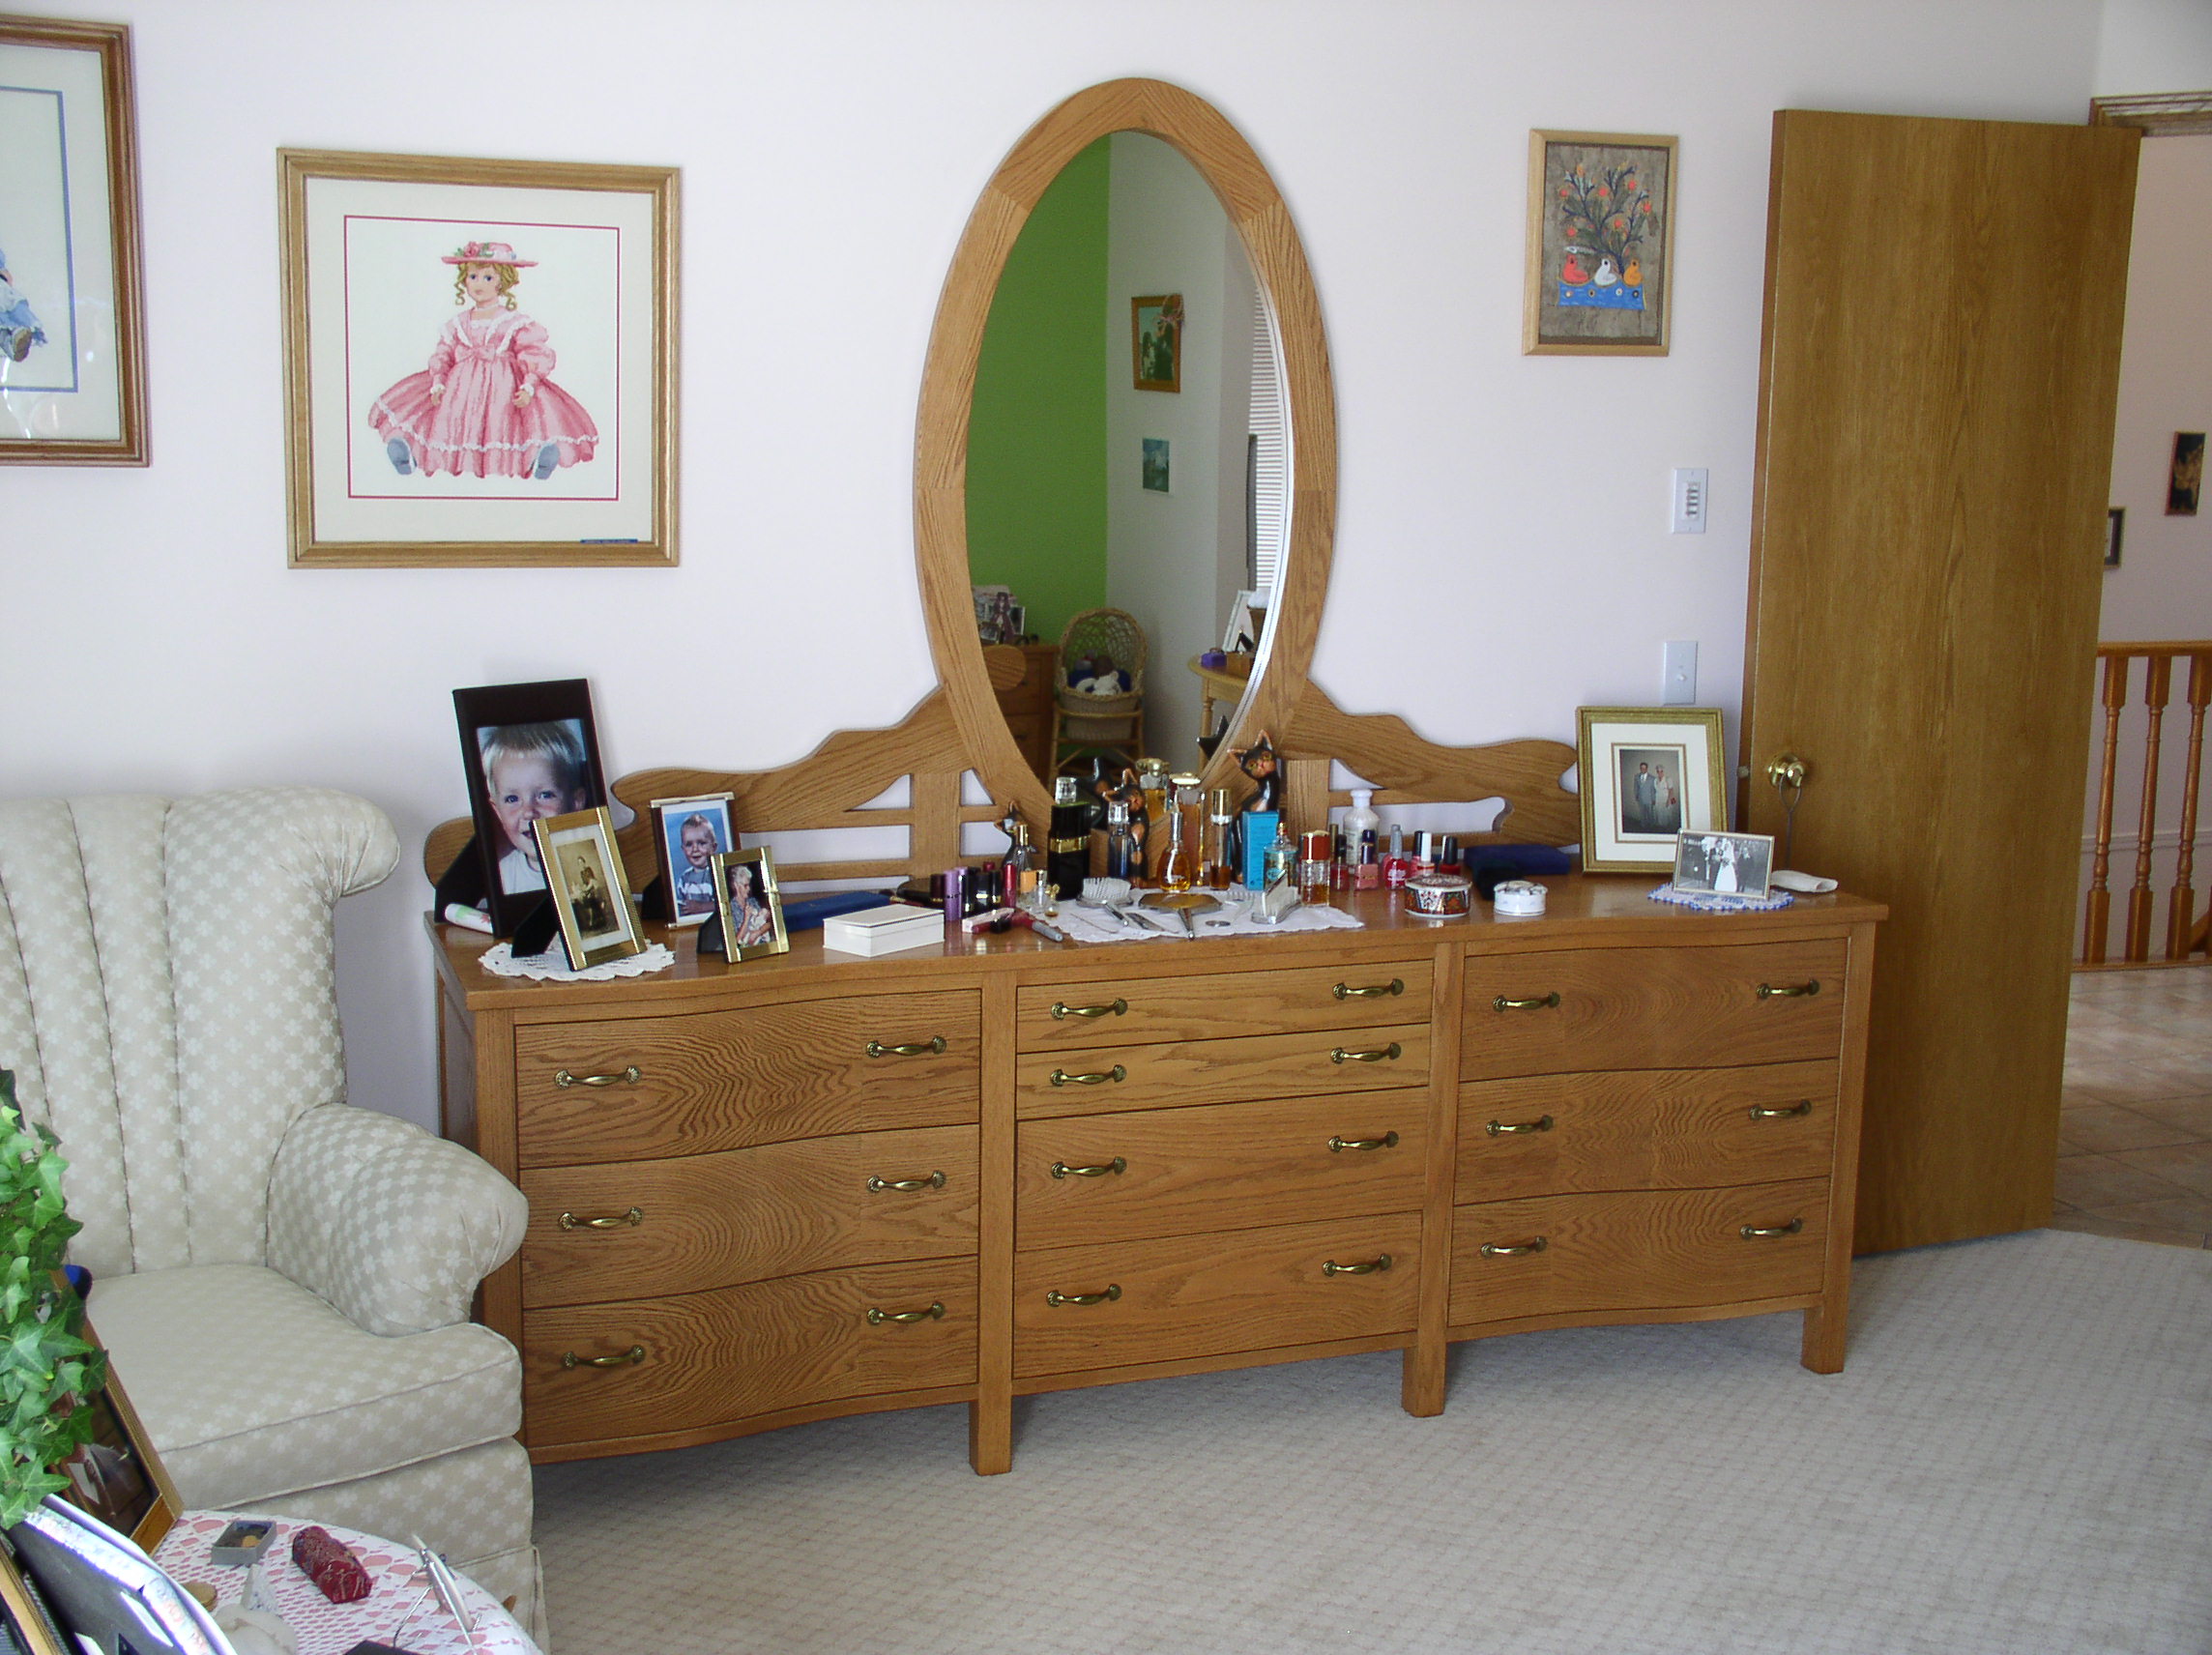
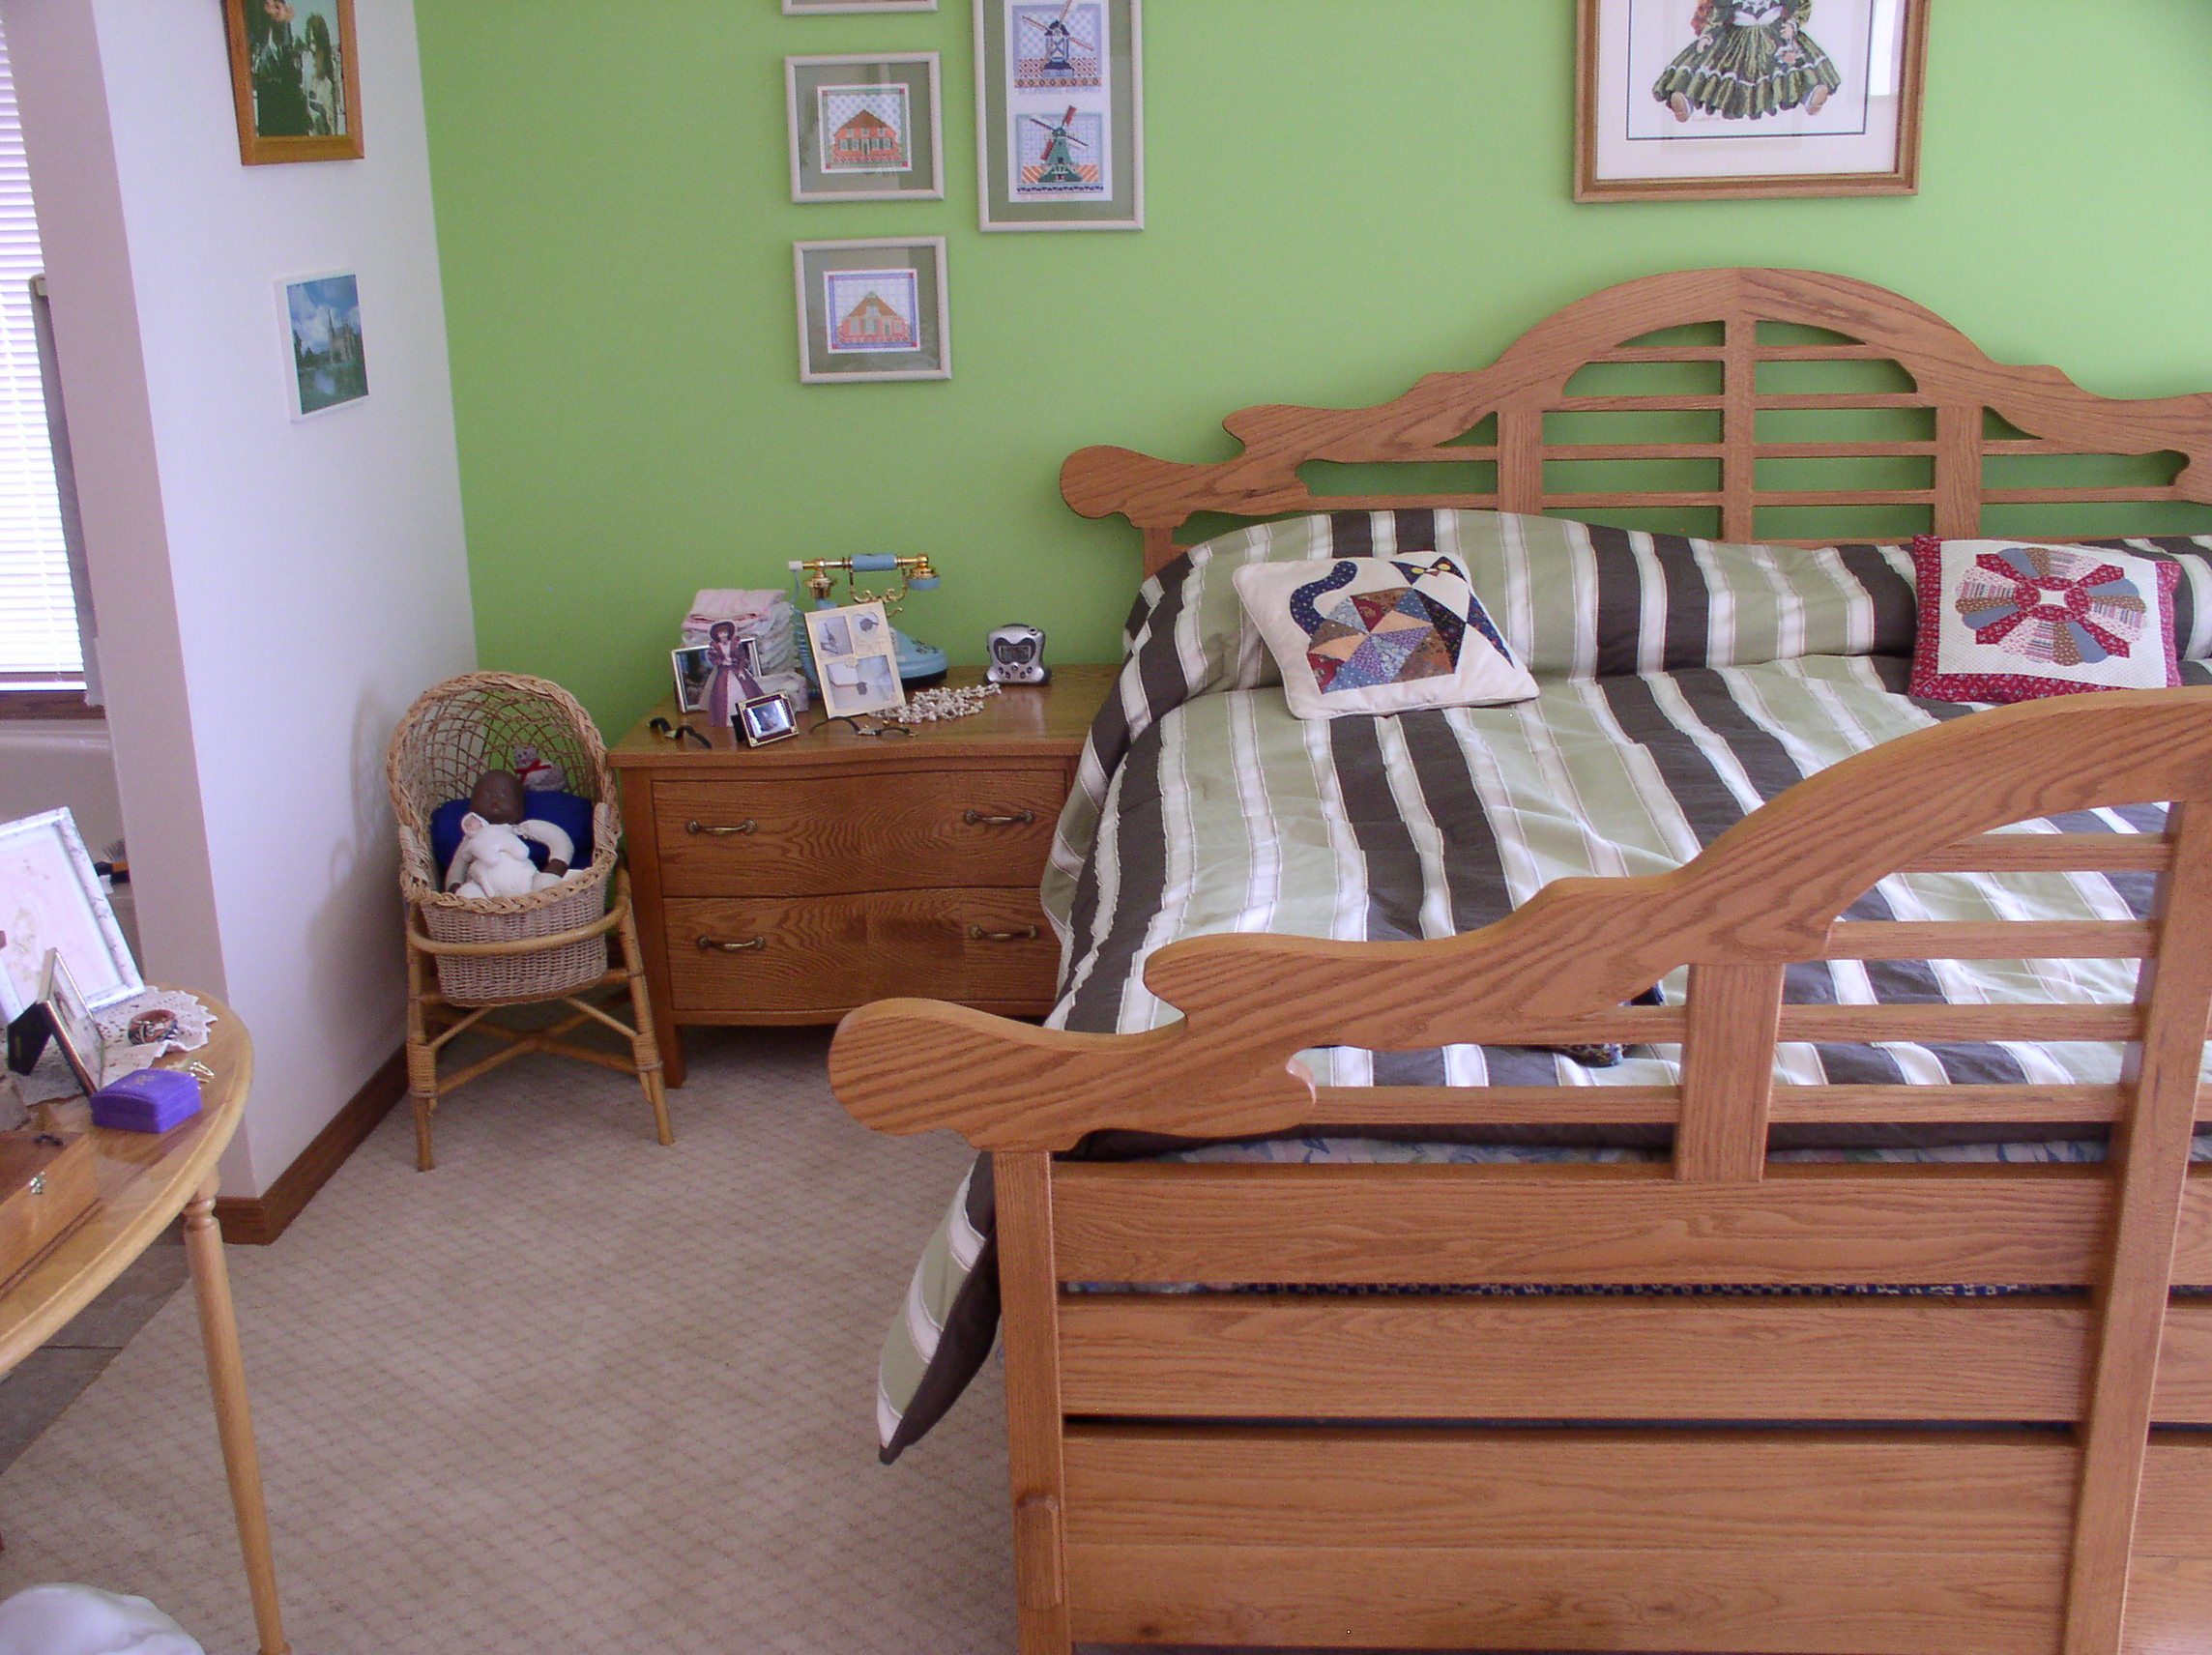
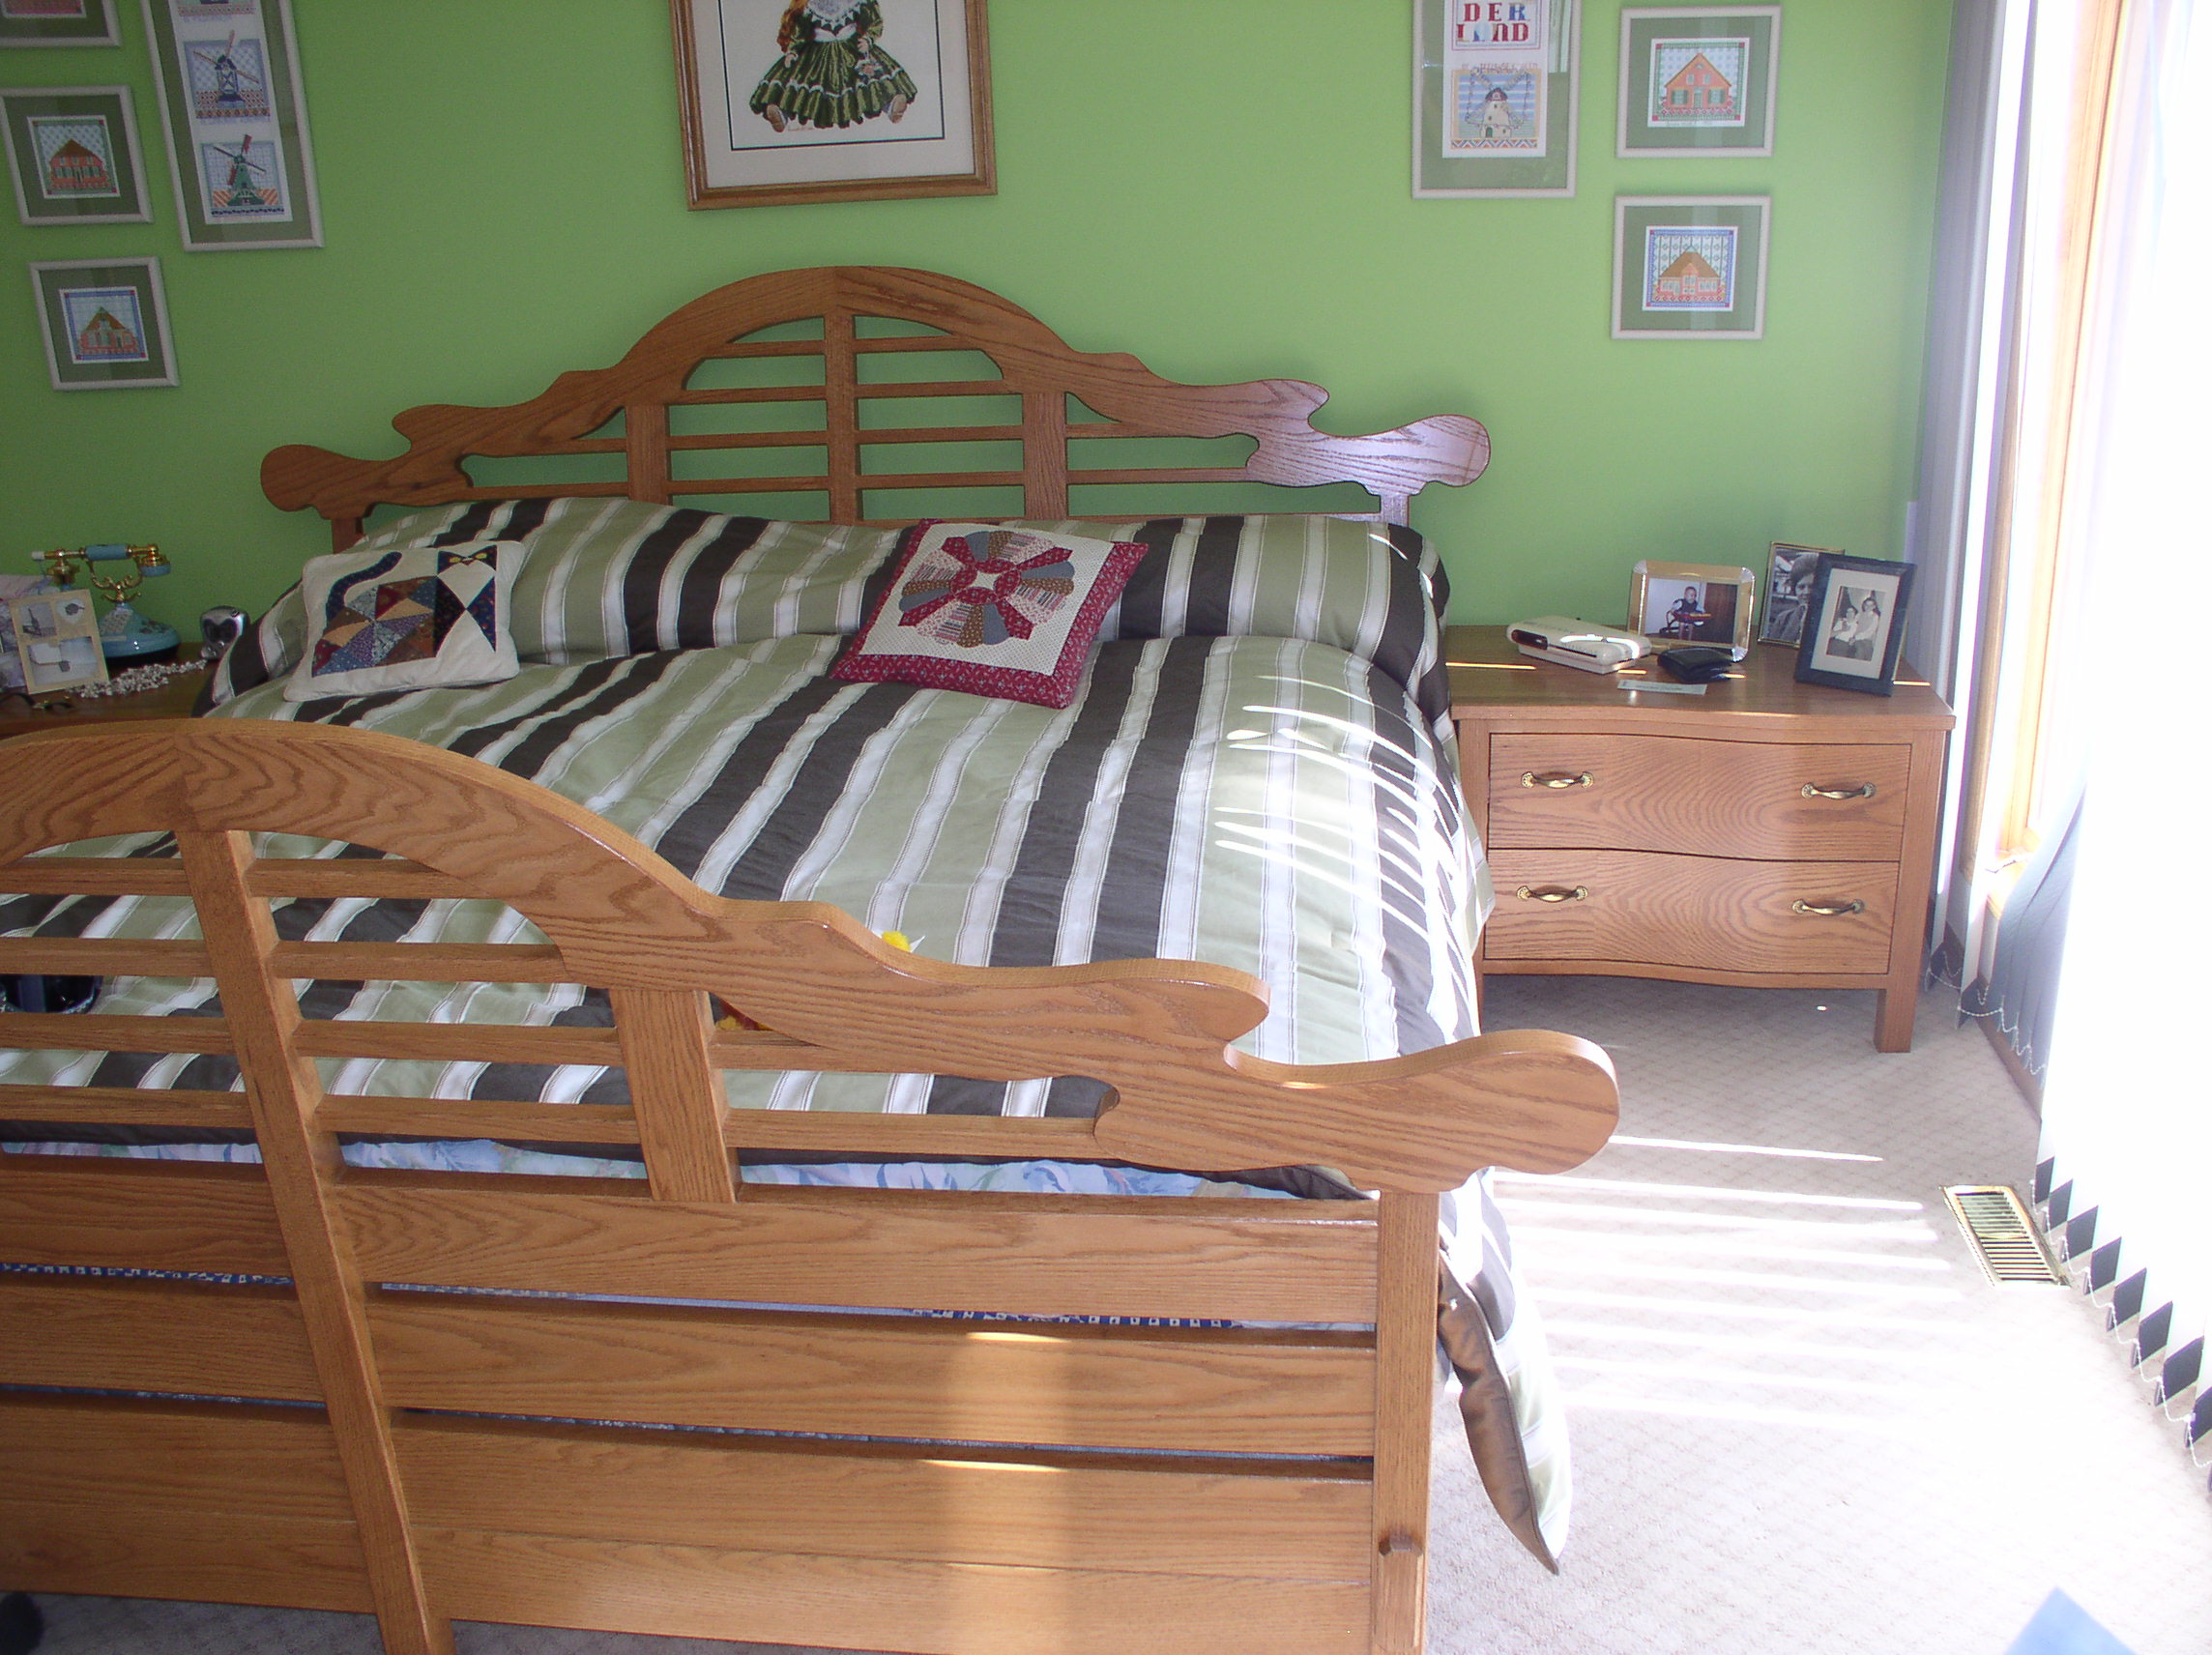